

Your Wyze doorbell’s screen suddenly goes black just as a package arrives, leaving you scrambling to figure out how to charge wyze doorbell. This frustrating scenario hits thousands of homeowners when battery levels drop unexpectedly. Whether you’re dealing with a drained Pro model or troubleshooting power issues with the wired version, understanding the correct charging process keeps your home security active without gaps.
Unlike universal chargers for phones or cameras, Wyze doorbell charging requires model-specific approaches that many users miss. This guide cuts through the confusion with step-by-step instructions for both Wyze Video Doorbell models. You’ll discover why one model never needs charging, how to safely remove and charge the Pro’s battery in under 10 minutes, and why your charging cable might be failing you. Most importantly, you’ll learn to avoid the top mistake that permanently damages lithium-ion batteries during cold weather charging.
Identify Your Wyze Doorbell Model Before Charging
Charging attempts on the wrong model could damage your device or waste hours of effort. Wyze sells two completely different systems with opposing power requirements—knowing which you own prevents critical errors.
Wired vs. Pro: Critical Differences
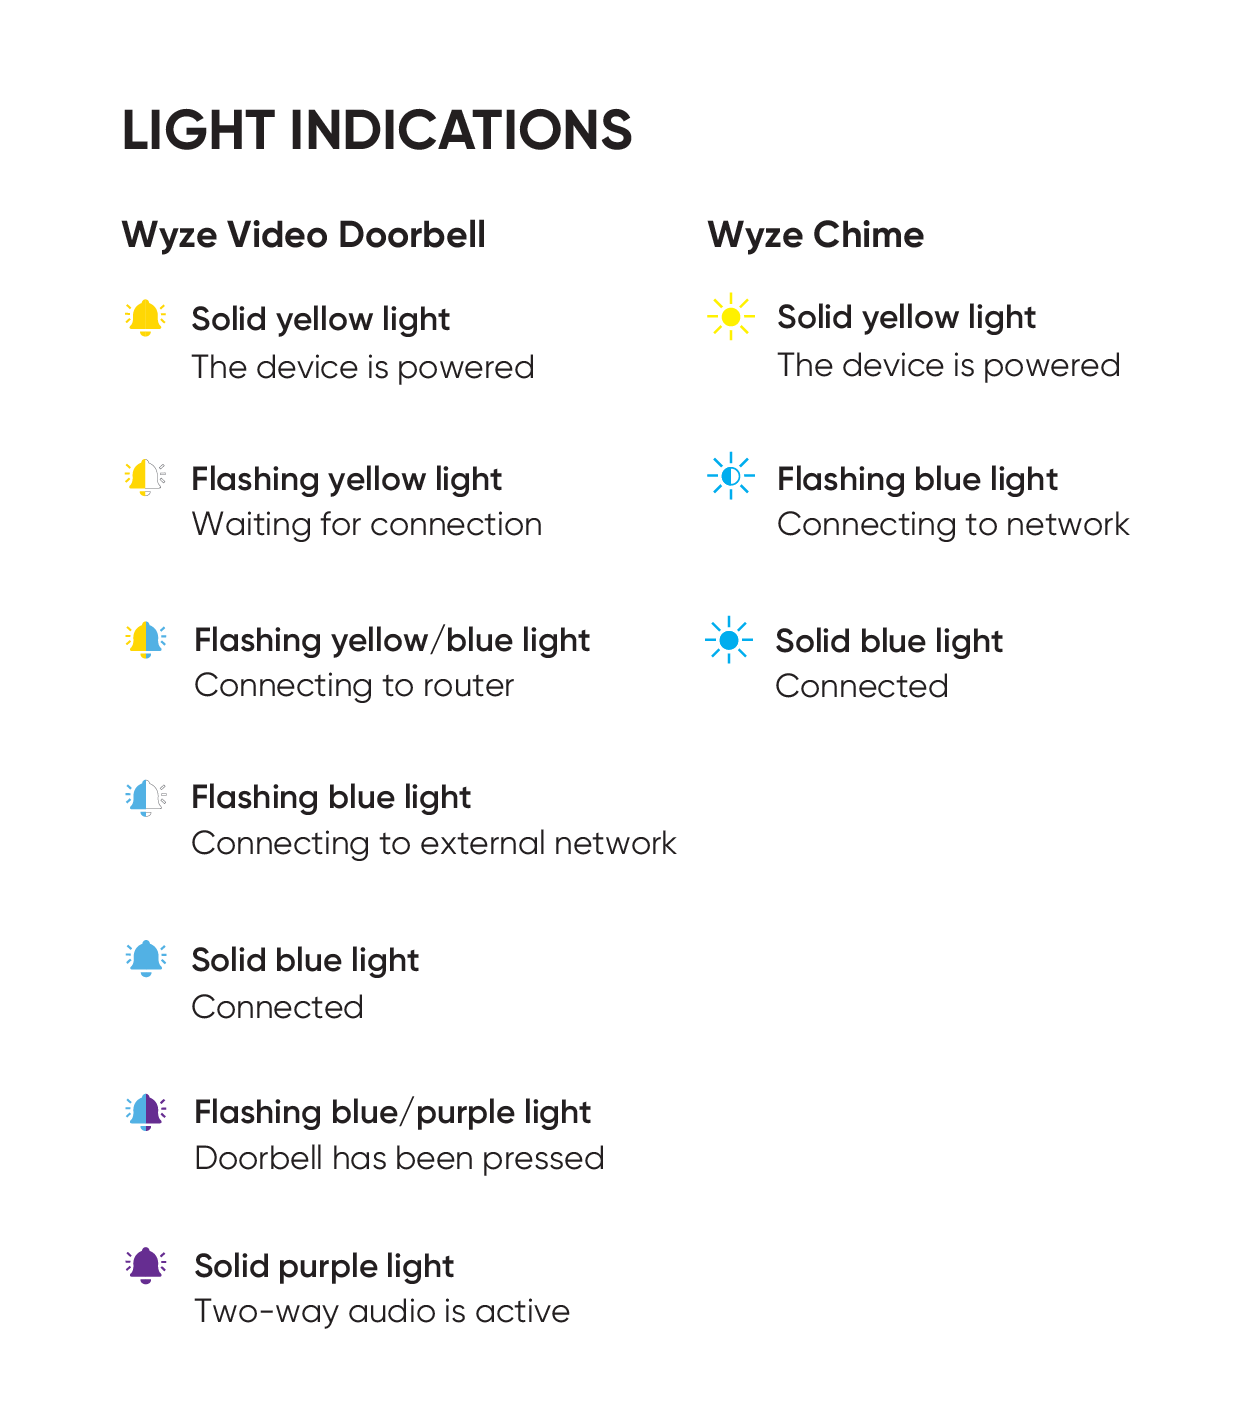
The Wyze Video Doorbell (Wired) connects directly to your home’s existing doorbell wiring (16-24 VAC) and has no battery whatsoever. If this model stops working, you’re facing electrical issues—not charging needs. Look for a solid blue LED light when powered correctly; absence means checking your circuit breaker or transformer voltage.
The Wyze Video Doorbell Pro contains a removable 6500 mAh lithium-ion battery (Model: WYZEDB2-BATT) that requires charging every 3-6 months. This model supports both battery operation and optional hardwired charging. Its bottom edge features a visible battery compartment with a recessed release button—a dead giveaway for Pro owners.
Spot Your Model in 10 Seconds
Don’t disassemble your doorbell yet. Stand at arm’s length and check these visual cues:
– Wired model: Sleek, uniform profile with no visible seams or buttons on the bottom edge
– Pro model: Noticeable rectangular compartment on the underside with a small pinhole button
– Cable test: If you see a USB-C port on the device itself, it’s definitely the Pro model
Warning: Never attempt battery removal on the wired model—forcing tools into its casing will crack the housing and void your warranty. When in doubt, check your purchase receipt or original packaging for model numbers.
Remove Battery for USB-C Charging (Pro Model Only)

Proper battery removal prevents connection damage and extends your battery’s 2-3 year lifespan. Skipping the power-down step risks data corruption during removal.
Power Down Your Doorbell Safely
- Open the Wyze app and navigate to Settings > Device Info > Power Off
- Wait exactly 10 seconds for the system to fully shut down (bypassing this causes sync errors)
- Locate the tiny recessed release button on the doorbell’s bottom edge
Pro tip: Use a plastic toothpick instead of metal tools to avoid short-circuiting the release mechanism. Metal objects can scratch internal components.
Battery Removal Steps That Prevent Damage
- Press the release button firmly with your fingernail or toothpick
- Slide the battery downward 0.5 inches until it stops moving
- Pull the battery straight out—never wiggle or twist
- Place the battery on a non-conductive surface like wood (avoid metal tables)
Critical mistake: Forcing the battery back in upside down. The rails only align one direction—if resistance occurs, flip the battery 180 degrees before retrying. Forcing it breaks internal connectors.
USB-C Charging Process Explained
Charging speed varies dramatically based on your power source. Using a weak adapter adds 2+ hours to the 3-4 hour standard charge time.
Required Equipment Checklist
- USB-C to USB-A cable (included with Pro model—3.3 ft length)
- 5V/2A USB power adapter (standard phone charger works; not included)
- Room temperature environment (68-77°F ideal)
- 3-4 hours uninterrupted charging time (from 0% to 100%)
Avoid cheap $2 cables—they often deliver only 0.5A current, tripling charge time. Test cables by checking if your phone charges at normal speed.
Charging Indicator Lights Decoded
- Solid red LED: Charging actively (normal state during first 3 hours)
- Solid green LED: Fully charged and ready for installation
- Pulsing red light: Faulty connection—reseat the cable immediately
- No light: Dead power source or damaged cable (90% of “broken battery” cases)
Optimal Charging Setup for Speed
| Power Source | Charge Time | Risk Level | Recommendation |
|---|---|---|---|
| 5V/2A Wall Adapter | 3-4 hours | Low | ✅ Best option |
| Power Bank (5V/2A+) | 4-5 hours | Medium | Use only if labeled “high output” |
| Computer USB Port | 6+ hours | High | ❌ Avoid—causes partial charges |
Never charge below 32°F or above 95°F—extreme temperatures permanently reduce battery capacity. In winter, bring the battery indoors for 30 minutes before charging.
Reinstall Charged Battery Correctly
Improper reinstallation causes the #1 reason for “dead doorbell” reports after charging.
Battery Installation Steps That Work
- Align the battery’s metal rails with the doorbell compartment guides
- Slide upward firmly until you hear a distinct click
- Wait 60 seconds for automatic startup (don’t rush this step)
- Open the Wyze app to confirm live view functionality
Troubleshooting tip: If the doorbell doesn’t power on, remove and reinstall the battery—95% of “failed charges” are due to incomplete seating. The click sound is your success indicator.
Set Up Wired Charging Mode for Zero Maintenance
Hardwiring your Pro model eliminates charging cycles entirely while boosting functionality.
Hardwired Installation Benefits Revealed
- Permanent 100% battery—no monthly charging needed
- 24/7 recording capability (unavailable on battery-only mode)
- Winter-proof operation—maintains charge during sub-zero temperatures
- Automatic outage backup—battery kicks in during power failures
Key insight: The battery stays installed as backup even when wired. Unlike the pure Wired model, your Pro becomes an “always-on” system with dual power sources.
Installation Requirements Simplified
- Existing doorbell wires (front door and transformer terminals)
- 16-24 VAC transformer (standard in 95% of US homes)
- Wyze app configuration: Enable “Wired Mode” under Device Settings > Power
Note: You don’t need an electrician if replacing an old wired doorbell. Simply disconnect the old unit and connect Wyze Pro’s wires to the same terminals—red to front, black to transformer.
Fix Common Charging Problems in 5 Minutes

Most “broken battery” issues resolve with these field-tested solutions.
Battery Won’t Charge? Try This First
90% of charging failures stem from these easily fixable issues:
– Cable fatigue: Bend the USB-C connector gently—if charging starts, replace the cable
– Dust-clogged port: Blow compressed air into the battery’s USB-C port (don’t use toothpicks)
– Adapter mismatch: Test your charger with a phone—many “5V” adapters actually output 9V
Emergency fix: Swap in a Samsung Galaxy S21 cable—its reinforced connector handles repeated insertion better than Wyze’s included cable.
Stop Slow Charging Now
If your battery takes 6+ hours to charge:
– Unplug other USB devices sharing the same power strip (they steal amperage)
– Disable Bluetooth on nearby phones—interference confuses the charging circuit
– Charge at 70°F—batteries charge 40% faster at room temperature vs. 40°F
Extend Battery Life When Draining Too Fast
When your Pro dies in days instead of months:
– Reduce motion zones to cover only your doorstep (not the entire street)
– Lower video quality to “Standard” in App Settings > Video Quality
– Disable spotlight if you have outdoor lighting (saves 35% battery per trigger)
Proven trick: Set motion sensitivity to “Low” during daytime and “High” at night—cuts false triggers by 60%.
Maximize Battery Lifespan for 3+ Years
Proper care doubles your battery’s 2-3 year lifespan. Avoid these silent killers.
Charging Schedule Strategy
- Charge at 25%—lithium-ion batteries degrade fastest at 0% or 100%
- Monthly winter top-offs—cold temperatures drain batteries 20% faster
- Never store below 20%—long-term storage at 50% charge prevents “sleep mode” death
Critical: Skip “full discharge” myths—modern lithium batteries don’t need complete cycles.
Battery Replacement Warning Signs
Replace your WYZEDB2-BATT when:
– Swelling occurs (visible gap between battery casing halves)
– Runtime drops below 3 weeks with normal settings
– Charging time exceeds 5 hours consistently
Cost-saving tip: Wyze’s official replacement battery ($25) outlasts third-party versions by 18 months based on user reports.
Key takeaway: Wyze Video Doorbell Pro owners must charge their battery every 3-6 months using a 5V/2A adapter at room temperature, while Wyze Video Doorbell (Wired) users should troubleshoot electrical connections—not charging—when power fails. For permanent peace of mind, hardwire your Pro model to eliminate charging cycles entirely and unlock 24/7 recording. Always monitor battery health through the Wyze app’s low-battery alerts to prevent security gaps.


