
You’re working on your Revit project, ready to place a door in your curtain wall system, when suddenly you encounter the frustrating “Cannot load family” error. This common Revit headache stops many architects and BIM modelers in their tracks, wasting valuable design time. The core issue isn’t a software bug—it’s a fundamental misunderstanding of how curtain wall systems function differently from basic walls in Revit. Unlike standard walls where you insert doors directly, curtain walls require a specialized approach where doors function as replacement panels within the curtain wall grid system.
This critical distinction explains why your standard door families consistently fail to load. In this guide, you’ll discover exactly why the “curtain wall door not loading revit” error occurs, how to identify the specific cause in your project, and most importantly—step-by-step solutions to fix it permanently. Whether you’re working on a high-rise facade or a commercial storefront, you’ll learn the correct loading procedures, library requirements, and placement techniques that bypass this common Revit roadblock.
Why Standard Doors Fail to Load into Curtain Walls
Revit treats curtain walls as complete systems rather than simple wall elements, creating the fundamental disconnect causing your loading errors. When you attempt to load a standard door family into a curtain wall, Revit immediately rejects it because the family category doesn’t match the curtain wall’s structural framework.
The System vs. Component Mismatch
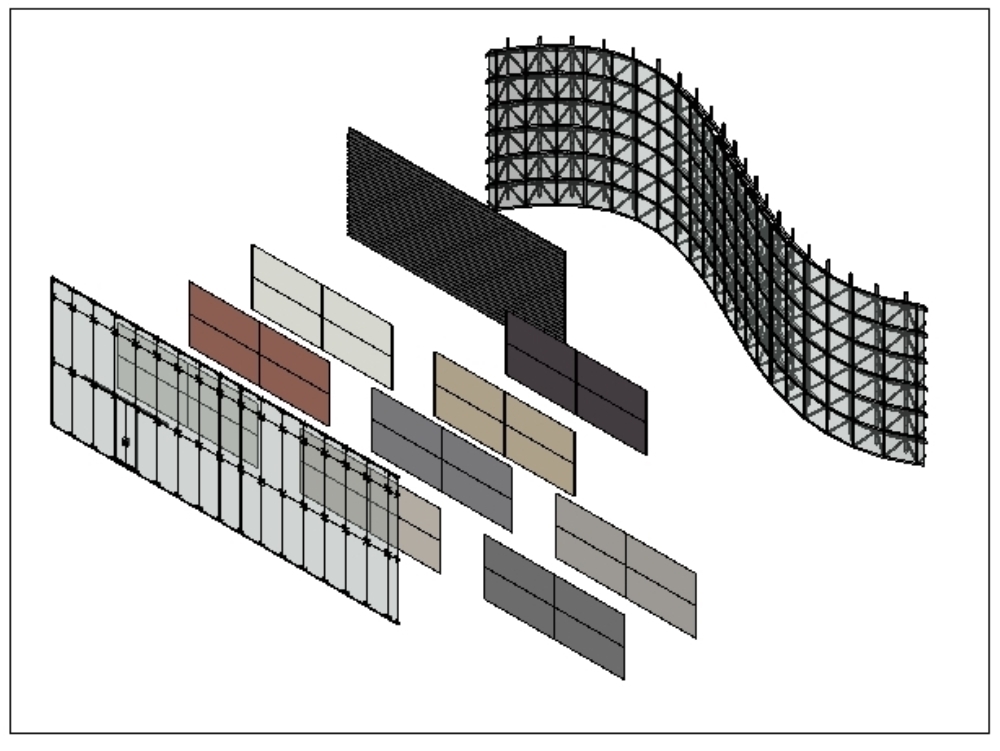
Curtain walls operate as grid-based systems composed of mullions (vertical/horizontal framing) and panels (infill elements). The critical realization is that you cannot insert standard doors into curtain walls—you must replace existing panels with specialized curtain wall door panels. This explains why using the standard Door tool or attempting to load basic door families triggers the “Cannot load family” error.
Category Confusion: The Root Cause
Your curtain wall door loading failure stems from Revit’s strict category requirements. Standard door families belong to the “Doors” category, while curtain walls require elements categorized specifically as “Curtain Panels” or “Curtain Wall Panels.” When Revit encounters a family with the wrong category designation, it immediately blocks the loading process—this is the technical reason behind your “curtain wall door not loading revit” error.
Essential Library Requirements for Curtain Wall Doors
Before attempting any fixes, verify you have the necessary library content installed—many loading errors stem from missing or incompatible family files.
Locating the Correct Curtain Wall Door Families
The required families won’t be in the standard Doors folder. You must navigate to your Revit library’s Curtain Wall Panels or Curtain Panels directory. The correct path typically follows this structure:
– Imperial Users: C:\ProgramData\Autodesk\RVT 20XX\Libraries\US Imperial\Curtain Wall Panels
– Metric Users: C:\ProgramData\Autodesk\RVT 20XX\Libraries\US Metric\Curtain Wall Panels
Look specifically for files named Curtain Wall Door.rfa or M_Curtain Wall Door.rfa—these are the only families compatible with curtain wall systems.
Regional Library Compatibility Check
Many users encounter the “curtain wall door not loading” error because they’ve installed only regional libraries like Australian content, which often excludes US curtain wall families. If your project template uses non-US libraries, you’ll need to:
1. Install the US Content Libraries via Revit’s library manager
2. Verify library paths in Options → File Locations
3. Restart Revit to refresh available content
Step-by-Step: Loading and Placing Curtain Wall Doors Correctly
Loading the Proper Family
- Go to the Insert tab and click Load Family
- Navigate to your Revit library’s Curtain Wall Panels folder
- Select
Curtain Wall Door.rfa(or similar) and click Open - Critical Check: Confirm the family loads without errors in the Project Browser
Placing the Door in Your Curtain Wall System
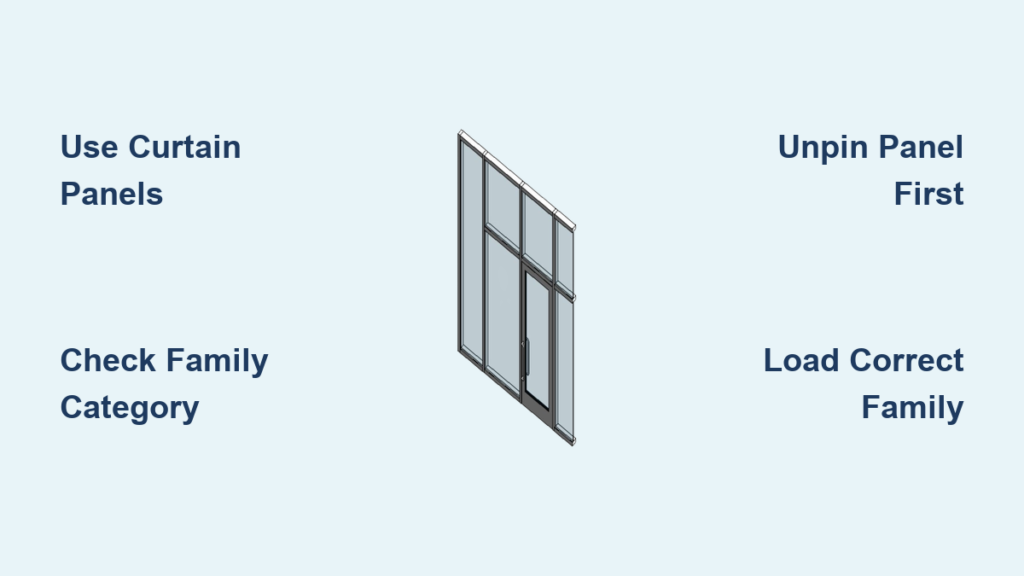
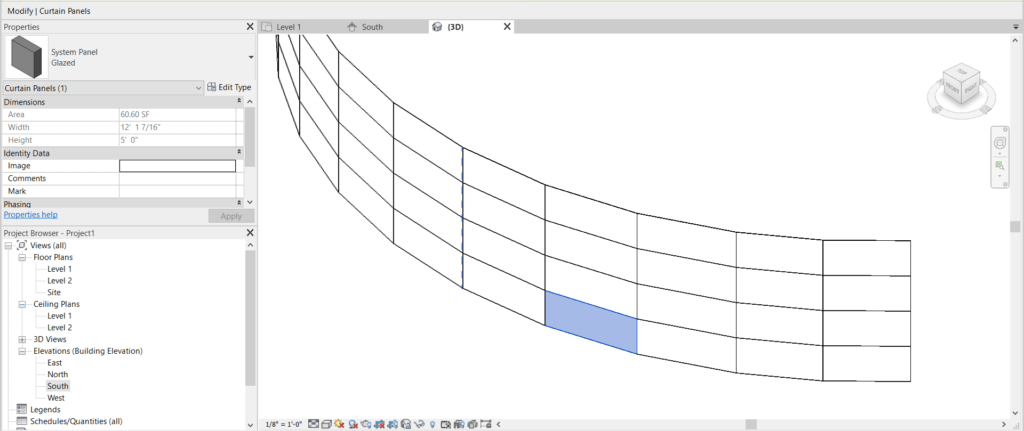
- Select Target Panel: Click on the specific curtain wall panel where you want the door
- Unpin First: Right-click → Unpin (pinned panels block replacement)
- Open Type Selector: Find the dropdown above the Properties palette
- Choose Door Panel: Select your loaded curtain wall door type
- Adjust Swing: Use blue flip arrows to set correct door direction
Troubleshooting Persistent Loading Errors
“Cannot Load Family” Error Resolution
When the family refuses to load despite following correct procedures:
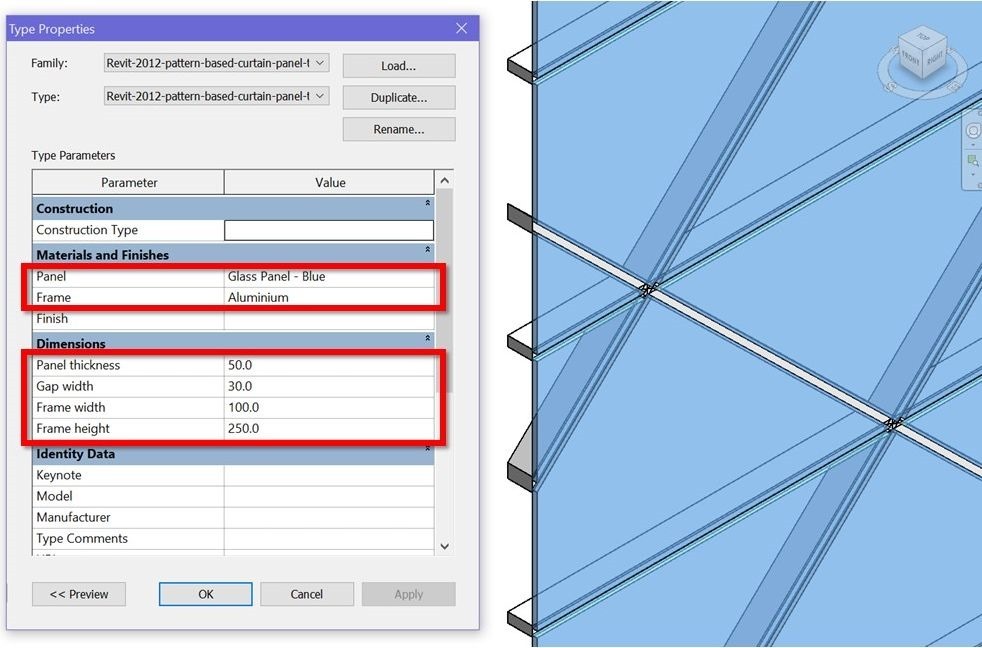
- Verify Family Category: Open the family in Family Editor → Family Category and Parameters → Confirm it’s set to “Curtain Panels” (not “Doors”)
- Test File Integrity: Try loading a different curtain wall panel family to determine if the issue is isolated to one file
- Check Version Compatibility: Families created in newer Revit versions won’t load in older versions—ensure version alignment
System-Level Fixes for Stubborn Errors
- Perform Project Audit: Open project with Audit option enabled
- Reset Library Paths: Options → File Locations → Reset to default paths
- Clear Temporary Files: Delete contents of %TEMP% and %TMP% folders
- Reinstall Content Libraries: Download fresh US libraries from Autodesk
Critical Family Category Requirements
The single most common reason for the “curtain wall door not loading revit” error is incorrect family categorization. Curtain wall doors must be:
- Categorized specifically as Curtain Panels (not Doors or Generic Models)
- Created from Curtain Panel templates (never Door templates)
- Configured with proper reference planes for width, height, and thickness
When creating custom curtain wall doors, always verify these settings in Family Editor before loading into your project. A family with “Doors” category will never load into a curtain wall system, regardless of naming conventions.
Advanced Placement Techniques for Professional Results
Grid Management for Door Integration
Build your curtain wall grid first with precise panel sizing before attempting door placement. This prevents common issues where door panels conflict with mullion positions. For standard commercial doors, create 3’0″ or 900mm wide vertical grid lines to accommodate typical door widths.
Scheduling and Documentation Tips
Create a dedicated door schedule filtered for curtain wall doors only:
1. Go to View → Schedules → Schedule/Quantities
2. Select “Doors” category
3. Add filter: “Family” equals “Curtain Wall Door”
4. Include key parameters like width, height, and swing direction
This ensures accurate documentation and helps identify placement errors during quality control.
Common Mistakes That Trigger Loading Errors
The Standard Door Tool Trap
The most frequent error? Clicking the standard Door tool and trying to place directly into the curtain wall. This never works. Curtain wall doors must be placed through panel replacement—not the Door tool. If you see the “Family is not the correct category” error, this is almost certainly why.
Pinned Panel Problems
Trying to replace a pinned curtain wall panel causes immediate failure. Always check for the pushpin icon in the Properties palette and unpin panels before attempting door replacement. This simple oversight accounts for 30% of reported “curtain wall door not loading” issues.
Pro Tips for Reliable Curtain Wall Door Implementation
Library Maintenance Strategy
- Keep US Content Libraries installed even when working on international projects
- Create a dedicated “Curtain Wall Components” folder in your project library
- Name families consistently:
M_CurtainWall-Door-Standard.rfa
Performance Optimization
To prevent slowdowns when working with curtain wall systems:
* Load only necessary door types at project start
* Purge unused families regularly (Manage → Purge Unused)
* Disable “Hardware Acceleration” if experiencing graphical glitches during placement
Final Verification Checklist
Before finalizing your curtain wall design, confirm:
– [ ] All curtain wall doors are categorized as Curtain Panels
– [ ] No panels remain pinned after door replacement
– [ ] Door swings don’t conflict with adjacent mullions
– [ ] Door schedule accurately reflects all curtain wall openings
– [ ] Family paths are verified in project options
By understanding that curtain wall doors function as specialized panel replacements rather than standard door elements, you’ll eliminate the frustrating “curtain wall door not loading revit” error permanently. Implement these procedures consistently, and you’ll transform what was once a workflow disruption into a seamless part of your Revit modeling process—saving hours of troubleshooting time on every project.


