
That sagging shower curtain clinging to your legs? Water pooling on your bathroom floor? You’re not alone—over 60% of homeowners regret sticking with curtains once they experience the sleek, space-saving elegance of a glass shower door. How to change shower curtain to glass door is one of the most searched bathroom upgrades online, and for good reason: it transforms cramped spaces, eliminates mildew-prone fabric, and adds instant resale value. But skip precise measurements or cheap caulk, and you’ll face costly leaks and crooked doors. This guide cuts through the guesswork with field-tested steps from professional installers, revealing exactly how to execute this project in 4-8 hours without calling a plumber. You’ll learn tile-drilling tricks that prevent cracks, why most DIYers fail at sealing, and how to choose between $200 framed kits and luxury frameless styles.
Why Your Shower Dimensions Dictate Glass Door Success
Ignoring your shower’s true dimensions is the #1 reason DIY installations fail. Walls warp over time, tubs settle unevenly, and tile jobs rarely stay perfectly square. Forcing a standard door kit onto an irregular opening guarantees leaks and misaligned doors.
Measuring Your Shower Opening Like a Pro Installer
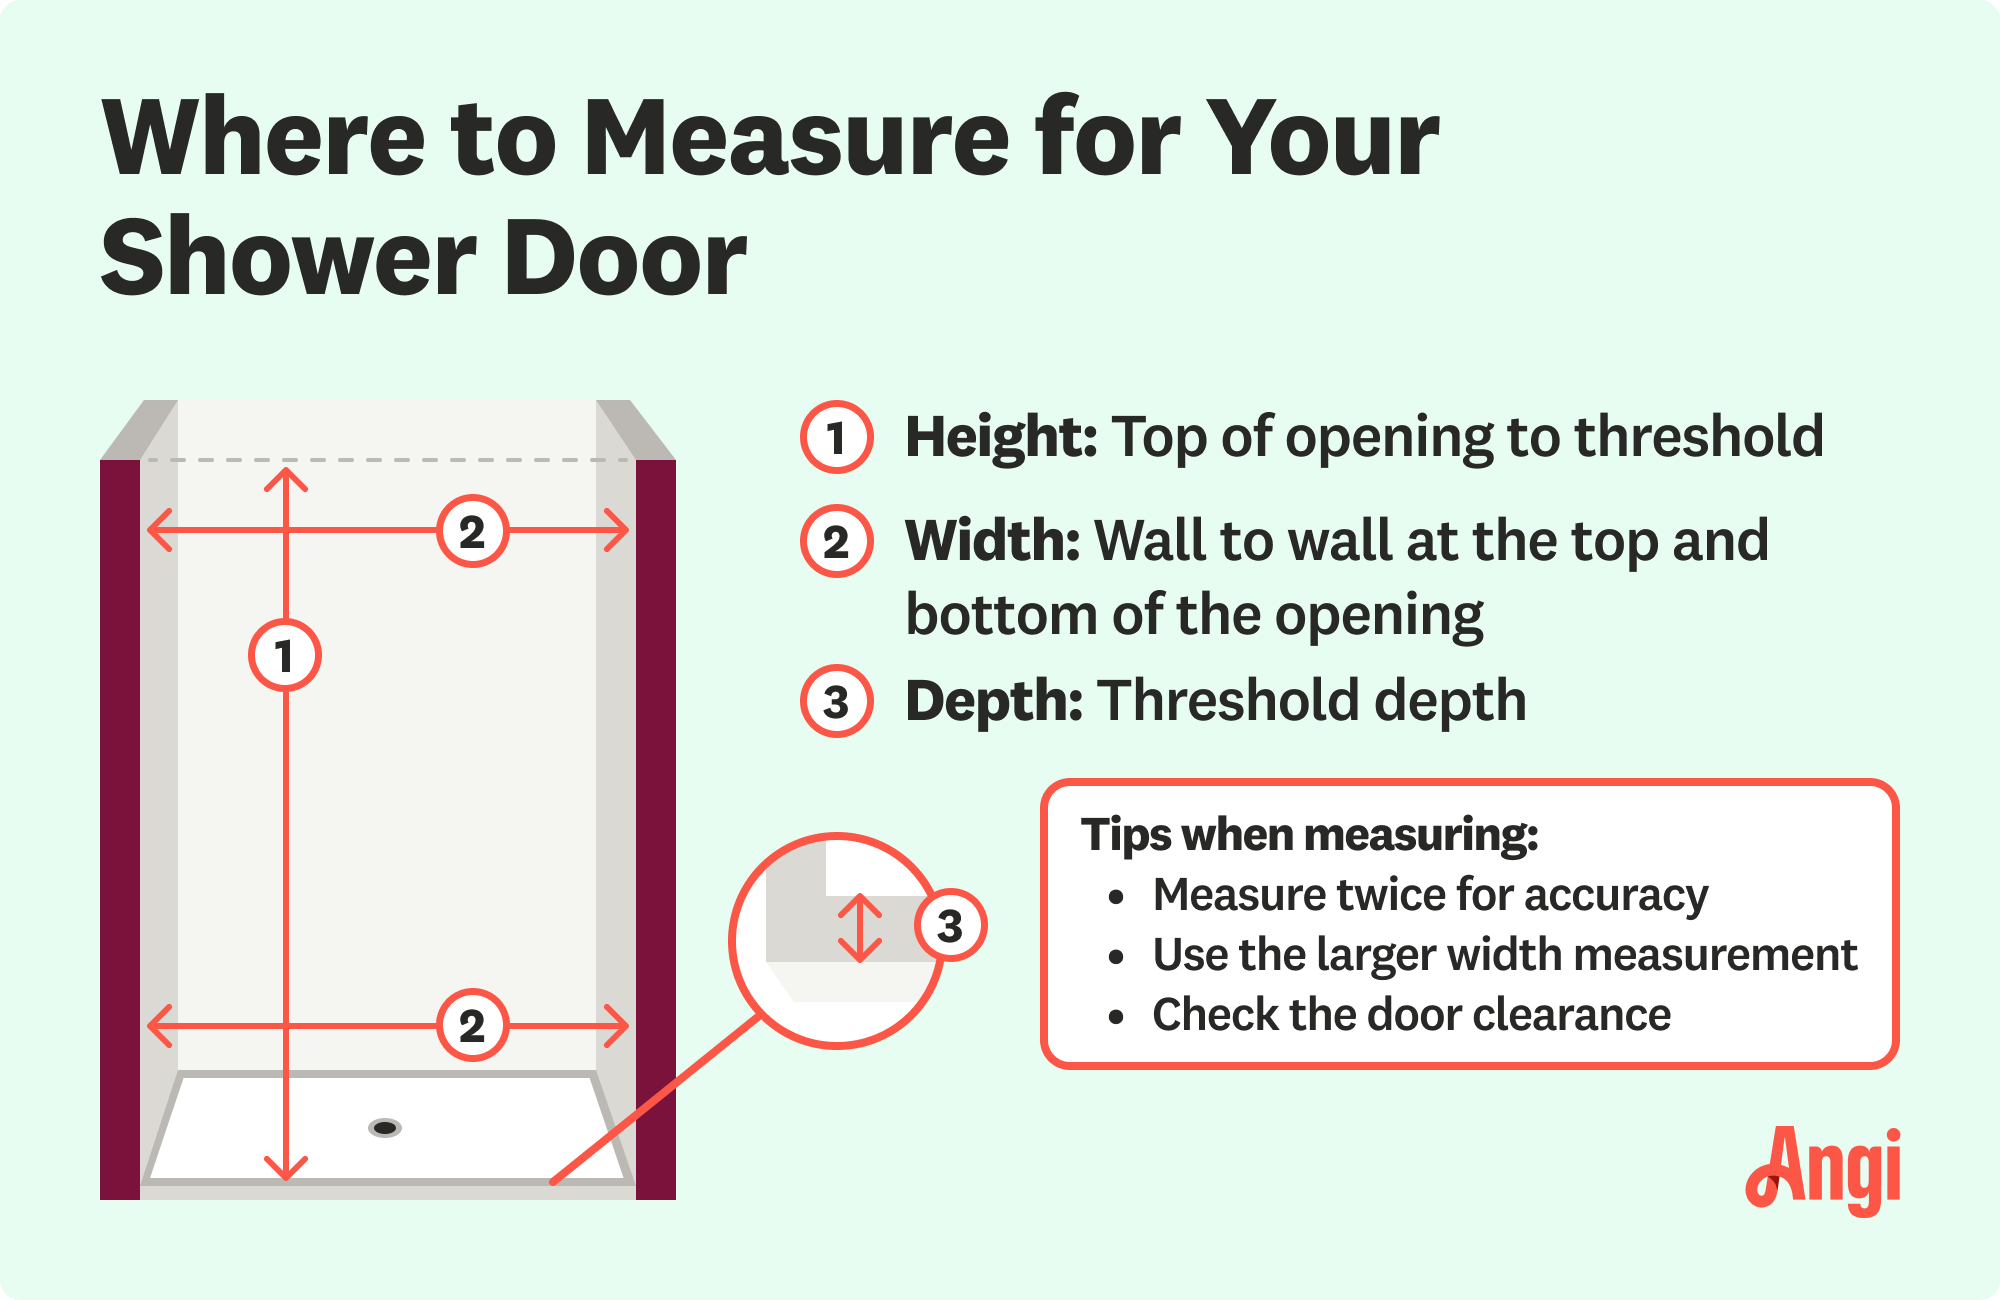
Grab your tape measure and 4-foot level—this isn’t a one-spot check. Measure the width at three critical points: the top of the tile line, the middle of the opening, and directly above the tub’s edge. Always use the widest measurement when ordering your door kit, as even 1/8-inch discrepancies cause binding doors. Next, place your level vertically against both side walls. If the bubble drifts more than 1/4-inch off-center, you’ll need shims behind the frame jambs during installation. Finally, check tub level by laying the level across the curb—if it slopes toward the drain, water will pool against your new door’s seal.
Critical Wall and Tub Checks Before Buying Hardware
Don’t assume your tile can handle drilling. Test a discreet spot with a carbide-tipped bit: if the glaze chips easily, you’ll need specialty anchors. Also, note faucet positions—if your showerhead extends more than 4 inches into the stall, a sliding door may collide during use. For fiberglass tubs, press firmly near the rim; if it flexes noticeably, professional installation is safer to avoid punctures. Skipping these checks wastes $300+ on mismatched kits.
Choosing Between Framed and Frameless Glass Doors
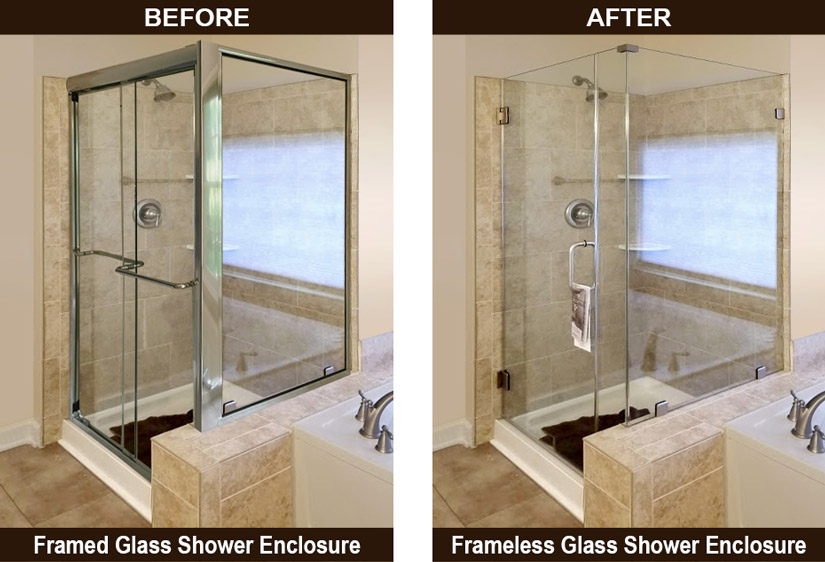
Your shower layout—not just budget—determines the right door type. Framed aluminum systems hide installation flaws but feel dated; frameless designs create luxury spa vibes but demand millimeter-perfect walls.
Swinging vs. Sliding Doors: Space-Saving Solutions
In stalls under 36 inches wide, sliding bypass doors prevent collisions with toilets or vanities. Measure swing clearance: pivot doors need 15+ inches of open space beyond the shower threshold to dry properly. For neo-angle showers (common in master baths), custom pivot doors are non-negotiable—off-the-shelf kits won’t fit the curved walls. Pro tip: If your shower has a built-in niche, choose a door that opens away from it to avoid soap bottles blocking closure.
Why Framed Kits Win for DIY Beginners
Framed doors (with visible aluminum channels) absorb 1/4-inch of wall irregularity—ideal for older homes. They cost $200-$500 for standard sizes and use forgiving rubber gaskets. Frameless systems ($800-$2,000+) require laser-level installation and 3/8-inch tempered glass; one drilling error cracks the entire panel. Unless your walls are laser-straight, start with a semi-frameless kit that blends frame support with minimalist aesthetics.
Must-Have Tools for Flawless Tile Drilling
Using the wrong drill bit shatters tile 70% of the time. Standard masonry bits skip across glazed surfaces, while carbide-tipped bits rated for porcelain tile prevent catastrophic cracks.
Step-by-Step Tile Drilling Without Cracks
- Mask and mark: Apply blue painter’s tape over drill points, then mark with a pencil. Place a dot of masking tape on the bit tip to limit depth.
- Start slow: Set drill to 300 RPM. Press firmly while angling the bit 45 degrees to create a starter groove, then straighten to 90 degrees.
- Let the bit work: Apply steady pressure—no forcing. For 1/2-inch tile, drill through in 60 seconds. If you smell burning, stop immediately.
Warning: Never drill near grout lines; the bit will follow the weak seam and crack tiles.
Why Cheap Caulk Guarantees Leaks
The silicone tube included in most kits contains ammonia that degrades rubber seals within months. Invest in 100% mold-resistant silicone (like GE Advanced Silicone 2), which stays flexible for 10+ years. Match the color to your grout—almond hides mildew better than clear in humid climates.
Installing Your Glass Door Frame Without Shims
Most DIYers skip dry-fitting, causing doors to bind days after installation. This 15-minute check prevents rework.
Dry-Fit Technique for Perfect Plumb
Assemble the frame without glass on a blanket. Lift it into the shower, resting the bottom rail on the tub edge. Place your level vertically against each side jamb. If uneven, slide plastic shims (not wood—they swell) behind jambs until plumb. Mark screw holes with a pencil through the frame slots, not on the tile. Critical: The top rail must be level after side jambs are plumb—adjust shims incrementally.
Mounting Jambs to Tile Walls Safely
Drill pilot holes only 1/8-inch deeper than your anchors. For tile, insert plastic sleeve anchors; for fiberglass, use rubber grommets to prevent stress cracks. Screw jambs in place with hand-tightened screws—overtightening by 1/4 turn cracks acrylic tubs. Test stability by pushing firmly on the top rail; if it wobbles, add a shim.
Hanging Glass Panels Without Dropping Them
Tempered glass weighs 5-7 pounds per square foot. One slip during installation causes dangerous breakage.
Two-Person Glass Handling Protocol
Wear cut-resistant gloves. Position one person inside the shower cradling the bottom edge, another outside supporting the top. Lift vertically—never tilt—into the frame channels. For pivot doors, attach top hinges before lifting; for sliders, insert panels into bottom tracks first. Never force glass into position; if resistance occurs, disassemble and recheck frame plumb.
Securing Hardware Without Cracking Glass
Tighten set screws in a star pattern (like lug nuts) to distribute pressure. Stop when resistance increases slightly—overtightening by 2mm creates hairline fractures. Test door swing: it should glide silently. If it binds, loosen the top hinge screw 1/8 turn and retest.
Applying the Leak-Proof Silicone Seal
Skipping this step floods floors within weeks. Caulking isn’t cosmetic—it’s your primary water barrier.
Why Inside Seams Are Non-Negotiable
Water migrates behind doors via capillary action. Apply silicone only along the inside seam where the frame meets tile and tub. Outside caulk traps moisture against walls, breeding mold. Clean seams with isopropyl alcohol first—soap residue prevents adhesion.
Perfect Bead Technique in 3 Steps
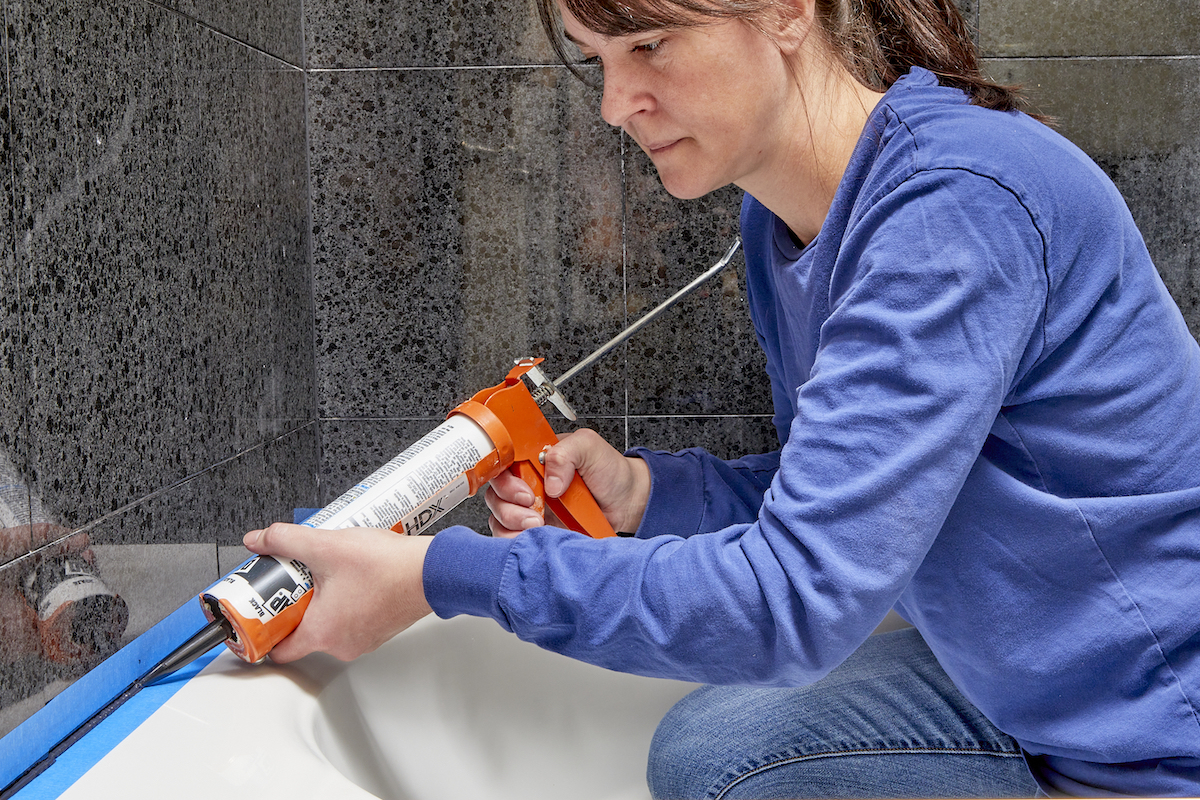
- Load gun correctly: Snip caulk tube tip at 45 degrees to match bead width (1/4 inch ideal).
- Apply steady pressure: Hold gun at 45 degrees, moving at 2 inches per second for uniform thickness.
- Smooth immediately: Dip finger in soapy water, press firmly along the bead to form a concave seal. Wipe excess within 10 seconds.
Fixing Common Post-Installation Problems
Water leaking? Door won’t close? These fixes take 5 minutes if caught early.
Stopping Threshold Leaks Instantly
If water escapes under the door, the bottom sweep isn’t seated. Remove the door, check for debris in the track, and reinstall. For persistent leaks, apply a second bead of silicone along the inside tub seam where the sweep contacts the curb.
Adjusting Binding Doors Without Re-Drilling
Loosen the top hinge screws 1/8 turn with an Allen wrench. Gently nudge the door toward the leak source (e.g., if water sprays left, shift door right). Re-tighten screws while holding position. Test with a dollar bill—if you feel drag when closing the door on it, the seal is too tight.
Daily Maintenance to Prevent Cloudy Glass
Hard water stains ruin glass clarity within months. Skip abrasive cleaners—they etch microscopic scratches that trap grime.
Pro Cleaning Routine That Takes 30 Seconds
After each shower, squeegee glass vertically from top to bottom. Weekly, spray with 50/50 white vinegar and water solution; let sit 5 minutes before wiping. For stubborn spots, rub gently with a pumice stone (sold at hardware stores) while wet—never dry.
When to Call a Professional Immediately
If your tub flexes when standing near the door, or if walls are more than 1/2-inch out of plumb, stop work. Professionals use laser levels and custom-cut glass to solve these issues. Their $300-$800 fee prevents $2,000 in water damage repairs.
Replacing your shower curtain with a glass door transforms bathroom functionality when done right. By measuring meticulously, using pro-grade silicone, and mastering tile drilling, you avoid the #1 DIY pitfall: leaks from improper sealing. Remember that framed doors forgive minor errors, while frameless styles demand perfection—start simple. Within 24 hours of sealing, enjoy a dry, modern shower that feels like a luxury upgrade. For tricky neo-angle showers or vintage tile, consult a glass specialist—their expertise saves costly rework. Ready to begin? Double-check your tub’s level today; your leak-proof glass shower awaits.


