
That familiar thud as your door slams against the wall isn’t just annoying—it’s slowly chipping paint, denting drywall, and potentially damaging your door hardware. Installing a door stopper correctly solves this common household problem before it creates costly repairs. Whether you’re a first-time homeowner or a seasoned DIYer, this guide shows you exactly how to install door stopper hardware that withstands daily use without failing. You’ll learn precise positioning techniques, proper mounting methods for different wall types, and professional tips most beginners miss—ensuring your stopper actually stops the door instead of becoming another wall decoration.
Most people grab the first door stopper they see and slap it on the wall, only to find it pulling loose within weeks. The difference between a stopper that lasts for years versus one that fails after three slams comes down to proper installation technique. This comprehensive guide walks you through every critical step, from selecting the right hardware to positioning it for maximum effectiveness. By the time you finish reading, you’ll know exactly how to install door stopper components that protect your walls while maintaining a clean, professional appearance.
Why Your Walls Need a Properly Installed Door Stopper Now
Ignoring door protection leads to expensive consequences most homeowners don’t anticipate. When a standard interior door slams against drywall at normal speed, it creates approximately 15-20 pounds of force—enough to gradually crack paint, create dents, and eventually punch through the wall surface. Baseboards suffer similar damage from repeated impacts, with repair costs ranging from $50-$200 per incident depending on wall finish and paint matching requirements. Worse, doors themselves can become misaligned over time when they consistently hit walls instead of stopping mechanisms, leading to hinge damage and costly door adjustments.
Wall-mounted stoppers prevent these problems by absorbing impact force through their flexible arms and rubber pads. Unlike temporary solutions like door wedges that get kicked aside or lost, a properly installed stopper works automatically every time the door opens. The right installation positions the stopper to intercept the doorknob precisely, preventing any contact between metal hardware and wall surfaces. This small investment protects your home’s structural integrity while maintaining that clean, undamaged look you paid for during your last renovation.
Selecting the Right Door Stopper for Your Specific Situation
Choosing inappropriate hardware guarantees installation failure, so don’t skip this critical selection step before you learn how to install door stopper components correctly.
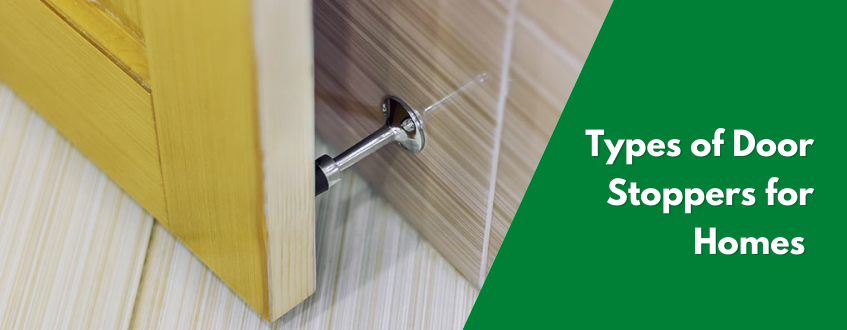
Wall-Mounted vs. Floor-Mounted: Which Stops Your Door Best?
Wall-mounted stoppers work by catching the doorknob before it hits the wall, making them ideal for standard interior doors where the primary concern is wall and baseboard protection. Look for models with spring-loaded arms and replaceable rubber pads—these absorb impact better than rigid plastic versions that transmit force directly to your mounting hardware. For doors that swing wide (like closet doors), choose an adjustable arm model that lets you fine-tune the stopping point after installation.
Floor-mounted stoppers serve different purposes—they prevent doors from swinging too far open rather than stopping them from hitting walls. These work well for exterior doors or heavy interior doors where wall space is limited, but they won’t protect your walls from doorknob impacts. If your main concern is preventing wall damage (as most homeowners’ is), wall-mounted remains the superior choice for standard interior doors.
Critical Hardware Features That Determine Longevity
The difference between a stopper that lasts five years versus five months comes down to three key factors: base plate thickness, arm construction, and pad material. Avoid ultra-thin plastic bases that crack under pressure—opt for at least 1/8-inch thick metal or high-impact polymer. Check that the arm has metal reinforcement inside plastic models, as pure plastic arms snap when doors slam hard. Finally, select stoppers with replaceable rubber pads rather than glued-on versions; these wear out first and can be swapped without replacing the entire unit.
Essential Tools Checklist for Flawless Door Stopper Installation
Gather these specific tools before you begin learning how to install door stopper hardware to avoid mid-project frustration:
- Wall-mounted stopper kit (with appropriate hardware for your wall type)
- Drill with 1/8-inch and 3/16-inch drill bits (match to your anchor size)
- Precision level (4-6 inches long for accurate alignment)
- Stud finder (crucial for drywall installations)
- Painter’s tape (prevents wall surface tearing when marking)
- Rubber mallet (for gently tapping anchors without damaging walls)
- Measuring tape with 1/16-inch increments (for precise positioning)
Pro Tip: Keep a small container nearby for screws and anchors—these tiny components easily roll away during installation.
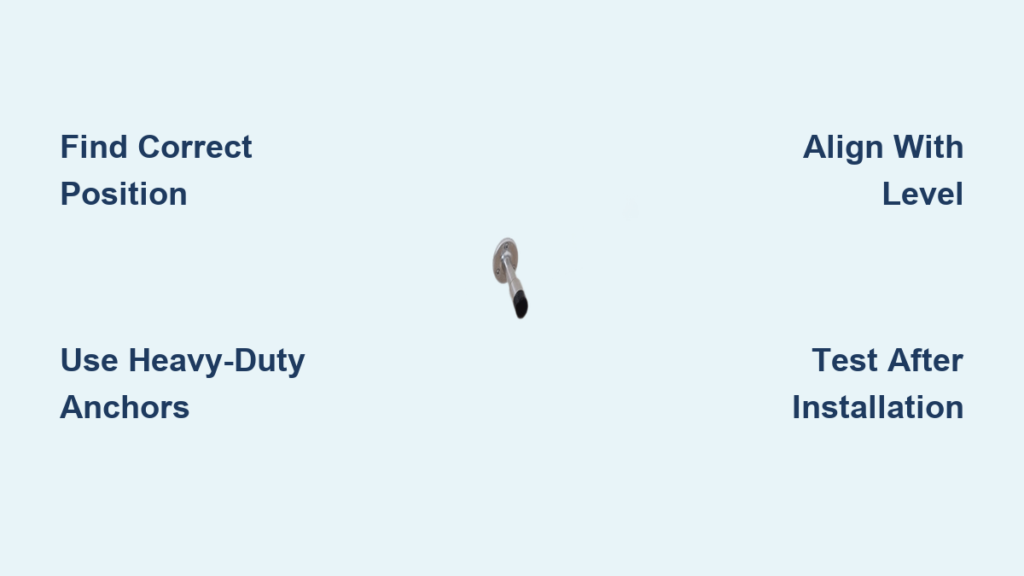
Positioning Your Door Stopper for Maximum Effectiveness
Find the Perfect Stopping Point Without Guesswork
- Mark your starting position: Close the door slowly until the knob is 1-2 inches from the wall. Place a small piece of painter’s tape on the wall at knob center height—this is your minimum stopping distance.
- Test the actual impact point: Gently swing the door toward the wall as if closing normally (not slamming). Note where the knob actually makes contact—this is your true target position, usually 1/2 inch farther out than your initial mark.
- Adjust for door thickness: Thicker doors require slightly more clearance. For doors over 1¾ inches thick, move your mark outward by 1/4 inch.
Avoid This Common Positioning Mistake
Over 70% of failed installations happen because homeowners mount stoppers too close to the door jamb. When positioned incorrectly, the stopper pad hits the door edge instead of the knob, creating leverage that pulls the entire unit from the wall. Always test your positioning with the door fully open before drilling—hold the stopper base against the wall and swing the door slowly to verify the knob contacts the pad directly.
Installing Your Door Stopper on Different Wall Types
Drywall Installation: The Right Way to Prevent Pull-Out
- Locate a stud if possible: Use your stud finder to identify solid wood behind the drywall. Mounting directly into a stud provides the strongest hold.
- No stud? Use heavy-duty anchors: Standard plastic anchors won’t withstand door impact forces. Install molly bolts or toggle anchors rated for 50+ pounds.
- Drill precise pilot holes: Match hole diameter exactly to your anchor specifications—too large and the anchor won’t grip, too small and it won’t seat properly.
- Tap anchors gently: Use a rubber mallet to seat anchors flush with the wall surface without cracking drywall.
Warning: Never use standard plastic wall plugs for door stoppers on drywall—they pull out within weeks from repeated door impacts.
Solid Surface Installation: Wood, Tile, and Plaster Tips
Wood baseboards and trim provide excellent mounting surfaces when installed correctly. Drill pilot holes 1/16 inch smaller than your screw diameter to ensure a tight grip. For tile walls, use a masonry bit and proceed slowly to prevent cracking—apply light pressure and let the drill do the work. Plaster walls require special care; drill slowly with a masonry bit and use anchors designed for brittle surfaces to prevent crumbling.
Final Installation Steps and Testing Protocol

Mounting Your Stopper Without Damaging the Hardware
- Position with precision: Align the base plate with your marks, using the level to ensure perfect vertical alignment.
- Start screws by hand: Begin threading screws to prevent cross-threading and ensure proper alignment.
- Tighten gradually: Alternate between screws, tightening each slightly before moving to the next—this prevents warping the base plate.
- Stop at snug: Overtightening cracks plastic bases and strips drywall anchors. Stop when resistance increases noticeably.
The Critical Testing Process Most Homeowners Skip
After installation, perform this three-step test before considering the job complete:
1. Slow-motion test: Gently swing the door to contact the stopper—observe if the pad compresses fully without the knob sliding past.
2. Normal use test: Operate the door at regular speed 10 times, checking for any movement in the mounting hardware.
3. Impact test: Close the door with moderate force (as you normally would) and verify the stopper absorbs the impact without shifting.
If the stopper fails any test, adjust the position slightly outward and repeat testing—don’t assume “close enough” will work with daily use.
Pro Maintenance Tips to Extend Your Door Stopper’s Lifespan
Replace worn rubber pads annually—hardened or cracked pads transfer impact force directly to your mounting hardware. Every six months, check mounting screws for looseness and tighten if necessary (but don’t overtighten). For spring-loaded models, apply a small drop of silicone lubricant to moving parts each spring to maintain smooth operation. In high-traffic areas, consider upgrading to commercial-grade stoppers with metal housings—they cost slightly more but last three times longer under heavy use.
Prevent Costly Repairs: Install Your Door Stopper Correctly Today
Taking just 20-30 minutes to properly install a door stopper saves hundreds in future wall repairs and maintains your home’s value. The key to success lies in precise positioning, appropriate hardware selection, and using installation methods matched to your specific wall type. When you know exactly how to install door stopper components to withstand daily impacts, you transform a simple piece of hardware into an effective protection system for your walls and doors. Start with one high-traffic door today—once you see how professional installation prevents that annoying thud while protecting your walls, you’ll want to tackle every door in your home. Remember, the best time to install a door stopper was before the first dent appeared; the second-best time is right now.


