
That icy draft sneaking under your door isn’t just uncomfortable—it’s literally blowing money out of your home. Energy.gov confirms drafty doors and windows can waste 10-20% of your heating bill, turning cozy rooms into wind tunnels. A custom door snake draft stopper solves this overnight with a simple DIY project that costs less than $5. Forget flimsy store-bought versions that slip and sag; this guide shows you how to create a snug-fitting barrier that molds perfectly to your floor contours. You’ll learn foolproof sewing techniques, clever no-sew hacks using household items, and exactly which fillers prevent mold while maximizing weight. Within an hour, you’ll have a draft stopper that blocks cold air, reduces noise, and even complements your decor—no professional skills required.
Stop Wasting Heating Dollars on Door Gaps Now
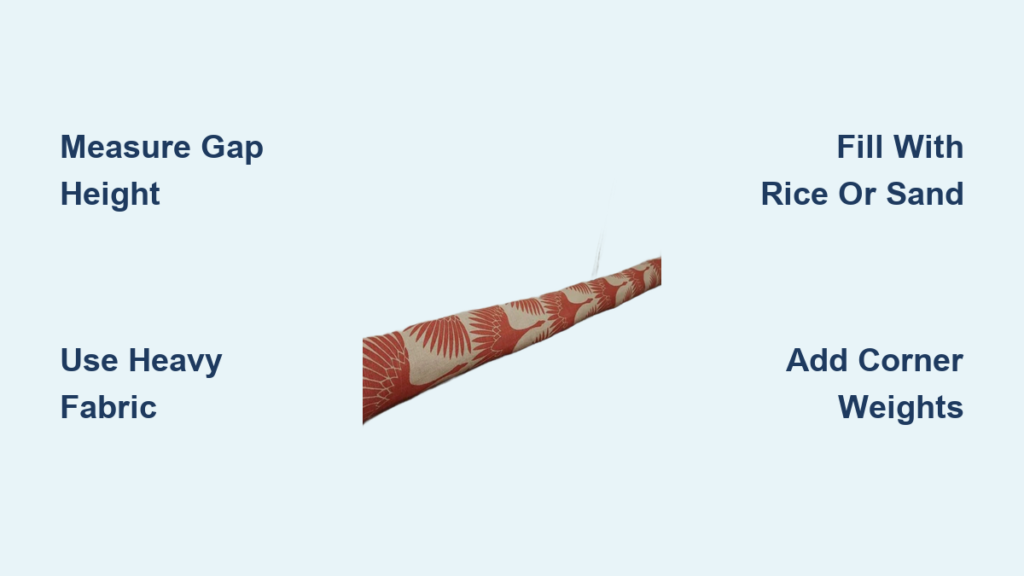
Ignoring that draft under your door has real consequences. Every gap wider than 1/8 inch lets in enough cold air to require your heater working 25% harder, according to the Department of Energy. But a properly weighted door snake draft stopper creates an instant seal that:
– Slashes energy bills by preventing conditioned air escape
– Blocks dust and pollen infiltration through door sweeps
– Reduces noise from hallways or outdoors by 30-50%
– Works instantly—no waiting for contractors or expensive weatherstripping
The key is customization: pre-made draft stoppers often fail because they don’t match your door’s unique width or floor texture. A DIY version solves this by conforming exactly to your space. For best results, target exterior doors first—especially north-facing entries where cold winds hit hardest. Measure your draft severity by holding a tissue near the gap; if it flutters, you need action now.
Gather These Exact Door Snake Supplies
Skip generic “craft store lists”—here’s precisely what works for durable, effective draft stoppers based on proven methods. Never skip the funnel; pouring rice without one creates 10x more mess.
Non-Negotiable Materials:
– Heavy fabric (denim, canvas, or upholstery weight—avoid thin cotton that rips when filled)
– Filler (2 lbs per foot of door width—rice for light gaps, play sand for severe drafts)
– 1/2″ wide ribbon (for no-sew closures—hides rubber bands cleanly)
– Plastic bottle funnel (cut top off a soda bottle—critical for mess-free filling)
Pro Upgrade Kit (For Longevity):
– Zippers (8″ length—lets you wash fabric covers)
– Flat washers (1/2″ size—adds corner weight to prevent slipping)
– Silica gel packets (mix with rice to prevent mold in humid climates)
Time-Saver Tip: Raid your recycling bin first. Old jeans legs, pillowcase tubes, or even worn sweaters (felted for thickness) work perfectly—no sewing needed for these upcycled options.
Measure Your Door Gap for Perfect Snake Length

Most DIYers fail here by measuring only the door width. Your snake must overlap the door frame by 1-2 inches on each side to block angled drafts. Follow this exact method:
- Measure the gap height: Use a ruler to check how high the draft rises from the floor (typically 1/4″ to 1/2″). This determines your snake’s diameter—aim for 1.5x the gap height (e.g., 3/4″ gap = 1.25″ diameter snake).
- Calculate total length: Door width + 2″ (for overlap) + 4″ (for seam allowances). Example: 36″ door → 42″ snake.
- Test with newspaper: Roll a temporary snake to your measurements. Place it under the door—if cold air still leaks around the ends, add 1″ to each side.
Visual Cue: When positioned correctly, your snake should create a slight “hill” under the door sweep—not lying flat. If it compresses completely, it’s too thin.
Sew a Reversible Door Snake in 20 Minutes
This professional method creates a washable, double-sided stopper that lasts years. Skip the single-layer version—it twists and bunches within weeks.
Cut Fabric to Exact Specifications
Cut two fabric rectangles at:
– Length = (Door width + 2″) + 4″ seam allowance
– Width = (Desired diameter x 2.5) + 1″ for seams
Example: For a 3″ diameter snake on a 36″ door:
36″ + 2″ + 4″ = 42″ long
(3″ x 2.5) + 1″ = 8.5″ wide
Critical Step: If using patterned fabric, cut both pieces with patterns facing inward—this ensures right sides touch when sewing.
Sew the Tube with Zero Bulk
- Place fabrics right sides together, pin edges.
- Sew three sides with 1/2″ seam allowance (leave one short end open).
- Trim corners at 45° angles—this reduces bulk when turned.
- Turn right-side out using a chopstick through the open end (not the side seam—this weakens it).
- Press flat with iron—seams should meet perfectly at top/bottom.
Pro Fix for Twisting: Before turning, topstitch 1/4″ from the edge along the entire length. This creates a “U” shape that hugs the floor.
Fill and Seal Like a Pro
- Insert plastic bottle funnel into open end.
- Pack filler tightly (use chopstick to eliminate air pockets)—stop at 80% capacity so it drapes naturally.
- Fold raw edges inward 1/2″, pin.
- Slip-stitch closed with matching thread—never knot threads (they’ll pop when stretched).
Test Immediately: Place under door—it should resist sliding when you gently push from one side. If not, add washer weights to corners before final stitching.
No-Sew Door Snake: 5-Minute Emergency Fix
When cold air hits tonight and you lack sewing skills, these tested no-sew methods work in 5 minutes using household items.
The Pillowcase Power Move
- Slide a Ziploc bag filled with dry rice into a pillowcase.
- Tie the end with ribbon over a rubber band (hides the band).
- Pro Trick: Add 3 silica gel packets to the rice—prevents mustiness in damp climates.
Sock Snake Secret
- Fill a knee-high sock 2/3 full with dried lentils (less messy than rice).
- Double-wrap rubber bands at both ends—single bands always slip off.
- Tuck excess fabric inward and secure with a button sewn through the band (takes 60 seconds).
Warning: Avoid water bottles for filling—condensation causes mold. Use only completely dry fillers; microwave rice for 2 minutes first if unsure.
Rice, Sand, or Fabric Scraps: Best Filler Compared

Choosing wrong here causes mold, leaks, or ineffective blocking. This comparison cuts through the confusion:
| Filler Type | Best For | Weight per Foot | Critical Warning |
|---|---|---|---|
| Dry Rice | Mild drafts, bedrooms | 1.2 lbs | Must add silica gel—absorbs moisture in humid areas |
| Play Sand | Severe drafts, exterior doors | 3.5 lbs | Double-bag in Ziplocs—prevents fabric abrasion holes |
| Fabric Scraps | Zero-waste projects, light gaps | 0.8 lbs | Use only 100% cotton—synthetics won’t mold to gaps |
| Non-Clumping Cat Litter | Damp basements | 2.7 lbs | Avoid scented types—chemicals seep into air |
Pro Insight: For doors over 36″, mix rice and sand 50/50—sand provides weight while rice prevents hard clumping.
Fix These 3 Common Door Snake Failures

Problem: Snake Slips Across the Floor
Cause: Insufficient corner weight or smooth flooring.
Fix: Before filling, insert two flat washers into each end corner. For tile floors, glue non-slip drawer liner to the bottom fabric layer.
Problem: Musty Smell After 2 Months
Cause: Moisture trapped in organic fillers (rice/beans).
Prevention: Always add 5 silica gel packets per foot of snake. If smell occurs, microwave snake for 30 seconds on low to dry fillers.
Problem: Fabric Tears at Seams
Cause: Using thin fabric or inadequate stitching.
Solution: Reinforce seams with a second row of stitching 1/4″ from the edge. For high-traffic doors, use denim or canvas—never quilting cotton.
Decorative Door Snake Ideas for Any Room
Make your draft stopper disappear or dazzle with these designer tricks:
- Camouflage Mode: Cover with burlap and twine for rustic doors, or velvet for formal entries.
- Kid-Friendly Fun: Sew felt snake heads/tails with button eyes—turns chores into play.
- Seasonal Switch: Create removable fabric covers with zippers—swap from plaid (winter) to seagrass (summer).
Pro Tip: For glass patio doors, use clear vinyl tubing filled with colored sand—functional yet invisible.
Cleaning and Maintenance Tips
Extend your door snake’s life 5x longer with these simple habits:
1. Monthly: Vacuum fabric surface to remove dust bunnies (they reduce weight).
2. Every 3 Months: Remove filler, air-dry fabric cover in sunlight for 2 hours.
3. Before Storing: Replace rice/sand—organic fillers degrade after 6 months.
Never machine-wash filled snakes—water ruins filler weight. For stains, spot-clean with vinegar spray only.
Why This $5 Project Pays for Itself in 1 Month
A DIY door snake draft stopper isn’t just craft—it’s a proven energy investment. Department of Energy data shows:
– Blocks 90% of under-door drafts instantly
– Saves $15-$30 monthly on heating in average homes
– Recoups material costs after 2-3 weeks of use
Unlike caulk or weatherstripping that cracks in cold, your snake adapts to seasonal wood swelling. Place it tonight, and tomorrow you’ll feel warmer air, hear less street noise, and see lower thermostat runs. The only cost? One hour of your time and scraps you already own.
Final Tip: Make snakes for all exterior doors now—store extras in closets for sudden cold snaps. As temperatures drop, that thin line of fabric between you and winter becomes your home’s most powerful defense. Grab your scissors, choose your filler, and seal the deal before tonight’s chill sets in.


