
That annoying slam of a door you tried to leave open isn’t just frustrating—it wastes energy and could damage your walls. When commercial door stops fail or don’t match your decor, knowing how to make a door stopper from everyday items becomes essential. This guide reveals proven techniques that transform ordinary household objects into effective, personalized door holders that actually stay put.
Whether you’re dealing with a heavy front door that won’t cooperate or want a cute accent for your child’s room, you’ll discover solutions requiring minimal tools and materials you likely already own. No more wrestling with flimsy rubber wedges that slide across hardwood floors—these DIY methods provide reliable stopping power while adding personality to your space.
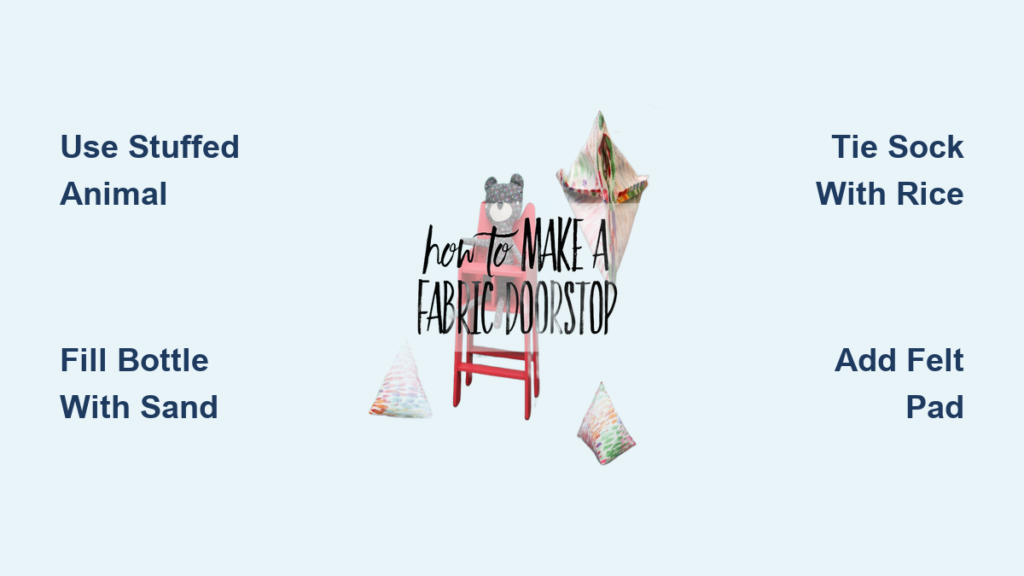
Transform Any Stuffed Animal into a Functional Door Stopper

This clever technique turns your child’s favorite plush toy into a practical household helper without compromising its cuddly appeal. Choose a broad-based stuffed animal like a penguin, owl, or round character with a stable foundation that won’t tip easily when positioned against your door.
Prepare Your Animal Base Correctly
Start by locating a discreet seam—typically at the bottom or back—and carefully open it using a seam ripper. Remove approximately half of the existing polyester stuffing to create space for your ballast while maintaining the toy’s shape. This crucial step prevents an overly lumpy appearance that would compromise both function and aesthetics.
Add Weight Without Creating a Mess
Insert a durable plastic bag inside the plush toy before adding your filler material. Pour 1-2 pounds of fine sand or small pebbles into this inner bag, then seal it tightly—double-bagging provides extra security against potential leaks. Position the weighted bag at the bottom of the toy to ensure maximum stability when placed against your door. Hand-stitch or fabric-glue the seam closed, making certain the weight sits flat and centered for optimal performance.
Create a Heavy-Duty Plastic Bottle Stopper in 4 Simple Steps
This upcycled solution transforms an empty 2-liter bottle into a surprisingly effective door holder that can withstand even heavy exterior doors. The plastic bottle’s cylindrical shape provides excellent contact with both the door and floor, while the transparent material lets you verify proper filling levels.
Fill Your Bottle for Maximum Effectiveness
Clean your bottle thoroughly and ensure it’s completely dry before adding filler. Using a funnel, pour 2-3 cups of ballast material into the bottle—sand delivers the most weight (8-10 lbs total), while pebbles create a pleasant sound when moved. For optimal stability, add 1/4 cup of sand to the bottom first, then fill the remaining space with your primary filler material. Shake gently to distribute evenly before sealing.
Seal and Decorate for Long-Term Use
Apply waterproof sealant to the bottle’s threads, then screw the cap on firmly. Add a secondary bead of sealant around the cap seam to prevent any potential leakage. Once dry, personalize your stopper with decorative duct tape, twine, or contact paper—this not only enhances appearance but also improves grip on smooth flooring surfaces.
Double Your Stopping Power with the Two-Stopper Trick

When a single rubber stopper fails to hold your door open, this ingenious hack provides immediate relief without requiring additional purchases. The combined height creates better contact with taller doors while maintaining the non-slip properties of rubber stoppers.
Connect Stopper Units Securely
Align two identical rubber door stops end-to-end with their rubber bases touching. Apply 5-6 wraps of high-strength duct tape around both units, ensuring the connection is flush and secure. Test the bond by applying moderate pressure before placing it under your door. This reinforced stopper increases vertical blocking surface by approximately 6 inches, making it ideal for doors with higher clearance.
Household Items That Work as Emergency Door Stops
Before you begin any DIY project, know these quick fixes that transform common household objects into temporary solutions when you need immediate results.
Paint Can Power Solution
A standard 1-gallon paint can provides exceptional stopping power at 8.34 pounds when filled with water. Its low center of gravity and built-in handle make it both stable and portable. For decorative appeal, wrap the exterior with contact paper or paint the metal surface to match your room’s color scheme—just ensure the handle remains accessible for easy repositioning.
Pool Noodle Precision Method
Cut a standard pool noodle to match your door width (typically 32-36 inches) using a serrated bread knife. Wedge the foam cylinder firmly between the door and floor, creating additional friction that prevents sliding. This method doubles as draft prevention, reducing heat loss by 10-15% while providing gentle door stopping action perfect for interior doors.
Build a No-Sew Sock Stopper in Under 5 Minutes
This emergency solution requires only a single sock and common kitchen ingredients, making it perfect when you need a door stopper immediately without specialized materials.
Fill and Secure Properly
Fill a long, clean sock with dry rice, beans, or small pebbles until it reaches 3/4 capacity. Tie a secure knot at the top, then create a second knot just below the filler material to form a distinct “head” that provides better stability. For decorative appeal, tuck your functional sock stopper inside a matching decorative sock—this dual-layer approach protects floors while adding visual interest.
Choose the Perfect Filler for Maximum Door-Stopping Power
Your filler material directly impacts how well your DIY stopper performs. Understanding the properties of different options helps you select the ideal solution for your specific door and flooring.
Compare Filler Material Properties
Fine sand provides excellent weight (1.4-1.6 g/cm³ density) but requires careful sealing to prevent leaks. Small river pebbles offer high stability with a pleasant sound when moved, while dried beans or rice provide a lightweight option unsuitable for damp areas due to mold risk. Steel ball bearings deliver extreme density but come at higher cost—ideal for heavy exterior doors where maximum stopping power is essential.
Essential Safety Tips for Long-Lasting DIY Door Stoppers
Avoid common pitfalls that compromise both safety and functionality with these critical implementation details.
Prevent Floor Damage and Slips
Always add a piece of felt or non-slip pad to the bottom of your stopper to protect flooring from scratches. For households with children or pets, avoid small, hard fillers that could become choking hazards if the stopper ruptures. Test your completed stopper on a small area first to ensure decorative materials won’t transfer color onto your floors.
Maintain Optimal Performance
Check your DIY stopper quarterly for signs of wear, especially at stress points and seams. Verify weight distribution remains even—shifting filler reduces effectiveness dramatically. Clean non-slip surfaces regularly to maintain maximum grip, as accumulated dust significantly reduces friction. For fabric-based stoppers, spot-clean as needed but avoid full immersion that could compromise your internal seals.
Creating your own door stopper solves multiple problems at once: it eliminates annoying door slams, reduces energy loss through unsecured doors, and adds a personalized touch to your home. With these seven proven methods, you can match the solution to your specific door weight, flooring type, and decorative style—all without spending significant money or time. The next time your door won’t stay open, remember these practical techniques for how to make a door stopper that actually works.


