
Your front doorbell button faces relentless weather exposure and constant use—rain, snow, and hundreds of daily presses wear it down until it finally fails. When that happens, you miss deliveries, guests, and important visitors. The good news? Most doorbell button repairs take under 30 minutes and cost less than $20. This guide reveals exactly how to diagnose whether your button is truly broken, then walks through the fastest repair or replacement process for both wired and wireless systems. You’ll learn to safely handle electrical components, avoid common pitfalls, and prevent future failures—all with basic tools you likely own.
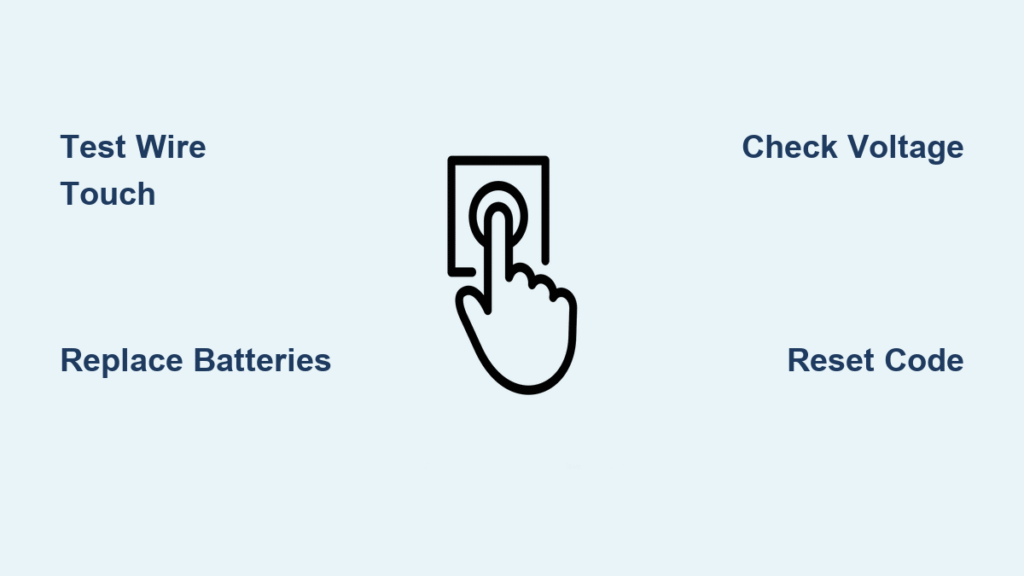
Diagnose Your Doorbell Button Failure in 60 Seconds
Before grabbing tools, confirm the button is actually broken. This simple test prevents unnecessary work and pinpoints whether the problem lies with the button or deeper in your system.
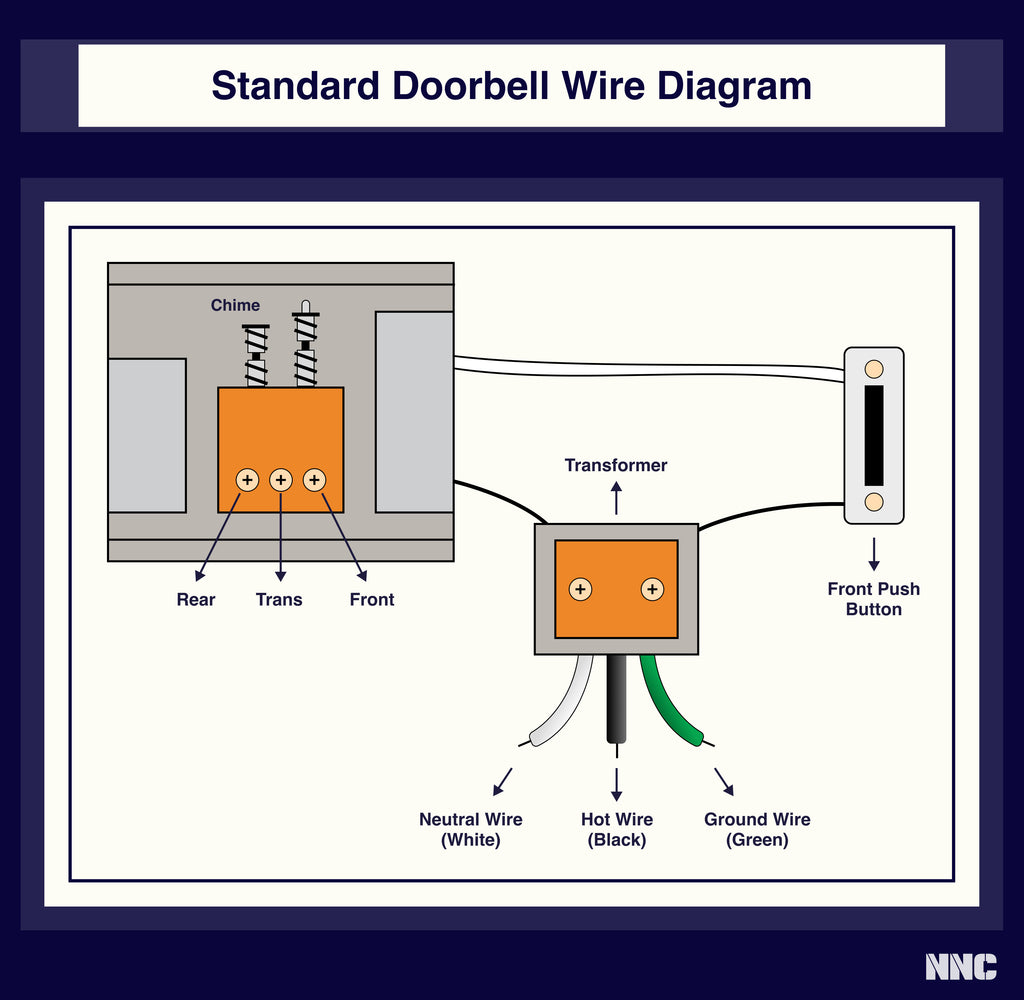
Wired System Diagnosis:
– Remove the button cover with a flathead screwdriver
– Disconnect one wire from its terminal
– Briefly touch the bare wire ends together
– Chime activates? Your button is dead and needs replacement
– No chime? Problem exists in wiring, transformer, or chime unit
Wireless System Troubleshooting:
– Press the button while standing next to the receiver unit
– No response at close range? Replace batteries immediately (90% of wireless failures)
– Works near receiver but not at door? Reprogram the code blocks or relocate the receiver
Essential Safety Steps Before Repairing
Even though doorbell circuits use safe low voltage (12-16V), skipping these precautions risks electrical issues or improper reassembly.
Power Management Protocol:
1. Locate your transformer (typically in basements, garages, or near breaker boxes)
2. Turn off the dedicated “doorbell” breaker at your main panel
3. Verify zero voltage at the button terminals using a multimeter
4. Critical warning: If the button feels warm during testing, you have a voltage mismatch (common in pre-1990s homes) requiring transformer replacement
Safety Must-Dos:
– Wear insulated electrician’s gloves when handling exposed wires
– Tape wires securely to prevent them slipping into wall cavities
– Photograph wiring configurations before disconnecting anything
Repair vs Replace: Make the Right Decision

Replacement is often simplest, but these specific scenarios justify repair efforts to preserve vintage aesthetics or avoid unnecessary costs.
Repair Only When:
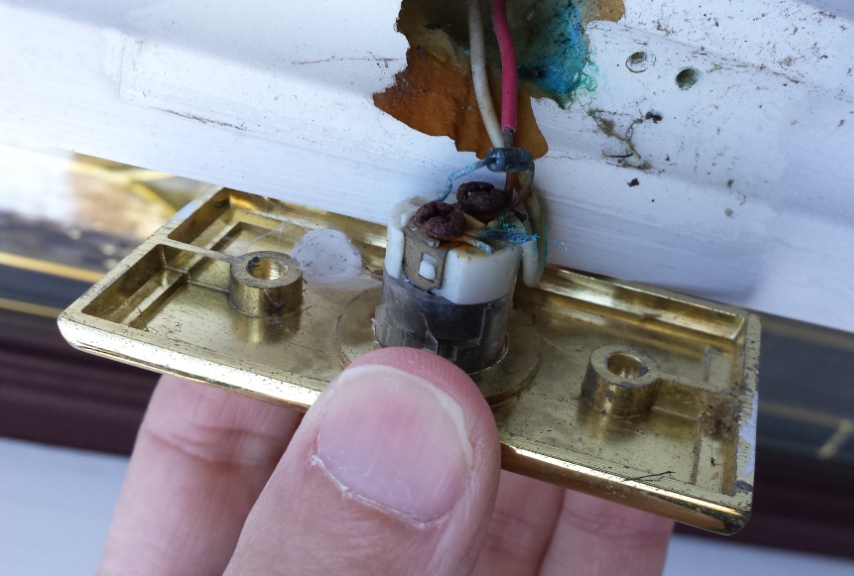
– You own a vintage brass button matching your home’s historic architecture
– The issue is mechanical jamming from dirt or minor corrosion (cleanable with contact cleaner)
– Only the LED indicator has failed in an illuminated button (diode replacement takes 5 minutes)
Always Replace When:
– Dealing with standard plastic buttons (cost $8-$15)
– Housing shows cracks or severe corrosion
– Handling wireless buttons (sealed units with non-repairable circuit boards)
Wired Doorbell Button Replacement: Step-by-Step
Tools and Materials Checklist
- Small Phillips/flathead screwdrivers
- Needle-nose pliers (for secure wire loops)
- AC/DC voltage meter ($15 at hardware stores)
- Exterior-grade silicone caulk
- Matching replacement button (verify 12-16V rating)
Installation Process
Preparation Phase:
1. Power off at transformer and confirm with voltage meter
2. Remove mounting screws using appropriate screwdriver
3. Carefully slice through old caulk with utility knife to prevent wall damage
4. Tape wires to wall surface to avoid losing them in the wall cavity
Wiring Connection:
1. Disconnect wires from old button terminals (order doesn’t matter)
2. Strip 1/4 inch of insulation if ends are frayed
3. Form tight J-loops with needle-nose pliers for secure terminal contact
4. Attach one wire per terminal on new button and tighten screws firmly
Final Mounting:
– Position button flush against siding before screwing
– Apply pea-sized caulk beads around edges for weatherproofing
– Pro tip: Paint caulk lines immediately after application to hide seams
– Restore power and test chime operation before final caulk cure
Wireless Button Troubleshooting That Actually Works
Wireless systems fail differently—avoid wasting money on replacements with these targeted fixes.
Battery & Connection Fixes:
– Replace CR2032 or AA batteries annually (even if functional)
– Clean corroded contacts with isopropyl alcohol and cotton swab
– Critical step: Reset code blocks by aligning all metal pins identically on button and receiver
Signal Range Solutions:
– Mount button on wooden door frames instead of metal surfaces
– Relocate receiver away from WiFi routers and LED bulbs (major interference sources)
– Test range by moving receiver closer—works? You need signal boosters
Fix Common Post-Repair Failures
Button Stops Working Within Days
- Check voltage: Below 10V at terminals means failing transformer
- Inspect connections: Loose wire nuts in junction boxes cause intermittent failures
- Re-caulk: Moisture intrusion around edges is the #1 cause of early failure
Intermittent Operation Fixes
- Tighten all terminal screws (vibration loosens them over time)
- Replace corroded wires showing green oxidation
- Pro move: Apply dielectric grease to terminals before reassembly
Prevent Future Doorbell Button Failures
Annual Maintenance Routine
- Clean contacts with electrical contact cleaner every spring
- Inspect caulk seals quarterly for cracks or shrinkage
- For wireless systems, replace batteries before winter (cold reduces battery life)
- Tighten mounting screws during routine home maintenance
Smart Upgrade Considerations
- Test WiFi signal strength at installation point first (smart doorbells need strong signal)
- Choose illuminated buttons for visibility in dark (last 5-8 years before LED failure)
- Match finishes to house hardware—brass/bronze resists corrosion 3x longer than plastic
Cost and Time Reality Check
DIY Repair Economics:
– Standard button replacement: $12 + 15 minutes
– Decorative brass button: $35 + 25 minutes
– Smart doorbell integration: $150 + 45 minutes
Professional Help Triggers:
– No existing wiring in walls (requires new circuit installation)
– Transformer buried in inaccessible crawl spaces
– Wall damage from previous amateur repairs
Lifespan Expectations:
– Basic plastic buttons: 10-15 years
– Illuminated models: 5-8 years
– Wireless units: 3-5 years (battery-dependent)
5-Step Doorbell Button Emergency Checklist
Before calling an electrician, run through these fixes:
1. Wire-touch test on wired systems (confirms button failure)
2. Battery replacement for wireless units (with contact cleaning)
3. Voltage check at transformer (must read 12-16V AC)
4. Code reset for wireless systems (realign all pins)
5. Caulk inspection for moisture entry points
Still not working? Hidden wiring damage or transformer failure requires professional diagnosis—don’t risk electrical hazards.
A broken doorbell button is rarely a complex electrical problem. By following this precise diagnostic sequence, you’ll fix 95% of failures in under 30 minutes with basic tools. Start with the wire-touch test to confirm the culprit, choose repair or replacement based on your button type, and always reseal connections against weather. Your delivery driver—and your impatient guests—will immediately notice the difference. Regular maintenance prevents most failures, but when repairs are needed, this guide ensures you’ll never miss another visitor at your door.


