
That distinctive click as your toddler locks themselves in the bathroom sends a jolt of panic through any parent. Interior door locks designed for privacy become dangerous traps when children accidentally engage them, creating life-threatening situations where a simple fall or medical emergency could go unnoticed. Knowing how to disable a lock on a door handle isn’t just convenient—it’s a critical safety measure for homes with young children, renters facing inflexible leases, or anyone dealing with faulty hardware. This guide delivers actionable, step-by-step methods to eliminate accidental lock-ins, from non-destructive renter-friendly fixes to permanent childproofing solutions. You’ll learn exactly how to modify common push-button locks in under 10 minutes, avoid costly door damage, and implement foolproof safety protocols that keep your family secure.
Why Toddlers Get Trapped in Locked Bathroom Doors
Interior privacy locks on bathroom and bedroom doors pose a hidden hazard most parents discover too late. A standard push-button lock requires only 1-2 pounds of pressure to engage—easily within a toddler’s capability when they mimic adult behavior. Once locked, these mechanisms lack external override features in many rental properties, trapping children for hours with no way to call for help. The danger escalates in bathrooms where slip-and-fall accidents are common; a child locked inside after a head injury could suffer severe consequences before anyone notices. This isn’t hypothetical—fire departments report hundreds of annual incidents involving children trapped in locked rooms. Disabling these locks transforms hazardous doors into safe, accessible exits while maintaining normal latching functionality.
Essential Safety Gear Before You Start
Never attempt lock modifications without eye protection. Tiny metal springs and plastic fragments can eject at high velocity when disassembling mechanisms. Always wear ANSI-approved safety glasses and work gloves to shield against sharp latch edges. For renter-friendly projects, keep painter’s tape and cardboard buffers on hand to prevent finish damage during prying. Your toolkit should include: a Phillips #2 screwdriver (most common for interior knobs), a 1/8-inch flathead for emergency bypass holes, needle-nose pliers for spring removal, and a rubber mallet for stubborn hinges. Skip power tools—they increase the risk of splintering wood doors or stripping screws.
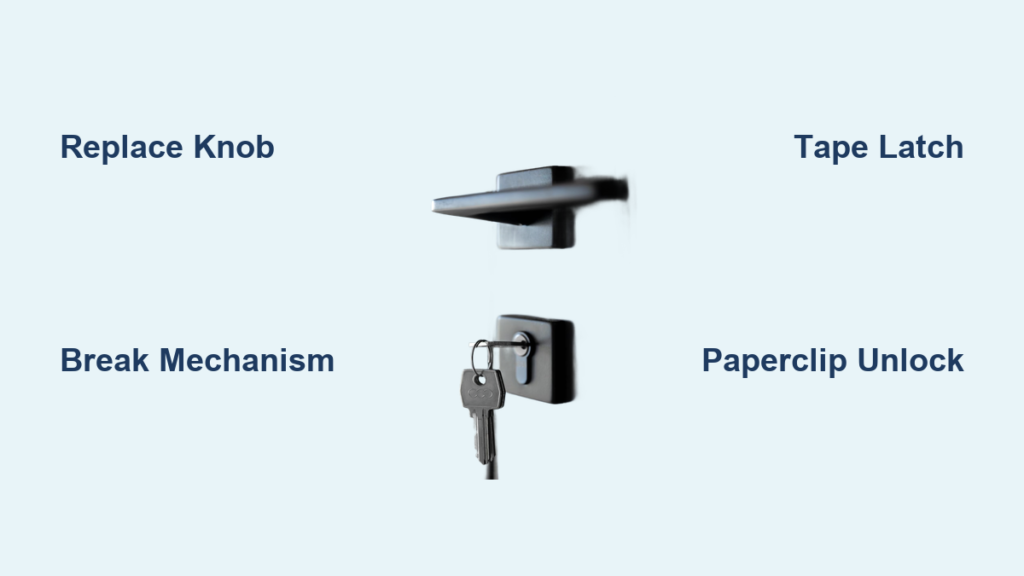
Replace Your Door Knob with a Child-Safe Passage Set
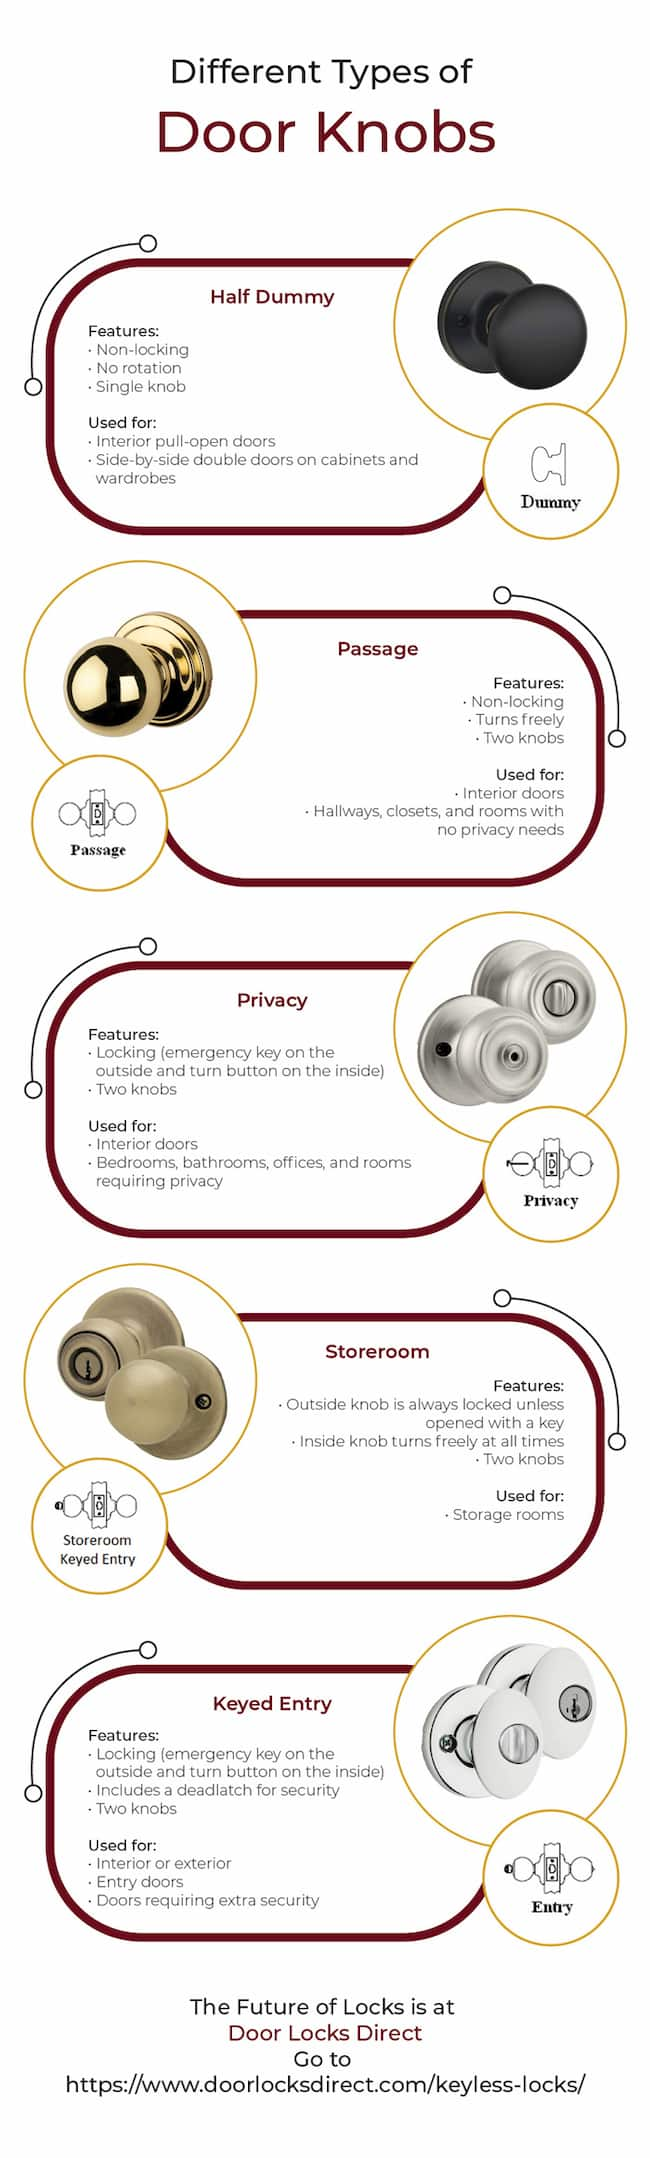
Swapping a locking knob for a non-locking passage set is the gold standard for permanent childproofing. This solution maintains door functionality while eliminating lock hazards entirely—ideal for children’s bedrooms and bathrooms. Renters can reinstall the original hardware upon moving out.
Step-by-Step Knob Replacement in 5 Minutes
- Locate the release mechanism on the interior knob’s shank (a small slot or pinhole near the base). Insert a flathead screwdriver to depress the clip.
- Pull the knob straight off the square spindle shaft. This exposes the mounting plate screws.
- Remove the two mounting screws connecting interior and exterior plates. The latch assembly will separate from the door edge.
- Insert the new passage latch into the door edge, aligning it with the strike plate hole.
- Slide both new knob halves onto the spindle, secure with screws, and test the smooth pull/push action.
Pro Tip: Choose satin nickel passage knobs—they resist fingerprints better than polished finishes and cost under $20. Avoid hollow-core door sets; solid brass ensures long-term durability.
Break the Internal Lock Mechanism Permanently
For doors where knob replacement isn’t feasible, disabling the internal mechanism provides a permanent fix. This method alters the lock forever by removing the engagement tab—a solution best for older hardware you won’t reuse.
Disable the Lock Without Damaging the Knob Exterior
- Remove the interior rose plate by unscrewing its mounting screws or depressing the release tab with a flathead.
- Identify the L-shaped metal tab connected to the push-button—it slides into the latch bolt to lock it.
- Use needle-nose pliers to bend this tab 90 degrees away from the bolt path, or snap the plastic retaining post holding it.
- Reassemble the knob and test: the button should depress freely without engaging the lock.
Critical Warning: This often voids warranties and can crack plastic knobs. Test on a closet door first. If the tab breaks completely, the latch may stay permanently retracted—requiring full replacement.
Tape the Latch Open: A Renter-Friendly Fix
When you can’t modify hardware, taping the latch bolt retracted is the fastest non-destructive solution. This takes 30 seconds, leaves zero residue with painter’s tape, and works on any interior door.
Prevent Latching Without Tools
- With the door open, push the latch bolt fully into the door edge.
- Wrap one layer of blue painter’s tape horizontally around the bolt, securing it in the retracted position.
- Test by closing the door—it should swing freely without catching the strike plate.
Why this beats duct tape: Painter’s tape’s low-adhesion formula prevents finish damage during removal. Reapply monthly as tape loses stickiness. For high-traffic doors, add a second tape layer over the first for durability.
Emergency Paperclip Unlock for Locked Doors
Every interior privacy lock has a hidden emergency bypass—a small hole on the exterior knob designed for exactly this crisis. Master this technique before an emergency strikes; it works 95% of the time on modern locks.
Unlock Any Door in 20 Seconds
- Straighten a paperclip and bend a 1/4-inch hook at the end.
- Insert it straight into the pinhole (center of exterior knob) until you feel resistance.
- Push firmly while wiggling the clip—you’ll hit a spring-loaded tab.
- Apply steady pressure for 3 seconds; the lock disengages with an audible click.
Troubleshooting tip: If the clip bends, use a 1.5mm hex key instead. Never force it—excessive pressure can jam the mechanism. Practice this monthly so it becomes muscle memory during real emergencies.
Childproofing Solutions: Top and Side Locks for Safety

For rooms requiring occasional adult locking (like home offices), high-mounted secondary locks provide childproofing without disabling primary hardware. These let you control access while eliminating entrapment risks.
Install a 60-Inch High Hook-and-Eye Lock
- Position the hook on the door’s top edge, centered horizontally.
- Place the eye on the frame 1/4 inch above the hook’s resting point.
- Secure both pieces with 3/4-inch screws into solid wood (avoid hollow-core doors).
- Test reachability: If a child can stand on furniture to access it, raise the hook another 6 inches.
This method maintains privacy for guests while keeping rooms accessible to children. Pair it with a door stop on bathroom doors for double protection against accidental lock-ins.
Rescue Steps When a Child Is Trapped in a Room
If your child is already locked inside, skip panic and follow this protocol. Never kick the door—you risk splintering frames or injuring the child.
Three Damage-Free Entry Methods
- Emergency bypass first: Attempt the paperclip method immediately. 80% of locks yield within 60 seconds.
- Hinge pin removal: If hinges face you, place a nail against the pin’s top. Tap gently with a hammer until the pin loosens. Pull it out completely—repeat for all pins—and lift the door off its frame.
- Professional help: Call a locksmith if the child is distressed or methods fail. Most residential unlocks cost $50-$100 and take 15 minutes, preserving door integrity.
Critical reminder: Time is safety. If you hear silence after loud noises inside the bathroom, assume injury and call emergency services immediately after entry.
Prevent Future Lock-Ins with Daily Checks
- Test all bedroom/bathroom doors weekly by having a child attempt to lock them.
- Keep emergency tools (paperclip, hex key) in a labeled “Safety Kit” by every bedroom.
- Install door monkeys on closet doors as visual reminders—these $8 devices prevent full closure without modifications.
Disabling a door lock isn’t about sacrificing privacy—it’s about prioritizing life-saving accessibility. By implementing even one permanent solution like passage knob replacement, you eliminate a critical household hazard while maintaining normal door function. For immediate safety, combine the paperclip bypass technique with high-mounted secondary locks to create layers of protection. Remember: in child safety, preparation beats reaction. Start with one high-risk door today—your bathroom—and work through all interior doors within a week. For more detailed hardware recommendations, consult our guide to fire-code-compliant childproofing or download our free room-by-room safety checklist. Your peace of mind begins with a door that can’t lock against you.


