
That frustrating wobble when you grab your screen door handle isn’t just annoying—it’s a security risk. When the handle flops uselessly or the latch fails to catch, your sliding screen door becomes more of a hazard than a convenience. Most homeowners face this common failure point at least once, especially with older aluminum-framed doors where rivets corrode and handles crack from sun exposure. The good news? Replacing a screen door handle is a straightforward DIY project that takes less than an hour with basic tools. You’ll restore smooth operation, eliminate safety concerns, and avoid the $150+ service call for what’s essentially a $20 fix. This guide cuts through the confusion with precise steps for handling riveted installations—the trickiest part most tutorials skip.
Why Your Screen Door Handle Failed and Needs Replacement
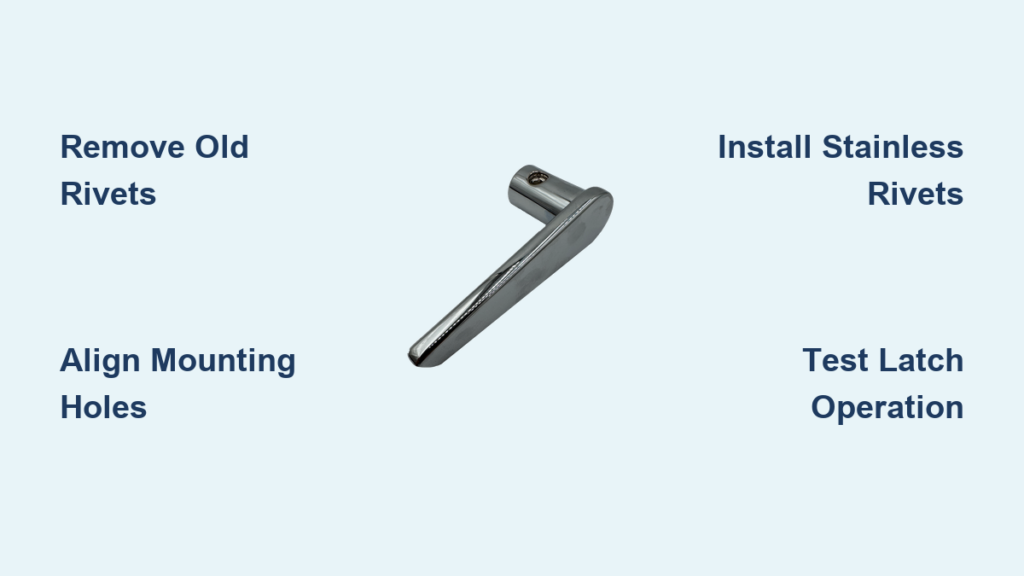
Sliding screen door handles typically die from three preventable causes: corrosion from moisture trapped in the frame, UV damage cracking plastic components, and stress fractures from repeated slamming. Unlike hinged doors, screen doors experience unique lateral pressure that twists handles off-axis. When you notice the handle spinning freely without engaging the latch or hear that ominous “clunk” when closing, replacement—not repair—is essential. Temporary fixes like tightening screws often fail because the original rivets have already compromised the mounting holes. Ignoring this issue risks complete handle detachment, leaving you unable to secure the door during storms or high winds. The good news? New handles cost $15-$40 at hardware stores, and compatibility is simpler than you think—most standard sliding doors use universal 2-3/4″ backset measurements.
Must-Have Tools for Replacing a Screen Door Handle (Avoid Costly Mistakes)

Skip the generic “tools you’ll need” list—here’s exactly what prevents disaster:
– Variable-speed power drill with 1/8″ and 3/16″ metal drill bits (crucial for cleanly removing rivets without tearing the frame)
– Stainless steel rivet gun with 3/16″ rivets (aluminum rivets corrode in 2 years; stainless lasts decades)
– Replacement handle kit matching your door’s backset (measure from frame edge to center of old handle—2-3/4″ is standard)
– Safety trifecta: ANSI-approved safety glasses, cut-resistant gloves, and a dust mask (metal shards fly when drilling rivets)
– Precision center punch (prevents drill bit walking on curved door frames)
– Masking tape (prevents surface scratches during drilling)
Pro Tip: Test-fit your new handle before removing the old one. Hold it against the frame—if the mounting holes align within 1/16″, you’ve got the right model. Most big-box stores carry universal kits like the Prime-Line Products B 3849 that fit 90% of sliding doors.
Essential Safety Steps Before Starting Screen Door Handle Replacement
Drilling into aluminum frames creates sharp metal burrs that can slice skin instantly. Before touching tools:
1. Secure the door with a C-clamp at the track to prevent accidental sliding during work
2. Cover surrounding areas with painter’s tape to avoid scratches from tools
3. Wear safety glasses AND gloves—never compromise here (rivet removal sends hot metal fragments flying)
4. Work in daylight—poor lighting causes misaligned drill holes that ruin the frame
Critical Warning: If your door has tempered glass, stop immediately. Improper drilling can shatter the entire panel. Call a professional if glass is within 6″ of the handle mounting area.
How to Remove the Old Screen Door Handle Without Damaging the Frame
Identifying Rivet Types and Removal Tactics
Most screen doors use either solid aluminum rivets (smooth heads) or pop rivets (slotted centers). For solid rivets:
– Cover the rivet head with masking tape and mark its center with a permanent pen
– Use the center punch to create a precise dimple for your drill bit
– Start drilling with a 1/8″ bit at LOW speed—only penetrate 1/16″ deep to pop the head off
For stubborn pop rivets:
– Insert a small flathead screwdriver into the rivet’s center slot
– Twist firmly to collapse the internal mandrel
– Pull out the entire rivet with needle-nose pliers
Common Mistake: Using a hammer to smash rivets. This dents the frame and creates uneven surfaces that prevent proper new handle alignment.
Cleaning the Mounting Area for Flawless Installation
After rivet removal:
1. Scrape out old adhesive or corrosion with a utility knife blade
2. Wipe the area with isopropyl alcohol on a microfiber cloth (removes oils that weaken new rivets)
3. Inspect for frame warping—gently flex the aluminum with pliers if needed to restore flatness
Visual Cue: The mounting surface must be completely smooth. Any bumps will cause the new handle to wobble.
Preparing the Door Frame for the New Handle Installation

Precision Hole Alignment Techniques
Misaligned holes cause 80% of installation failures. Do this:
1. Place the new handle’s backplate over the existing holes
2. Slide a business card between plate and frame to detect gaps
3. If holes don’t align:
– Cover old holes with aluminum tape
– Position new handle and wrap masking tape around its edges
– Mark new hole centers through the tape with a ballpoint pen
Time-Saving Shortcut: Use a combination square to ensure the handle sits perfectly perpendicular to the door frame. A 2° tilt causes binding within weeks.
Installing the Replacement Screen Door Handle: Step-by-Step
Securing the Handle with Stainless Steel Rivets for Permanent Fix
Screws work temporarily but loosen within months due to door vibration. For lasting results:
1. Insert the handle spindle through the door frame
2. Position exterior and interior handles on the spindle
3. Critical step: Slide a washer onto the spindle before attaching the interior plate
4. Hold handles firmly in the “neutral” position (latch retracted)
5. Drill pilot holes through mounting tabs using a 1/16″ bit
6. Insert stainless steel rivets and set with the rivet gun until the mandrel snaps cleanly
Pro Tip: Apply light tension on the rivet gun handle while setting—this compresses the aluminum frame slightly for a vibration-proof fit. You’ll know it’s right when the rivet head sits flush without dimpling the metal.
Troubleshooting Common Screen Door Handle Installation Problems
Handle Feels Loose Despite Tight Rivets
This means the spindle isn’t engaging the latch mechanism. Remove the interior handle and:
– Rotate the square spindle 90° until it clicks into the latch
– Reattach handles while holding the latch in the “unlocked” position
– Test operation before final riveting
Latch Won’t Catch in Strike Plate
90% of alignment issues come from improper handle positioning. Fix it by:
1. Loosening (not removing) the rivets slightly
2. Inserting a business card between door and frame at latch height
3. Gently tapping the handle upward/downward until latch engages smoothly
4. Re-tightening rivets while holding alignment
Warning: Never force the latch with pliers—this bends the delicate aluminum strike plate permanently.
When to Call a Professional for Screen Door Handle Replacement
Skip DIY if you encounter:
– Rusted frame sections that crumble when touched (requires full frame patching)
– Tempered glass within 6″ of the handle (drilling risks explosive shattering)
– Multiple failed attempts where new handle wobbles despite correct installation (indicates frame warping beyond DIY repair)
A handyman ($75-$120) brings specialized tools like frame straightening jigs and glass-safe rivet systems. For older Anderson or Pella doors, contact the manufacturer—they often provide free replacement handles for vintage models.
Maintaining Your New Screen Door Handle for Years of Smooth Operation
Seasonal Care Routine That Prevents Future Failures
- Every 6 months: Apply graphite powder (not oil!) to the latch mechanism—oil attracts dust that gums up sliding parts
- Before winter: Check rivet tightness with a screwdriver (gently tap heads—if they move, re-rivet immediately)
- After storms: Flush the latch with compressed air to remove sand/debris
Expert Note: The #1 reason replacements fail prematurely is overtightening rivets during installation. Stop pulling the rivet gun trigger the moment the mandrel snaps—further tension cracks the aluminum frame.
Replacing your screen door handle isn’t just about fixing a broken part—it’s reclaiming security and peace of mind every time you close that door. By using stainless steel rivets and precise alignment techniques, your new handle will operate smoothly for 5+ years even in harsh coastal climates. Remember the golden rule: measure twice, drill once. If you follow these steps, you’ll avoid the most common pitfalls that turn a simple fix into a costly repair. For stubborn vintage doors, check manufacturer websites—many offer free handle templates for pre-2000 models. Now go enjoy that satisfying click of a properly latched screen door!


