
You’re trying to slide open your patio door for evening air, but the handle resists with a gritty grind. Or worse—it spins uselessly without engaging the latch, leaving you stranded between indoors and out. A malfunctioning patio door handle isn’t just an annoyance; it compromises home security, energy efficiency, and daily convenience. If you’re searching for how to fix patio door handle issues, you’re in the right place. This guide delivers precise, actionable solutions for sticky, loose, or unresponsive handles—no professional needed for most problems. You’ll diagnose the exact failure, gather essential tools, and execute repairs in under 45 minutes, restoring smooth operation and peace of mind.
Most patio door handle failures stem from three core issues: internal grime buildup, mounting hardware failure, or component breakage. The fix ranges from a 10-minute cleaning to a full assembly replacement—depending on accurate diagnosis. How to fix patio door handle problems starts with understanding what’s happening inside that mechanism. Whether you own Andersen, Pella, or standard sliding doors, these proven steps work universally. Let’s pinpoint your exact issue and get your handle functioning like new.
Why Your Patio Door Handle Suddenly Sticks or Won’t Turn
Grinding resistance when turning your patio door handle usually means internal components are fighting dirt or misalignment. Hardened lubricant mixed with dust creates a sticky paste that binds gears, while seasonal door frame shifts can torque the latch assembly out of position. If the handle spins freely without retracting the latch, a broken spring or stripped gear is likely hiding inside the mechanism. Critical visual cues include: visible rust around the spindle, inconsistent resistance at specific turning points, or a failure to return to neutral position after release. Test this by operating the handle while the door is slightly ajar—if it works smoothly open but sticks closed, your strike plate alignment is off.
How Misalignment Causes Handle Binding in 30 Seconds
Most homeowners miss that patio door handles rely on millimeter-perfect alignment between the latch and strike plate. When the door sags or the frame shifts, the latch bolt scrapes against the strike plate housing, transferring force back into the handle mechanism. This causes two telltale symptoms: a distinct “catch point” when turning the handle (usually at 45° rotation), and visible wear marks on the strike plate metal. To confirm, shine a flashlight at the latch/strike interface while operating the handle—you’ll see the bolt drag against metal instead of sliding cleanly into the receiver hole.
Identifying Internal Component Failure
When your patio door handle won’t turn at all—or spins with zero resistance—inspect for broken internals. Remove the handle assembly (detailed in next section) and check these critical points:
– Spindle wear: Grab the square spindle bar and wiggle it. Excessive play means stripped connection points
– Spring integrity: Look for corroded or snapped torsion springs near the latch cam
– Gear teeth: Rotate the spindle manually while watching internal gears for missing or chipped teeth
A single broken spring often causes total failure, as these mechanisms rely on precise tension sequences to operate.
Must-Have Tools for Fixing a Sticking Patio Door Handle
Skipping the right tools risks damaging your door or worsening the problem. For how to fix patio door handle issues correctly, gather these essentials before starting:
– Precision screwdrivers: Phillips #1 and #2 for most interior screws, plus flathead for older models
– Hex key set: 2mm–6mm sizes (critical for Andersen and Marvin handles)
– Spindle-specific bits: T15 Torx for Pella, 5mm hex for many standard doors
– Cleaning supplies: Old toothbrush, isopropyl alcohol (90%+), and electronic contact cleaner
– Lubricant: Silicone-based spray only—never oil-based (attracts dirt)
– Torque aid: Small rubber band wrapped around screwdriver shaft prevents overtightening
Pro tip: Place a magnetized tray under your work area before disassembly. Patio door handles contain tiny springs and pins that vanish instantly on hardwood floors. A smartphone flashlight is non-negotiable for inspecting dark mechanism cavities.
Removing Your Patio Door Handle Without Damage
Forcing a stuck handle during removal cracks plastic bases or strips screw heads. Follow this damage-free process:
Step 1: Locate Hidden Fasteners in 60 Seconds
Most handles hide screws under decorative caps. Slide a utility knife blade under the cap’s edge (usually at the bottom of the handle base) and gently pry upward. If no caps exist, check for set screws along the handle’s underside—common on Pella doors. Warning: Never hammer pry tools; plastic bases shatter easily. If caps resist, warm them with a hairdryer for 20 seconds to soften adhesive.
Step 2: Safe Disassembly Sequence
- Remove all visible screws (typically 2–4)
- Hold both handles steady—sliding doors have through-bolts connecting interior/exterior handles
- Gently wiggle the interior handle outward while supporting the exterior side
- If resistance occurs, stop immediately—likely misaligned spindle binding
Critical mistake to avoid: Pulling handles straight out. Always twist slightly while withdrawing to disengage the spindle from the latch mechanism. Forcing it bends the spindle, requiring full replacement.
Cleaning and Inspecting the Handle Mechanism Step-by-Step

A thorough cleaning resolves 70% of sticky handle issues. Skip this step and lubricant just creates new gunk.
Deep Cleaning Protocol for Maximum Effectiveness
- Soak mechanism in isopropyl alcohol for 5 minutes (removes old grease)
- Scrub crevices with toothbrush dipped in contact cleaner
- Blow compressed air through spindle holes (canned air works)
- Wipe dry with lint-free cloth—never paper towels (leave fibers)
Focus on the spindle channel and latch cam grooves where gunk accumulates. For severe buildup, use a dental pick to scrape hardened deposits from gear teeth without damaging edges.
What to Check During Inspection
- Spindle squareness: Measure spindle corners with calipers—worn spindles become rounded
- Spring tension: Compare to new spring; weak springs won’t retract latches fully
- Gear wear: Shine light across gear teeth—shadows indicate cracks or chips
If any component shows visible damage, replacement is mandatory. Patching broken gears with glue fails within weeks.
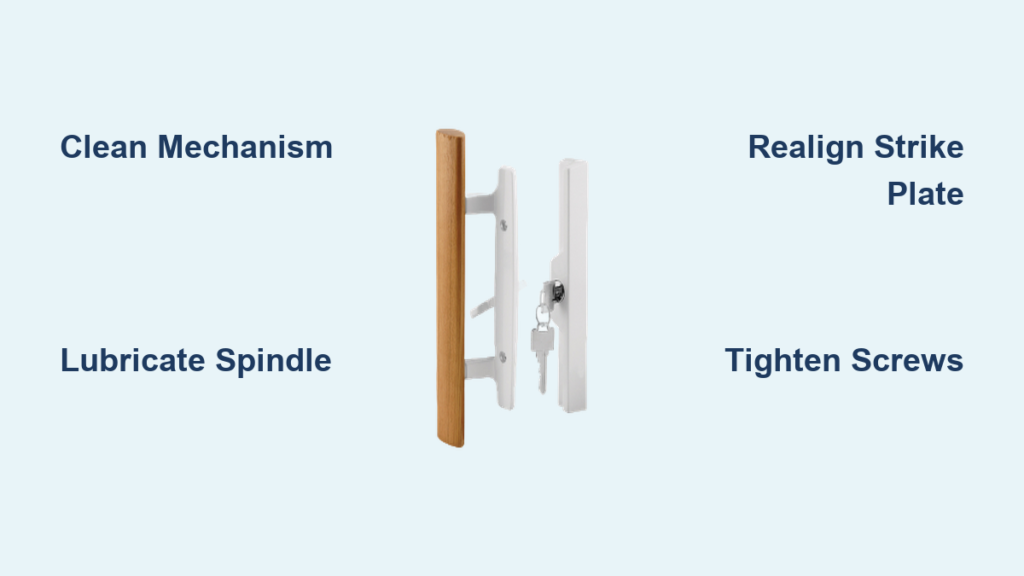
Fixing Common Handle Problems Permanently
Stop Handle Stickiness in 15 Minutes
After cleaning, apply dry silicone lubricant only to:
– Spindle contact points
– Latch cam pivot
– Gear teeth surfaces
Use short 1-second bursts—excess lubricant attracts dirt faster. Test operation before reassembly: the mechanism should move silently with finger pressure. If resistance remains, realign the strike plate by loosening its screws and shifting it 1/16″ toward the door’s travel direction.
Eliminate Handle Wobble Without Stripping Screws
Loose handles stem from stripped mounting holes—not just loose screws. Here’s the pro fix:
1. Remove handle and clean screw holes
2. Fill stripped holes with toothpicks dipped in wood glue (for wood doors) or epoxy putty (for vinyl)
3. Let cure 2 hours
4. Reinsert screws with blue thread locker on threads
Time-saver: Use longer 1.5″ screws if original holes are too damaged—most doors have 2″ depth for secure grip.
Handle Won’t Turn? Internal Repair Shortcut
When gears are broken but the housing is intact:
1. Remove broken spring/gear
2. Take assembly to hardware store for exact match (bring old parts!)
3. Install new component using plastic-safe adhesive on plastic gears
For Andersen doors with common armature alignment issues, slightly bend the metal armature tab inward with needle-nose pliers to restore tension.
Reassembling and Testing Your Patio Door Handle Correctly
Overtightening during reassembly is the #1 cause of recurring problems. Follow this sequence:
Torque-Perfect Reassembly in 4 Steps
- Insert spindle into latch mechanism
- Hand-tighten all screws until snug
- Tighten screws in star pattern (like car wheels) to 25 in-lb torque
- Test operation before attaching decorative covers
If the handle sticks during testing, back off screws by 1/8 turn—over-tightening warps the housing. The latch should retract fully with 3 lbs of handle pressure (about the weight of a can of soda).
Preventing Future Handle Issues: Simple Maintenance Routine
Skip annual maintenance and you’ll repeat this repair every 18 months. Implement this 3-minute routine:
Monthly: Preventative Action Checklist
- Spray silicone lubricant into spindle channel (2 bursts)
- Wipe handle base to remove moisture buildup
- Check for play by gripping handle and wiggling sideways
Yearly Deep Maintenance
- Remove handle assembly
- Clean mechanism as outlined earlier
- Inspect strike plate alignment (should show even contact marks)
- Replace worn springs before failure occurs
Do this each spring, and your patio door handle will operate smoothly for 5+ years. For Pella and Marvin doors, apply graphite powder to latch bolts—silicone attracts too much dust in high-use scenarios.
A properly functioning patio door handle is your home’s silent security guardian. By mastering how to fix patio door handle issues with these precise steps, you’ve eliminated a major vulnerability while saving $150+ in service calls. Remember: 80% of handle failures stem from preventable grime buildup and misalignment—not broken parts. If your mechanism shows severe corrosion or plastic cracking, replace the entire assembly—don’t risk security for a $20 part. For complex electronic handles (common on newer smart doors), consult your manufacturer’s manual before disassembly. Now go enjoy that seamless slide into your backyard—the way it should be.


