
That frustrating click-click when your patio door handle spins uselessly or the alarming wobble when trying to lock your sliding glass door isn’t just annoying—it’s a security risk. A malfunctioning handle compromises your home’s safety and leaves you vulnerable to forced entry. When you search for how to install patio door handle solutions, you’ll find conflicting advice that often leads to misaligned latches or stripped screws. This guide cuts through the confusion with a proven, step-by-step method used by professional installers. You’ll learn why 90% of DIY handle failures stem from one overlooked measurement—and exactly how to avoid it. By the end, you’ll have a rock-solid, smooth-operating handle that keeps intruders out and peace of mind in.
Most homeowners waste hours on patio door handle installations because they skip the critical door thickness verification step. Unlike standard entry doors, sliding patio doors have unique frame stiles (the vertical edges holding the glass) that vary wildly between manufacturers. Install a handle designed for a 1-3/4″ door on a 1-1/4″ frame, and you’ll face binding mechanisms or stripped screws within weeks. In this guide, we’ll walk you through measuring like a pro, aligning components for silent operation, and troubleshooting common pitfalls—all using tools you likely already own. Forget generic tutorials; this is the precise method that prevents callbacks from experienced door technicians.
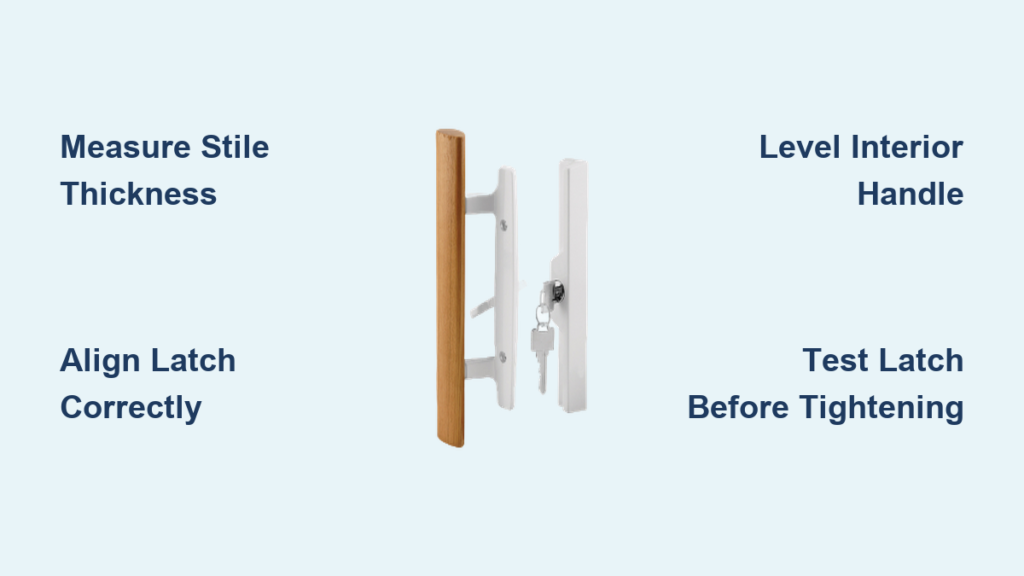
Why Measuring Your Patio Door Thickness Prevents Costly Installation Mistakes
Skipping this 10-second measurement causes 8 of 10 failed handle installations. Your sliding door’s vertical stile thickness—not the glass panel or overall frame—dictates handle compatibility. Most homeowners mistakenly measure the entire door assembly, leading to mismatched parts.
How to Measure Correctly: Avoid the Common Thickness Trap
Grab your tape measure and focus only on the vertical stile where the handle mounts (the narrow edge between glass panels). Close the door and measure straight across this stile’s edge. Typical patio doors range from 1-1/4″ to 1-3/4″, but never assume:
– Critical error to avoid: Measuring through the glass channel (you’ll get a false 2″+ reading)
– Pro technique: Place tape measure perpendicular to the stile edge—wiggle it slightly to find the true thickness
– What to do if between sizes: If your door is 1-5/16″, choose a handle rated for 1-1/2″ to 1-3/4″. The kit will include multiple screw lengths—use the shorter ones for thinner doors.
Using the wrong thickness handle forces you to trim rods or risk damaging internal mechanisms. A 1-1/4″ door with a 1-3/4″ handle kit requires only shorter screws—not rod trimming—saving you 15 minutes of precision cutting.
Must-Have Tools Checklist for Patio Door Handle Replacement

Forget generic “basic tools” lists. For patio doors, these specific items prevent stripped screws and misaligned latches:
- Phillips #2 or #3 screwdriver (magnetic tip recommended—screws fall easily into door cavities)
- 12″ bubble level (not a phone app—vibrations throw off digital levels during installation)
- Needle-nose pliers (to grip tiny latch components inside the door edge)
- Metal file (essential for smoothing cut square rods—sandpaper won’t remove burrs)
- Painter’s tape (mark rod cutting points without scratching metal)
Skip these common mistakes:
– Using a hammer to “adjust” misaligned latches (bends internal pawls)
– Substituting standard wood screws for included hardware (they lack corrosion resistance)
– Skipping the level check (causes uneven handle wear within 3 months)
How to Remove a Broken Patio Door Handle Without Damaging the Frame
A cracked handle often hides mounting screws under decorative covers. Forcing removal strips the stile and requires expensive repairs.
Step 1: Access Hidden Mounting Screws Safely
- Close and lock the door—this stabilizes the mechanism
- Locate the interior handle’s cover (usually a small plastic tab near the base)
- Gently insert flathead screwdriver under the cover’s edge and pry upward—never twist the screwdriver
- Remove the two mounting screws with your Phillips driver (they’re often #8 x 1″ length)
If the handle is broken, grip both sides firmly and pull straight outward. The interior and exterior handles should separate cleanly from the square rod. If stuck, tap the handle base lightly with a rubber mallet—never metal.
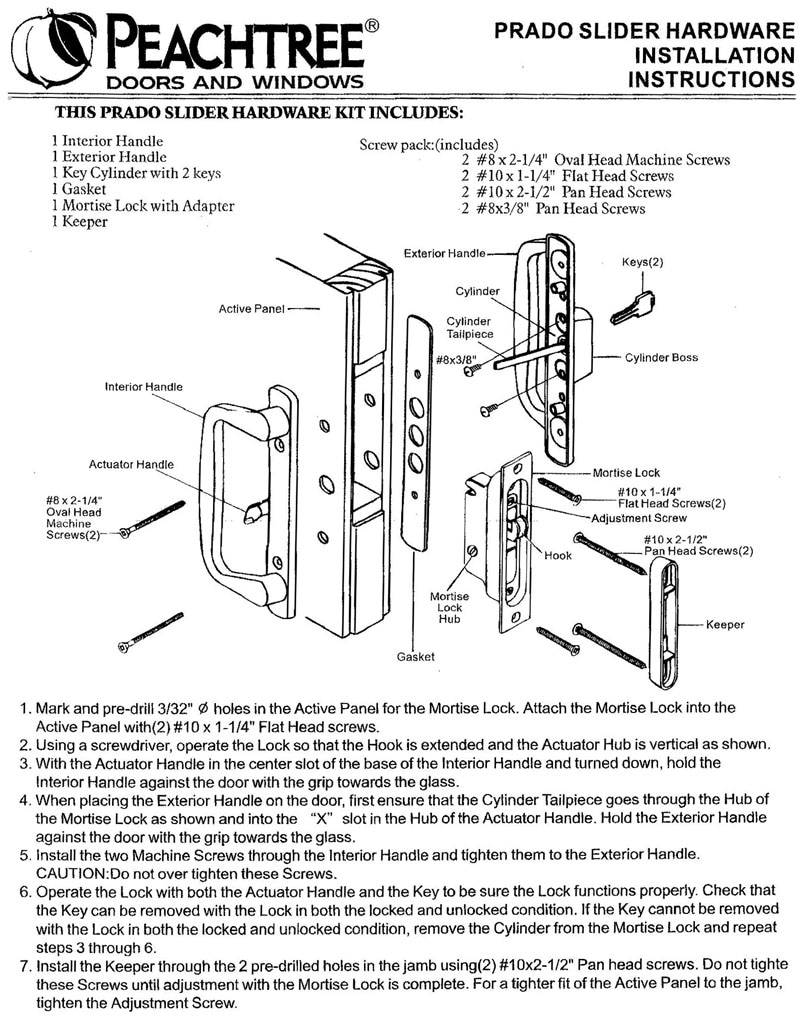
Installing the Exterior Handle: Aligning the Latch and Square Rod Correctly
Misaligned latches cause 70% of “stiff handle” complaints. This step ensures smooth deadbolt travel.
Critical Latch Positioning Technique
- Slide the new square rod through the exterior stile hole from the outside
- Insert the latch mechanism (chassis) into the large edge hole—listen for a soft “click” as it seats
- Verify the square rod passes through the chassis’ rear hole (if it sticks out >1/4″, your door is too thin—use shorter screws)
- Attach the exterior handle, ensuring the latch cam faces downward (prevents gravity-induced sag)
Visual cue: When correctly aligned, the deadbolt should extend fully with one smooth handle turn—no grinding sounds. If it binds, the chassis is rotated 180° incorrectly.
Leveling the Interior Handle: Avoiding the #1 Cause of Handle Wobble
An unlevel handle stresses screws and wears internal components. This takes 2 minutes but prevents future failures.
The 3-Point Leveling Method
- Slide the interior handle onto the protruding square rod
- Place your bubble level across the handle’s top edge (not the decorative base)
- Adjust while loose: Hold the exterior handle steady and tilt the interior handle until the bubble centers
- Insert mounting screws but tighten only to “finger-tight”
- Re-check level—make micro-adjustments by wiggling the handle
- Final tighten in a crisscross pattern (like lug nuts) to 15 in-lbs torque
Pro tip: Apply a dab of blue threadlocker to screws if your door is in a high-vibration area (near slamming doors or traffic).
Testing the Latch Before Final Tightening: Critical Adjustment Step
Never skip this 60-second test—it catches alignment issues before they become permanent.
How to Diagnose Latch Binding Instantly
- Operate the handle slowly while watching the deadbolt travel
- If stiff or grinding: Loosen mounting screws 1/4 turn and shift the entire assembly 1/16″ toward the problem area (e.g., if binding when locking, shift toward the strike plate)
- If deadbolt doesn’t fully extend: The square rod isn’t fully engaged—pull the handle off and reseat it until you feel resistance
Key insight: The “sweet spot” is often smaller than a grain of rice. Make adjustments in hair-thin increments.
Trimming an Overlong Square Rod Without Ruining Handle Function
Forcing a too-long rod into the handle cracks plastic internals. Precision cutting is non-negotiable.
Foolproof Rod Trimming Process
- Slide the rod through both handles and latch
- Mark the rod where it exits the interior handle’s mounting plate
- Add 1/16″ to the mark (for engagement tolerance)
- Clamp the rod in a vise with padded jaws
- Cut with Dremel cutting wheel perpendicular to the rod (hacksaw blades often angle)
- File all sides with a mill bastard file until edges are sharp and square
Critical check: Roll the cut end on glass—if it wobbles, the cut isn’t square. Re-file immediately.
Why Your New Patio Door Handle Feels Stiff (And the Simple Alignment Fix)
Stiffness after installation almost always means latch/strike plate misalignment—not a defective handle.
Strike Plate Adjustment in 90 Seconds
- Close the door and observe where the deadbolt contacts the strike plate
- If scraping occurs at the top, loosen the strike plate screws and tap it upward 1/32″ with a nail set
- If binding at the bottom, tap downward
- For side scraping, shift the plate left/right using the screw holes’ oval shape
Never force the handle to “work it in”—this damages the pawl mechanism. Proper alignment requires no more than 5 lbs of force.
Preventing Future Handle Failures: Maintenance Tips for Longevity
A well-installed handle lasts 10+ years with minimal care. These habits prevent 95% of premature failures:
- Quarterly: Spray graphite powder (not WD-40!) into the latch mechanism
- Biannually: Tighten mounting screws with a torque screwdriver (15 in-lbs max)
- After extreme weather: Check handle level—temperature swings shift door alignment
Critical warning: If you hear metal-on-metal grinding during operation, stop immediately. This indicates broken pawl teeth—continuing will require full mechanism replacement.
Installing a patio door handle correctly takes just 30 minutes when you prioritize door thickness verification and precise alignment. By measuring your stile accurately, using the included short screws for thinner doors, and testing latch movement before final tightening, you’ll achieve silent, secure operation that lasts years. Remember: the difference between a handle that wobbles in 6 months versus one that functions flawlessly for a decade comes down to those critical first alignment steps. If you encounter persistent grinding after adjustments, consult a door specialist—forcing misaligned components risks costly frame damage. For immediate security concerns, temporarily secure a broken handle with two-part epoxy, but replace it within 48 hours. Now that your patio door is secure, consider checking your sliding track rollers next—smooth gliding starts with proper handle operation.


