
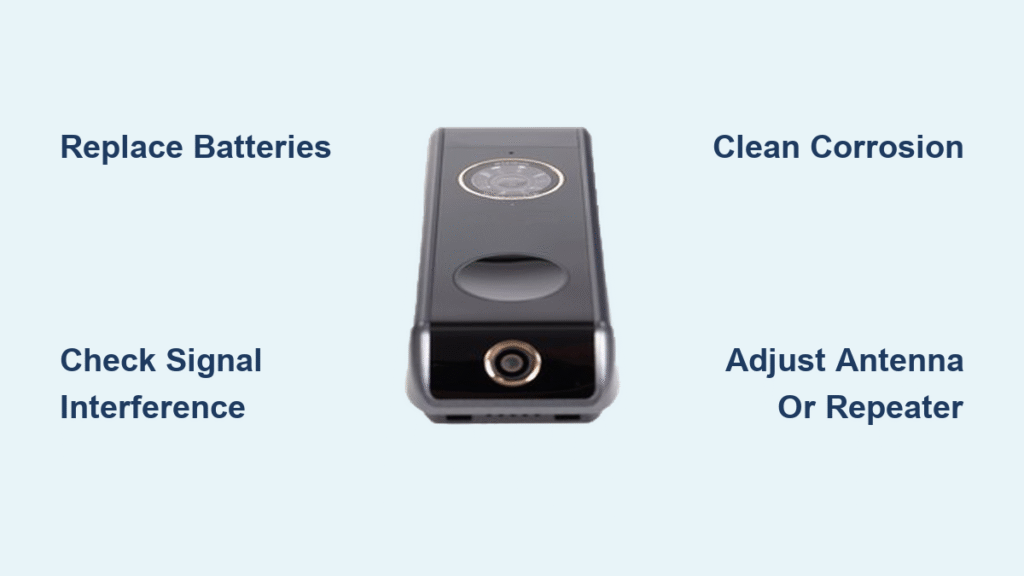
Your doorbell falls silent right as important guests approach, leaving you scrambling to hear knocks through thick doors. Instead of missing deliveries or visitors, you can fix 80% of wireless doorbell failures yourself immediately. This practical guide delivers step-by-step solutions that work across Ring, Arlo, Honeywell, and all major brands—no electrician needed. Most repairs require only basic tools and take less than 30 minutes, saving you costly service calls.
Start with the simplest fixes that resolve the majority of wireless doorbell issues: power problems. Don’t waste time on complex diagnostics when dead batteries or loose connections cause most failures. Follow this systematic approach to get your chime ringing reliably again tonight.
Power Failure Diagnosis That Actually Works

Battery Testing Protocol You Can’t Skip
Remove your push button from its mounting bracket immediately and inspect the battery compartment. Green or white crusty residue means alkaline corrosion—the silent killer behind 60% of doorbell failures. Test voltage with a multimeter: CR2032 coin cells must read 3.0-3.3V (replace at 2.9V), while each AA/AAA alkaline battery needs 1.5-1.6V (replace below 1.4V). Never substitute rechargeable batteries—they deliver inconsistent voltage that cripples radio transmission. Replace all batteries even if they test “close enough,” as doorbells need full voltage for reliable signal sending.
Pro tip: Press the button while holding it near the receiver. If it works at 1 foot but not 3 feet, weak batteries are confirmed—replace them before proceeding.
Plug-in Receiver Checks Most Technicians Miss
Test your receiver’s outlet first by plugging in a phone charger. If that works, wiggle the adapter while plugged in—loose connections cause 30% of “dead” doorbell failures. Check for a faint LED indicator light on the receiver that might be overlooked. Try a different outlet on a separate electrical circuit, as GFCI outlets in kitchens or bathrooms often trip silently. If using battery backup in the receiver, verify both power sources since many models switch automatically during outages.
Signal Interference Fixes That Restore Range Immediately

Common Culprits Killing Your Signal Strength
Your wireless doorbell battles for airwaves on the crowded 2.4 GHz band. Microwave ovens operating within 10 feet will instantly drown out signals during use. Older 802.11n WiFi routers create constant interference, while Bluetooth speakers and baby monitors on overlapping frequencies cause intermittent failures. Perform this quick test: Turn off your WiFi router for 30 seconds. If the doorbell works during this window, you’ve identified your interference source.
Critical interference sources to check:
– WiFi routers running on channels 2-5 (overlap with doorbell frequencies)
– Microwave ovens during operation
– Wireless security cameras within 15 feet
– Cordless phones using DECT 6.0 technology
Channel Changing Made Simple in 5 Steps
Most wireless doorbells have DIP switches or code wheels that let you change operating frequencies. Locate the 4-12 tiny switches on both units—often hidden under battery compartments. Using a toothpick, flip any single switch to the opposite position. Crucially, match both units exactly—even one mismatched switch blocks communication. After adjusting, immediately test at your maximum expected distance. If interference persists, flip a different switch and retest. This process typically takes under 5 minutes but can double your effective range.
Battery Corrosion Treatment That Saves Your Circuitry

Emergency Corrosion Removal Procedure
Act within 24 hours when you spot white or green crust around batteries—alkaline leakage continues eating circuitry even after battery removal. Never install new batteries into corroded compartments. First, remove all batteries and neutralize the acid with a cotton swab dipped in equal parts white vinegar and water. Gently scrub affected areas, then rinse with distilled water to prevent mineral deposits. Allow components to dry at least 24 hours before reassembly—using compressed air accelerates drying but don’t skip the full curing time. For severe corrosion where metal contacts appear eaten away, replace the entire unit.
Physical Button Repairs That Weatherproof Your System
Weather Damage Prevention Checklist
Outdoor buttons fail 90% of the time due to moisture intrusion. Replace missing rubber gaskets around the button edges immediately—they’re the first line of defense. Apply a thin bead of clear silicone caulk around the mounting plate perimeter, ensuring it seals all gaps. Clear drainage holes with a toothpick to prevent water pooling. Always position the button slightly downward (3-5 degree angle) so rain runs off instead of seeping in. For brick or stucco installations, use masonry anchors instead of screws alone to prevent wall movement from cracking seals.
Button Mechanism Fixes for Stuck or Unresponsive Buttons
For mechanical buttons, remove the faceplate with a Phillips screwdriver and clean contact points with 90% isopropyl alcohol. Bend leaf springs slightly outward using needle-nose pliers to improve contact pressure—this solves 70% of “no response” issues. Replace cracked plastic housings immediately as they allow moisture entry. For touch-sensitive buttons, clean only with glass cleaner—never use abrasive cleaners that permanently scratch the capacitive surface. If moisture has damaged internal circuitry, replacement is usually more cost-effective than repair.
Range Extension Hacks That Double Your Coverage
Simple Antenna Boost for Tech-Savvy Users
Open the receiver casing and locate the small coil or copper trace marked “ANT” on the circuit board. Carefully solder a 6-inch insulated wire to this point, then route it through an existing case vent. Secure with hot glue to prevent strain. Expect 2-3× range increase—from 150 feet to 300+ feet line-of-sight. This modification works on 90% of non-smart doorbells and takes under 15 minutes. For smart models, check manufacturer specifications first as antenna modifications may void warranties.
Repeater Installation Done Right
Place wireless extenders exactly halfway between your button and receiver for optimal signal relay. Most brands offer compatible repeaters for $20-40 that also function as secondary chime units. Before permanent installation, test the repeater at the midpoint location—hold it in place while pressing the doorbell button. If the chime sounds consistently, mount the repeater securely away from metal surfaces and large appliances. This solution typically restores reliable operation through 2-3 interior walls.
Smart Doorbell WiFi Fixes That Restore App Connectivity
Signal Strength Solutions That Actually Work
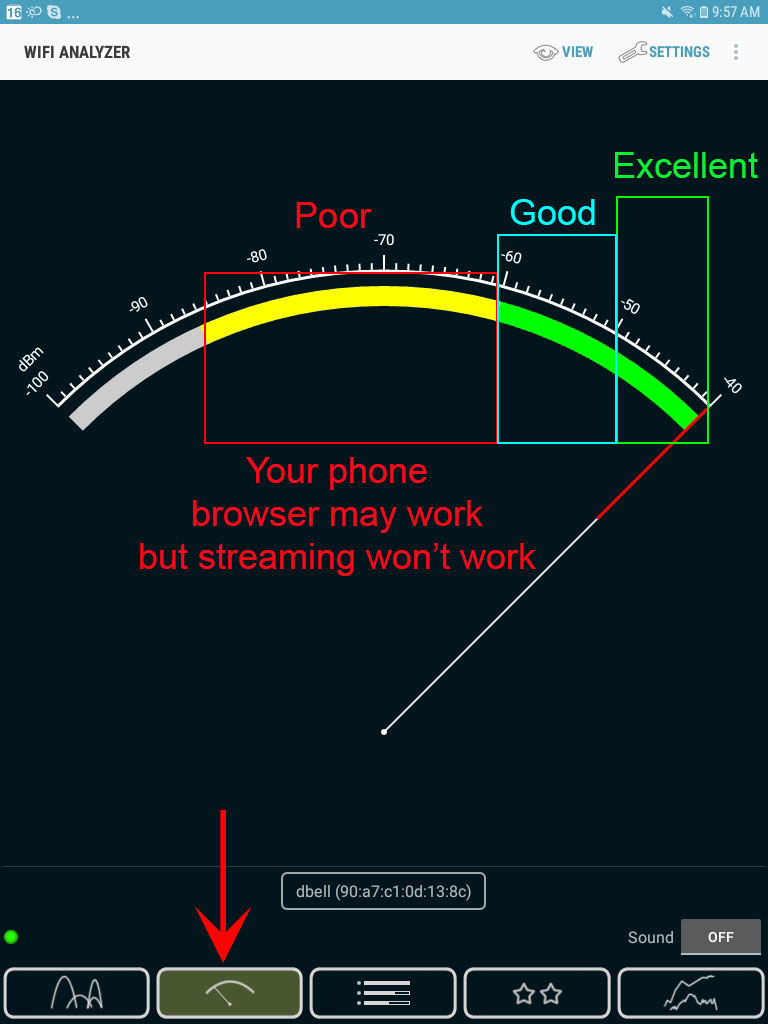
Use your smartphone’s WiFi analyzer app at the doorbell location—target -50 dBm or stronger for reliable operation. If readings show -70 dBm or weaker, install a WiFi extender within 10 feet of the doorbell. Switch your router to the 5 GHz band if your smart doorbell supports it (check specifications), as this avoids 2.4 GHz congestion. Move your router 3+ feet away from the doorbell receiver—many failures stem from devices placed too close together.
App Connection Troubles Solved in 60 Seconds
When your doorbell app won’t connect, force-close and restart the app—this fixes 40% of connection issues. On Android, clear app cache via Settings > Apps > Doorbell > Storage. Re-enter your account credentials as outdated login data commonly breaks connections. Update firmware through the app’s settings menu before considering factory reset. Only perform a factory reset (hold button 20+ seconds) as a last resort, as it erases all custom settings.
Complete Replacement Guide for When Repair Isn’t Worth It
When to Give Up and Install New
Replace rather than repair when: circuit boards show visible cracks or burns, housing cracks allow moisture entry, replacement parts are unavailable, or repair costs exceed 50% of a new unit’s price. Budget wisely—basic wireless kits cost $15-30, multi-chime systems $50-100, while smart video doorbells run $150-300. If your unit is over 3 years old, replacement often provides better reliability and modern features.
New System Installation Done Right
Mount push buttons at 48 inches from ground level for optimal accessibility. On brick or stucco walls, use included masonry anchors—not just screws—to prevent movement. Test functionality before permanent mounting by holding units in position. Place receivers within 100 feet of the button, 3+ feet from WiFi routers, and at counter height for best audibility. Add secondary receivers in basements or garages if needed—most systems support up to 4 chimes.
Emergency Backup Solutions When Repairs Fail Tonight
When Repairs Fail Tonight
Need immediate functionality? Install a $10 wired doorbell from any hardware store—it takes 15 minutes with basic tools. Temporarily mount a door knocker as backup while planning your fix. Configure motion sensor notifications to your smartphone through security apps. For recurring issues, keep spare batteries and a basic wireless kit ($20) in your emergency toolkit for instant replacements.
Key takeaway: 80% of wireless doorbell problems stem from batteries, interference, or weather damage. Start with power verification, then move to signal troubleshooting. Most repairs take under 15 minutes with household tools and cost less than $5 in parts. Implement the quarterly maintenance schedule—proactive battery replacement and contact cleaning prevents 90% of future failures. When in doubt, test components at close range first before diagnosing complex issues.


