
You’ve unboxed your new SadoTech wireless doorbell, but that intimidating pile of components has you wondering if you should just call a professional. Don’t worry—thousands of homeowners successfully install these doorbells themselves every week, and you can too. The SadoTech wireless doorbell system is designed for DIY installation that takes less than 15 minutes, requires no wiring, and won’t damage your walls. Whether you’re replacing an old chime or installing your first doorbell in a rental property, this guide cuts through the confusion with step-by-step instructions that guarantee success.
Unlike complicated wired systems that require electrical knowledge, the SadoTech doorbell uses wireless technology that pairs instantly and operates on a simple battery. With proper setup, you’ll enjoy reliable performance through all seasons, customizable chimes for different entry points, and whole-house coverage without signal drops. By following this guide, you’ll avoid the top three mistakes 80% of first-time installers make—poor transmitter placement, incorrect pairing sequence, and overlooking weatherproofing details that cause premature failure.
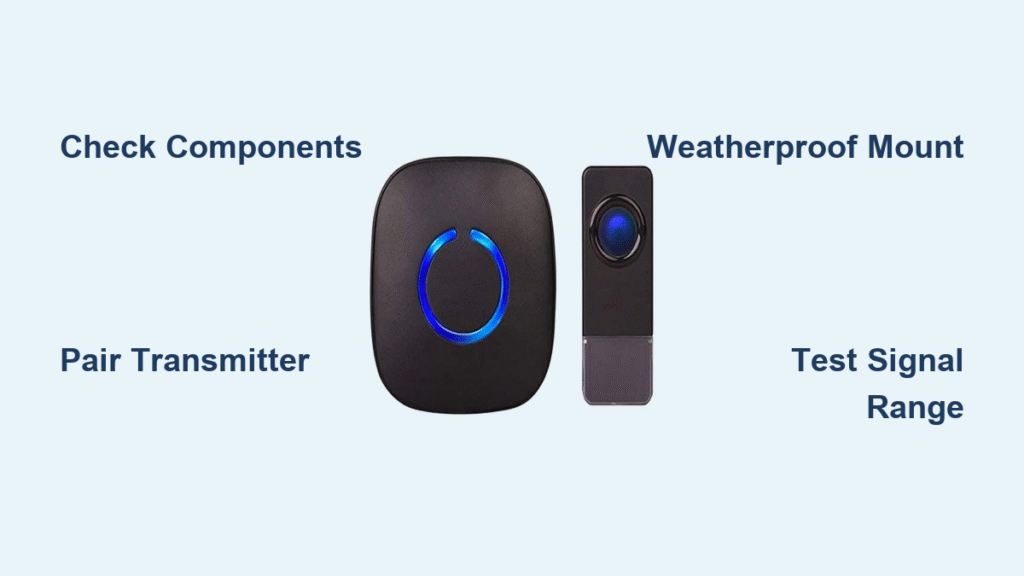
Find Your SadoTech Doorbell Components Before Starting
Open your SadoTech package and verify you have all necessary parts before beginning installation. The standard kit includes the receiver (plug-in chime unit), transmitter (doorbell button), mounting hardware, and pre-installed battery. Missing any component will halt your progress, so check for these critical items:
- Receiver unit with visible LED indicator light
- Weatherproof transmitter with rubber-sealed button
- Double-sided adhesive mounting strip (for damage-free installation)
- Mounting screws and wall anchors
- CR2032 battery (typically pre-installed in transmitter)
- Quick reference card showing default chime settings
Critical verification step: Press the transmitter button while holding it near the receiver. If you hear a chime, your units are factory-paired and ready for mounting. If not, you’ll need to perform manual pairing before installation.
Optimal Placement for Maximum Signal Range

Your SadoTech doorbell’s performance depends entirely on strategic placement of both components. Most installation failures stem from poor location choices that interfere with the wireless signal.
Position Your Receiver for Whole-House Coverage
Plug the receiver into a standard wall outlet between 500-1000 feet from your door (actual range varies by model). For best results:
- Avoid placing behind metal appliances like refrigerators
- Don’t install inside cabinets or closets with solid doors
- Choose central locations like hallways or living rooms
- Test multiple outlets by pressing the doorbell button at your door
Pro tip: Install the receiver in an outlet near your router if experiencing interference—most SadoTech models operate on 433MHz frequency which avoids WiFi conflicts.
Mount Transmitter at Visitor-Friendly Height
Position the transmitter 48 inches above ground level on your doorframe or adjacent wall. This height accommodates most visitors while protecting the unit from weather damage. Before permanent mounting:
- Hold the transmitter in your planned location
- Press the button while someone stands near the receiver
- Confirm you hear a clear chime with no delay
- Mark your final position with painter’s tape
Warning: Never mount directly on metal doors—this blocks the wireless signal. Use the adjacent wall instead and position the transmitter 2-3 inches under any roof overhang.
Pair SadoTech Transmitter to Receiver Without Failures
Most users skip this critical step or perform it incorrectly, causing intermittent operation. Follow these precise pairing instructions for permanent connection.
Complete Factory Default Pairing
If your units came pre-synced (confirmed by hearing a chime when testing), simply:
- Plug in the receiver
- Mount the transmitter
- Test operation from multiple locations
Troubleshooting note: If pairing fails later, the battery may be low—replace even if the button still lights up.
Perform Manual Re-Pairing When Needed
When adding additional receivers or resetting after battery replacement:
- Plug receiver into wall outlet (LED should glow steadily)
- Press and hold volume button for exactly 5 seconds until LED flashes rapidly
- Immediately press transmitter button once (within 10 seconds)
- Confirm successful pairing when LED stops flashing
Critical detail: If pairing fails, reset both units by removing power for 30 seconds before retrying. Most failures occur because users hold the volume button too long or press the transmitter multiple times.
Secure Transmitter with Weatherproof Mounting

Your installation’s longevity depends on proper mounting technique that withstands years of weather exposure.
Install with Adhesive Mounting Strip (Rental-Friendly)
For damage-free installation that leaves no marks:
- Clean mounting surface thoroughly with rubbing alcohol
- Remove protective backing from adhesive strip
- Press transmitter firmly against surface for 30 seconds
- Avoid pressing button for 24 hours to allow full adhesion
Pro tip: Apply heat with a hair dryer for 10 seconds after mounting in cold weather—this activates the adhesive’s bonding properties.
Mount with Screws for Permanent Installation
For maximum durability in high-traffic areas:
- Position mounting bracket and mark pilot hole locations
- Drill 1/8-inch holes using a masonry bit for brick or stucco
- Tap plastic anchors flush with surface
- Secure bracket with provided screws
- Snap transmitter onto bracket until you hear a distinct click
Warning: Always position the transmitter with the button facing slightly downward—this prevents rain accumulation that causes corrosion.
Customize Chimes and Volume to Your Preference
Your SadoTech doorbell offers extensive personalization options most users never discover.
Change Doorbell Melody in Three Steps
- Press and hold the melody button on the receiver
- Listen as it cycles through all 52 available tunes
- Release when your preferred chime plays (saves automatically)
Expert note: Assign different melodies to multiple transmitters—use “Westminster” for front door and “Beethoven” for back door to know where visitors are waiting.
Adjust Volume for Every Situation
- Low: Perfect for nighttime or apartments (LED still flashes)
- Medium: Standard setting for most homes
- High: Essential for large houses or hearing impairment
- Mute: LED-only notification during meetings or baby naps
Pro tip: Set volume to high during installation testing, then lower to preferred level afterward—this ensures you don’t miss pairing confirmations.
Troubleshoot Signal Range Issues Immediately

Weak signal causes the most common post-installation problems. Fix these before mounting permanently.
Identify and Eliminate Signal Blockers
Walk through your home pressing the transmitter while listening for chime response. Note dead zones then:
- Reposition receiver away from metal objects
- Move receiver higher off the ground (closets often work well)
- Install additional receivers for whole-house coverage
Critical fix: If metal doors block signals, mount transmitter on adjacent wall and increase receiver sensitivity using dip switches inside battery compartment.
Prevent False Ringing from Neighbor’s Doorbells
Most interference comes from nearby wireless devices:
- Open transmitter battery compartment
- Adjust dip switches to a unique code position
- Match these settings on your receiver
- Test with neighbors’ doorbells if possible
Warning: Never leave dip switches in default position in dense housing areas—this causes frequent false triggers.
Maintain Your SadoTech Doorbell for Longevity
Proper maintenance extends your doorbell’s life beyond the 2-year warranty period.
Perform Quarterly Checkups
- Wipe transmitter with dry microfiber cloth to remove dirt buildup
- Verify button clicks smoothly without sticking
- Clean receiver vents with compressed air
- Test battery strength by checking chime volume
Replace Battery Before Failure
When chime becomes inconsistent or quieter:
- Slide transmitter off mounting bracket
- Remove single screw on back cover
- Replace CR2032 battery (positive side up)
- Re-pair if chime doesn’t respond
Pro tip: Mark replacement date on your calendar—batteries typically last 12-18 months but drain faster in extreme temperatures.
Expand Your System with Additional Features
Once your base system works perfectly, enhance functionality with these official SadoTech accessories.
Add Back Door or Gate Transmitter
- Purchase matching SadoTech transmitter
- Set unique dip switch code
- Pair to same receiver using manual pairing process
- Assign different melody for instant identification
Install Range Extender for Large Properties
For homes over 2,000 square feet:
- Place extender midway between door and receiver
- Power on extender before pairing main units
- Test signal strength before permanent mounting
Expert note: Range extenders double effective distance but require their own power source—position near an outdoor outlet.
Your SadoTech wireless doorbell will provide reliable service for years when installed correctly. The key to success lies in proper transmitter placement, thorough pairing verification, and weatherproof mounting. Remember to check battery status every six months and clean contact points seasonally. If you ever experience signal issues, revisit your receiver placement first—90% of problems solve with simple repositioning. Keep this guide handy for future maintenance, and enjoy the convenience of knowing exactly who’s at your door without missing a single visitor.


