
You turn the knob, push the door shut, and nothing happens. The latch refuses to catch, leaving your door stuck in a half-closed position or swinging open. This common household problem compromises your security, lets drafts in, and creates daily frustration. The good news is that most latching issues stem from just a few fixable causes.
In this guide, you will learn exactly why your door won’t latch and apply the right repair method. We will cover precise diagnostic techniques, hardware adjustments, and proven fixes that work for both interior and exterior doors.
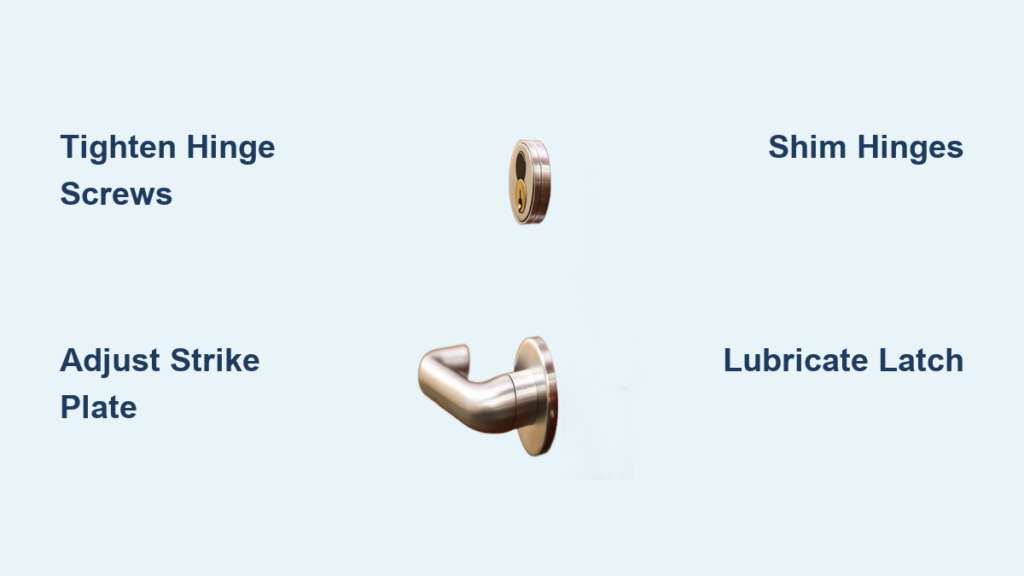
Diagnose the Latch Misalignment

Before grabbing tools, you need to identify the exact cause. Jumping straight to repairs without diagnosis often leads to wasted effort or making things worse.
Perform the Lipstick Alignment Test
This test gives you visual proof of where the misalignment occurs.
Apply lipstick, crayon, or chalk to the latch bolt. Stick masking tape over the strike plate. Close the door gently and reopen it. Check where the mark transferred.
Mark above the strike hole means the door has sagging at the bottom. Mark below the hole means the door has risen at the bottom. Mark to the left or right means the door is too far in or out from the jamb.
Inspect Gap Uniformity
Close the door and examine the gap between the door edge and jamb. The ideal gap is 1/8 inch all the way around. If the gap widens at the top or bottom on the latch side, the door is sagging. If the hinge side gap is uneven, the frame may be out of plumb or the hinges are loose.
Use a ruler or feeler gauge to measure discrepancies. Even 1/16 inch of misalignment can prevent latching.
Check for Door Warping
A door may look straight but still bow horizontally near the handle. Place a straight edge or level across the door width at handle height. Look for gaps indicating a front-to-back curve. If the door rubs at the top or bottom but the edges seem aligned, warping is likely.
Severe warping may require replacement, but minor cases can be compensated with hardware adjustments.
Tighten or Replace Hinge Screws
Loose hinges are the most common cause of a sagging door and failed latching. Over time, screws loosen or strip, especially in soft wood.
Tighten All Hinge Screws
Start with the basics. Use a screwdriver or drill to tighten every screw on both door and jamb sides of all hinges. Focus on the top hinge. Reinforcing it often lifts the door enough to realign the latch.
If a screw spins without tightening, the hole is stripped and needs repair.
Replace Screws with Longer Ones
Upgrade to 2¼- to 3-inch screws to anchor into the wall framing behind the jamb. Remove the top hinge short screws. Insert longer screws. They reach into the stud, pulling the door upward and stabilizing it.
This simple fix often resolves latching issues in minutes.
Repair Stripped Hinge Holes
When screws will not hold, the wood is damaged. You need to rebuild the grip.
Use Toothpicks and Wood Glue
For light-duty interior doors, this method works well. Coat wooden toothpicks or matchsticks with wood glue. Jam them into the stripped hole until full. Snap or cut flush with the surface. Let dry, then drill a pilot hole and reinstall the screw.
This creates a solid base for the screw to bite into.
Install a Wooden Dowel
For heavier doors or long-term durability, use a wooden dowel. Drill out the hole to match a wood dowel (e.g., 3/8 inch). Apply wood glue and insert the dowel. Let cure, trim flush, drill pilot hole, and reinstall screw.
This offers the strongest repair and mimics original wood integrity.
Shim Hinges to Correct Alignment
If the door has sunken hinge mortises or persistent misalignment, shims restore proper positioning.
Choose the Right Shim Material
Cardboard, playing cards, or plastic shims work for minor adjustments. Metal shims are required for fire-rated doors to meet safety codes.
Apply Shims Strategically
Remove one hinge at a time. Shim behind bottom hinge lifts the door. Shim behind top hinge lowers the door. Shim near hinge knuckle pushes door out from jamb. Shim near hinge edge pulls door in toward jamb.
Reattach the hinge and test. A 1/16-inch shim often solves the problem with no visible change.
Adjust the Strike Plate Position
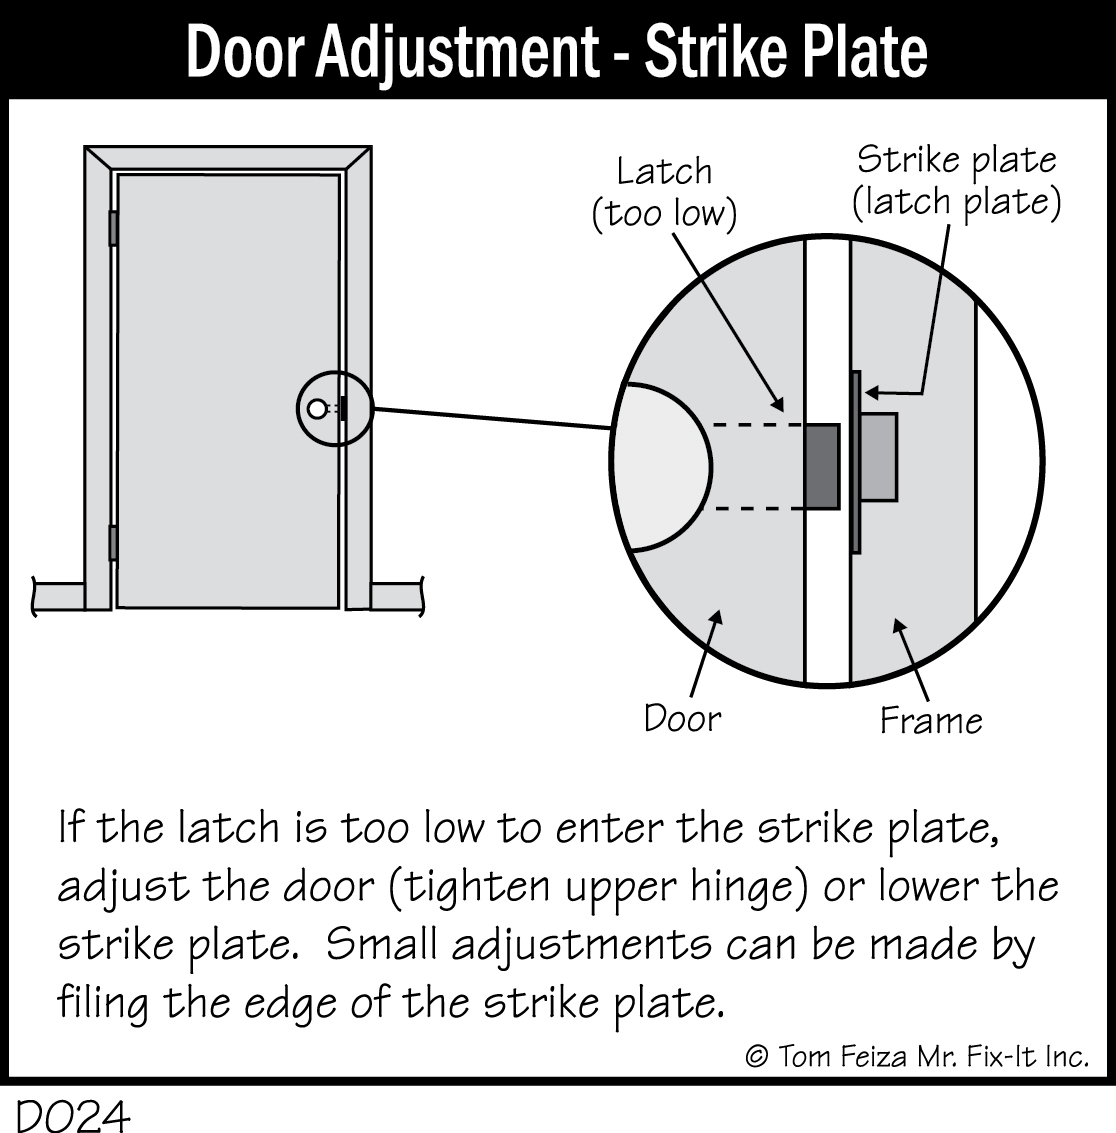
When the latch misses the strike plate, you must realign the hardware.
Enlarge the Strike Plate Hole
If the latch is off by less than 1/8 inch, file the hole instead of moving the plate. Remove the strike plate if needed. Use a curved metal file or Dremel with carbide bit.
File the bottom edge if latch hits above the hole. File the top edge if latch hits below. File the sides for horizontal offset.
Test frequently to avoid over-enlarging.
Relocate the Strike Plate Entirely
For misalignment over 1/8 inch, move the plate. Use the lipstick test to mark the correct position. Remove the strike plate. Chisel a new mortise for the plate. Enlarge the latch hole in the jamb so the bolt can fully extend. Drill new pilot holes and secure the plate.
Fill old screw holes with toothpicks and glue or dowels. Drill new holes adjacent to repairs to ensure grip.
Shim the Strike Plate for Wide Gaps
If the door edge sits too far from the jamb, the latch cannot reach.
Add a Strike Plate Shim
Remove the strike plate. Place washers, cardboard, or a cut business card behind it. Reinstall. The shim brings the plate closer to the latch.
This eliminates the need for chiseling and works instantly.
Sand or Plane Binding Areas
Swelling from humidity or paint buildup can cause the door to rub and prevent full closure.
Identify Contact Points
Close the door slowly and look for rub marks on the jamb or door edge. Look for resistance when closing. Look for binding at top, bottom, or latch side.
Mark high spots with a pencil.
Remove Material Gradually
Use sandpaper or an orbital sander for minor swelling. Use a hand plane for larger adjustments. Focus on corners, edges, or jamb areas where contact occurs.
Test after each pass. Remove only enough to allow smooth closure.
Clean and Lubricate the Latch
A sticky or stiff latch will not extend fully.
Free a Stuck Latch
Remove the door handle if needed to access the mechanism. Use a brush or compressed air to clear dirt, paint, or debris. Clean the strike plate recess in the jamb.
Lubricate Properly
Apply graphite powder for long-term, dust-free operation. Apply silicone spray for smooth action that will not attract grime. Use WD-40 only for cleaning. Avoid it as a long-term lubricant because it attracts dust.
Reassemble and test. A well-lubricated latch should extend and retract smoothly.
Replace with an Extended Strike Plate
If the gap is too wide or the jamb is damaged, a longer strike plate can bridge the distance.
Install an Oversized Plate
Fill the old hole with wood filler or glued dowels. Let dry, then install the new plate over the repaired area. Ensure the latch fully seats for security.
Extended plates are ideal for exterior doors or high-traffic areas.
Address Warped Doors
Some doors warp horizontally, preventing the latch from engaging.
Check for Hidden Bow
Use a level or straight edge across the door at handle height. Even if vertical edges look straight, a front-to-back curve can block latching.
Fix Options
Adjust strike plate to match new latch position. Install a mending plate in front of the jamb hole to create a new catch point. Replace the door if warp is severe.
Some warps cannot be permanently fixed. Replacement may be the only solution.
When to Call a Professional
DIY fixes work for most cases, but some issues need expert help.
Seek Help If
Multiple doors have latching problems. This may indicate foundation settling. The frame is cracked, split, or out of square. You have a fire-rated door. Modifications must meet code. Use metal shims and avoid unauthorized changes.
You have smart or electronic locks. Internal diagnostics require trained technicians. You are uncomfortable removing doors or chiseling frames.
A structural engineer should evaluate if doors keep misaligning after repairs.
Prevent Future Latching Issues
Avoid repeat problems with simple maintenance.
Maintenance Checklist
Lubricate latches annually with graphite powder or silicone spray. Check hinge screws every 6-12 months, especially on high-use doors. Control indoor humidity between 30-50% to minimize wood expansion and contraction. Avoid over-painting jambs and stops. Multiple layers can close gaps needed for latching.
Install 3-inch hinge screws during initial install to prevent sagging from day one.
Final Test After Repairs
Always verify your fix works under real conditions.
Open and close the door 5-10 times. Confirm the latch engages smoothly without force. Check that the door sits flush with the frame. Listen for rubbing, scraping, or noise. Test in different seasons or humidity levels if possible.
A properly repaired door should close securely with a single push. No jiggling, no shoving.
Frequently Asked Questions About Fixing a Door That Won’t Latch
What causes a door to stop latching?
The most common causes are loose hinge screws, sagging due to weight or settling, misalignment between the latch bolt and strike plate, warped door slabs, and swelling from humidity or paint buildup.
How do I know if my door is sagging?
Close the door and check the gap between the door edge and jamb. If the gap is wider at the top or bottom on the latch side, the door is sagging. The lipstick test also reveals vertical misalignment.
Can I fix a door that won’t latch without replacing it?
Yes. Most latching problems are fixable with basic tools. Tightening screws, shimming hinges, adjusting the strike plate, or sanding swollen areas typically resolve the issue without door replacement.
How much does it cost to fix a door that won’t latch?
Most repairs cost under $20. You may need longer screws, wood shims, strike plates, or basic tools you likely already own. Professional help is only needed for severe structural issues.
Should I use WD-40 on my door latch?
Use WD-40 only for cleaning sticky mechanisms. For long-term lubrication, use graphite powder or silicone spray. Oil-based lubricants attract dust and grime, causing future sticking.
Key Takeaways for Fixing Your Door That Won’t Latch
A door that will not latch is almost always fixable with the right diagnosis and basic tools. Start with the lipstick test to identify exactly where the misalignment occurs. Then work through the repair chain. Tighten or replace hinge screws first. Add shims if needed. File or relocate the strike plate for minor or major offsets. Clean and lubricate the latch mechanism.
For seasonal swelling, sand or plane affected areas. For severe warping, consider door replacement. Regular maintenance prevents future problems. Check hinge screws every six months, lubricate annually, and control indoor humidity.
With these proven methods, you will restore smooth, secure door operation without professional help.


