
Is your door scraping the floor, refusing to latch, or leaving unsightly gaps? You are not alone. A sagging door is one of the most common household issues, especially in older homes or high-traffic areas. Left unattended, it can lead to difficulty operating the door, energy loss, security risks, and even permanent damage to the frame. The good news? In most cases, you do not need to replace the door. With basic tools and a few proven techniques, you can fix a sagging door in under an hour.
This guide walks you through diagnosing the cause, applying the right repair, and preventing future sagging. No professional help is required in most scenarios.
Diagnose Why Your Door Is Sagging

Before grabbing tools, you need to identify why your door sags. The fix depends entirely on the root cause, so skipping this step wastes time and money.
Check for Loose or Stripped Hinge Screws
Inspect all hinges, starting with the top hinge, which bears up to 80% of the door’s weight. If screws spin freely or wobble, you have stripped holes in the jamb. Press on the door near the hinges. If the jamb flexes or pulls away from the wall, the frame is separating from the stud.
Test for Alignment Problems
Open the door halfway and let go. If it swings shut or open on its own, the door is out of plumb, indicating structural shift or improper installation. Use a level on the door edge and frame to confirm vertical alignment.
Look for Door or Frame Damage
Check for these common issues:
- Wood swelling from humidity
- Warping, especially in solid wood doors
- Cracks in the jamb around hinge areas
- Rub marks on the floor or strike side
Quick Diagnostic Trick: Lift the door handle while closing it. If it latches easily when lifted, the problem is hinge failure or stripped screws, not frame warping.
Tighten Hinge Screws to Stop Sagging
Start with the simplest fix before moving to more involved repairs.
How to Tighten Hinge Screws Properly
Use a screwdriver or power drill to tighten every hinge screw on both the door and jamb side. Focus on the top hinge first, as it supports the most weight.
- If screws tighten firmly and the door operates smoothly, you may be done
- If screws will not grip or the door still sags, move to the next step
Pro Tip: Do not overtighten. This can strip soft wood or damage paint. Stop when resistance increases.
Replace Short Screws With Long Ones
Most pre-hung doors come with 1-inch screws that only secure the jamb, not the wall framing. This is a primary cause of sagging.
Anchor Screws Into the Wall Stud
Upgrade to 3- to 4-inch screws in the top hinge to reach the wall stud behind the jamb. This method alone fixes approximately 90% of sagging door issues.
Steps:
- Remove the short screws from the jamb side of the top hinge
- Insert a 3-inch screw and drive it in slowly
- If you hit resistance, pre-drill with a 1/8-inch bit to avoid splitting the jamb
- Repeat for the middle hinge if needed
Why It Works: These long screws pull the jamb tight to the stud, eliminating flex and instantly correcting sag.
User Success: One homeowner fixed a chronically binding front door by replacing 1-inch screws with 3-inch ones. No other repairs were needed.
Repair Stripped Screw Holes
If screws will not hold, you need to reinforce the hole before reinstalling hinges.
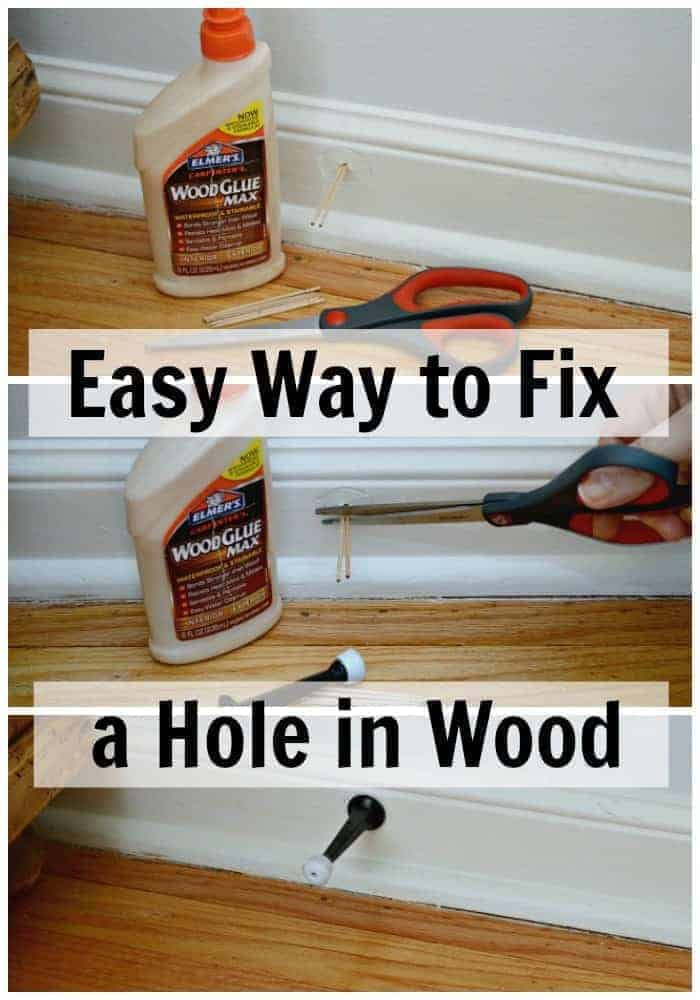
Quick Fix With Toothpicks and Glue
This method works well for light to moderate wear on interior doors.
Steps:
- Remove the hinge from the door
- Apply wood glue to 3 to 4 wooden toothpicks or matchsticks
- Jam them into the hole until fully packed
- Snap or cut them flush with the surface
- Let dry for 2 to 4 hours
- Reinstall the hinge with the original screw
Permanent Fix With Wooden Dowels
For heavier doors or repeated failures, use wooden dowels for a stronger repair.
Steps:
- Drill out the stripped hole to 3/8 inch
- Coat a wooden dowel in wood glue and tap it in
- Let cure overnight
- Trim flush and drill a pilot hole for the screw
- Reinstall the hinge screw
Result: This restores solid wood for screw anchoring and is stronger than the original hole.
Shim Hinges for Better Alignment

If the door still does not align after screw repair, shimming adjusts the hinge position to correct the problem.
When to Shim the Lower Hinge
If the top corner opposite the hinges gaps or rubs, the door sags downward. Placing a shim behind the lower hinge tilts the top of the door inward, closing the gap.
Steps:
- Remove the hinge screws from the jamb
- Cut a thin shim from cardboard, plywood, or plastic
- Place it between the hinge leaf and jamb
- Reattach the hinge with screws
- Test the door and add or remove shim layers as needed
Alternative: Use metal washers behind hinge leaves for minor vertical adjustments.
Bend Hinges for Fine-Tuning
For minor realignment without full disassembly, you can bend the hinge leaf.
How to Bend a Hinge Safely
If the door rubs slightly on one side, bend the hinge leaf with an adjustable wrench.
Steps:
- Loosen the hinge screws slightly
- Clamp a wrench around the hinge barrel or leaf
- Gently bend the metal toward the frame to shift the door
- Retighten screws and test
Warning: Only bend steel hinges. Brass or worn hinges may snap. This is a temporary fix. Address the root cause first.
Adjust the Strike Plate
Even after realigning the door, the latch may miss the strike plate. This is a common secondary symptom of sagging.
Fix Latching Problems
Steps:
- Loosen the strike plate screws
- Shift the plate up, down, left, or right to align with the latch
- If the latch does not fully engage, chisel out the mortise slightly deeper or wider
- Re-tighten screws
Pro Tip: Mark misalignment with lipstick on the latch. Close the door and see where it contacts the strike plate.
Plane or Sand the Door Edge
If the door still drags on the floor or jamb after all adjustments, you may need to remove material from the door edge.
Remove Rubbing Spots Safely
Steps:
- Identify contact points using chalk or lipstick to mark rubbing areas
- Remove the door or support it with blocks
- Use a hand plane, orbital sander, or belt sander to remove 1/16 to 1/8 inch of material
- Sand smooth and re-finish to prevent moisture damage
Critical Rule: Only plane after confirming the door is properly aligned. Otherwise, you will create gaps or compromise weather sealing.
When to Replace Instead of Repair
Sometimes a door has gone too far to repair cost-effectively.
Repair If:
- Sagging is due to loose hinges or stripped holes
- Only minor wood damage exists
- A $20 fix restores function
- The door is aesthetically or historically valuable
Replace If:
- Extensive rot, warping, or structural damage is present
- The door will not stay aligned despite repeated fixes
- Foundation settling has distorted the frame
- You want better insulation or security
Expert Note: If multiple doors are misaligned or floors are uneven, consult a structural engineer. This may indicate a foundation issue, not a door problem.
Prevent Future Door Sagging
An ounce of prevention saves hours of repair time.
Use 3-Inch Screws During Installation
During any installation or repair, always use 3-inch screws in the top hinge. This simple step prevents 90% of sagging issues.
Install Three Hinges on Heavy Doors
Standard doors use two hinges, but tall or heavy doors should have a third hinge midway for support.
Perform Annual Maintenance
- Tighten hinge screws every 6 to 12 months
- Lubricate hinges with WD-40 or silicone spray
- Inspect for gaps, rubbing, or sticking
Control Indoor Humidity
Wood doors expand in humidity and contract in dry air. Use dehumidifiers or humidifiers to maintain stable indoor conditions and reduce swelling or warping.
Special Cases for Different Door Types
Front and Exterior Doors
These doors are heavier and exposed to weather. Use exterior-grade screws and hinges. Sagging compromises weatherstripping and energy efficiency. Ensure threshold clearance is maintained to prevent water entry.
Metal or Fiberglass Doors
These doors are less prone to warping but still sag due to hinge failure. Repair methods work the same. Check for rust or corrosion on hinges.
Oversized or Custom Doors
These require ball-bearing hinges and structural reinforcement. They may need longer screws and steel stud backing.
Test Your Repairs
After completing repairs, verify success with these checks:
- Open and close the door 5 to 10 times and check for smooth operation
- Confirm even 1/8-inch gaps around the door
- Ensure it latches without lifting or forcing
- Apply lubricant to hinges and latch for quiet movement
- Recheck with a level if problems persist
Bonus Tip: Place a dollar bill in the door gap and close it. If you can pull it out with resistance, the seal is good. If it slides freely, adjust alignment.
Cost and Time Summary
| Task | Time Required | Cost |
|---|---|---|
| Tighten screws | 10 minutes | $0 |
| Replace screws | 20 minutes | $5 to $10 |
| Repair stripped holes | 30 to 60 minutes | $5 to $15 |
| Shim hinges | 15 minutes | $2 |
| Professional repair | 1 to 2 hours | $75 to $150 per hour |
| Door replacement | 2 to 4 hours | $200 to $1,000 or more |
Bottom Line: Most sagging doors can be fixed for under $20 and less than an hour using longer screws and basic repairs.
Frequently Asked Questions About Fixing a Sagging Door
Why does my door start sagging after working fine for years?
Doors sag over time due to repeated stress on hinges. Frequent opening and closing loosens hinge screws, especially in high-traffic areas like front doors. The top hinge bears the most weight and is usually the first to fail.
Can I fix a sagging door without removing it?
Yes. You can tighten screws, replace short screws with longer ones, and even bend hinges slightly without removing the door. However, for repairs requiring shims or hinge removal, propped support is recommended.
How do I know if the problem is the door or the frame?
Lift the door handle while closing. If it latches easily when lifted, the problem is hinge failure or stripped screws. If it still binds, the frame may be warped or the door may be swollen from humidity.
What is the fastest way to fix a sagging door?
Replace the top hinge screws with 3-inch screws that anchor into the wall stud. This single step fixes approximately 90% of sagging door issues and takes about 20 minutes.
Should I replace hinges when fixing a sagging door?
Replace hinges if they are bent, worn, or corroded. Otherwise, tightening screws and using longer screws is usually sufficient. Consider upgrading to heavy-duty hinges for exterior or heavy doors.
Key Takeaways for Fixing Your Sagging Door
A sagging door is rarely a crisis, but it is a warning sign that should not be ignored. Address it early with the right fix, and you will restore function, security, and comfort to your home.
The most powerful tool in your repair arsenal is a 3-inch screw. By anchoring the top hinge into the wall stud rather than just the jamb, you eliminate the flex that causes sagging in the first place. Keep a few 3-inch screws on hand. They are the best defense against door sag and cost less than $1 each.
For stripped screw holes, start with the toothpick and glue method for quick interior door repairs. For permanent fixes or exterior doors, use wooden dowels for superior holding power. Always test your repairs by opening and closing the door multiple times before considering the job complete.


