
You just replaced your carpet with hardwood flooring, and now there’s a glaring gap under your door. It’s big enough for cold air to rush in, pests to sneak through, or your dog to bat a toy underneath. You’re not alone. A gap under a door is one of the most common household issues, especially after renovations, but it’s also one of the easiest to fix if you know the right solution for your situation.
The fix depends on how big the gap is, whether it’s an interior or exterior door, and what materials you’re working with. A 1/4-inch gap calls for a simple sweep, while a 1-inch gap may need structural adjustment. This guide walks you through every proven method, from quick fixes to permanent seals, so you can choose the best option for your door, floor, and lifestyle.
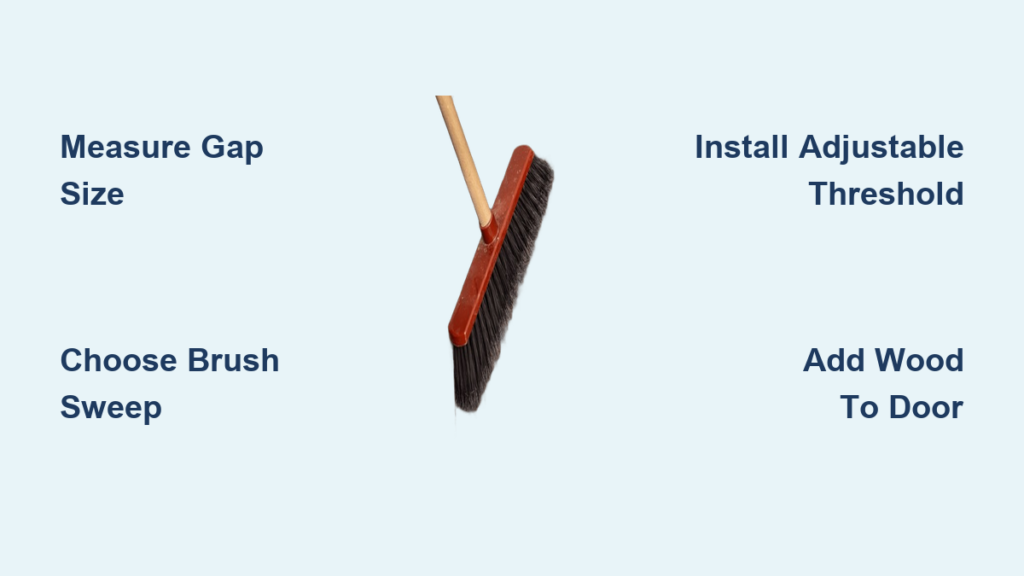
Measure the Gap First
Before buying any product, know your gap size. A solution that works for a 1/2-inch gap will not seal a 1-inch one.
Use the Right Tools
Grab a ruler, tape measure, or feeler gauges. Measure at three points: left, center, and right. Floors are not always level, and doors can sag over time, so the gap might vary.
• Up to 1/2 inch: Standard door sweep or kerf-in weatherstripping
• 1/2 to 1 inch: Brush sweep or adjustable threshold
• Over 1 inch: Add wood to door bottom or replace threshold
Pro tip: Stack feeler gauges or use calipers for precision on small gaps.
Check if your floor is uneven. Open and close the door. Does the sweep drag on one side? That means a flexible brush-style sweep will perform better than a solid rubber fin. Also, inspect the threshold type. Aluminum thresholds are common on exterior doors but often non-adjustable. Wood or composite thresholds can be replaced for better sealing and aesthetics.
Install a Door Sweep
Door sweeps are the most popular fix. They are affordable, durable, and easy to install.
Choose the Right Type
Standard EPDM Rubber Sweep
This type works best for gaps up to 1/2 inch. The solid rubber fin compresses when the door closes, creating an airtight seal. It is weather-resistant and low-cost, but it wears faster on rough or uneven floors.
Recommended product: M-D Building Products 68247. It is commercial-grade, 36 inches long, with EPDM rubber and screw-mounted installation.
Brush or Bristle Sweep
This type works best for gaps up to 1 inch or uneven floors. The nylon or polypropylene bristles adapt to surface changes. It lasts long, operates smoothly, and is ideal for post-renovation gaps, but it is slightly less airtight than rubber.
Use this when your floor is not perfectly level. It prevents premature wear from dragging.
Adjustable Height Sweep
This type works best for variable gaps between 3/8 to 1 inch. It features a sliding or screw-adjustable fin that lets you fine-tune the seal after installation. It is more expensive and slightly complex to set up, but it offers customization.
Top pick: Frost King DAT39H Adjustable Threshold. It raises the contact point without modifying the door.
Kerf-In Replacement Sweep
This requires a door with a horizontal groove (kerf) on the bottom edge. You push the fin into the groove and optionally secure with screws. It offers a hidden look with no visible hardware, but it only works if the groove exists and is not DIY-friendly for beginners.
Check: Open the door and inspect the bottom. If there is a 1/4- to 3/8-inch groove, you can use M-D Building Products 67967 Brown Kerf-Style sweep.
Install Without Mistakes
- Remove the door from hinges (optional but recommended for accuracy).
- Pre-drill screw holes to prevent wood splitting.
- Align the sweep flush with the door edge, ensuring full contact across the width.
- Test operation by opening and closing the door. There should be no dragging or resistance.
- Adjust if needed. Some sweeps allow post-install tuning.
Warning: A tightly sealed door can create pressure changes. Some users report windows rattling after installation. If this happens, slightly loosen the sweep or choose a less aggressive seal.
Replace or Raise the Threshold

If the gap is caused by new flooring, the threshold might be the real problem, not the door.
Use an Adjustable Threshold
Many thresholds have screws across the base that let you raise or lower the contact point. Loosen the screws evenly to lift the threshold into contact with the door. This requires no door modification. The limit is that most can only adjust up to 3/8 inch.
If no adjustment is possible, replace the threshold.
Install a New Threshold
For larger gaps, install a Frost King Adjustable Height Threshold (DAT39H). It raises the floor contact point by up to 1 inch.
Steps:
- Remove the old threshold using a pry bar.
- Clean the subfloor and check for rot or damage.
- Dry-fit the new threshold and ensure it aligns with door swing.
- Secure with screws into the subfloor.
- Test door closure. There should be no binding or tripping hazard.
Safety note: Raised thresholds over 1/2 inch can cause stubbed toes. Bevel edges if needed, especially in high-traffic areas.
Choose Aesthetic Options
Want it to look nice? Use a wood threshold from Home Depot or a custom-stained piece. It matches flooring or door and can be painted or stained. The downside is it requires sealing for exterior use. Cost is under $20 for standard sizes.
Pair with a vinyl self-stick door sweep for a complete seal.
Add Wood to Door Bottom

When the gap is too big for sweeps, scabbing on wood is a permanent, low-cost fix.
How to Do It
- Remove the door from hinges.
- Cut a wood strip (hardwood, pine, or molding) to match door width.
- Sand and stain to match door (optional but recommended).
- Attach with wood glue and screws driven from the side edge.
- Rehang and test.
Pro tip: Screw from the inside edge so heads are not visible.
Pros and Warnings
This method closes large gaps, reuses your existing door, and is strong and lasting. However, stain matching is difficult and the joint may be visible.
Expert note: A professional painter warns that this is not easy to do and will be more obvious than a purpose-bought sweep. Matching stain is not as easy as matching color.
Best for: Dark doors where the bottom is not noticeable, or when replacing the door is not an option.
Use Kerf-In Weatherstripping
If your door has a pre-cut groove (kerf) on the bottom, this is the most elegant solution.
How to Identify
Look at the bottom edge of the door. If there is a horizontal slot, single or double, you can insert a vinyl or rubber fin.
Installation
- Slide fin into the groove. No screws needed.
- Secure with screws at ends for durability (optional).
- Trim excess with a utility knife.
Warning: You do not get much room for error. Precision matters. Measure door width carefully.
Product: M-D Building Products 67967 Brown Kerf-Style. It fits 35-3/4″ to 36″ doors.
Try Temporary Fixes
Not ready for a permanent fix? These stopgap solutions help.
Roll a Towel or Draft Snake
Place a rolled towel or fabric tube (filled with rice or sand) against the gap. It is immediate, free, and easy. The downside is it is not pet-proof and gets dragged around by dogs.
User reality: Many people shove a towel roll against the door to reduce heat loss, but the dog sometimes drags it around.
DIY Door Snake
Sew a fabric tube and fill it with rice, foam, or dried beans. Place it along the door bottom when closed. It works best for interior doors or seasonal use.
Bonus: Decorative versions blend with home style.
When to Replace the Door or Frame
If the gap is huge, the door is warped, or energy efficiency is critical, replacement may be the best long-term choice.
Consider Replacement If
• Gap is over 1 inch and other fixes fail
• Door is old, drafty, or poorly insulated
• Threshold cannot be replaced or adjusted
• You want maximum energy savings
Expert advice: Buy a cheap door and just use the frame for the upgraded weatherstripping. Focus on the frame’s seal, not just the door.
Emotional hurdle: Many homeowners hope to avoid replacing the door. But sometimes, it is the only way to achieve a perfect seal.
Match Solution to Gap Size
Use this quick decision guide:
| Gap Size | Best Fix | Why |
|---|---|---|
| < 1/2 inch | Standard door sweep | Fast, effective, affordable |
| 1/2 to 1 inch | Brush sweep or adjustable threshold | Handles larger or uneven gaps |
| > 1 inch | Add wood to door or replace threshold | Permanent structural fix |
| Door has kerf | Kerf-in weatherstripping | Clean, invisible seal |
| Aesthetics matter | Stained wood threshold + painted sweep | Blends with decor |
| Pests a concern | Sweep + threshold gasket + sealant | Eliminates all entry points |
| Floor uneven | Brush-style sweep | Adapts to surface changes |
Prevent Future Gaps
Plan for Flooring Changes
When switching from carpet to hard flooring, account for the height difference. Trim the door bottom during installation or install an adjustable threshold. Pro move: Use shims to test gap size before finalizing.
Maintain Seals Annually
Inspect sweeps before winter or rainy season. Clean debris from bristles or rubber fins. Replace every 3 to 5 years for rubber, 5 to 7 years for brush, or 10-plus years for metal.
Most sweeps come with 1- to 5-year warranties. Metal and kerf-mounted units often have longer coverage.
Avoid Common Mistakes
Do Not Ignore Floor Levelness
An uneven floor causes uneven sealing. A solid rubber sweep will wear out fast if it drags on one side.
Fix: Use a brush sweep or level the threshold.
Do Not Over-Tighten the Sweep
Too tight and the door drags, wears the sweep, or causes pressure buildup.
Rule: Door should open and close smoothly with no resistance.
Do Not Forget the Threshold
Sealing only the door side leaves a gap at the floor. For best results, seal both sides: door sweep plus threshold gasket.
Combo seals reduce air infiltration by up to 90%.
Watch for Trip Hazards
Raised thresholds over 1/2 inch can cause falls. Follow ADA guidelines: max 1/2 inch rise, or bevel the edge.
User warning: Raising the threshold will almost definitely result in stubbed toes.
Frequently Asked Questions About Gap Under Door
What is the easiest way to fix a gap under a door?
The easiest way is to install a door sweep. For gaps up to 1/2 inch, a standard EPDM rubber sweep costs under $10 and takes about 15 minutes to install. Simply align it with the door bottom and screw it in place.
How do I fix a gap under my door after installing new flooring?
Measure the gap size first. If it is under 1/2 inch, a door sweep works. If it is between 1/2 and 1 inch, use a brush sweep or adjustable threshold. For gaps over 1 inch, you may need to add wood to the door bottom or replace the threshold entirely.
Can I fix a gap under an exterior door myself?
Yes. Most door sweeps and thresholds are DIY-friendly. You need basic tools like a drill, tape measure, and screwdriver. For exterior doors, choose weather-resistant materials like EPDM rubber or aluminum.
Why does my door gap let in pests?
Gaps as small as 1/4 inch allow mice, insects, and spiders to enter. Even with tight sealing, inspect other entry points. Combine a door sweep with a threshold gasket and exterior sealant for complete protection.
How much does it cost to fix a gap under a door?
Most solutions cost between $10 and $30. A standard door sweep runs $10 to $15. An adjustable threshold costs about $20. Adding wood to the door bottom requires materials under $20 but more labor.
Key Takeaways for Fixing Gap Under Door
Fixing a gap under a door is not just about stopping a draft. It is about comfort, savings, and peace of mind. Whether you are blocking winter wind, keeping lizards out, or stopping your dog from creating a mess, the right fix makes a big difference.
Start by measuring the gap at three points. Choose your solution based on size: standard sweeps for small gaps, brush sweeps for uneven floors, and wood addition or threshold replacement for large gaps. Combine a door sweep with a threshold gasket for maximum efficiency, which can reduce air infiltration by up to 90%.
From a $10 brush sweep to a custom wood threshold, the solution fits your budget and skill level. Measure first, choose wisely, and seal it right, once and for all.


