
Installing an interior door transforms the look and function of your home, improving privacy, defining spaces, and adding polish to any room. Whether you’re replacing an old door or installing one in a newly framed wall, a flat jamb prehung interior door is the most reliable choice for DIYers. These doors come factory-assembled with hinges already attached, making installation faster and more accurate than fitting a slab into an existing frame.
The key to success lies in precision: measuring the rough opening correctly, ensuring the jamb is plumb and level, and securing everything to the studs, not just drywall. With the right tools and this step-by-step guide, you can install a door that opens and closes smoothly for years.
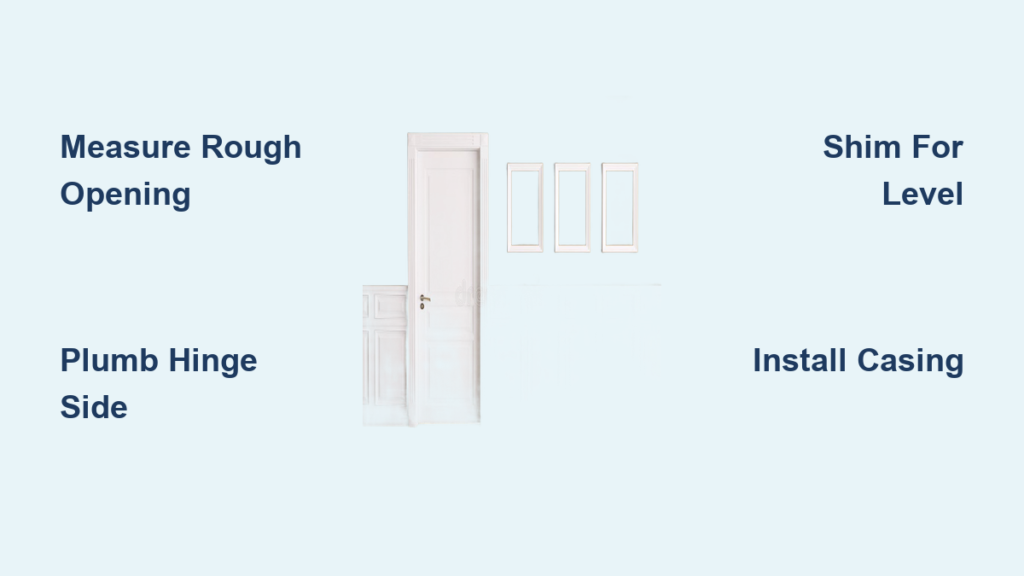
Measure the Rough Opening Before Buying a Door
Before purchasing a door, confirm your rough opening size. This is the framed space between studs, not the current door or trim. Taking accurate measurements prevents the frustration of a door that won’t fit.
Check Width, Height, and Depth
Measure the width across the top, middle, and bottom of the opening. Use the smallest number. The rough opening should be 2 inches wider than the door unit. Measure the height from the subfloor to the header on both sides. Use the shorter measurement. The opening should be 2.5 inches taller than the door. Measure the depth of the wall to ensure compatibility with jamb thickness. Standard walls with 2×4 studs and 1/2-inch drywall on each side are 4-9/16 inches deep.
Standard interior door sizes include widths of 24, 28, 30, 32, and 36 inches, with a standard height of 80 inches or 84 inches for tall doors.
Verify Square and Plumb
Use a level and tape measure to check if the header is level, the side studs are plumb, and both sides are the same height. Repair any framing damage before proceeding. A crooked opening leads to a binding door that will cause ongoing problems.
Remove the Old Door and Frame
If replacing an existing door, clear the way for the new unit. This step exposes the rough opening and allows proper inspection of the framing.
Take Off the Door Slab
Open the door and place wedges under it for support. Unscrew hinge pins with a screwdriver and hammer, or use a hinge pin removal tool. Lift the door off and set it aside. Work with a partner for solid core doors, which are heavy.
Pry Off the Casing
Use a flat pry bar to remove trim from both sides and the top. Work slowly to avoid tearing drywall. Slide a putty knife behind the casing to protect the wall surface. Label and save the casing if you plan to reuse it.
Remove the Old Jamb
Break apart the jamb with a hammer and pry bar. Pull out all nails and screws from the studs. Clean out debris and inspect the opening for pests, moisture, or rot. Repair any damage before installing the new door.
Position the Prehung Door in the Opening

With help, lift the new door into place. Prehung doors, especially solid core models, are heavy and require two people for safe handling.
Confirm Door Swing
Determine the correct swing before positioning. A right-hand swing has hinges on the right when facing the door from the outside. A left-hand swing has hinges on the left. Most bedrooms and bathrooms use inswing, where the door opens into the room. Stand in the doorway with your back to the hinges to test. If the door swings to your right, it is a right-hand swing.
Set the Door in the Opening
Center the door so the gap between the jamb and stud is even on both sides. Align the jamb flush with the drywall on both sides of the wall. Leave 1/8-inch clearance at the top and between the door edge and strike jamb. Support the bottom with wood blocks or shims to maintain a 3/4-inch gap above the floor for carpet or flooring expansion.
Never let the door rest directly on the floor, as this can warp the jamb over time.
Level and Shim the Jamb for Smooth Operation
This step ensures the door operates smoothly and stays aligned for years. Proper shimming is the difference between a door that works well and one that causes constant frustration.
Plumb the Hinge Side
Place a 4-foot level vertically on the hinge-side jamb. Insert shims behind each hinge at approximately 10, 30, and 60 inches from the floor until the jamb is perfectly plumb. Drive a 3-inch wood screw through the hinge and into the stud. Do not tighten fully until all hinges are secured.
Always screw into wood studs, never into drywall alone. Screws need solid backing to hold the door securely.
Level the Head Jamb
Check the top jamb with the level. Shim between the head jamb and header as needed to achieve level alignment. Add shims on the latch side if the head is not level. An out-of-level head causes the door to swing open or closed on its own.
Test the Door Swing
Open and close the door to check for rubbing or binding. Adjust shims until the door swings freely and closes on its own without being pushed. The door should stay open at 90 degrees without moving.
Secure the Strike Side
Check the gap between the door and strike jamb. It should be even top to bottom, approximately 1/8 inch. Shim behind the strike jamb at the strike plate height and at the top. Nail or screw the jamb to the stud using #6 finishing nails or screws.
Avoid over-tightening screws, as this can twist the jamb and cause misalignment.
Install the Door Casing
Trim covers gaps and gives the door a finished, professional look. Proper casing installation hides imperfections and completes the installation.
Cut and Fit the Casing
Use primed pine or MDF casing, with 2.25 inches being the standard width. Miter the top corners at 45 degrees for a clean joint. For uneven walls, cope the inside corners instead of mitering for a tighter fit.
Nail the Casing in Place
Drive #6 finishing nails every 12 to 16 inches. Nail into the jamb and into wall studs behind for secure attachment. Use a nail set to sink nails slightly below the surface for a smooth finish.
Finish the Edges
Trim excess shims flush with a utility knife. Fill nail holes with wood filler if painting. Sand lightly and wipe clean before applying finish.
Paint or stain casing before installation for cleaner results and a more professional appearance.
Install Door Hardware
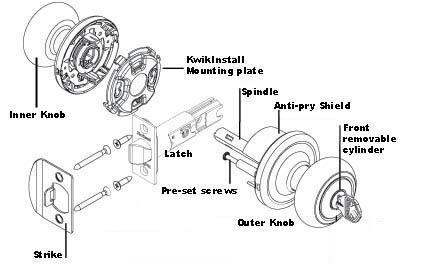
With the door secure, add the knob, latch, and strike plate to complete functionality.
Mark and Drill for the Doorknob
Follow the manufacturer template provided with the hardware. Use a hole saw sized at 2-1/8 inches for the knob bore. Drill a 1-inch crossbore for the latch mechanism.
Install the Latch and Knob
Insert the latch into the edge of the door. Secure with the provided screws. Attach the knob and backplate according to manufacturer instructions.
Fit the Strike Plate
Close the door and mark where the latch hits the strike jamb. Chisel a mortise so the strike plate sits flush with the jamb surface. Screw it in place securely.
Test that the latch engages smoothly without force. If it does not, adjust the strike plate position or deepen the mortise.
Finish and Seal the Door
Final touches make the installation look professional and protect it from wear.
Caulk the Gaps
Use painter’s caulk between the casing and wall. Run a smooth bead and wipe with a damp finger for a clean finish. Caulk hides small gaps and shadows for a polished appearance.
Paint or Stain
Touch up any scratches or nail holes. Use a brush for trim and a roller for flat surfaces. Let dry fully before frequent use.
Avoid water-based finishes on solid core doors in humid areas, as moisture can cause swelling and warping.
Troubleshoot Common Door Problems
Even careful installations can have issues. Here is how to fix them quickly.
Door Rubs Against the Jamb
This problem usually means the hinge side is not plumb or shimming is uneven. Recheck plumb with a level and adjust shims behind the hinges until the rubbing stops.
Door Closes on Its Own
Gravity pulls the door due to an out-of-plumb frame. Shim the hinge side until the door stays open at 90 degrees without moving.
Latch Does Not Catch
The strike plate is misaligned. Loosen the screws, shift the plate slightly, and retighten. Alternatively, deepen the mortise with a chisel.
Door Binds When Opening
A twisted jamb or loose screws causes binding. Tighten hinge screws and re-shim the head jamb to level it.
A quick fix for hinge instability is swapping short hinge screws for 3-inch screws in the top hinge for better holding power.
Best Practices for a Perfect Fit
Follow these tips to avoid mistakes and ensure long-term performance.
Use quality tapered wood or composite shims for precise adjustments. Avoid folded cardboard or plastic scraps, which compress unevenly. Do not over-tighten screws, as excessive force bows the jamb. Tighten gradually and check alignment after each screw.
Label each door before installation with the room and swing direction to prevent mix-ups on multi-door projects. Protect the door surface with masking tape or cardboard during installation to prevent dents, scratches, and paint splatter.
Pre-fit all casing pieces before nailing to ensure clean miters and reveal any gaps early.
Maintain Your Interior Door
A well-installed door lasts decades with minimal upkeep.
Tighten hinge screws annually to prevent sagging and misalignment. Lubricate hinges with silicone spray or graphite powder once a year. Avoid oil-based lubricants, which attract dust and grime.
In humid rooms like bathrooms and laundry areas, monitor for sticking caused by swelling. Sand edges lightly if needed and improve ventilation to prevent recurrence.
Inspect weatherstripping if present and replace if cracked or compressed.
Choose the Right Door for Your Space
Style and function should guide your selection for each room.
Match the room purpose to the door type. Bedrooms benefit from solid core MDF or wood for sound insulation. Bathrooms need mold-resistant MDF or fiberglass. Closets work well with hollow core or louvered doors for airflow. Living areas suit paneled or glass doors for light and style.
Solid core doors reduce noise by 50 percent or more compared to hollow core, making them ideal for home offices, nurseries, or media rooms.
For tight spaces, consider barn doors that slide on a track or pocket doors that disappear into the wall. These require different installation methods and specialty framing.
Key Takeaways for Installing Interior Doors
Installing an interior door is a high-impact upgrade that boosts both function and style in your home. Focus on precise measurement, proper shimming, and secure fastening to achieve a door that operates smoothly and looks professionally installed.
Always double-check rough opening measurements before purchasing a door. Use quality shims and secure all fasteners into wood studs, not drywall. Test door operation at every stage before permanently securing the frame.
Whether you are a first-time DIYer or a seasoned homeowner, this process is doable in a single day with the right approach. Stick to flat jamb prehung doors for the simplest, most reliable results, and enjoy the satisfaction of a job well done.
Frequently Asked Questions About Installing Interior Doors
What is the standard rough opening size for an interior door?
The rough opening should be 2 inches wider than the door unit and 2.5 inches taller. For a standard 32-inch by 80-inch door, the rough opening should be approximately 34 inches by 82-1/2 inches.
Can I install an interior door by myself?
Yes, a single person can install a prehung interior door, though having a second person is helpful for holding the heavy unit during alignment. The process takes approximately 2 to 4 hours for experienced DIYers.
How do I know if my door is right-hand or left-hand swing?
Stand in the doorway with your back against the hinges. If the door swings to your right, it is a right-hand swing. If it swings to your left, it is a left-hand swing.
Why does my newly installed door stick or rub?
Door rubbing usually indicates the hinge side jamb is not plumb. Check the level and adjust shims behind the hinges until the door swings freely without contact.
Should I paint or stain my interior door before installing?
Painting or staining before installation produces cleaner results. It allows you to coat all surfaces and edges without worrying about getting paint on the walls or flooring.
How much clearance should there be between the door and floor?
Leave approximately 3/4 inch clearance for carpet or flooring expansion. This gap accommodates thick carpet padding and allows the door to clear the floor when swinging.


