
Installing a new exterior door improves energy efficiency, security, and curb appeal. Whether you’re replacing an old, drafty entry or upgrading during a renovation, knowing how to install an exterior door correctly ensures years of reliable performance. This guide walks you through every critical phase from measuring and removal through flashing, alignment, and finishing with pro tips to avoid common mistakes.
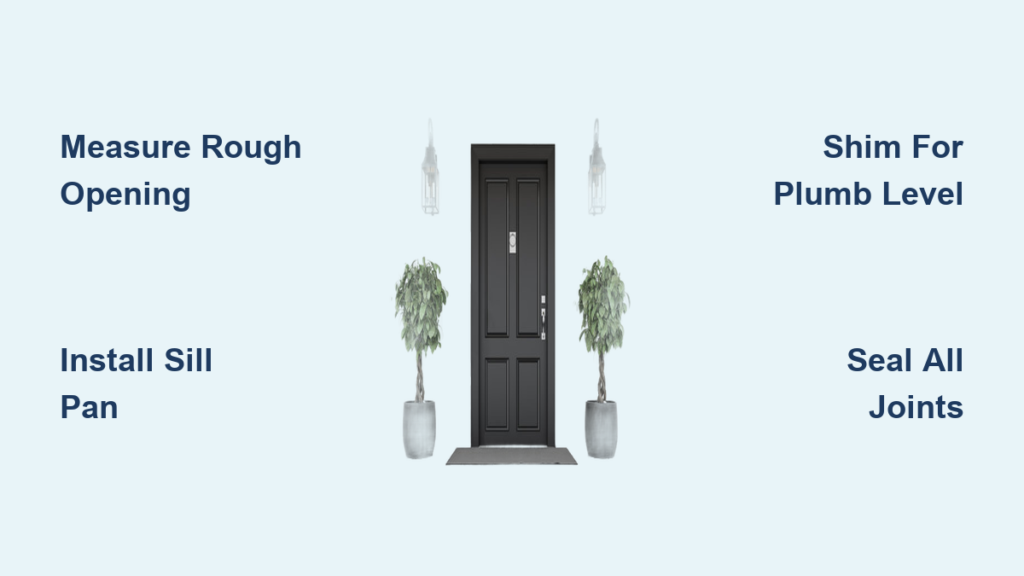
Choose the Right Door Size for Your Rough Opening
Standard prehung exterior doors measure 37 1/2 inches wide by 81 5/8 inches tall, designed to fit a rough opening of 38 1/4 inches wide by 82 1/2 inches high. This provides 3/8 inch of clearance on each side for shimming and leveling. Always confirm whether you need a prehung unit with jamb or just a slab, and verify the jamb depth matches your wall thickness.
Match Door to Rough Opening
Before ordering, measure your existing rough opening at three points: top, center, and bottom for width, and both sides for height. Record the smallest values to ensure proper fit. Confirm the handing and swing direction are correct. In hurricane-prone areas like Florida, outward-swinging doors are often required to prevent wind uplift.
Verify Door Handing and Swing
Stand outside the door facing it to determine handing. If hinges are on the left, you need a left-hand door. Swing direction affects weather resistance and safety. Order a custom-sized door if your wall or rough opening does not match standard dimensions, even if it costs slightly more, since it saves time and ensures better sealing.
Remove Your Old Door Safely
Take Out the Slab First
Use a flathead screwdriver to tap hinge pins out from bottom to top, then lift the door slab off carefully with a helper assisting. Set the old slab aside for proper disposal. This step makes the jamb easier to access and remove.
Demolish the Old Jamb
Use a pry bar to remove the jamb from the framing. Cut stubborn nails with an oscillating tool or Sawzall. Remove all debris, old caulk, and damaged insulation. Wear safety goggles and gloves since old wood may splinter or contain hidden nails.
Inspect the Rough Opening
Check for rot or insect damage in jack studs, header, or threshold. Verify the jack studs and sill are plumb and level. Measure diagonals to ensure squareness. If framing is damaged, repair or sister the studs before proceeding.
Check Rough Opening Fit Before Proceeding

Measure Width and Height Accurately
Measure the rough opening width at top, center, and bottom, recording the smallest value. Measure height from subfloor to header on both left and right sides. Standard clearance should be 3/4 inch total, or 3/8 inch per side, around the jamb. The rough opening must be slightly larger than the door unit to allow for shimming.
Ensure Level Threshold
Place a four-foot level across the sill. If uneven, shim under the threshold or sister the subfloor. A level sill prevents binding and ensures smooth door swing. Use composite shims under the sill to adjust height rather than wood that can compress over time.
Install Sill Pan for Waterproofing
Why a Sill Pan Is Non-Negotiable
Water infiltration under doors is a leading cause of rot and structural damage. A sill pan acts as a waterproof barrier beneath the threshold. Most manufacturers require a sill pan, and skipping it voids your warranty. Materials include PVC, rubberized membrane, or galvanized steel.
Steps to Install Pan Flashing
Cut the pan to extend 1/2 inch beyond jack studs. Apply silicone caulk or PVC cement at seams and corners. Slope the pan 1/4 inch per foot outward for drainage. Seal edges temporarily with painter’s tape until the door is set.
Flash Head and Sides Properly
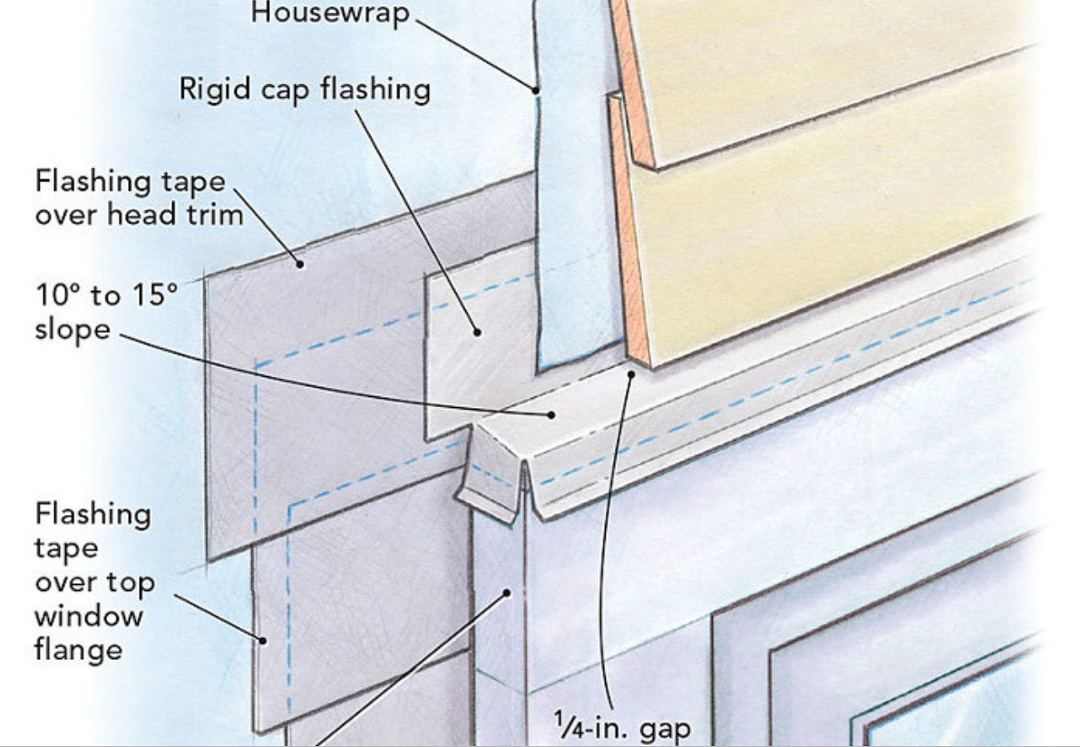
Add Drip Cap Above Door
Install drip cap under siding and over brickmold. This directs water away from the jamb and header, preventing water from wicking into wood. The drip cap creates a critical drainage path for water runoff.
Use Continuous Flashing in Wet Climates
In rainy or coastal zones, apply head flashing over the top of the door unit. Install jamb flashing down the sides, lapping over the sill pan. This creates a drainage plane that sheds moisture. In Florida or hurricane zones, use full pan flashing under the entire threshold for maximum protection.
Set the Door Unit and Secure with Shims
Position with Two People
Tilt the prehung door into the rough opening. Rest the center of the bottom rail on the sill pan, then raise the top into place without forcing it. Always use two people, one inside and one outside, to control alignment and prevent damage.
Shim at Critical Points
Insert shims behind each hinge, at the top and bottom of the latch side, and at corners of the jamb. Use a four-foot level to check plumb on the hinge side and level across the head jamb. Adjust until gaps between door and jamb are even at 1/8 inch and the door swings freely when opened to 1/8 inch from closed. Replace the top hinge screw with a three-inch structural screw that anchors into the stud for extra stability.
Install Lockset and Deadbolt
Follow Manufacturer Template
Most locksets come with a drilling template. Mark the bore hole, usually 2 1/8 inches in diameter. Drill through the door edge and chisel the mortise for the latch. Install the latch, faceplate, and strike plate according to instructions.
Reinforce the Strike Plate
Use three-inch screws instead of the short ones provided. Add a metal strike reinforcement plate behind the jamb if possible. Long screws anchor into the framing, making kick-in break-ins much harder.
Add Exterior Brickmold Trim
Nail Brickmold with Clearance
Use 16d galvanized casing nails to attach brickmold. Leave a 1/16 inch to 1/8 inch gap between brickmold and hinges to prevent rubbing. Do not install brickmold on the interior. Score and snap any protruding shims with a utility knife before installing trim.
Seal All Exterior Joints
Apply silicone caulk where brickmold meets jamb, where brickmold meets siding, and where sill pan meets threshold. This prevents air and water infiltration. Proper sealing is essential for energy efficiency and long-term durability.
Insulate and Seal All Gaps
Use Low-Expanding Spray Foam
Fill gaps between jamb and framing with low-expansion spray foam. High-expansion foam can warp the jamb or push the door out of alignment. Never let foam expand into hinge or latch mechanisms. Apply conservatively and allow proper cure time.
Install Wedge Pads
Place wedge pads at the bottom corners of the frame if included with your door unit. These prevent wood-to-wood contact and allow for drainage. They also help maintain proper spacing during temperature fluctuations.
Test Door Operation Before Finishing
Check for Binding or Gaps
Open and close the door multiple times. Verify it swings freely, the latch engages smoothly, and weatherstrip contact is even throughout. Listen for scraping or dragging. Close the door on a piece of paper at three points, top, middle, and bottom. It should grip evenly due to compression.
Fix Common Issues Fast
If the door binds at the top, re-shim the hinge side lower. If the latch won’t catch, adjust the strike plate position. If drafts appear at the bottom, raise the threshold cap or re-caulk. If hinges rub trim, reinstall brickmold with more clearance.
Paint or Stain Within 60 Days
Protect the Jamb Finish
If your jamb is primed, apply exterior-grade paint or stain within 60 days of delivery to maintain warranty coverage. Use 100% acrylic latex paint for flexibility and durability. Paint all six sides of the door and jamb before installation if possible for maximum protection.
Frequently Asked Questions About Installing an Exterior Door
How Long Does It Take to Install an Exterior Door?
Installing an exterior door takes 4 to 8 hours for most DIYers. This includes removing the old door, preparing the opening, installing the new unit, and finishing work. Plan for a full day if this is your first time.
What Tools Do I Need to Install an Exterior Door?
You need a tape measure, two-foot and four-foot levels, drill driver, pry bar, oscillating tool or Sawzall, utility knife, caulking gun, hammer, and safety goggles. Having a helper is essential since the prehung unit requires two people to position safely.
Do I Need a Sill Pan When Installing an Exterior Door?
Yes, a sill pan is non-negotiable. It prevents water infiltration that causes rot and structural damage beneath the threshold. Most manufacturers require its installation for warranty validation.
Why Is My New Exterior Door Hard to Close?
A door that is hard to close is usually out of plumb or level. Re-shim the hinge side to ensure it is perfectly plumb. Check that the threshold is level and adjust the threshold cap if needed. Over-tightening screws can also warp the jamb.
Should I Hire a Professional to Install an Exterior Door?
If you have experience with carpentry and framing, you can install an exterior door yourself. However, if your rough opening is non-standard or you are installing in a hurricane zone, hire a professional. Proper flashing and structural anchoring are critical in these situations.
How Do I Prevent Drafts Around My Exterior Door?
Prevent drafts by ensuring even weatherstrip compression around the entire door perimeter. Adjust the threshold cap until a dollar bill resists removal when the door is closed. Caulk all exterior joints between brickmold and siding, and fill gaps behind the jamb with low-expanding foam.
Key Takeaways for Installing Your Exterior Door
Replacing an exterior door is a high-impact home improvement that pays off in comfort, efficiency, and security. The most critical steps are measuring your rough opening accurately before ordering, installing a sill pan for waterproofing, and checking plumb and level at every stage of installation. Use long screws in the top hinge and strike plate for structural integrity, seal all exterior joints with silicone caulk, and finish primed surfaces within 60 days to keep your warranty valid. By following these steps, especially proper flashing, alignment, and sealing, you will install a door that performs flawlessly for decades.


