
Painting a door is one of the fastest ways to transform your home’s appearance, but achieving a smooth, professional result requires more than just applying paint. Whether you’re refreshing an interior door or upgrading a front entryway, knowing how to paint a door properly comes down to thorough preparation, the right techniques, and patience. A poorly executed paint job reveals every brush stroke, drip, and missed spot, while a properly painted door blends seamlessly into your space, enhancing your home’s overall design.
This comprehensive guide walks you through every step of the door painting process, from surface preparation and tool selection to advanced techniques that deliver a sprayed-quality finish using only a brush and roller. You’ll learn which products professionals recommend, exactly how to paint each section of a paneled door, and critical mistakes that could ruin your hard work.
Prepare the Door Surface for Painting
Proper surface preparation is the foundation of any successful door painting project. Skipping this critical step leads to peeling, poor adhesion, and an uneven finish, regardless of how expensive your paint happens to be.
Sand the Door for Better Adhesion
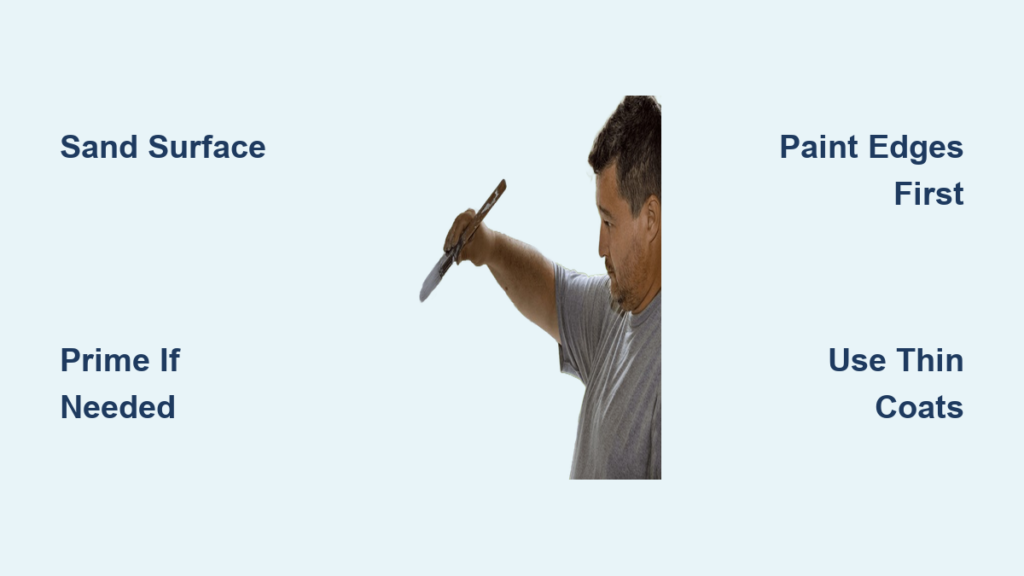
Start by scuffing the entire door surface with 120-grit sandpaper to remove any glossy finish and create a texture that new paint can grip. Glossy surfaces repel paint, making this step essential even if the door appears clean.
Use these techniques for best results:
• Use a sanding block or sponge sander for flat areas to maintain even pressure
• Pay extra attention to panel edges, rails, and stiles where paint buildup commonly occurs
• Follow up with 220-grit sandpaper for a silky-smooth base ready for primer
Pro Tip: Wipe new primed doors with denatured alcohol before painting. Manufacturing processes often leave silicone residue that prevents paint from properly adhering.
Repair Dents and Holes
Inspect the door carefully for dings, cracks, or old nail holes. Fill any imperfections with fast-drying wood filler like DAP Plastic Wood using a putty knife, then let dry completely before sanding smooth with 150-grit followed by 220-grit paper. For MDF or hollow-core doors, seal repairs with primer first to prevent swelling from moisture exposure.
Clean the Surface Thoroughly
Dust, grease, and grime sabotage paint adhesion. Wipe the door with Krud Kutter or mild soapy water, using denatured alcohol for oily spots and TSP substitute for exterior doors that may have accumulated grimy buildup. Allow the door to dry completely before proceeding to the next step.
Remove or Protect Door Hardware
The cleanest painting results come from removing hardware entirely, but if that’s not possible, protecting it carefully prevents paint buildup and ensures sharp, clean lines.
Remove Knobs, Plates, and Accessories
Take off these components before painting:
• Doorknob and deadbolt
• Strike plate
• Kickplate
• Door knocker or decorative hardware
Label all screws and store them in a labeled zip bag to keep everything organized for reassembly.
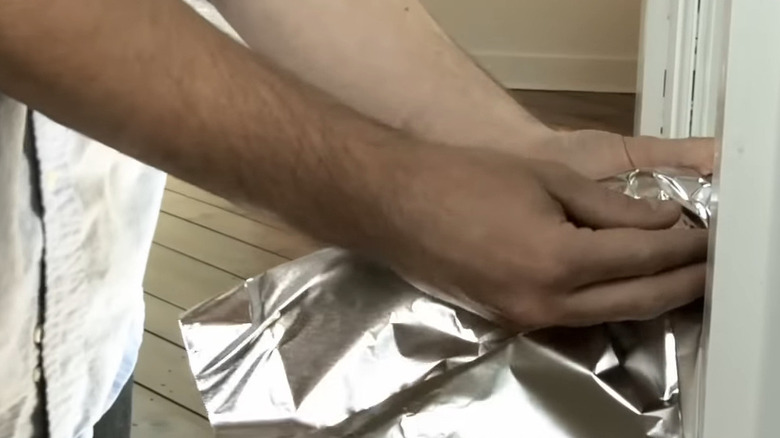
Pro Tip: If hardware must stay in place, wrap hinges tightly in aluminum foil and tape around edges, then trim excess with a utility knife for a clean fit.
Choose Between Painting On Hinges or Removing the Door
Your choice between these two approaches affects the final result and the amount of effort required.
Leave the Door on Its Hinges
This approach works best for quick touch-ups and lightweight interior doors. The advantages include no need to rehang the door and minimal setup time. However, painting on hinges makes it difficult to paint edges evenly and increases the risk of paint dripping onto hinges or the door frame. Use painter’s tape on the jamb and floor, and work slowly to maintain a wet edge and avoid lap marks.
Remove the Door for Best Results
Removing the door provides full access to all six sides and makes achieving a smooth finish significantly easier. This method works best for exterior doors, high-traffic interior doors, and any project where long-term durability matters. The trade-offs include requiring two people and a set of sawhorses or a door painting cradle.
Critical Rule: Always paint all six sides of a wooden door, including the top, bottom, and edges, to prevent moisture absorption and warping over time.
Apply Primer When Necessary
Not every door requires primer, but knowing when to prime prevents costly paint failure.
When Primer Is Essential
Apply primer in these situations:
• Bare wood or metal surfaces
• Switching from oil-based to latex paint
• Making a drastic color change, such as dark to white
• Covering stains, knots, or tannin bleed
• Surface feels slick; test by rubbing with alcohol—if paint doesn’t come off, it’s oil-based and needs bonding primer
Select the Right Primer
Choose based on your specific situation:
• Zinsser Bulls Eye 1-2-3 bonds to slick surfaces and oil-based finishes
• Shellac-based primer works best for sealing tannins and water stains
• Exterior-grade primer is required for front and garage doors exposed to weather
Never apply latex paint directly over oil-based paint without a bonding primer—this causes peeling within months.
Select the Best Paint and Finish
The right paint makes or breaks your door painting project. Using quality products specifically designed for doors ensures durability and a beautiful finish.
Top Interior Door Paints
These products deliver professional results:
• Benjamin Moore Advance: Waterborne alkyd that self-levels, has low odor, and provides ultra-durable finish
• Sherwin-Williams ProClassic Latex: Smooth application with great coverage
• Sherwin-Williams Emerald Urethane Trim Enamel: Chemical-resistant, ideal for kids’ rooms and high-use areas
Best Exterior Door Paints
For front doors that face the elements, choose:
• Rust-Oleum Door & Trim Paint: Fast-drying, water-based, one-hour recoat
• Modern Masters Front Door Paint: High-performance, fade-resistant formula
• Sherwin-Williams SnapDry: Allows completing the entire project in one day
Choose the Right Finish
Semi-gloss remains the most popular choice for doors because it’s durable, easy to clean, and offers slight shine. Satin provides a softer look and hides minor flaws better than semi-gloss. Avoid flat or matte finishes on doors—they stain easily and cannot be wiped clean.
Gather the Right Painting Tools
Using incorrect tools creates texture, bubbles, and visible brush strokes that detract from a professional appearance.
Essential Tools for Door Painting
You need these supplies:
• Angled brush: 1.5″ to 2.5″ Purdy XL Dale or similar quality
• Mini roller: 4″ with 1/4″ microfiber or woven nap
• Roller tray or Pelican bucket for controlled paint access
• Sanding supplies: 120, 150, 220, and 320-grit paper
• Tack cloth for removing fine dust after sanding
• Painter’s tape: 3M Blue or Scotch-Blue
• Drop cloth: Canvas or plastic to protect floors
Avoid foam rollers at all costs—they trap air and leave a stippled finish that DIYers consistently describe as useless for trim work.
Apply Paint in the Proper Sequence
Following the correct painting order maintains a wet edge and prevents lap marks, which ruin an otherwise good paint job.
Step 1: Paint the Edges First
Use a brush or mini roller to paint all four sides: top, bottom, hinge edge, and latch edge. For dual-color doors, paint the hinge side in the exterior color and the latch side in the interior color. Sealing all edges prevents moisture damage and warping.
Step 2: Paint the Panels
Cut in panel edges with a 1.5″ angled brush, then roll the flat center with a lightly loaded 1/4″ nap roller. Feather toward the stile to avoid creating ridges that show after drying.
Step 3: Paint the Center Vertical Stile
Roll from top to bottom in long, smooth strokes while maintaining consistent pressure throughout.
Step 4: Paint the Horizontal Rails
Paint the top, middle, and bottom rails in that order, rolling horizontally to follow the grain direction. Apply thin coats to prevent buildup at the joints.
Step 5: Paint the Outer Vertical Stiles
Complete the job by painting the outer vertical stiles, working from top to bottom as the final rolling step.
Use Paint Additives for a Smoother Finish
Additives extend open time and help paint level like a professional application.
Floetrol for Latex Paint
Mix 8 to 16 ounces per gallon of latex paint. This additive slows drying time, reduces brush marks, and is ideal when using Benjamin Moore Advance or Sherwin-Williams ProClassic.
Penetrol for Oil-Based Paint
This additive improves flow and leveling while reducing brush strokes on oil-based finishes.
Pro Tip: Additives give you extra time to blend and tip off, which is crucial for complex paneled doors where visible strokes are more likely.
Allow Proper Drying Time Between Coats
Rushing the drying process leads to smudges, sticking, and wrinkling that require costly repairs.
First Coat Drying Guidelines
Standard paints require 2 to 4 hours between coats. Benjamin Moore Advance needs a 16-hour recoat window for optimal results. Fast-drying products like SnapDry and Rust-Oleum Door & Trim allow recoating in as little as 30 to 60 minutes.
Light Sanding Between Coats
Use 320-grit sandpaper to smooth any texture from the first coat, then wipe with tack cloth—never use your bare hands, which transfer oils. Inspect for missed spots or runs before applying the second coat.
Apply Second and Third Coats
Follow the identical sequence used for the first coat. Most doors require 2 to 3 thin coats, especially when making bold color changes.
Final Drying Before Reassembly
Do not reinstall hardware or close the door for at least 24 hours after the final coat. Full cure takes up to 7 days for alkyd paints. Closing too soon causes blocking, where paint sticks to the frame and damages the finish.
Remove Tape and Reinstall Hardware
Timing matters when removing painter’s tape and returning hardware to the door.
Peel Tape at the Right Moment
Remove tape when paint is dry to the touch but not fully cured. Pull at a 45-degree angle slowly to prevent peeling and achieve clean lines.
Reinstall All Hardware
Attach the doorknob, deadbolt, strike plate, and any other accessories you removed. Lubricate hinges if needed, then test the door swing and latch to ensure everything works properly.
Common Mistakes to Avoid
Even experienced DIYers make these errors that compromise their door painting results.
Skipping Edge Sealing
Wooden doors absorb moisture through unfinished ends, leading to warping over time. Always paint all six sides to seal the door properly.
Using Thick Coats
Thick coats cause drips, runs, and orange peel texture. Apply thin, even layers instead.
Painting in Direct Sunlight
Paint dries too quickly in direct sun, creating lap marks that remain visible. Work in shade or during early morning hours.
Using Wrong Roller Nap
Thick nap leaves texture, and foam rollers bubble and stipple. Use 1/4″ microfiber or woven rollers only.
Closing the Door Too Soon
The door sticks to weatherstripping or the jamb, damaging the fresh paint. Wait at least 24 hours before closing.
Frequently Asked Questions About Painting Doors
How long does it take to paint a door?
The actual painting takes 2 to 4 hours for two coats, plus 1 to 2 hours for preparation. However, you need to account for drying time, which adds 24 to 48 hours before the door can be closed. Plan for a 2 to 3-day project total.
Do I need to sand my door before painting?
Yes, sanding is essential for proper paint adhesion. Use 120-grit sandpaper to scuff glossy surfaces, then follow with 220-grit for a smooth base. Skip this step and paint will peel prematurely.
Can I paint over oil-based paint with latex?
Only if you use a bonding primer first. Test by rubbing alcohol on the surface—if paint comes off, it’s latex; if not, it’s oil. Apply a bonding primer like Zinsser Bulls Eye 1-2-3 before using latex paint.
Should I use a roller or brush to paint a door?
Use both for best results. Apply paint with a 1/4″ nap roller for smooth, even coverage, then tip off with an angled brush in the direction of the grain to eliminate roller marks and achieve a professional finish.
How many coats of paint does a door need?
Most doors need 2 to 3 thin coats for full coverage. Dark color changes typically require three coats, while refreshing a similar color may need only two.
What paint finish is best for doors?
Semi-gloss offers the best balance of durability and appearance for most doors. It’s easy to clean, resists stains, and provides a subtle shine that looks professional. Satin works well for modern aesthetics where less reflection is desired.
Key Takeaways for Painting Your Door
A perfectly painted door should go unnoticed—not because it’s flawed, but because it looks exactly as it should: clean, crisp, and professionally finished. The difference between amateur and professional results lies in thorough preparation, quality tools, patient technique, and adequate drying time.
Remember these critical points:
• Always paint all six sides of wooden doors to prevent warping
• Use thin coats rather than thick ones to avoid drips and uneven texture
• Wait at least 24 hours before closing the door after painting
• Choose quality paints like Benjamin Moore Advance or Sherwin-Williams Emerald for durability
Start by prepping your door properly, gather the right tools, and work in sequence from edges to panels to stiles. With patience and attention to detail, you’ll achieve a flawless finish that enhances your home’s appearance for years to come.


