
A freshly painted metal door can transform your home’s curb appeal, protect against the elements, and extend the life of your entryway. But unlike wood, metal doors require special prep and materials to prevent peeling, rust, and cracking caused by sun exposure and temperature shifts. The key to a flawless finish starts long before the first brushstroke. With the right techniques, proper cleaning, priming, and paint selection, you can achieve a smooth, long-lasting result that looks professionally done. Whether your door is chipping, rusting, or just outdated, this guide walks you through every critical step.
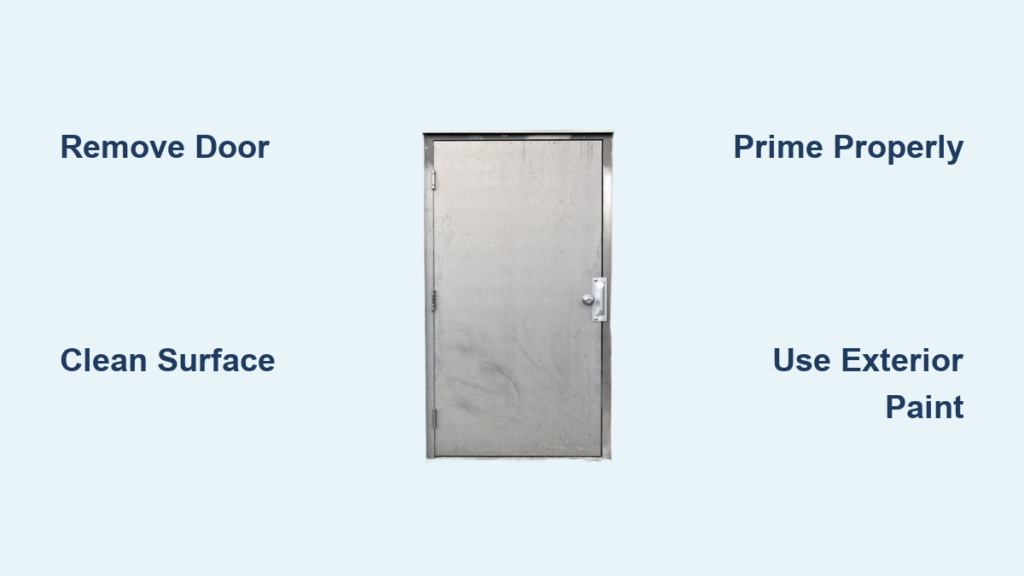
Remove Door and Hardware
Taking off the door ensures full access and eliminates drips from painting in place. Lay it flat on sawhorses or a protected surface to work evenly on both sides, edges, and recessed panels.
Take Off the Door for Best Results
Removing the door provides complete access to all surfaces and prevents paint drips on your floors or walls. Lay the door flat on sawhorses covered with drop cloths to protect the surface. If removal is not possible, mask surrounding trim thoroughly and work in sections, but expect limited reach on top and bottom edges. To remove, unscrew hinge screws carefully and have a helper support the weight during the process.
Remove All Door Hardware
Knobs, locks, hinges, strike plates, kickplates, and mail slots must be removed to prevent paint buildup and ensure full coverage. Painting over hardware leads to a sloppy finish and can impair function. Store screws and parts in labeled bags to avoid confusion during reinstallation. If removal is not feasible, wrap components tightly with plastic and use painter’s tape for sharp masking, but this is a compromise rather than a substitute for full disassembly.
Prepare the Surface Thoroughly

Surface preparation determines the success and longevity of your paint job more than any other factor. Take time to assess, clean, and treat the door properly before applying any product.
Assess Existing Paint Condition
Check for peeling, cracking, bubbling, or chalking on the current finish. If paint is failing, it must be stripped completely because painting over it guarantees future delamination. Use a paint scraper or chemical stripper to remove loose layers. For pre-1978 homes, assume lead-based paint is present and never dry sand. Use a HEPA vacuum and wet methods to avoid toxic dust, and follow EPA guidelines at www.epa.gov/lead.
Clean With Degreaser and TSP
Wash the entire surface with TSP (trisodium phosphate) or a TSP substitute like Krud Kutter to remove dirt, oils, and residues. Scrub recessed panels and edges thoroughly since contaminants hide in these areas. Rinse with clean water and let dry completely. Finish with a denatured alcohol wipe to eliminate invisible contaminants like silicone or fingerprints that cause fish-eyeing in the final paint finish.
Treat Rust and Corrosion
For rust spots, use a stiff wire brush or 80-100 grit sandpaper to sand down to bare metal. Apply rust neutralizer such as Loctite Rust Neutralizer or Naval Jelly to convert iron oxide into a stable surface. Follow dwell time and rinse instructions carefully. For deep pitting, fill with auto body filler like Bondo, let cure, then sand smooth with 180-220 grit paper before proceeding.
Handle Galvanized Metal Correctly
Galvanized steel has a zinc coating that resists paint adhesion if not properly treated. Clean with a water-based degreaser to remove manufacturing oils and remove white rust with light sanding. Prime immediately after cleaning to prevent re-oxidation. Never use oil-based primers because they react with zinc and cause peeling. Use only water-based primers like KILZ 2 or Glidden Water-Based Primer on galvanized surfaces.
Prime the Metal Door
Priming is non-negotiable for durability on metal surfaces. Skip this step and your paint will fail prematurely regardless of how good the topcoat is.
Choose the Right Primer
Select a primer based on your door’s specific surface type. Use oil-based primer such as Rust-Oleum Clean Metal Primer for bare or rust-prone steel because it offers excellent adhesion and corrosion resistance. Use water-based primer such as KILZ 2 for galvanized metal. Use high-performance acrylic metal primer such as Benjamin Moore for sound previously painted surfaces. Warning: Oil-based paints may void manufacturer warranties on pre-finished steel doors, so check documentation first.
Apply Primer Evenly
Use a 2-inch angled brush for edges and recessed panels where rollers cannot reach. Use a microfiber roller with 1/4-inch nap for flat areas. Apply a thin, even coat and avoid pooling in grooves which causes drips. Let dry 2-4 hours for water-based or 12-24 hours for oil-based primers. After drying, lightly sand with 220-320 grit paper and wipe with a tack cloth to remove all dust. For dark topcoats, use grey-tinted primer to reduce the number of paint layers needed.
Select the Right Exterior Paint
Choosing the correct paint is critical for durability, UV resistance, and flexibility on metal surfaces that expand and contract with temperature changes.
Use Exterior-Grade Paint Only
Never use interior paint even on the inside of an exterior door. Both sides must be painted with exterior-grade paint to prevent moisture imbalance and warping. Interior paint lacks UV resistance and flexibility, leading to premature failure within months of exposure. This is one of the most common mistakes homeowners make when painting metal doors.
Choose Durable Paint Types
Select from these top-performing options for metal door applications. 100% acrylic latex such as Benjamin Moore Regal Select Exterior offers flexibility, UV resistance, and low VOCs. Urethane-modified alkyd such as PPG Break Through provides extremely durable, self-leveling results that harden fully over 1-2 weeks. Enamel such as Rust-Oleum Door Enamel delivers chip-resistant finishes ideal for high-traffic doors. Automotive spray paint paired with clear coat produces factory-like finishes when applied with proper technique.
Pick the Best Sheen and Color
Satin or semi-gloss finishes hide imperfections better than flat paints and resist fingerprints while being easy to clean. Lighter colors absorb less heat, reducing thermal expansion that stresses the paint film. Dark colors increase heat absorption significantly, so use grey primer and allow extra drying time between coats when using dark shades.
Apply Paint Like a Pro
Technique matters more than tools when painting metal because the surface shows every imperfection and brush stroke.
Use the Brush and Roller Method
For DIYers, this method delivers excellent results with the right approach. First, cut in edges with a high-quality angled brush like Purdy Whizz Wedge. Next, work recessed panels by painting the panel field before the rails. Then, roll flat areas using a fully loaded 1/4-inch nap microfiber roller. Finally, tip off with a brush to eliminate roller marks by using light strokes in the direction of the grain. Pro tip: Prop the door slightly open with a paint stir stick to access and paint side edges without smudging the wet paint.
Reduce Brush Marks With Additives
Paint additives significantly improve flow and reduce visible brush strokes. Add Floetrol at 8-12 ounces per gallon to latex paint for better flow and longer leveling time. Add Penetrol at 10-12% by volume to oil-based paint to improve smoothness. These additives help achieve a near-sprayed finish using brush and roller methods.
Apply Multiple Thin Coats
Thin coats dry evenly and create a more durable finish than thick layers that trap solvents and crack.
Follow Recommended Coating Schedule
Apply 1-2 primer coats and 2-3 topcoats for maximum durability. Never apply thick layers because they dry unevenly and cause runs. Allow proper drying time between coats: latex paint needs 2-4 hours while oil-based paint requires 12-24 hours. Full cure time is 7-14 days, so avoid slamming or heavy use during this period to prevent damage to the finish.
Sand Between Coats (Optional)
For ultra-smooth results, lightly sand with 320 grit paper between topcoats. Wipe with a tack cloth before applying the next coat to remove all sanding dust. This step is especially useful when using spray paint or high-gloss finishes where every imperfection shows.
Consider Spraying for a Flawless Finish

Spraying eliminates brush and roller marks entirely and provides the smoothest possible finish, especially on paneled doors.
HVLP vs. Airless Sprayers
HVLP (High Volume Low Pressure) sprayers are ideal for beginners because they offer low overspray, easy cleanup, and deliver smooth finishes. Airless sprayers provide faster coverage but require more skill to operate properly. Airless sprayers operate at up to 3,000 psi and can cause serious injury if the spray tip punctures skin. Always wear goggles, respirator, gloves, and long sleeves when spraying, and never point the gun at yourself.
Why Pros Prefer Spraying
Professional painters prefer spraying because it provides a factory-like, uniform finish in less time than brushing. The finish is completely smooth with no brush or roller marks visible. With proper masking of surrounding areas, you can complete both sides efficiently. If possible, rent an HVLP system or hire a pro for best DIY results on visible exterior doors.
Apply Clear Coat for Maximum Durability
Clear coat adds an extra layer of protection that significantly extends the life of your paint job, especially on doors in full sun.
Boost Protection With Urethane Clear Coat
For doors in full sun or high-traffic areas, apply a 2K automotive urethane clear coat 2-3 days after the final paint coat. This adds UV resistance to prevent fading, scratch and scuff resistance for high-traffic areas, and gloss depth for a premium look. Clear coat is especially beneficial for dark-colored doors that absorb heat and are prone to chipping. User insight: Many professionals paint all metal doors with automotive primer and spray paint, then follow up with a clear coat a few days later for maximum durability.
Paint in Ideal Conditions
Environmental conditions directly affect paint adhesion and finish quality. Painting in wrong conditions is a common cause of paint failure.
Avoid Direct Sun and Moisture
Never paint in direct sunlight because hot metal causes paint to dry too quickly, reducing flow and adhesion. Work in the shade or on overcast days when possible. Ideal temperature ranges from 50-85°F (10-29°C). Low humidity provides the best results. Avoid painting before rain or heavy dew because moisture compromises bonding and causes adhesion failure.
Control the Environment
If possible, paint in a garage or covered area to protect from wind-blown dust and allow better control over drying conditions. Ensure good ventilation, especially when using oil-based products or sprayers. Controlled environments produce superior finishes and faster drying times.
Maintain the Finish Long-Term
Regular maintenance extends the life of your paint job significantly and keeps your door looking freshly painted for years.
Clean and Inspect Annually
Wash the door yearly with mild soap and water to remove dirt and contaminants. Avoid abrasive cleaners that scratch the surface and damage the finish. Inspect regularly for chips, scratches, or rust spots, and touch up immediately with primer and paint to prevent spread. Catching problems early prevents major repairs later.
Re-Paint and Reapply Clear Coat
Plan to re-paint every 5-7 years depending on climate and sun exposure in your area. Reapply clear coat every 3-5 years in harsh environments such as coastal, sunny, or humid areas. Regular maintenance extends the life of your paint job to 10-15 years, especially with automotive-grade finishes and clear coat protection.
Special Considerations
Certain situations require special handling to ensure successful results and avoid common pitfalls.
Paint Different Colors on Each Side
Yes, you can paint the interior and exterior different colors using exterior-grade paint on both sides for balanced protection. Apply painter’s tape along the edge for a clean line where the colors meet. This is popular for curb appeal where bold exterior colors complement neutral interior shades.
Check Manufacturer Warranty
Some steel doors have factory finishes with warranties that void if oil-based paint is used. Always consult the manufacturer’s guidelines before starting your project. When in doubt, stick with water-based primers and paints to preserve any remaining warranty coverage.
Use Automotive Refinishing for Ultimate Results
For maximum durability and a showroom finish, use the automotive refinishing method. Apply epoxy primer for superior adhesion, then spray automotive basecoat, and finish with clear coat 2-3 days later. This method is more expensive and skill-intensive but delivers exceptional longevity and appearance that outperforms standard house paints.
Frequently Asked Questions About Painting Metal Doors
Can I paint a metal door without removing it?
Yes, but removal produces better results. If you must paint in place, thoroughly mask all surrounding trim and work in sections. Expect limited access to top and bottom edges. Remove as much hardware as possible for the cleanest finish.
What type of paint is best for metal doors?
100% acrylic latex exterior paint or urethane-modified alkyd provides the best results. These paints offer flexibility to handle thermal expansion, UV resistance for sun exposure, and durability for high-traffic use. Brands like Benjamin Moore Regal Select Exterior and PPG Break Through are frequently recommended by professionals.
Do I need to prime a metal door before painting?
Yes, priming is essential for durability. Prime bare metal to prevent rust, prime over repairs or patches, and prime when switching between paint types. Even on sound existing paint, priming improves adhesion and extends the life of your finish. Skipping primer is the most common cause of paint failure on metal.
How long does paint take to cure on a metal door?
Latex paint feels dry to the touch in 2-4 hours and cures fully in 7 days. Oil-based paint takes 12-24 hours between coats and reaches full cure in 14 days. Avoid slamming the door or placing items against it during the cure period to prevent damage.
How do I prevent brush marks when painting a metal door?
Use paint additives like Floetrol for latex or Penetrol for oil-based paint to improve flow and reduce brush marks. Apply thin coats rather than thick ones, and always tip off rolled areas with a brush using light strokes. Loading your roller heavily and using quality tools also minimizes visible marks.
Key Takeaways for Painting Your Metal Door
A perfectly painted metal door starts with meticulous preparation and ends with patience. The most critical steps are thorough surface cleaning, proper rust treatment, and using the correct primer for your specific metal type. Choose exterior-grade paint in satin or semi-gloss for best durability and heat resistance. Apply multiple thin coats rather than thick layers, and allow full cure time before heavy use. For maximum longevity, consider adding a clear coat especially on dark-colored doors or those in full sun. Regular annual cleaning and prompt touch-ups will keep your door looking beautiful for 10-15 years or more.


