
You’re standing in front of a door knob with no visible screws, no slots, nothing. You need to remove it, but there’s no obvious way in. You’re not alone. Millions of homeowners face this puzzle every year. The good news? Every hidden-screw door knob can be removed without damage. These sleek designs hide fasteners for clean aesthetics, but they rely on predictable internal mechanisms like spring pins, side tabs, snap-on plates, or threaded spindles. With the right technique and a few common tools, you can disassemble any hidden-screw knob in under 10 minutes.
This guide reveals every method, tool, and trick used by professionals and DIYers alike. You’ll learn to identify the mechanism type, use the correct removal technique, and handle stubborn cases including antique glass knobs and brand-specific designs.
Identify the Mechanism Type First

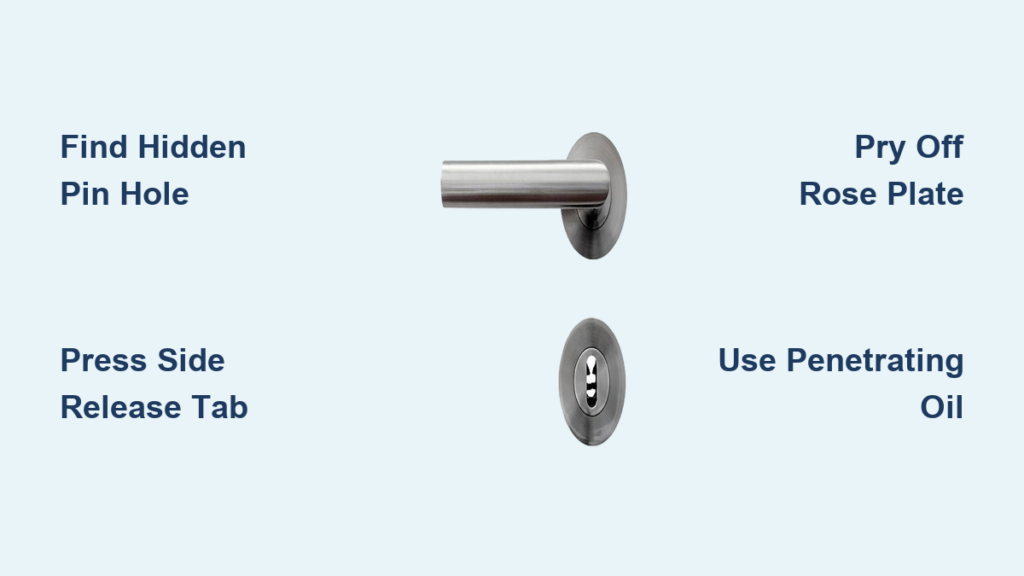
Before applying force or tools, inspect the knob closely. The removal method depends entirely on the internal mechanism. Most hidden-screw knobs fall into several categories: spring-loaded pins, side tabs, removable rose plates, threaded assemblies, or internal clips. Your first step is visual diagnosis.
Look for a Release Pin or Hole
Rotate the knob slowly and examine the base or shank. Many modern interior knobs have a small hole that appears only when the knob is turned slightly. This hole houses a spring-loaded pin. Insert a paperclip or small flathead screwdriver. If it depresses with a click, you’ve found the release mechanism.
Pro Tip: Shine a flashlight at an angle to spot tiny indentations or seams. Paint buildup from past renovations often hides access points.
Check for a Side Tab or Slot
Inspect the side of the knob near the door surface. Some models feature a tiny metal tab or slit in the shank. This is a side release lever. It must be pressed inward or downward with a narrow flathead screwdriver while pulling the knob straight off.
Warning: Don’t force it. If the tab won’t move, you may be pressing the wrong spot or the mechanism is sealed with paint.
Examine the Rose Plate for a Seam
The decorative plate covering the base may snap or pry off. Look for a notch, gap, or seam along its edge. If present, this plate hides mounting screws. Gently insert a flathead screwdriver into the gap and twist slightly to pop it off.
Visual Cue: Kwikset models often have a small notch at the 6 o’clock position, a telltale sign of a removable plate.
Remove Knobs with a Release Pin
This is the most common mechanism in modern interior doors like bathrooms and bedrooms. It uses a spring pin that locks the knob to the spindle. Depress the pin, and the knob slides off.
Locate the Pin Hole
Rotate the knob 10 to 30 degrees. A small hole should appear in the shank or base. If not, check for paint or debris blocking it. Use a utility knife or needle to clear the opening.
Time Estimate: 30 seconds to locate the hole on most models.
Depress the Pin and Pull
Insert a small flathead screwdriver or bent paperclip into the hole. Push the pin inward until you feel resistance give way. While holding it down, pull the knob straight off the spindle. Do not twist or yank sideways.
Common Mistake: Releasing pressure too soon. Keep the pin depressed until the knob is fully removed.
Expose and Remove Mounting Screws
Once the knob is off, the rose plate will either slide off or unscrew. Behind it, you’ll find two Phillips-head screws securing the interior and exterior halves through the door. Remove them, then pull both sides apart.
Tool Note: Use a #2 Phillips bit in a drill for faster removal, but stop when the screw loosens to avoid stripping.
Remove Knobs with a Side Release Tab
Some brands like older Dexter or generic hardware use a side-mounted tab instead of a pin. This lever must be pressed to disengage the spindle lock.
Press the Tab with a Flathead
Insert a very small flathead screwdriver into the slot or against the protruding tab. Push it inward or downward. Direction varies by model. You should feel a slight give when the mechanism releases.
Difficulty Indicator: These tabs are often stiff. Use light taps if needed, but avoid bending the metal.
Pull the Knob Straight Off
While holding the tab depressed, pull the knob straight off. If it resists, rotate it slightly to align internal grooves. Do not twist aggressively. It can damage the spindle.
Expert Note: Some models require you to push gently on the back of the knob to prevent internal parts from spinning during release.
Remove the Faceplate and Screws
After removing the knob, the rose plate can usually be pried off with a screwdriver. Underneath, two mounting screws will be exposed. Remove them to separate the interior and exterior components.
Preservation Tip: Wrap the screwdriver tip in painter’s tape to avoid scratching the door or hardware.
Remove Snap-On or Twist-Off Rose Plates

In some designs, the knob stays on, but the rose plate comes off first to expose screws. This is common in Kwikset, Schlage, and other branded hardware.
Find the Notch or Gap
Look around the edge of the trim plate. There’s often a tiny notch or separation line. This is where the plate detaches. Kwikset models typically have a notch at the bottom.
Visual Clue: If the plate looks like it’s glued on, it’s likely snap-fit. No screws are visible until the plate is removed.
Pry the Plate Off Gently
Insert a flathead screwdriver into the notch. Use a wood shim or cloth to protect the door surface. Twist gently to pop the plate outward. It may require moderate force.
Caution: Excessive pressure can dent the door or crack the plate. Work slowly.
Unscrew the Mounting Hardware
Once the plate is off, two long screws will run through the door connecting the interior and exterior knobs. Remove them with a Phillips screwdriver or drill. Then, pull both sides apart.
Reassembly Tip: When reinstalling, hand-tighten screws first to avoid misalignment.
Remove Threaded Antique or Glass Knobs
Vintage or pre-1990s doors often use threaded knobs screwed onto a central spindle. These are common in older homes with brass, glass, or crystal hardware.
Apply Penetrating Oil
Spray WD-40 or similar lubricant around the base of both knobs. Let it sit for 5 to 10 minutes to loosen paint, corrosion, or thread locker. This step is critical for stiff, decades-old hardware.
User Confirmed: It took brute strength, but the oil helped break the seal.
Hold One Knob, Unscrew the Other
Grip one knob firmly with a cloth or gloves. Turn the opposite knob counterclockwise. It should unscrew like a lightbulb. Use an adjustable wrench if grip is poor.
Warning: Don’t use pliers directly on glass or polished brass. Wrap in cloth to prevent scratches.
Try Counter-Rotation for Stubborn Knobs
If one knob won’t budge, have two people turn each knob in opposite directions simultaneously. This balances torque and prevents spindle binding. This method has resolved countless stuck antique knobs.
Real-World Success: Twist both in opposite directions, it comes loose.
Handle Knobs with No Visible Mechanism
Sometimes no hole, tab, or seam is visible. This doesn’t mean it’s impossible. It just means the mechanism is hidden or sealed.
Remove the Latch Screws First
Take out the two screws on the edge of the door that hold the latch in place. Pull the latch out slightly. This exposes the spindle and mounting hardware, revealing how the knobs are attached.
Key Insight: Many mismatched installations like vintage knobs on modern latches can only be diagnosed from the latch side.
Determine the Attachment Type
With the latch removed, check if the knobs are slip-on, threaded, or riveted. Slip-on knobs use pins or clips. Threaded knobs screw onto spindles. Riveted knobs are permanent and require cutting.
Expert Advice: I’d just use a hacksaw and replace everything. It’s a mismatched mess.
Cut the Spindle as Last Resort
If the knob is fused or broken, use a hacksaw or oscillating tool to cut the spindle between the knob and latch. Then slide the knob off. Replace the entire assembly afterward.
Safety First: Wear safety glasses and secure the door to prevent movement.
Brand-Specific Removal Tips
Different brands use unique mechanisms. Knowing your brand can save time and prevent damage.
Kwikset: Push the Internal Lever
Kwikset knobs use a four-prong lock system. After removing the rose plate, look for a tiny lever with an upward arrow. Push it upward with a flathead screwdriver. The knob will slide off.
Reinstall Tip: Align the half-circle mark on the knob with the spindle, then rotate fully left to re-engage.
Dexter: Find the Stem Screw
Older Dexter models from the 1970s to 1980s often have a set screw in the knob stem. Look for a small hole or slot at 3 or 6 o’clock. Use an Allen wrench or flathead to remove the screw, then slide the knob off.
Troubleshooting: If the hole is painted over, use a needle or utility knife to clear it.
Brinks: Use a Clip-Compression Tool
Brinks knobs hide a spring clip behind a small indent. You need a specialized clip-compression tool to depress the internal tab. While pressing, pull the knob off.
Warning: Paperclips or bent wires often fail and can damage the mechanism. Use the correct tool.
Troubleshoot Common Problems
Even with the right method, issues arise. Here’s how to fix them fast.
Knob Won’t Release
Cause: Paint, corrosion, or misaligned pin. Fix: Apply penetrating oil, wait 10 minutes, then retry. Use a flashlight to confirm the pin is fully depressed.
Pro Move: Tap the screwdriver lightly with a hammer to seat the pin.
Stripped Screw Heads
Cause: Over-tightening or wrong screwdriver size. Fix: Place a rubber band over the screw head, then insert the screwdriver. The rubber fills gaps and improves grip.
Alternative: Use a screw extractor bit for completely stripped screws.
Paint-Sealed Faceplates
Cause: Multiple paint layers fused the plate to the door. Fix: Score around the edge with a utility knife before prying. This prevents chipping.
Pro Tip: Use a heat gun on low to soften old paint, but keep it moving to avoid scorching.
Tools You’ll Actually Need
You don’t need a full toolbox. These five items handle 95% of hidden-screw knob removals.
Small Flathead Screwdriver
Essential for pressing pins, tabs, and prying rose plates. Choose a narrow tip for precision.
Phillips #2 Screwdriver or Drill Bit
For removing mounting screws once access is gained. A drill speeds things up, but use hand control near the end.
Adjustable Wrench
Provides leverage when unscrewing stiff threaded knobs. Always wrap jaws in cloth to protect finishes.
Penetrating Oil
Breaks down rust, paint, and old lubricants. Apply it early because it needs time to work.
Utility Knife
Cleans paint from seams, notches, and screw heads. A sharp blade prevents slipping and damage.
Frequently Asked Questions About Removing Door Knobs with Hidden Screws
How do I know if my door knob has hidden screws?
Hidden screws are indicated by the absence of visible fasteners on the knob or rose plate. Look for small holes in the shank, notches in the trim plate, or metal tabs on the side. Modern interior knobs for bathrooms and bedrooms typically use this design.
What tool removes a door knob with a hidden release pin?
A small flathead screwdriver, bent paperclip, or precision pick works best. Insert it into the small hole in the knob’s base while pulling the knob straight off the spindle.
Can I remove a door knob without special tools?
Yes. Most hidden-screw knobs can be removed with common household items. A flathead screwdriver, paperclip, and Phillips screwdriver handle the majority of cases. Antique threaded knobs may require an adjustable wrench.
How do I remove a door knob that’s painted shut?
Score around the rose plate with a utility knife to break the paint seal. Apply penetrating oil around the base and wait 10 minutes. Then try the standard release method again.
What do I do if the screw heads are stripped?
Place a rubber band over the stripped screw head before inserting the screwdriver. The rubber provides grip. For completely stripped screws, use a screw extractor bit.
Are hidden-screw knobs more difficult to replace?
They require more steps initially, but once you identify the mechanism, removal is straightforward. Replacement is similar to standard knobs once mounting screws are exposed.
Key Takeaways for Removing Door Knobs with Hidden Screws
Removing a door knob with hidden screws is a test of observation, not strength. The mechanism is always there, sometimes hidden by design and sometimes by decades of paint. Start with non-destructive methods: locate pins, press tabs, or remove plates. Save cutting for last. The five essential tools are a small flathead screwdriver, Phillips screwdriver, adjustable wrench, penetrating oil, and utility knife. Different brands use different mechanisms, so identify your brand like Kwikset, Dexter, or Brinks before attempting removal. With this guide, you’re equipped to handle any knob from modern privacy locks to century-old glass antiques. No more mystery. No more frustration. Just results.


