
You just unboxed your new Ring doorbell and want to see who’s at your door from anywhere in the world. The good news? Connecting your Ring doorbell to your iPhone takes just 10-15 minutes and puts real-time notifications right in your pocket. Whether you’re using a Ring Video Doorbell, Ring Pro, or Ring Elite model, this guide delivers the exact steps to get your system operational with your iPhone.
Millions of homeowners rely on Ring doorbells for security, but that first setup can feel overwhelming if you’ve never connected smart home devices before. Don’t worry—this step-by-step walkthrough eliminates confusion and gets you answering doorbells from your couch, office, or vacation spot. You’ll learn how to download the app, connect to Wi-Fi, position your camera perfectly, and customize notifications so you never miss a delivery or unexpected visitor.
Download and Install Ring App on iPhone
Open your iPhone’s App Store and search for “Ring – Always Home.” Look for the official app with the distinctive blue ring logo—be careful not to download imposter apps that might compromise your security. Tap the cloud download icon next to the app listing, and wait for the installation to complete. Most iPhones finish downloading the app in under 60 seconds when connected to Wi-Fi.
Before you begin, verify your iPhone runs iOS 14 or newer—older operating systems won’t support the latest Ring features. To check, go to Settings > General > Software Update. If an update appears, install it first for seamless Ring integration. When the app finishes downloading, tap Open and prepare to create your account or sign in if you already have Ring devices.
Create Your Ring Account Properly
Enter your primary email address—the one you’ll use for all Ring notifications and security alerts. Create a strong password with at least 12 characters, mixing uppercase letters, numbers, and symbols for maximum security. After submitting your details, Ring immediately sends a verification email. Check your inbox (and spam folder) for this message and tap the verification link within 24 hours.
Complete your profile by adding your full name, phone number, and physical address. This address information helps Ring optimize motion detection zones for your specific property layout. When prompted, enable Two-Step Verification using either SMS codes or an authenticator app—this critical security measure prevents unauthorized access to your camera feed.
Prepare Your Ring Doorbell for iPhone Connection

If you purchased a battery-powered model like the Ring Video Doorbell 3 or 4, charge it fully using the included orange USB cable before setup. The battery indicator LED turns solid blue when fully charged—a process that takes 5-10 hours for the first charge. Never attempt setup with less than 50% battery, as the process will fail if power drops below 20%.
For wired models like the Ring Pro or Elite, turn off power at your circuit breaker before removing your existing doorbell. Carefully connect the existing wires to your new Ring doorbell terminals following the color-coded diagram in your manual. If your home lacks doorbell wiring, purchase a plug-in transformer kit compatible with your Ring model.
Connect iPhone to Ring’s Temporary Setup Network
Open the Ring app and tap “Set Up a Device” on the home screen. Select “Doorbells” from the device categories, then choose your specific model from the list. The app displays a QR code—hold your iPhone steady 6-12 inches from your doorbell’s setup button until it beeps and flashes.
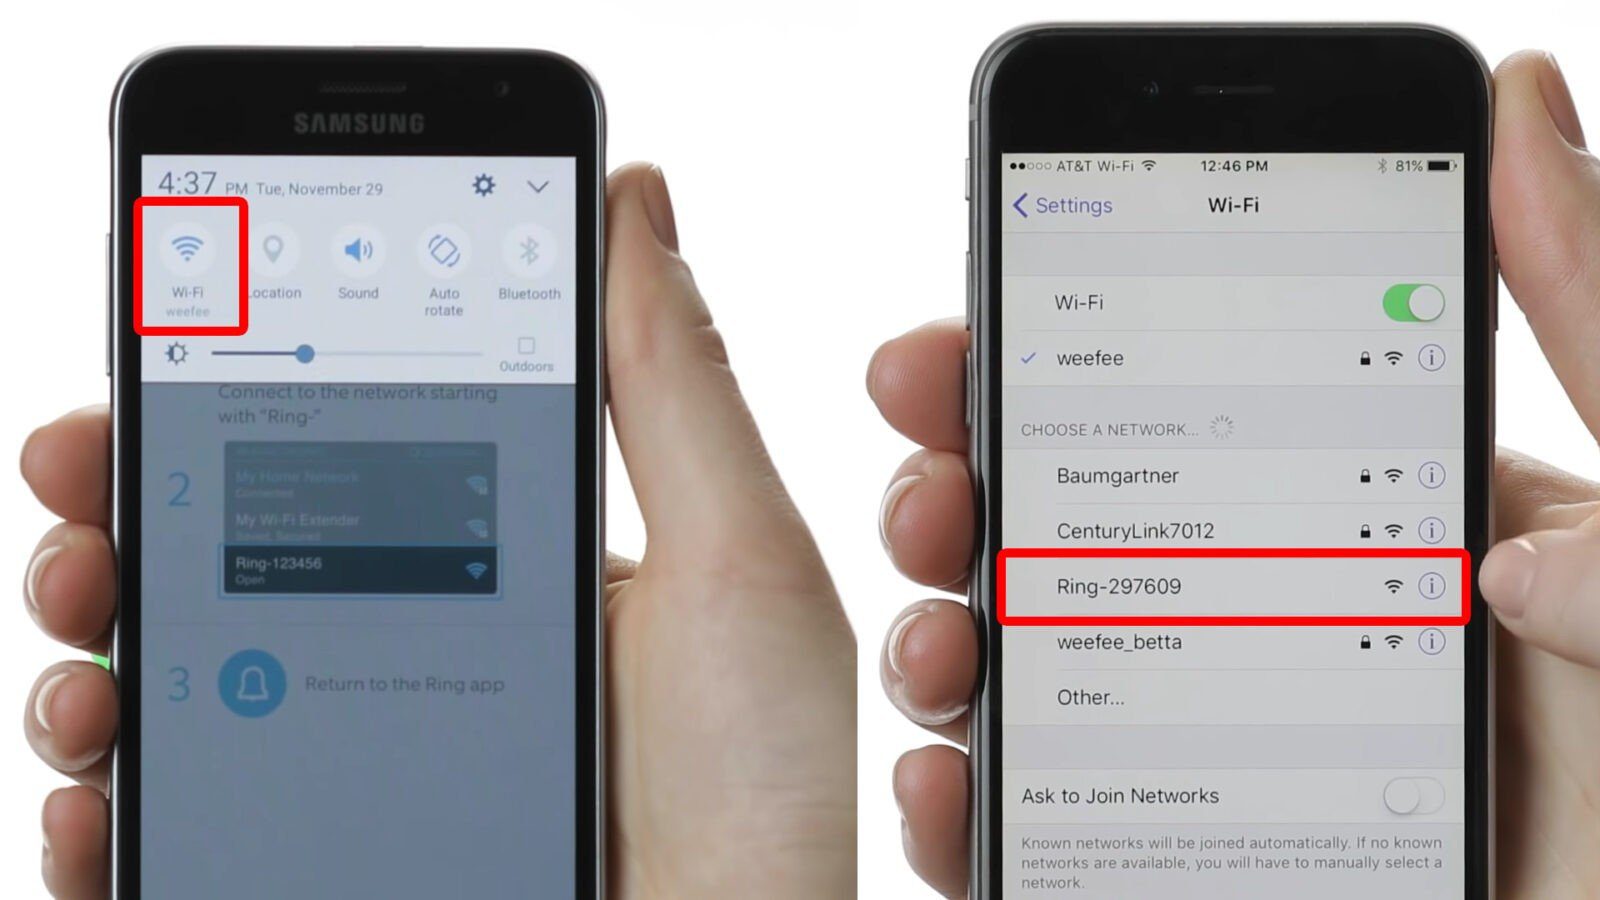
Your Ring doorbell creates a temporary Wi-Fi network named “Ring-Setup-XX.” Navigate to your iPhone’s Settings > Wi-Fi and select this network from the available options. Return to the Ring app immediately after connecting—your iPhone automatically detects this connection and proceeds to the next setup stage.
Troubleshooting tip: If “Ring-Setup” doesn’t appear after 30 seconds, press and hold your doorbell’s orange setup button for 10 seconds until it flashes rapidly, indicating it’s broadcasting the network again.
Link Ring Doorbell to Your Home Wi-Fi Network
The Ring app now scans for available home networks. Select your primary 2.4GHz Wi-Fi network from the list—Ring devices require 2.4GHz for initial setup, even if your router broadcasts 5GHz signals. Enter your Wi-Fi password carefully, noting that passwords are case-sensitive. For dual-band routers, look for network names ending in “-2.4G” or similar identifiers.
After entering your password, the app tests your connection strength. A solid green indicator means excellent signal—above -67 dBm. If you see yellow or red indicators, move your router closer to your doorbell’s location or install a Wi-Fi extender. The doorbell won’t complete setup with weak signals, so don’t skip this critical check.
Position Your Doorbell for Optimal iPhone Viewing
Hold your iPhone at eye level near your doorbell mounting location. Open the Ring app’s live view feature to see exactly what your camera captures. The ideal mounting height is 48 inches from the ground—this captures visitors’ faces clearly while showing their full body when they approach your door.
Walk through your entryway while watching the live preview on your iPhone. Adjust the doorbell angle until it captures your entire porch and walkway. For doors facing direct sunlight, attach the included sun shield or use the wedge kit to tilt the camera downward slightly. Test different positions by having someone approach your door from various angles.
Test All Ring Features Through Your iPhone
Press your doorbell button and watch your iPhone screen—you should receive an instant notification with live video within 3-5 seconds. Tap the notification to open the video feed and test two-way audio by speaking into your iPhone. Your voice should transmit clearly through the doorbell speaker.
Walk around your property while monitoring your iPhone to test motion detection zones. The app should send alerts when you enter designated motion areas. Have a friend approach your door while you’re inside to verify the full system works before finalizing installation. This real-world test catches issues before you complete setup.
Configure Motion Detection Zones for Fewer False Alerts
Tap Motion Settings in your Ring app and select Motion Zones. Drag the corners of the blue grid on your iPhone screen to cover only your porch and walkway—exclude areas like busy streets or neighbor’s yards. Start with Standard sensitivity, then adjust based on your environment: Lower for quiet neighborhoods, higher for areas with frequent visitors.
Enable Motion Scheduling to automatically disable alerts during specific hours—perfect for silencing notifications while you’re home or during neighborhood events. Create custom activity zones for package deliveries by drawing a smaller rectangle around your doorstep. These targeted zones reduce false alerts while ensuring you see important events.
Customize iPhone Notification Settings for Instant Alerts
Go to Settings > Notifications > Ring on your iPhone and enable Allow Notifications. Select Sounds and Banners for immediate doorbell alerts, and choose Immediate Delivery instead of Scheduled Summary for time-sensitive notifications.
Within the Ring app, navigate to Device Settings > Notifications and activate:
– Ring Alerts for doorbell presses
– Motion Alerts for movement detection
– Rich Notifications to see preview images
– Package Alerts if you frequently receive deliveries
Disable Motion Alerts during high-traffic times like school dismissal or garbage day to preserve battery life. Prioritize Ring Alerts as Critical Notifications in iPhone settings to ensure they bypass Do Not Disturb mode.
Share Doorbell Access with Family Members
Tap the three-line menu in the Ring app and select Shared Users. Enter family members’ email addresses—they’ll receive invitations to download the Ring app and access your doorbell feed. Each user gets full functionality: answering doorbells, viewing live feeds, and adjusting settings.
Set expiration dates for temporary users like house sitters or dog walkers through the Shared Users menu. Review access permissions monthly to ensure only trusted individuals can view your camera feed. Remove previous owners’ access immediately after moving into a new home with an existing Ring system.
Troubleshoot Common iPhone Connection Issues
Ring App Won’t Connect to Doorbell
Force close the Ring app by swiping it up from your iPhone’s app switcher, then reopen it. Toggle Wi-Fi off and on in iPhone Settings to refresh the connection. If problems persist, restart your doorbell by holding the orange setup button for 20 seconds until it beeps twice.
Delayed or Missing Notifications
Verify Ring has Background App Refresh enabled in iPhone Settings > General > Background App Refresh. Disable Low Power Mode during setup—it restricts background processes. Check that your iPhone’s date and time settings are automatic in Settings > General > Date & Time.
Poor Video Quality on iPhone
Move closer to your Wi-Fi router while viewing the feed—distance affects streaming quality. Reduce video resolution in Ring app settings if you have slow internet. Clear the Ring app cache by signing out and back in if video freezes frequently.
Optimize Battery Life for Wireless Doorbells
Adjust Motion Frequency to Regularly for most homes—this balances battery life with event detection. Set Snapshot Capture to every 5 minutes instead of the default 1 minute to significantly extend battery life between charges.
Check battery health weekly in the Ring app under Device Health > Battery. Recharge when levels drop below 30%—waiting until 20% risks missing events during charging. For extreme climates, bring battery-powered models indoors during temperature extremes to preserve battery health.
Secure Your Ring Account Against Unauthorized Access
Enable Two-Step Verification with an authenticator app instead of SMS for stronger security. Review Authorized Devices monthly in Ring app settings and remove old phones you no longer use. Create a unique, complex password that you don’t use for any other accounts.
Consider enabling End-to-End Encryption in Ring settings for maximum privacy, though this prevents sharing videos with law enforcement. Be cautious about which third-party services you connect to your Ring account—only authorize trusted applications that genuinely enhance your experience.
Your Ring doorbell now delivers instant notifications and crystal-clear video directly to your iPhone, putting home security in your pocket. Test your system weekly by pressing the doorbell and verifying notifications arrive promptly. For persistent issues, contact Ring support directly through the app’s Help section—they typically respond within 24 hours with personalized troubleshooting. With proper setup, your Ring doorbell becomes an indispensable part of your home security, keeping you connected to your front door no matter where life takes you.


