
Your ADT doorbell camera has been watching over your home, but now it’s time to remove it—maybe you’re upgrading to a newer model, moving to a new house, or switching security providers. One wrong move during removal could leave you with electrical hazards, damaged walls, or unexpected monitoring charges. Wired models require careful electrical work, while wireless units have hidden security features that trip up most DIYers.
This guide delivers precise, model-specific instructions to safely remove any ADT doorbell camera. You’ll discover the exact tools needed, electrical safety protocols that prevent shocks, and step-by-step procedures for both wired and wireless models. Learn how to avoid the top three mistakes that leave homeowners with costly repairs and how to properly disconnect from ADT services to stop billing.
Identify Your ADT Doorbell Camera Model Before Removal
Wired vs. Wireless Identification
Check for visible wires running into your wall—these indicate a wired model requiring electrical safety steps. Wireless models have discreet battery compartments typically accessed by sliding or unscrewing the back cover. Your ADT app also shows power source details under device settings.
ADT Model-Specific Features Checklist
ADT Blue Series: Look for a quick-release tab on the bottom edge that slides upward when pressed. No tools needed for camera detachment, only for the mounting bracket.
ADT Pulse Models: Feature hidden security screws under the bottom cover requiring a Torx screwdriver. These models have a locking tab that must be depressed during removal.
ADT Command Integration: Requires system disarming before removal—taking it down while armed triggers tamper alerts. Contains a separate backup battery needing disconnection after main battery removal.
Power Down Your ADT Doorbell Camera Properly

Cut Electrical Supply for Wired Models
Locate your home’s electrical panel and flip the breaker labeled “doorbell” or “front entry” to OFF. Press your doorbell button—no chime means power is successfully cut. Critical step: Use a voltage tester on the doorbell wires. If the tester lights up, you’ve selected the wrong breaker—recheck before proceeding.
Disable Wireless Models Completely
Slide open or unscrew the battery compartment cover. Pull the rechargeable battery pack straight out and wait 30 seconds for complete shutdown. This prevents accidental triggering during removal that could send false alerts to your ADT monitoring service.
Remove Wired ADT Doorbell Camera Body Safely
Detach Faceplate Without Damage
Most ADT wired models hide mounting screws under the bottom edge or behind a removable cover. Apply a utility knife around the camera edges to score through any paint seal first. Use a flathead screwdriver to gently pry the faceplate away before removing screws—this prevents paint chipping.
Document and Disconnect Wires Correctly
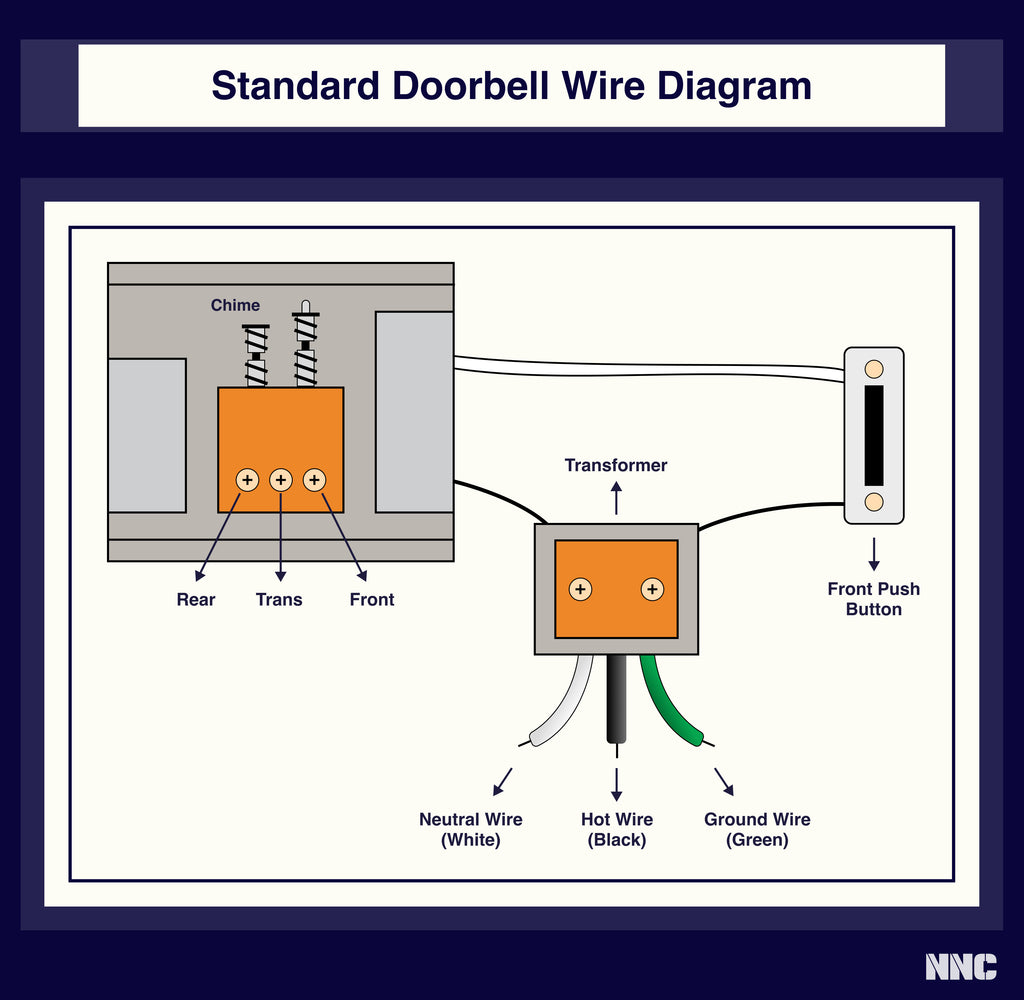
Take a photo of the wiring configuration before touching anything—red wires typically connect to positive terminals, white or black to negative. Loosen terminal screws with a Phillips-head screwdriver, then pull wires straight out (not sideways) to avoid damage. Immediately cap each exposed wire end with a wire nut for safety.
Wireless ADT Camera Removal Without Triggering Alerts
Battery Removal Protocol
Press the small release tab (if present) while sliding the back cover open. Remove the battery pack and wait 30 seconds—this allows the internal capacitor to discharge fully. Skipping this step often causes the camera to reboot during removal, triggering system alerts.
Mounting Bracket Disengagement
Most wireless ADT cameras use security screws hidden under the bottom edge. Remove these screws, then slide the camera upward and away from the mounting bracket. Some models require pressing a release tab while lifting—forceful prying damages the bracket.
Handle Model-Specific Removal Challenges
ADT Blue Series Quick-Release Technique
Press the small tab on the bottom edge while sliding the camera upward—no tools needed for camera detachment. The mounting bracket requires a Phillips-head screwdriver. Pro tip: Apply slight downward pressure while sliding up to prevent the tab from catching.
ADT Pulse Security Screw Solution
Remove the bottom cover to expose Torx security screws. Use a T10 Torx screwdriver (star-shaped) to extract these specialized screws. Depress the locking tab with a flathead screwdriver while lifting the camera—forcing it without releasing the tab cracks the housing.
Remove Mounting Hardware Without Wall Damage
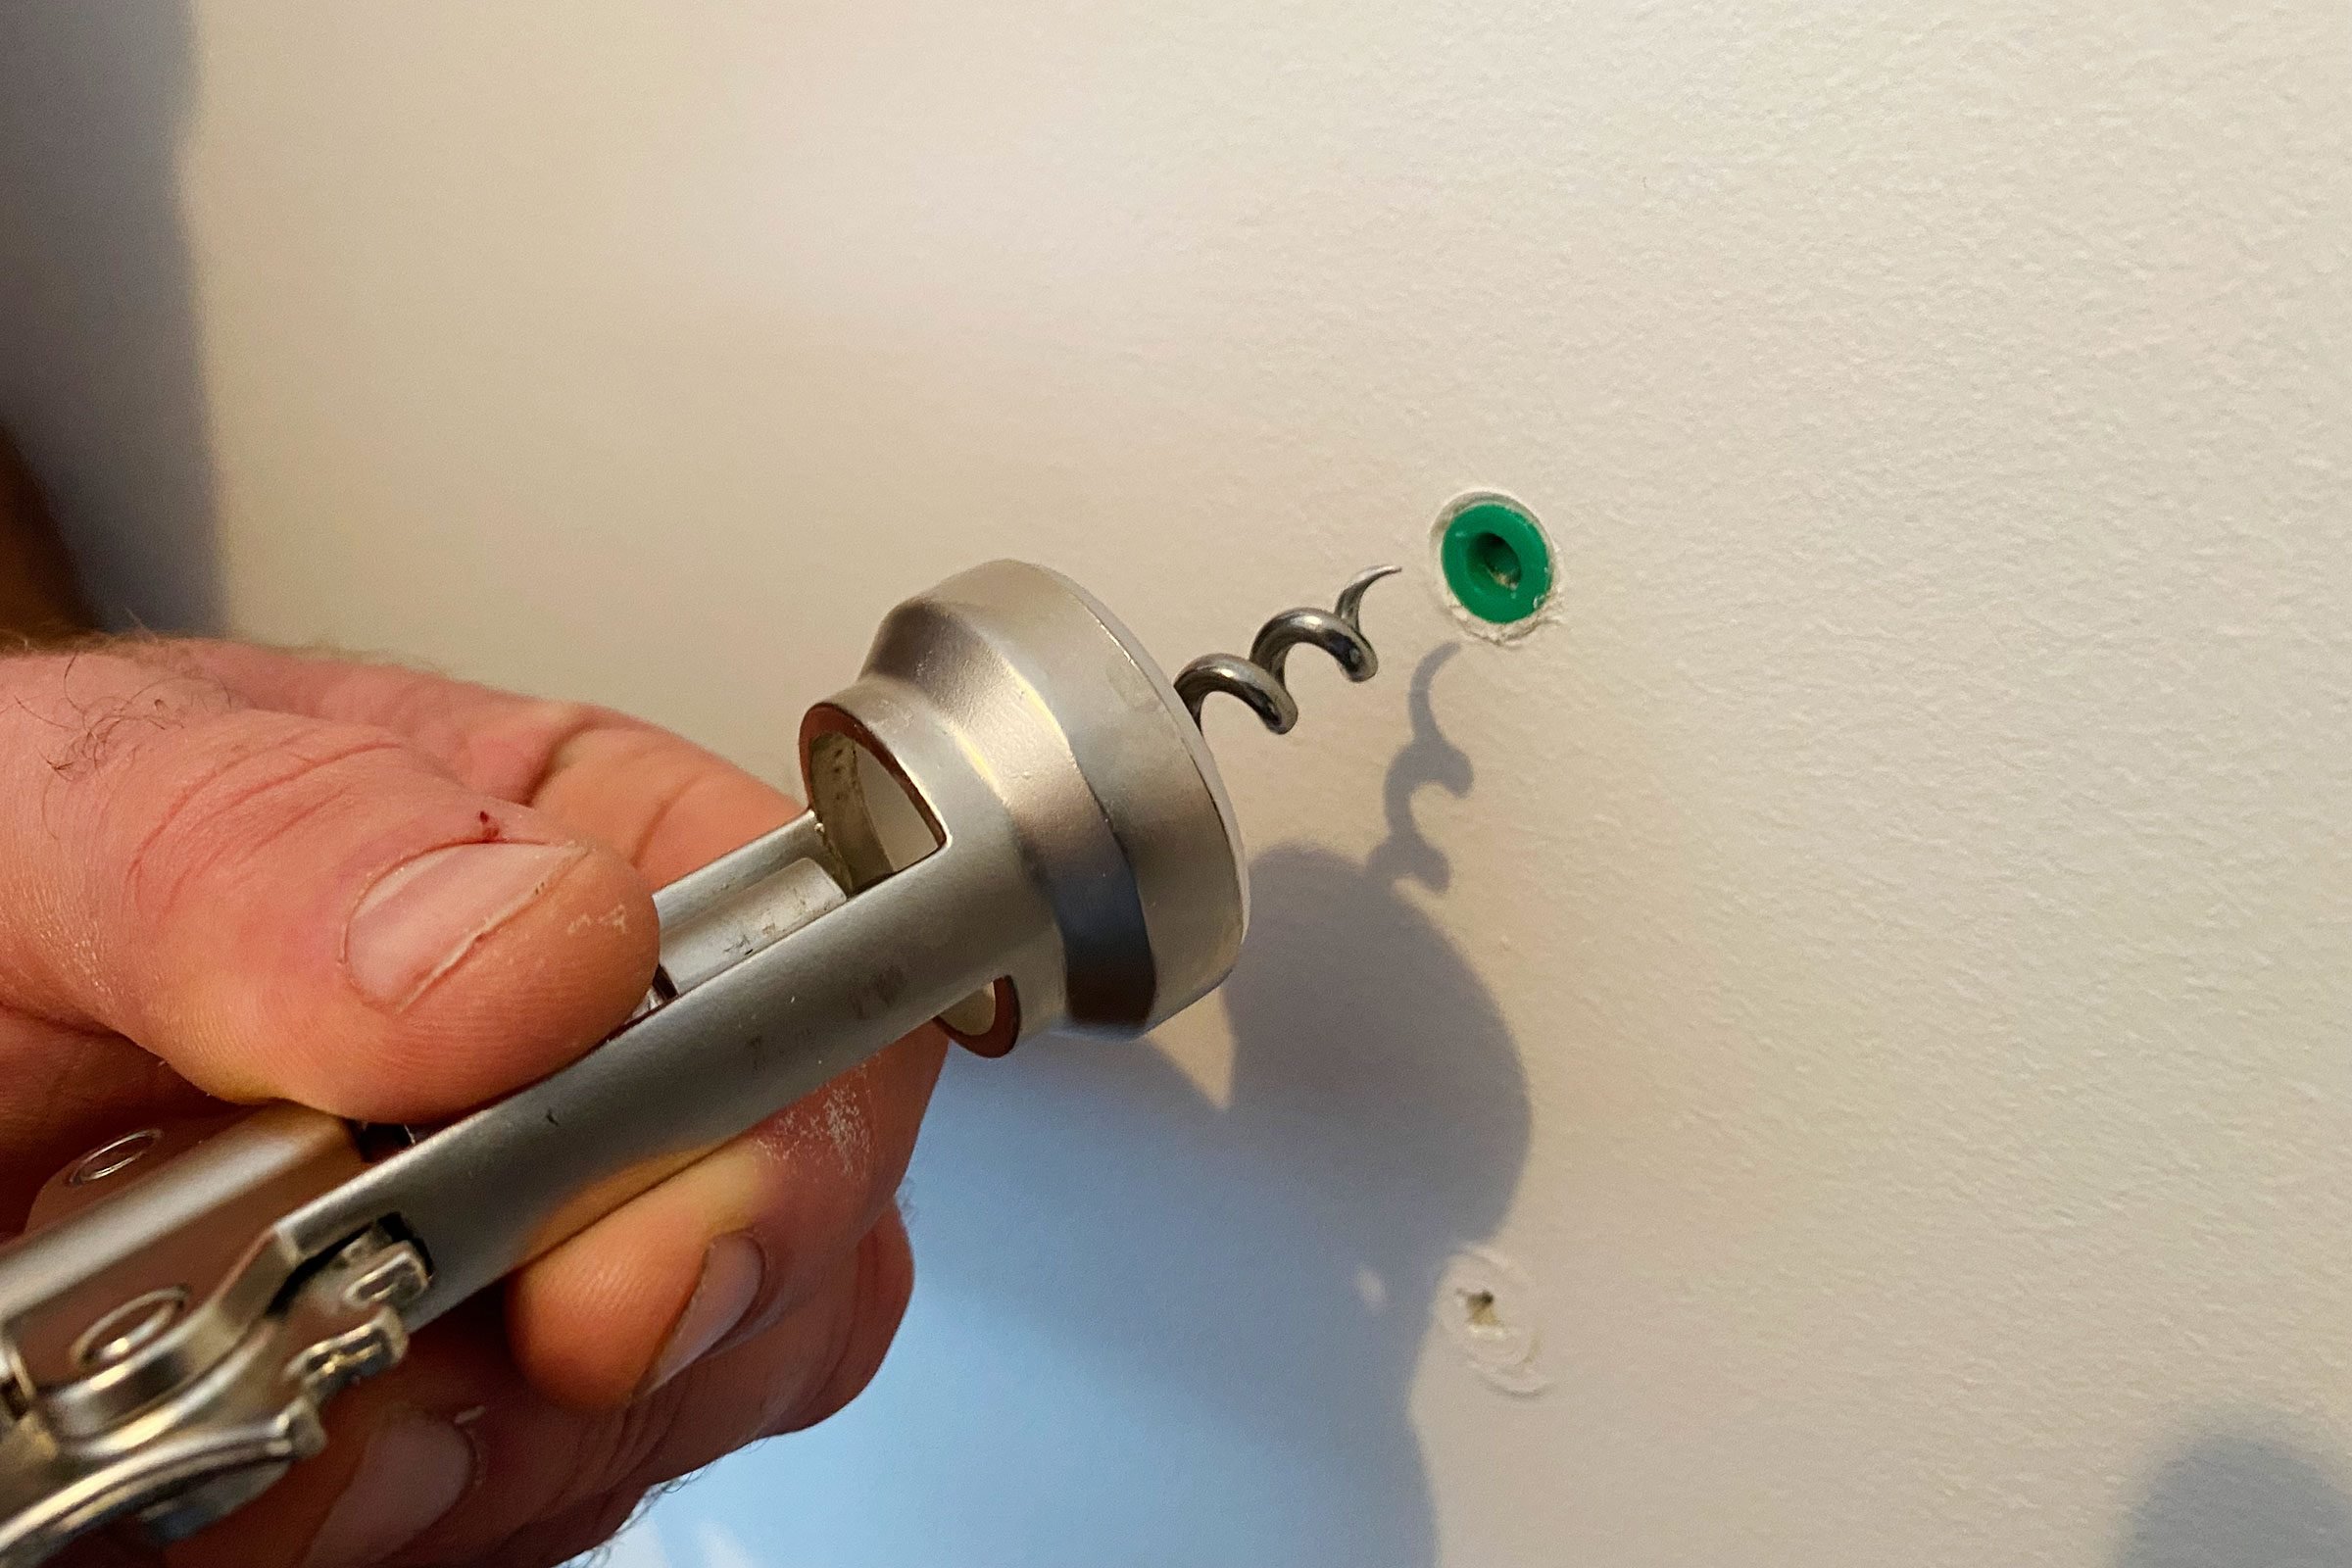
Extract Wall Anchors Properly
For plastic wall anchors, grip the anchor edge with needle-nose pliers and pull straight out. Never twist—this cracks wall surfaces. Metal anchors often require drilling them slightly deeper, then patching over with spackle. If anchors resist removal, cut mounting screws flush with a Dremel tool instead of forcing them out.
Repair Surface Like a Professional
Fill screw holes with spackle using a putty knife, slightly overfilling the hole. Let dry completely (2-4 hours), then sand smooth with 220-grit sandpaper. Most doorbell locations match leftover paint from your last project—stir thoroughly before applying with an angled brush for seamless blending.
Disconnect from ADT Services to Stop Billing
Complete App Removal Process
Open your ADT Security app, select the doorbell camera, and tap “Remove Device.” Confirm deletion when prompted. Critical step: Call ADT customer service immediately after physical removal—your monitoring contract continues billing until they confirm removal. Have your account number ready to expedite the process.
Data Security Protocol Before Disposal
Delete all recorded footage from ADT’s cloud storage through the app settings. Remove the camera from your home Wi-Fi network. If your model has an SD card, remove it and format using a computer—this erases personal data before disposal or resale.
Troubleshoot Common Removal Problems
Stuck or Stripped Screws Fix
Apply penetrating oil (WD-40) and wait 10 minutes. Place a rubber band between your screwdriver and the screw head for better grip. If the screw head strips completely, use needle-nose pliers to grip the edge and turn counterclockwise—applying steady pressure prevents further damage.
Paint-Sealed Camera Separation
Score around the camera edges with a utility knife to break the paint seal. Apply low heat from a hair dryer (medium setting) for 30 seconds to soften old paint. Use a plastic pry tool (not metal) to gently separate the camera from the wall—metal tools chip paint and gouge surfaces.
Prepare for Post-Removal Next Steps
Wall Patching Checklist
Fill holes with spackle, overfilling slightly. Let dry completely, then sand smooth. Prime the patched area before painting for better color match. Apply paint in thin layers, feathering edges outward—this prevents visible repair lines. Most touch-up projects need two coats for seamless blending.
Reinstallation Considerations
Measure the distance between existing screw holes before removing the mounting bracket. Many new doorbells use standard 1.5-inch spacing compatible with ADT mounts. Check wire condition and length—if installing another wired doorbell, test voltage first to ensure compatibility with your new device.
Proper Disposal and Recycling Process
Electronic Waste Protocol
Contact ADT about their device return program—some models qualify for free recycling. Never throw your ADT camera in regular trash. Local electronic waste centers accept doorbell cameras and recycle components responsibly. Most Best Buy and Staples locations have free recycling bins for small electronics.
Battery Disposal Safety
Remove rechargeable batteries and recycle them separately at hardware stores or battery retailers. Hold the reset button for 10+ seconds to wipe the device clean before disposal. Warning: Damaged lithium-ion batteries can ignite—wrap in non-conductive material before transport to recycling centers.
Removing your ADT doorbell camera properly protects your home’s integrity and your wallet. Following these precise steps prevents electrical hazards, stops unexpected monitoring charges, and leaves your wall ready for the next homeowner. Remember: when dealing with electrical components, taking an extra 15 minutes to verify safety saves hours of repair work later. Keep this guide handy if you ever need to reinstall or upgrade your home security system.


