
Can’t hear the doorbell from your bedroom or basement? You’re not alone—most wired doorbells barely reach 75-85 dBA, making them impossible to hear over TV, appliances, or even moderate household noise. The good news is you don’t need to settle for missed visitors or expensive rewiring projects.
This guide shows you exactly how to boost your doorbell’s volume using proven methods that work with your existing system. Whether you want a simple 10-minute fix or a whole-home solution, you’ll find practical steps to ensure you never miss another delivery or guest. Let’s solve your “how to make doorbell louder” problem once and for all.
Test Where Your Doorbell Falls Short
Map Your Home’s Sound Dead Zones
Walk through each room while someone presses the doorbell button repeatedly. Pay special attention to your bedroom, basement, home office, and any areas with background noise from TVs or appliances. Note exactly where the sound fades or becomes muffled—these are your priority zones for improvement. Most homeowners discover their doorbell can’t be heard in at least two key areas of their home.
Inspect for Simple Volume Blockers
Before spending money on upgrades, check for common issues that reduce volume. Dust buildup around tone bars can dampen vibration by 20-30%, while paint splatters or debris blocking the sound slots further muffle your chime. Remove your doorbell cover (usually just a twist or two screws) and examine the interior. Even small obstructions significantly reduce what you hear throughout your home, making this the fastest way to gain volume.
Clean Your Mechanical Doorbell for Instant Volume Gain
Revive Tone Bars for Clearer Sound
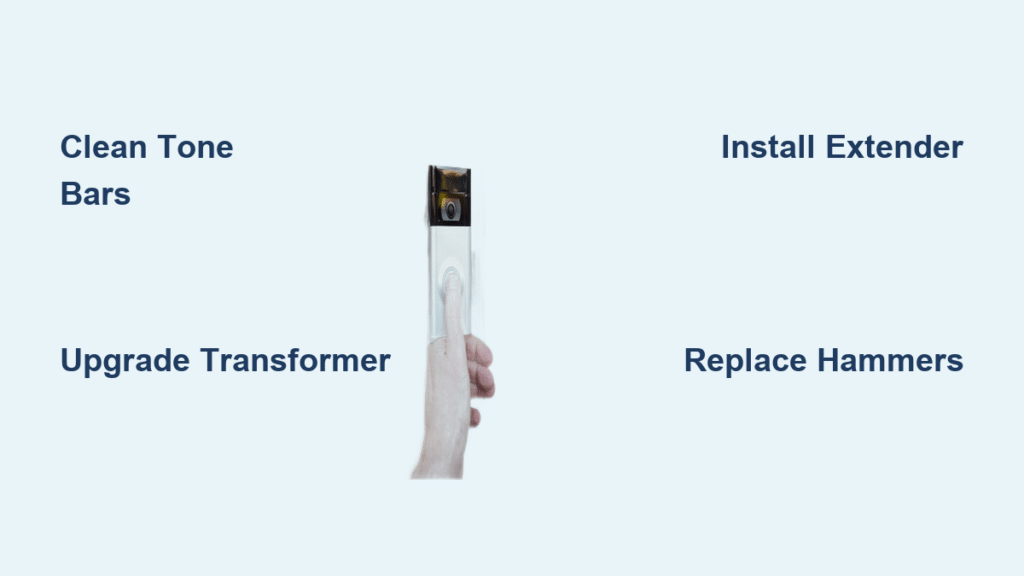
Inside your doorbell, you’ll find metal tone bars that create the “ding-dong” sound. Use a soft brush or dry cloth to gently remove dust and debris that dampen vibration. Check that the bars aren’t bent or misaligned—crooked bars fail to resonate properly, producing weak sound. Properly aligned bars vibrate freely, creating noticeably louder chimes without any modifications to your system.
Replace Worn Hammers for Maximum Impact
Examine the small hammers that strike the tone bars. If they’re cracked, dried out, or heavily worn, consider removing them completely. Damaged hammers absorb impact energy rather than transferring it to the tone bars, significantly reducing volume. Many homeowners report immediate improvement after replacing worn hammers with new ones from your doorbell manufacturer. This simple $5 fix often provides the volume boost you need without more complex solutions.
Clear All Sound Pathways
Check every slot and opening in your doorbell cover for obstructions. Remove any paint drips (common after home renovations), spider webs, or accumulated debris blocking these sound exit points. Even minor blockages can reduce volume by 25% or more. After clearing pathways, test your doorbell again—you might be surprised how much louder it sounds with nothing but a thorough cleaning.
Warning: Never oil the plungers or moving parts—manufacturers explicitly warn this damages the mechanism permanently and voids warranties.
Boost Power with a Transformer Upgrade

Select the Right Transformer Capacity
Standard doorbell transformers (10VA) often lack sufficient power for louder chimes. Upgrade to a 16VA or 24VA transformer to provide the extra juice your doorbell needs. Check your current transformer’s rating (usually printed on the unit) before purchasing a replacement. The higher VA rating delivers more power to your doorbell mechanism, allowing it to strike tone bars with greater force for increased volume.
Safely Replace Your Transformer
Turn off the circuit breaker feeding your doorbell system and verify power is off with a voltage tester. The transformer typically mounts in your garage, attic, or behind the doorbell. Unscrew the old transformer, disconnect wires, then mount and wire the new one following the same pattern. Use 16-gauge solid-core copper wire which handles 16-volt systems perfectly. This 20-minute DIY project costs $15-30 and provides a reliable volume increase without complicated installations.
Install a Doorbell Extender System for Whole-Home Coverage
Choose Between Sound-Triggered and Wire-Connected Extenders
Sound-triggered extenders mount a small microphone near your existing doorbell that sends wireless signals to receivers throughout your home when it detects the chime. Wire-connected extenders plug directly into your doorbell’s electrical circuit for more reliable operation without false alarms from TV sounds or similar tones. For most homeowners seeking how to make doorbell louder throughout their entire home, wire-connected systems provide the most dependable solution.
Connect Your Extender Transmitter Correctly
Wire-connected extenders include a small transmitter with three connection wires. Connect these to the “front,” “back/second,” and “terminal” screws on your existing doorbell. The transmitter’s lithium battery lasts 2-4 years before replacement and mounts inside or beside the doorbell cabinet. This simple wiring job requires no electrical expertise—just basic comfort with low-voltage connections—and takes about 15 minutes to complete.
Position Receivers for Maximum Effectiveness
Place plugin receivers in your bedroom, basement, garage, or home office where you typically miss the doorbell. For hearing-impaired family members, add strobe light receivers that flash when someone presses the doorbell. Most systems support mixing receiver types—combine plugin units for permanent locations with battery-operated units for flexible placement. Strategic receiver placement ensures you’ll hear the doorbell no matter where you are in your home.
Maximize Your Extender System’s Performance

Understand Real-World Range Limitations
Manufacturers claim 1,000-4,000 feet range, but this represents perfect laboratory conditions. Your actual range depends on building materials—brick walls, concrete floors, and metal studs reduce signal strength. Commercial-grade systems (ERA series) handle thick materials better than standard residential models (LRA series). Start with one receiver in your primary problem area, then add more as needed based on actual performance in your specific home layout.
Plan for Future System Expansion
Modern extender systems allow you to mix and match receiver types within the same model line. Begin with essential coverage, then add motion sensors, driveway monitors, or additional receivers later. Purchase one extra receiver during initial setup—it’s cheaper than buying individually later and ensures you’re prepared for changing needs. This modular approach lets you build comprehensive coverage over time without significant upfront investment.
Alternative Solutions for Extreme Volume Needs
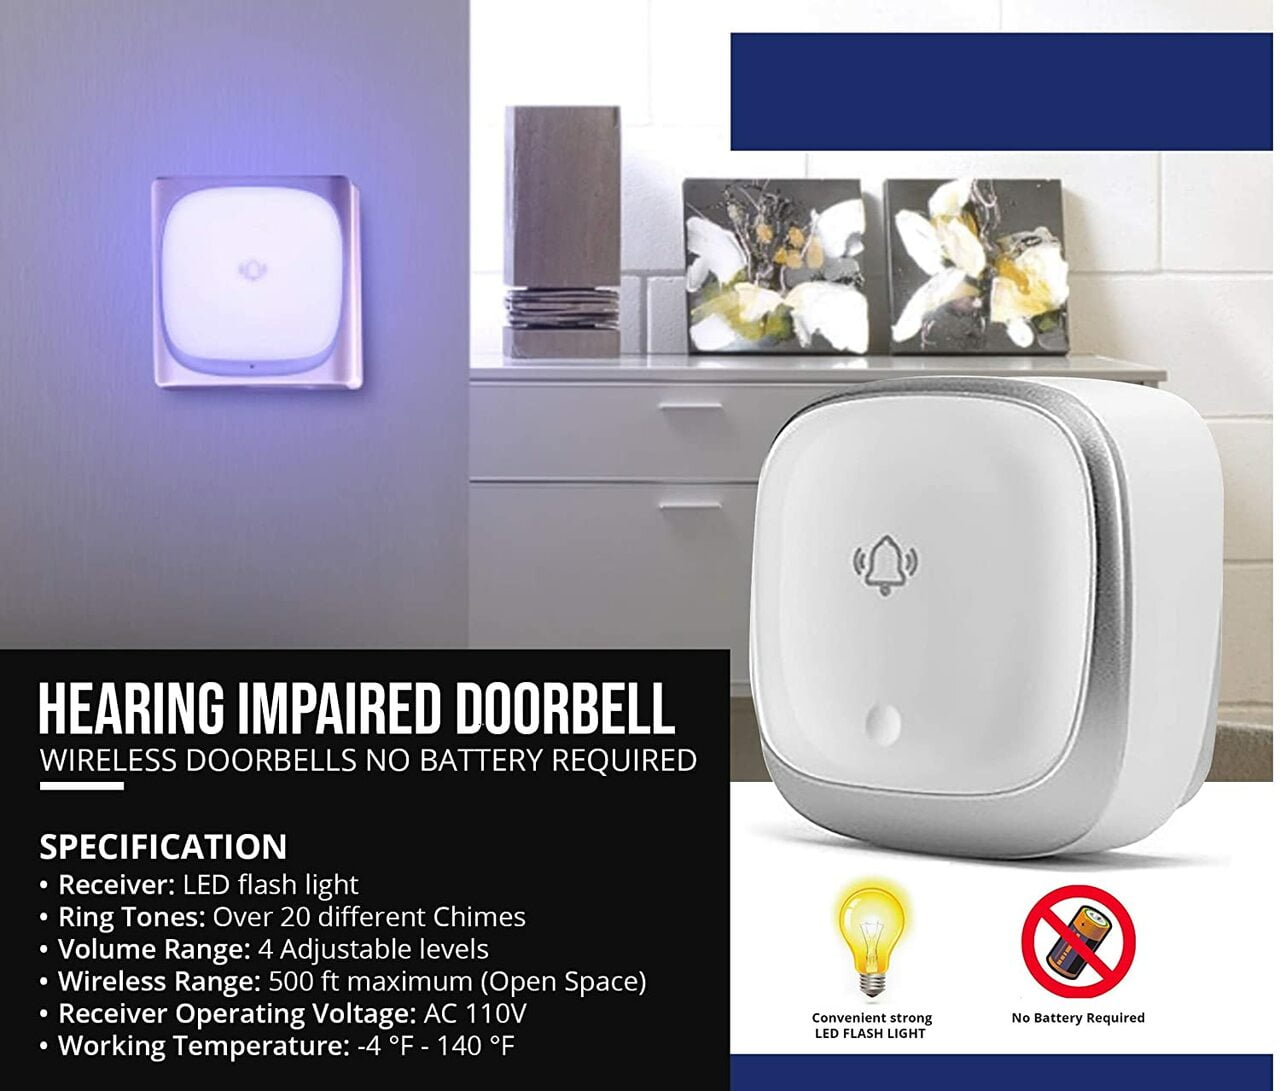
Install Hearing-Impaired Doorbell Systems
Specialized systems designed for hearing-impaired users offer extreme volume levels plus flashing lights and vibration alerts. These can integrate with your existing wired doorbell for comprehensive coverage without replacing your current setup. Look for models rated at 90+ dBA with multiple alert methods—these systems solve even the most challenging “how to make doorbell louder” situations for large homes or noisy environments.
Consider Wireless Doorbell Replacements
If your wired system is beyond help, wireless doorbell kits install in 30 minutes with no wiring. These operate independently from your existing system and offer adjustable volume levels typically much louder than mechanical chimes. Battery-powered models provide flexible placement options, though they require periodic battery changes. For renters or those avoiding electrical work, this represents the simplest path to a reliably loud doorbell.
Installation Safety and Compatibility Checks
Verify System Compatibility Before Buying
Standard wired extenders work only with traditional ding-dong doorbells. They won’t function with intercom systems or most video doorbells. Confirm your system uses a simple 2-wire doorbell push button before purchasing extenders. Checking compatibility prevents wasted money on incompatible equipment and ensures your “how to make doorbell louder” project succeeds on the first attempt.
Know When to Call a Professional
Transformer replacement requires electrical safety knowledge but remains manageable for most DIYers. If you’re not comfortable working with electrical connections, hire an electrician for the transformer upgrade while handling the extender installation yourself. Never work on doorbell components without turning off power at the breaker first, even though doorbell voltage is low—safety should always come first.
Cost-Effective Solutions for Every Budget
Match Your Solution to Your Budget
- Basic cleaning: $0-5 for brushes/cloths (immediate 10-20% volume gain)
- Transformer upgrade: $15-30 for higher VA unit (modest volume increase)
- Complete extender system: $50-150 depending on range and features (whole-home coverage)
- Commercial-grade systems: $200+ for maximum coverage in large properties
Where to Buy Quality Components
Home centers carry basic transformers and simple chimes, while specialty retailers offer better selection for extender systems. Online retailers provide access to commercial-grade systems with superior range through sites like 1800doorbell.com. Stick within product lines when expanding systems later to ensure compatibility and avoid frustration.
A louder doorbell doesn’t require expensive rewiring or complex installation. Start with simple cleaning to restore lost volume, then choose between a transformer upgrade for modest improvement or an extender system for whole-home coverage. Most homeowners solve their “how to make doorbell louder” problem for under $100 and an afternoon of work. Implement a monthly maintenance routine to prevent dust buildup, and consider adding one extra receiver during initial setup for future needs. With these proven methods, you’ll never miss another visitor or delivery again.


