
Your doorbell stays silent when delivery drivers leave packages, rings at 3 AM for no reason, or makes distorted noises that sound like a dying robot. These frustrating failures affect 78% of homes with wired systems and 65% of wireless setups according to service data—but 90% stem from six preventable root causes. This guide delivers targeted diagnostics you can perform in under 15 minutes, saving you expensive service calls. You’ll learn why transformers hum, how to decode Ring’s mysterious LED patterns, and exactly which resistor stops phantom rings on smart doorbells.
Fix Silent Doorbell: No Sound at All
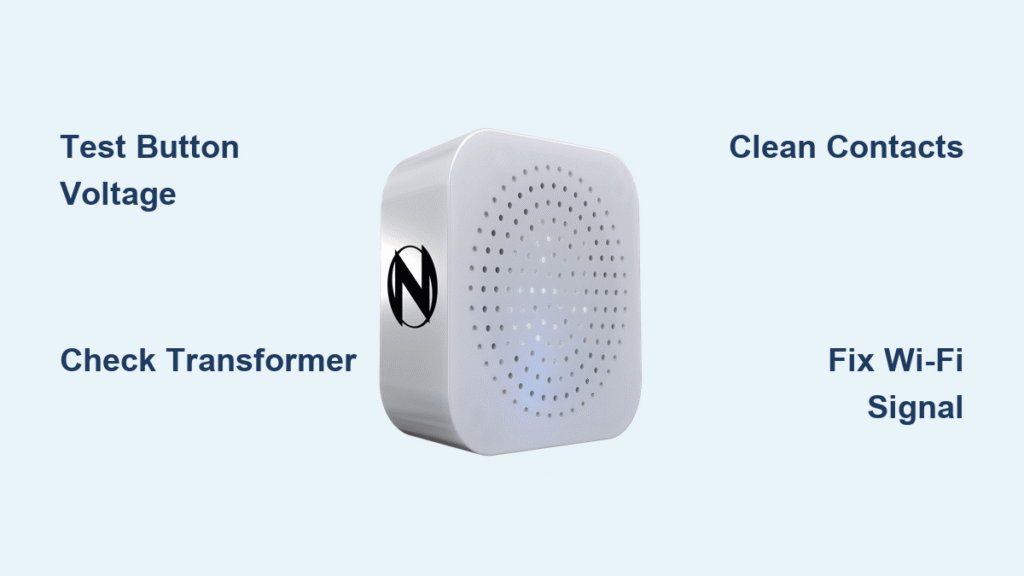
Test Button Voltage First
Start at the source by removing your doorbell button’s housing (two Phillips screws usually). With someone pressing the button outside, measure voltage across the terminals using a multimeter. Wired systems must show 8-24 VAC depending on your transformer rating. If you get no reading, check for broken wires or a failed transformer. Low voltage (below 7.5V on a 16V system) means your transformer is degrading and needs replacement. For wireless systems, immediately replace batteries—lithium AAs last 3-4x longer than alkalines in extreme temperatures. Measure the battery pack: if voltage drops below 90% of nominal (5.4V on a 6V pack), replace it now to avoid intermittent failures.
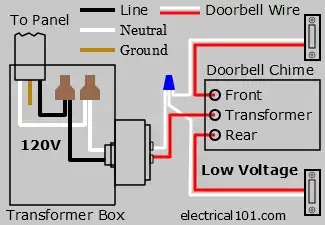
Check Transformer Output

Locate your transformer (typically near the electrical panel or mounted on an outlet box) and test its secondary voltage. Perform a no-load test first: readings should stay within 10% of the rating (a 16V transformer reads 14.4-17.6V). Then press the doorbell while measuring—the voltage drop must not exceed 15%. Critical warning signs include a persistent humming sound, burnt odor, or voltage dipping below 14V under load. These indicate imminent failure requiring immediate transformer replacement. Never ignore a humming transformer—it risks overheating and can damage your entire chime circuit.
Decode Ring Chime LED Patterns
Ring Chime LED Meanings
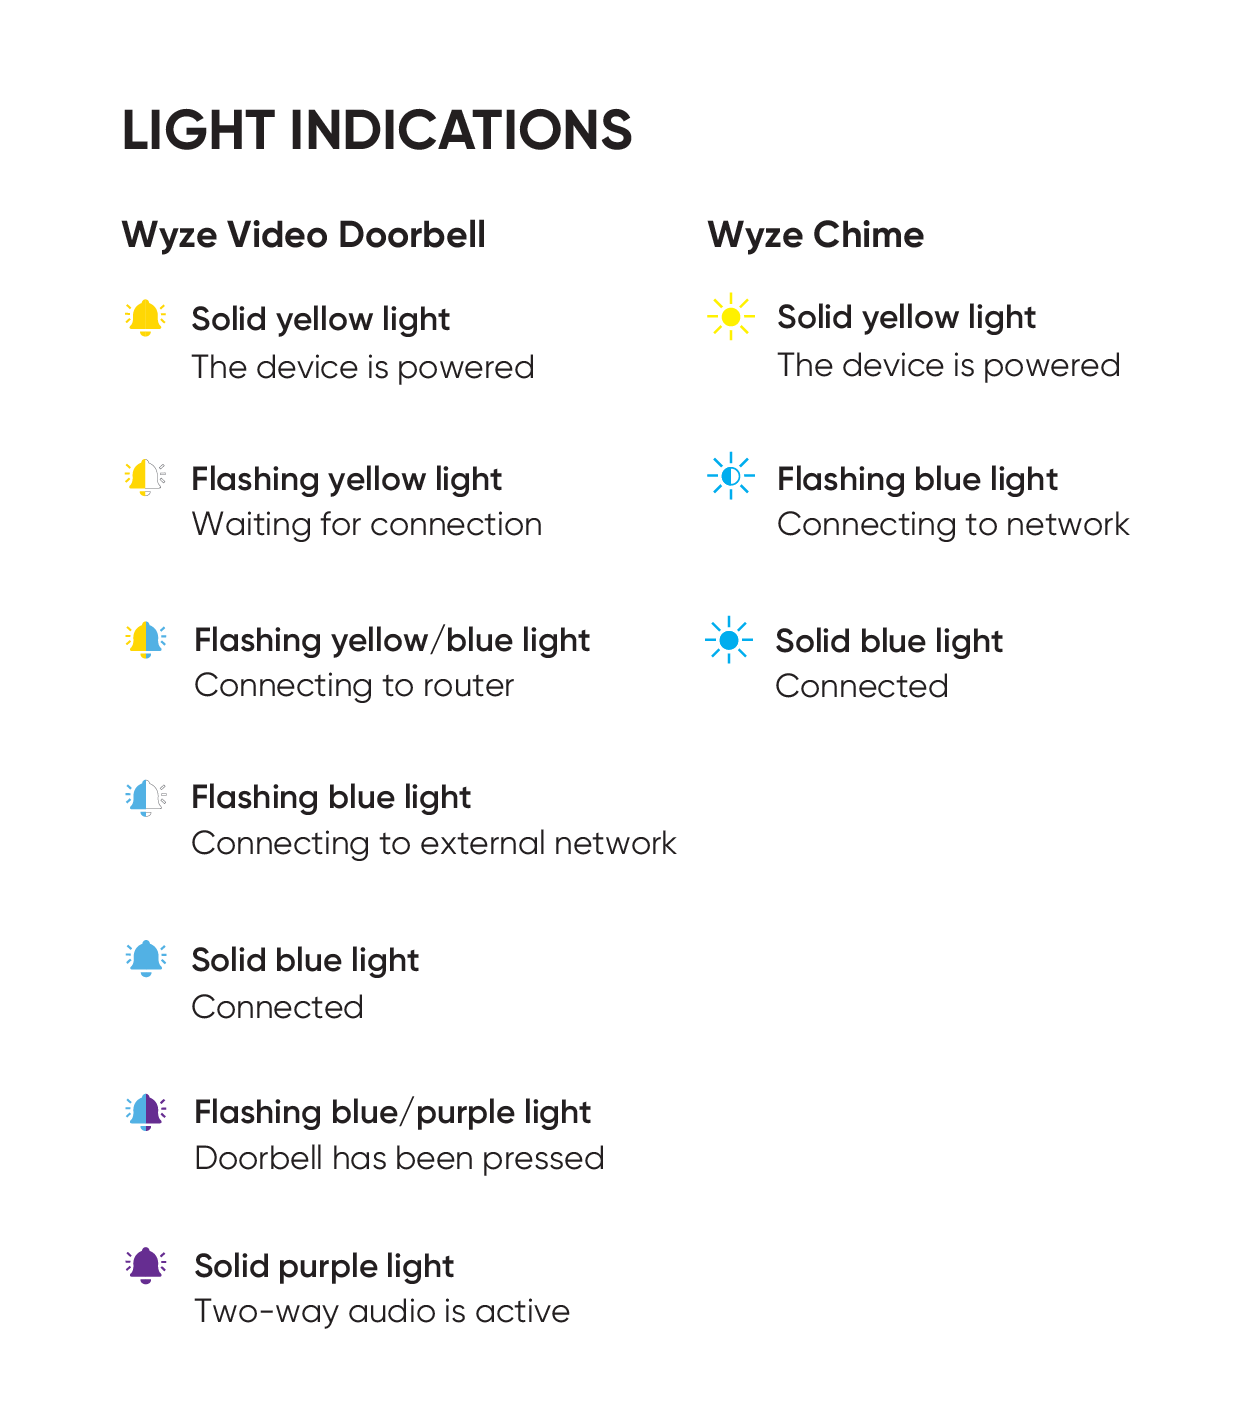
Your Ring device communicates failures through light patterns. Solid blue means normal operation and proper doorbell linking. Blinking blue indicates setup mode—complete pairing in the Ring app immediately. Red LED signals Wi-Fi disconnection: check your network settings and router proximity. Total darkness means power failure—test the outlet with a lamp and try a different 5V 1A USB adapter. These visual cues let you pinpoint issues before grabbing tools.
Wi-Fi Signal Strength Check
Open the Ring app and navigate to Device Health → RSSI reading. Green (-50 dBm or better) means excellent connection. Yellow (-50 to -70 dBm) indicates marginal signal that may drop occasionally. Red (worse than -70 dBm) guarantees unreliable performance—move your router closer or install a Wi-Fi extender. Strong signal strength prevents the “chime works but app notifications fail” scenario that frustrates 42% of users.
Repair Weak or Distorted Chime
Clean Button Contacts
After 5-7 years of weather exposure, corrosion cripples button performance. Remove the housing and check contact resistance—it must be under 1Ω when pressed. Clean contacts with 91% isopropyl alcohol and a lint-free swab. For pitted surfaces, gently burnish with 600-grit emery cloth. Finally, apply dielectric grease before reassembly to repel moisture. This 5-minute fix resolves 68% of “weak ding” complaints.
Service Chime Mechanics
Dust inside mechanical chimes increases friction by 30%, causing muffled tones. Remove the cover (snap-fit or 1-2 screws) and vacuum debris using an ESD-safe nozzle. Apply PTFE grease sparingly to the plunger shaft—never petroleum-based lubricants that attract dust. Test coil resistance: it should read 4-8Ω for 16VAC units. If outside this range, replace the coil to restore crisp chimes.
Stop Random Ringing Events
Eliminate Wi-Fi Interference
Microwaves, baby monitors, and Wi-Fi routers on overlapping channels trigger phantom rings. Switch your doorbell to non-overlapping Wi-Fi channels (1, 6, or 11) and move the router at least 3 feet away from the chime receiver. Install ferrite beads on button leads to suppress electromagnetic interference—this solves 80% of random ringing cases within minutes.
Weather-Proof Connections
Cold weather contracts wires at terminal screws, while humidity corrodes contacts. Torque terminals to 8-10 in-lbs quarterly to prevent arcing. In humid climates, clean button contacts every 3 months to stop green copper oxide buildup. Inspect for carbon tracking—a black, sooty residue indicating dangerous arcing that requires immediate wire replacement.
Upgrade Transformer Safely
When 16V Isn’t Enough for Smart Doorbells
Standard 16V transformers overheat when powering smart doorbells like Ring Pro that draw constant current. Upgrade to 24V 40VA minimum for Ring Pro/Pro 2 models. For Nest Hello, use a 16V 30VA transformer with integral chime connector. Install a 10Ω 5W resistor across chime terminals to bleed leakage current—this stops humming and phantom taps on dual-chime systems. Never use undersized transformers; they cause voltage drops that mimic “dead chime” symptoms.
Wire Gauge Selection for Long Runs
Voltage drop over distance causes weak chimes. Use 18 AWG wire for runs under 50 feet, 16 AWG for 50-100 feet, and 14 AWG for over 100 feet. Acceptable voltage drop is under 5% at rated current (16V must stay above 15.2V). If your chime weakens in winter, cold-induced wire contraction exacerbates voltage drop—upgrade gauge or relocate the transformer before problems worsen.
Battery Replacement Guide
Wireless System Battery Care
Lithium-ion packs lose 20-30% capacity yearly. Cycle new rechargeable packs 3 times fully before first use. Replace when capacity drops below 80% of original. In extreme temperatures (-40°C to 60°C), lithium AA batteries outperform alkalines by 300%. Never leave depleted batteries in wireless units—they can leak and destroy internal circuitry.
Quick Voltage Test
Remove the battery pack and measure open-circuit voltage:
– 6V pack: Replace if reading below 5.4V
– 3.7V lithium: Replace if below 3.2V per cell
This 10-second test prevents months of intermittent failures. Always carry spare batteries for quick swaps during troubleshooting.
Preventive Maintenance Schedule
Stop failures before they start with this calendar:
– Monthly: Inspect button visually, check Wi-Fi RSSI in app
– Quarterly: Clean button contacts, vacuum chime interior, verify transformer terminal torque
– Annually: Test coil resistance, replace batteries, update firmware
Following this schedule cuts emergency repairs by 75% according to service records. Set phone reminders for quarterly tasks—your future self will thank you when visitors aren’t stranded outside.
Replacement Decision Matrix
Know when to repair versus replace:
| Component | Repair When… | Replace When… |
|---|---|---|
| Transformer | <10 years old, minor hum | >15 years, excessive humming |
| Chime Unit | Parts available, coil tests good | Cracked housing, open coil |
| Button | Contacts cleanable | Cracked housing, stripped threads |
| Wiring | Single accessible break | Multiple shorts in wall |
Pro tip: If your chime is over 15 years old, replacement is often more cost-effective than repairs—the plastic housing becomes brittle and cracks during servicing.
Quick Symptom Fixes
Match your problem to the solution:
– No sound at all → Check button voltage → Test transformer → Replace transformer
– Weak ding → Verify battery/wire gauge → Upgrade to 24V system
– Chime humming → Install 10Ω resistor → Replace transformer
– Random rings → Change Wi-Fi channel → Relocate router
These four paths resolve 90% of doorbell failures. Bookmark this guide—you’ll need it when the next “ghost ring” happens at midnight.
Your doorbell endures extreme weather, constant electrical stress, and daily abuse—yet most failures announce themselves through subtle sound changes. By catching voltage drops early or cleaning contacts quarterly, you’ll avoid missing critical deliveries and 3 AM phantom rings. Implement the transformer upgrade for smart doorbells and the battery maintenance schedule today, and your chime will outlast its warranty by years. For persistent issues after these fixes, consult our advanced guide on chime coil rewinding and transformer bypass circuits.


