

Installing window casing transforms a plain opening into a polished architectural feature. Whether you’re renovating, building new, or upgrading old trim, knowing how to case a window properly ensures clean lines, tight joints, and a professional finish. This guide walks you through both basic and advanced methods, covering tools, components, measurements, and expert techniques.
From selecting materials to final sanding and finishing, every step matters. You’ll learn how to install casing with precision, avoid common mistakes, and achieve results that look like they were done by a seasoned pro.
Essential Tools and Materials
Before cutting any wood, gather the right tools and supplies. Using proper equipment ensures accuracy, safety, and efficiency.
Required Tools
- Miter saw for precise 45-degree and square cuts
- Table saw for ripping jamb extensions and cutting rabbets in stools
- Jigsaw or coping saw for notching stool ends and shaping aprons
- Pneumatic nail gun and air compressor for fast, clean fastening
- Hammer and nail set for hand nailing and recessing nail heads
- Tape measure and sharp pencil for accurate marking
- Carpenter’s square to ensure perpendicular lines
- Straightedge and compass for scribing reveal lines
- Utility knife and pry bar for removing old trim safely
- Sandpaper (120-grit) and tack rag to prep surfaces for paint
- Wood plane for trimming jambs or corner blocks
- Safety goggles to protect your eyes during cutting
Key Materials
- Casing stock: pre-primed pine, poplar, or MDF (¾” x 2½” to 3″ wide)
- Stool and apron lumber matching the casing species
- Jamb extensions (1x stock) if jambs are recessed behind the wall
- Corner blocks (optional) for traditional decorative styles
- Fasteners: 18-gauge 1½” nails, 4d and 6d finish nails, 8d nails
- Adhesives: wood glue, paintable caulk, and wood putty
- Finishes: primer, paint, or stain and varnish
Understand Window Casing Components
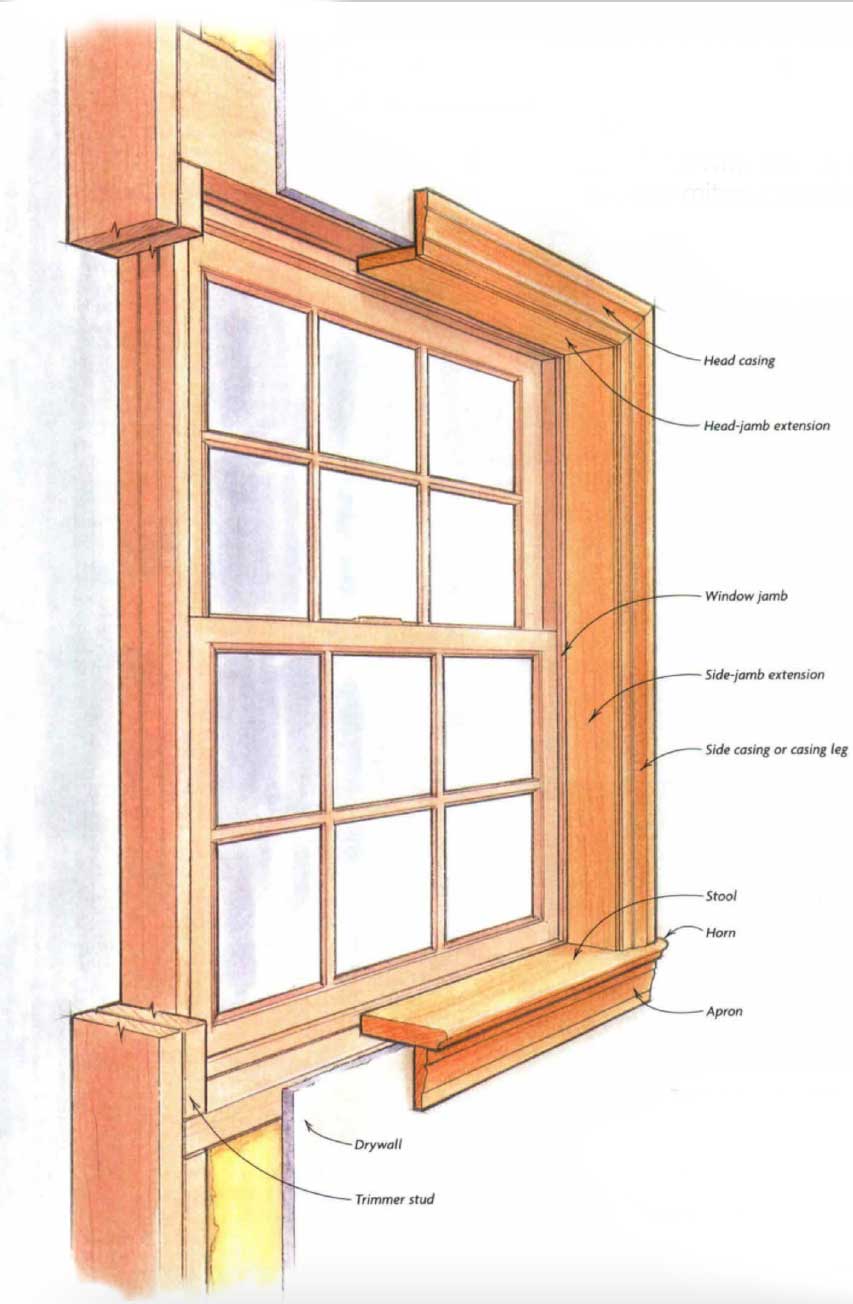
Knowing the parts of a window trim system helps you plan and execute installation correctly.
Casing
The vertical and horizontal trim pieces that frame the window. They hide the gap between the jamb and wall and range from simple flat boards to ornate profiles.
Reveal
A deliberate 1/8″ to 1/4″ gap between the window jamb and the inner edge of the casing. This gap creates shadow lines for depth and allows for natural wood movement.
Pro Tip: Never install casing flush to the jamb. It looks amateurish and tends to crack over time.
Stool
The interior sill that extends past the side casings (typically 1″ on each side). It is often confused with the exterior sill but is purely decorative indoors.
Apron
A narrow trim piece installed beneath the stool. It adds elegance, especially in historic homes.
Corner Blocks
Small decorative blocks at the top corners where side and head casings meet. They hide miter imperfections and add traditional charm.
Jamb
The structural frame of the window (top, left, and right sides). Your casing attaches directly to it.
Horn
The end of the side casing that overhangs and sits on top of the stool. It is reinforced with nails driven up through the horn into the stool.
Remove Old Casing Safely
Start with a clean work area by removing existing trim without damaging drywall.
Score the Paint Line
- Run a utility knife along the joint between the old trim and wall.
- Cut through paint and slightly into the drywall to prevent tearing.
- Go around all sides of the window.
Pry Off Trim Carefully
- Slide a pry bar behind the casing near a corner.
- Gently lever the trim away from the wall.
- Tap the pry bar with a hammer if stuck, but never force it.
- Work slowly to avoid gouging drywall or chipping the jamb.
Warning: If nails are too close together, use a reciprocating saw to cut them from behind.
Mark and Set the Reveal Line
Accurate reveal lines ensure consistent, professional-looking trim.
Choose Reveal Width
- Standard: 1/8″ to 1/4″
- Match other windows in the house for uniformity
Mark All Three Sides
- Measure from the inside edge of the jamb outward to your chosen reveal distance.
- Make a mark on the wall at top, left, and right.
- Use a straightedge to draw a continuous line parallel to each jamb edge.
Pro Tip: Use a compass set to 1/4″ to scribe reveal lines, especially on uneven walls.
Install Basic Wrap-Around Casing
Ideal for beginners. This style uses only four pieces: two sides, one head, and one bottom.
Cut and Fit the Head Casing
- Place trim on a workbench and cut a 45° miter on one end.
- Hold it at the top of the window, aligning the inner edge with the reveal line.
- Mark where the opposite end meets the other side’s reveal line.
- Cut the second 45° miter to match.
- Test fit and shave with a plane or sandpaper if needed.
Nail the Top Piece
- Apply wood glue to the back where it contacts the jamb.
- Position and check alignment.
- Nail every 6 inches using 18-gauge 1½” nails.
Install Side Casings
- Cut 45° miters on the top ends of side pieces.
- Align the inner edge with the vertical reveal line.
- Mate the mitered top to the head casing.
- Glue the joint before nailing to prevent gaps later.
- Nail into jamb and wall every 6 inches.
- Wipe excess glue immediately.
Pro Tip: Clamp pieces temporarily while glue dries for stronger joints.
Add Bottom Casing (Optional)
- Measure between the bottom ends of the side casings.
- Cut with 45° miters on both ends.
- Glue and nail into place, matching the miters tightly.
Advanced Installation: Add Stool, Apron & Corner Blocks

For traditional or high-end finishes, follow this layered approach.
Prepare the Jambs First
- Check if jambs are flush with the wall using a straightedge.
- If protruding: plane them down.
- If recessed: attach jamb extensions (ripped 1x stock) using 1½” nails.
- Plane extensions flush with the wall.
Pro Tip: Scribe a 1/4″ reveal line on all jambs using a compass for accuracy.
Cut and Install the Stool
The stool forms the base of the advanced assembly.
Determine Length
- Hold side casing against the wall aligned with reveal lines.
- Mark the outside edge on both sides.
- Measure between marks and add 2″ (1″ overhang per side).
- Cut stool to length.
Rabbet the Ends
- Place stool upside down on the sill.
- Mark where the jamb meets the end.
- Draw a line from the back edge to the jamb mark.
- Use a table saw to remove the waste and create a notch that fits over the sill trim.
Pro Tip: The rabbet depth should equal the thickness of the existing sill trim.
Notch for Jambs and Wall
- Mark 1″ in from each end for the overhang.
- Place stool in opening and mark where it hits the jambs.
- Scribe fit lines using a compass to account for out-of-plumb walls.
- Cut notches with a jigsaw and fine-tune with a chisel or sandpaper.
Secure the Stool
- Apply wood glue to the sill.
- Set stool in place.
- Facenail through the front with four 1½” nails.
Install Side Casing Over Stool
Now attach the vertical trim.
Cut and Position
- Cut a square end on side casing.
- Stand it on the stool.
- Mark where the inner edge meets the head jamb reveal line.
- Cut square across.
Glue and Nail
- Apply glue to the back of the casing and bottom end.
- Align with reveal line.
- Nail into jamb (4d nails) and wall (8d nails), every 6″.
- Wipe excess glue.
Fasten the Horn
- Drive two 6d nails up through the bottom of the horn into the stool.
- Drill pilot holes if hand-nailing to prevent splitting.
Pro Tip: Elevate the back of the casing 1/8″ on scrap wood when cutting miters. This creates a slight bevel that seals better against the wall.
Attach Head Casing
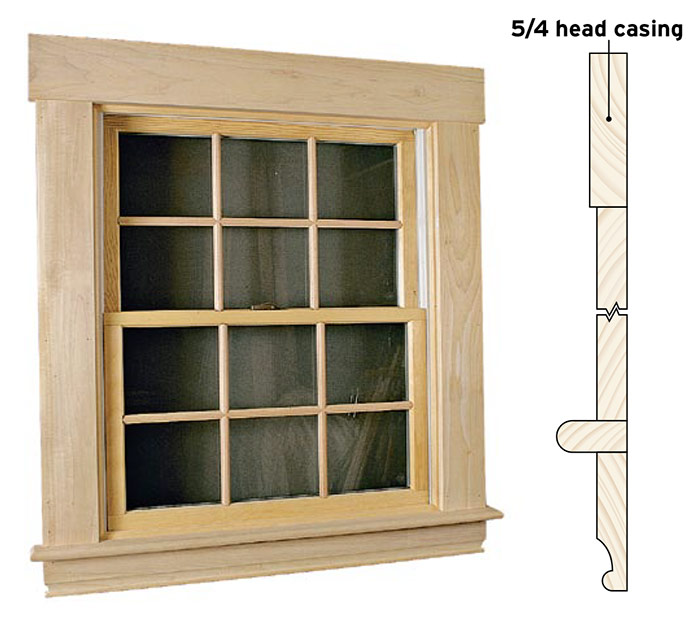
In advanced setups, the head casing butts against the side casings without a miter.
Cut Square Ends
- Hold head casing across the top.
- Mark where it meets the inside face of each side casing.
- Cut square ends with a miter saw.
Install with Glue
- Apply glue to back and ends.
- Press into place.
- Nail to head jamb every 6 inches.
Avoid: Mitering head casing unless using corner blocks.
Install Corner Blocks (Optional)
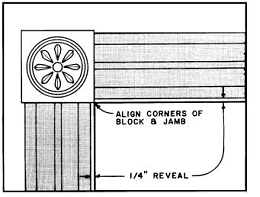
Adds traditional elegance and hides joint gaps.
Test Fit
- Place block at top corner between side and head casing.
- Check for gaps on both faces.
Trim and Glue
- Use a plane to shave edges until tight.
- Apply glue to mating surfaces and back.
- Position block.
- Nail with 18-gauge brad nails or 8d finish nails (pilot holes required).
Pro Tip: Use pre-carved blocks from a millwork supplier for authentic detailing.
Add the Apron Below the Stool
This final decorative touch grounds the window.
Cut to Length
- Hold apron stock face down on stool.
- Mark where it meets the outside edge of side casings.
- Cut square ends.
Shape Decorative Ends (Optional)
- Trace a profile from scrap onto apron ends.
- Cut with jigsaw.
- Sand smooth.
Install
- Apply glue to top edge.
- Press against bottom of stool.
- Align ends with side casings.
- Nail in place.
Finish Like a Pro
Final steps make the difference between DIY and professional results.
Recess Nail Heads
- Use a nail set and hammer to sink all nails 1/16″ below the surface.
Fill and Sand
- Apply wood putty to nail holes and small gaps.
- Let dry overnight.
- Sand with 120-grit paper until smooth.
- Wipe dust with a tack rag.
Prime and Paint
- Tape off walls with painter’s tape.
- Apply primer to all surfaces, especially end grain.
- Follow with two coats of paint or stain.
- Remove tape before paint fully dries.
Caulk the Wall Joint
- Run a thin bead of paintable latex caulk along the outer edge where trim meets wall.
- Tool with a damp finger for a clean, seamless seal.
Pro Tip: Caulking prevents drafts and creates a crisp, finished line.
Avoid Common Mistakes
Even skilled DIYers make these errors. Don’t let them ruin your project.
Rushing Measurements
- Always measure twice. One wrong cut can delay the entire job.
- Label each piece after cutting: “Left,” “Right,” “Head.”
Skipping the Reveal
- Installing trim flush to the jamb leads to visible gaps as wood moves.
- A 1/4″ reveal hides imperfections and adds depth.
Forgetting Glue
- Nails alone won’t hold mitered corners long-term.
- Glue creates strong, lasting joints.
Using Unstable Wood
- Warped or green lumber will shrink or twist.
- Use kiln-dried lumber or pre-primed MDF for stability.
Inconsistent Overhangs
- Stool should extend exactly 1″ past each side casing.
- Measure and mark every time.
Final Tips for Success
- Start Small: Practice on a less visible window first.
- Match Existing Trim: In older homes, replicate the original profile for authenticity.
- Use Pre-Made Profiles: Stock moldings from local mills save time and money.
- Work Clean: Keep your saw and workspace free of sawdust for accurate cuts.
- Check for Plumb: Walls aren’t always straight. Scribe instead of assuming square.
Frequently Asked Questions About Casing a Window
What is the easiest way to case a window for beginners?
The wrap-around style is the simplest method. It uses four trim pieces with 45-degree mitered corners and can be completed in under two hours per window.
How much does it cost to case a window?
Materials typically range from $2 to $10 per linear foot of molding, depending on the wood species and profile complexity.
What is a reveal on window casing?
A reveal is a deliberate 1/8″ to 1/4″ gap between the window jamb and the inner edge of the casing. It creates shadow lines for depth and allows wood to expand and contract naturally.
Can I install window casing without a stool and apron?
Yes. The basic wrap-around style omits both pieces and is ideal for modern or minimalist interiors. Stool and apron assemblies are typically used in traditional or historic homes.
How do I keep mitered corners from opening up over time?
Apply wood glue to every mitered joint before nailing. Nails alone will allow joints to separate as the house settles or the wood moves.
What type of wood should I use for window casing?
Pre-primed pine, poplar, or MDF are popular choices. Use kiln-dried lumber to prevent warping and shrinking after installation.
Key Takeaways for Casing a Window Like a Pro
Window casing is more than decoration. It is the final touch that elevates a room. Whether you choose a simple wrap or a full traditional build, the process stays the same: measure precisely, cut carefully, glue every joint, and finish beautifully.
Start with the right tools and stable materials, then take time to scribe accurate reveal lines. Glue your mitered joints, recess your nail heads, and caulk the wall seam for a polished look.
With patience and this guide, you can case any window like a seasoned carpenter. The result is a clean, elegant frame that enhances natural light, adds value, and gives your home a finished, professional appearance.



