
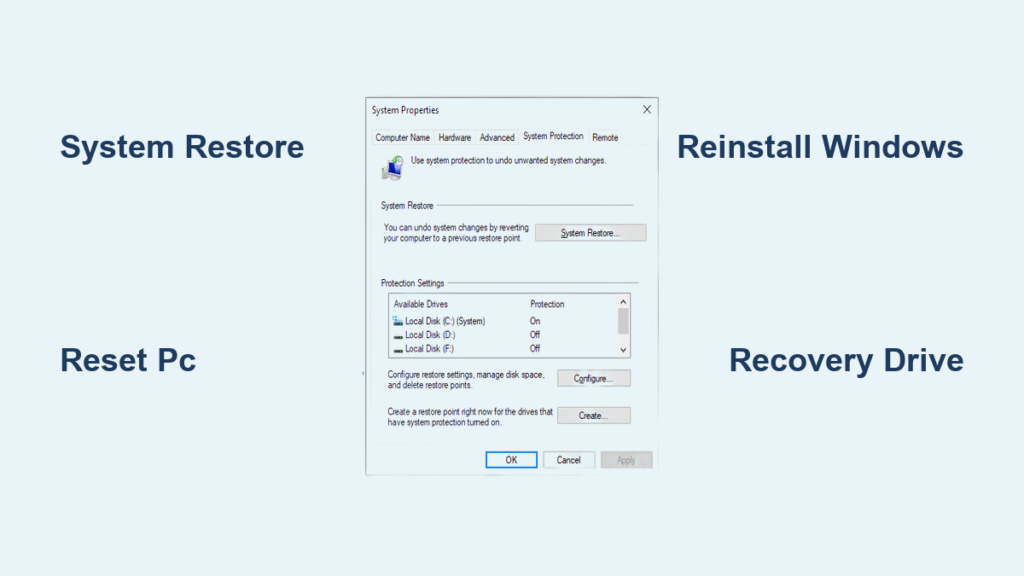
If your PC is running slow, crashing, or refusing to start after an update or new software install, you’re not alone. Many Windows users face instability due to driver conflicts, malware, or failed updates. The good news? Windows includes built-in recovery tools that can roll your system back to a stable state without deleting your personal files. Whether you can still boot into Windows or your screen is stuck on a restart loop, this guide walks you through every recovery option available. You’ll learn how to restore Windows using restore points, reset your PC, or reinstall the OS when necessary, all while protecting your data and avoiding common pitfalls.
Access System Restore in Windows
Use this method if your computer boots normally and you can sign in.
Launch Restore via Run Command
The fastest way to start System Restore is using the Run dialog:
1. Press Win + R to open Run.
2. Type rstrui.exe and press Enter.
3. This launches the System Restore wizard directly.
Alternatively, search for “Recovery” in the taskbar, open the Recovery control panel, then click Open System Restore.
Choose a Valid Restore Point
After launching the tool:
– Click Next on the initial screen.
– Select a restore point from the list. Points are labeled with dates and descriptions.
– Check Show more restore points if the one you need isn’t visible.
Windows automatically creates restore points before major changes like updates or app installations.
Preview Affected Programs
Before confirming:
– Click Scan for affected programs to see which apps will be removed or restored.
– This helps avoid accidentally uninstalling critical software.
– Once satisfied, click Next, review the summary, then select Finish.
– Confirm with Yes when prompted.
Your PC will restart and begin the restoration process. After completion, a message will confirm success or failure.
Restore from Recovery Environment
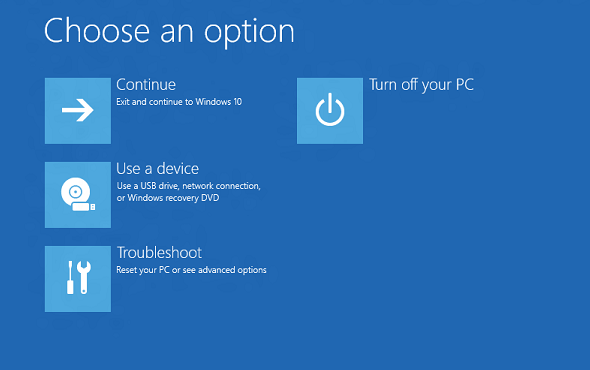
Use this when Windows won’t start or crashes during boot.
Boot into Windows Recovery (WinRE)
To force entry into recovery mode:
1. Power on the PC and interrupt boot three times by holding the power button during startup.
2. On the fourth attempt, Windows detects a startup issue and launches Automatic Repair.
3. Wait for the Choose an option screen to appear.
Alternatively, use a USB recovery drive if the internal partition is inaccessible.
Navigate to System Restore
From the recovery menu:
1. Select Troubleshoot > Advanced options > System Restore.
2. If prompted, log in with your user account password.
3. If BitLocker is enabled, have your 48-digit recovery key ready.
The restoration process mirrors the in-Windows version: choose a point, scan for changes, and confirm.
Complete the Restoration
After selecting the restore point:
– Wait 30 to 60 minutes for the process to finish.
– Do not interrupt power or restart manually.
– Once done, click Restart.
If successful, Windows boots normally. If not, try another restore point or consider resetting the PC.
Reset PC When Restore Fails

When System Restore doesn’t fix the problem, reset Windows as the next step.
Keep Files or Remove Everything
From WinRE:
1. Go to Troubleshoot > Reset this PC.
2. Choose one of two options:
– Keep my files: Removes apps and settings but keeps documents, photos, and music.
– Remove everything: Full wipe, ideal for selling the device or eliminating malware.
Select based on severity and whether you’ve backed up data.
Initiate the Reset Process
Follow these steps:
1. Confirm your choice.
2. Wait for Windows to download necessary files (requires internet).
3. The system reinstalls Windows and restores default settings.
This typically takes 45 to 90 minutes. Afterward, you’ll go through initial setup like a new PC.
Reinstall Windows as Last Resort
Use clean installation only when all else fails.
Create Installation Media
You’ll need:
– A working PC.
– A USB flash drive (8GB or larger).
– The Microsoft Media Creation Tool.
Steps:
1. Download the tool on a healthy computer.
2. Run it and select Create installation media for another PC.
3. Choose language, edition, and architecture.
4. Select the USB drive and let it create bootable media.
Boot from USB and Install
On the affected PC:
1. Insert the USB drive.
2. Restart and enter BIOS/UEFI (usually F2, F12, or Del).
3. Change boot order to prioritize the USB.
4. Save and exit.
Windows Setup loads:
– Follow prompts to select language and accept terms.
– At installation type, choose Custom: Install Windows only (advanced).
– Select the system drive (usually Drive 0, Partition C:).
– Confirm deletion of existing partitions if needed.
Windows formats the drive and installs fresh. This removes all apps, settings, and personal files.
Uninstall Updates and Roll Back Versions
Fix issues caused by recent changes without full restoration.
Remove a Problematic Update
If performance dropped after an update:
1. Open Settings > Windows Update > Update history.
2. Click Uninstall updates.
3. Select the problematic update (often labeled “Quality Update”).
4. Click Uninstall and restart.
This reverses specific patches without touching apps or files.
Go Back to Previous Windows Version
Within 10 days of upgrading (e.g., 10 to 11):
1. Open Settings > System > Recovery.
2. Under Go back, click Go back to the previous version of Windows.
3. Follow prompts and provide a reason (optional).
After 10 days, this option disappears. To roll back later, a clean install is required.
Diagnose Missing Restore Points
Sometimes no restore points appear. Here’s why and how to fix it.
Check System Protection Status
System Restore won’t work if protection is off:
1. Press Win + R, type sysdm.cpl, press Enter.
2. Go to the System Protection tab.
3. Ensure protection is On for your main drive (usually C:).
4. If off, click Configure > Turn on system protection.
Also verify that disk space usage is set (5 to 10% is recommended).
Enable Protection and Create Manual Point
To prevent future issues:
1. With System Protection enabled, click Create.
2. Name the point (e.g., “Before Driver Update”).
3. Click Create and wait for confirmation.
Always create a point before installing software or changing drivers.
Prevent Data Loss During Recovery
Avoid losing files during restoration with smart preparation.
Back Up Before Any Recovery
Even if System Restore claims to preserve files:
– Copy important documents, photos, and emails to an external drive or cloud (OneDrive, Google Drive).
– Use File History (Settings > Update & Security > Backup) for automatic backups.
Never rely solely on System Restore for data protection.
Manage BitLocker Recovery Key
If your drive is encrypted:
– The 48-digit BitLocker key is required during recovery.
– Retrieve it from:
– Your Microsoft account (if synced).
– A printed copy or USB drive.
– Active Directory (business environments).
Without it, you cannot access the drive during recovery.
Compare Recovery Methods Side by Side

Choose the right tool for your situation.
System Restore: When to Use It
Best for:
– Fixing issues after recent app or driver installs.
– Reversing problematic Windows updates.
– Resolving registry or system file corruption.
Pros:
– Fast, non-destructive.
– Keeps personal files and most settings.
Cons:
– Requires a valid restore point.
– Won’t fix hardware or deep OS corruption.
Reset PC: Best for General Instability
Use when:
– The system feels sluggish or buggy.
– You want to clear apps without losing documents.
– Preparing to sell or donate the PC.
Pros:
– Fresh start with option to keep files.
– Removes bloatware and conflicting apps.
Cons:
– Apps must be reinstalled.
– Longer than System Restore.
Reinstall Windows: For Severe Issues
Only use when:
– Malware persists after scans.
– System files are severely damaged.
– Hardware has been replaced or upgraded.
Pros:
– Cleanest possible OS state.
– Full control over partitioning and installation.
Cons:
– Deletes everything.
– Requires time to reinstall apps and restore data.
Create and Update Recovery Media
Be ready for total system failure.
Build a Recovery Drive
Requirements:
– USB flash drive (8GB+).
– Working Windows PC.
Steps:
1. Connect the USB drive.
2. Search for “Create a recovery drive” and run the tool.
3. Check Back up system files to the recovery drive (optional but recommended).
4. Follow prompts to format the drive and copy files.
This drive lets you access:
– System Restore
– Startup Repair
– Command Prompt
– Reset and Reinstall options
Test and Refresh the Drive
Over time, recovery media becomes outdated:
– Recreate the drive after major Windows updates.
– Store it in a safe, labeled location.
– Test it annually by booting from it on your PC.
Having current media can save hours during a crisis.
Troubleshoot Common Restoration Failures
Even with the right tools, problems can occur.
System Restore Fails to Start
Causes:
– Corrupted restore points.
– Insufficient disk space.
– Antivirus interference.
Fixes:
– Run Disk Cleanup and delete temporary files.
– Temporarily disable third-party antivirus.
– Use Safe Mode with Command Prompt and run rstrui.exe.
Restore Stuck or Frozen
If the process halts:
– Wait at least 2 hours before interrupting.
– Force restart and try a different restore point.
– Use Startup Repair first, then attempt System Restore again.
No Recovery Options Available
If WinRE is missing or corrupted:
1. Use another PC to create Windows installation media.
2. Boot from USB.
3. At setup screen, press Shift + F10 to open Command Prompt.
4. Run rstrui.exe from the command line.
Frequently Asked Questions About Restoring Windows
How long does a Windows System Restore take?
System Restore typically takes 30 minutes to 2 hours, depending on your hardware speed and the amount of data being processed. Do not interrupt the process once it begins.
Will System Restore delete my personal files?
No. System Restore preserves personal files like documents, photos, and emails. It only reverts system files, registry settings, and programs installed after the restore point was created.
What if I have no restore points available?
If no restore points exist, check System Protection settings to ensure it’s enabled. You can also create a manual restore point going forward. For current issues without a restore point, consider Reset PC or reinstalling Windows.
Can I undo a System Restore if it causes problems?
Yes. System Restore can be undone. Run the tool again and select the option to undo your last restoration, or choose a different restore point.
How do I restore Windows without a recovery drive?
If you don’t have a recovery drive, use another working PC to download the Media Creation Tool from Microsoft and create bootable installation media on a USB drive (8GB or larger).
Is Resetting PC the same as reinstalling Windows?
No. Reset PC reinstalls Windows but offers the option to keep personal files. A clean reinstall via installation media completely wipes the drive and requires you to manually restore backed-up data.
Key Takeaways for Restoring Windows Successfully
Restoring Windows doesn’t have to mean losing your data. Start with System Restore if you have a valid restore point and can boot into Windows. Use the Recovery Environment when startup fails. Escalate to Reset PC for general instability, and reserve clean reinstallation for severe corruption or malware.
Before any recovery process, back up your files and locate your BitLocker key if applicable. Create a recovery drive now so you’re prepared before disaster strikes. With the right preparation and tools, you can restore Windows to a stable state and keep your important data intact.



