

Is your home feeling drafty even with the heat on? Are energy bills climbing for no clear reason? The culprit is often a failed window seal. Over time, the caulk between your window frame and surrounding walls cracks, shrinks, and pulls away, letting in cold air, moisture, and even pests. Learning how to reseal a window frame is one of the most cost-effective home improvements you can tackle yourself.
This guide covers every step of the resealing process, from spotting failing seals to applying a flawless new bead. Whether you fix one drafty window or your entire home, you’ll gain the confidence to create a durable, weatherproof seal that lasts for years.
Spot the Signs Your Window Needs Resealing
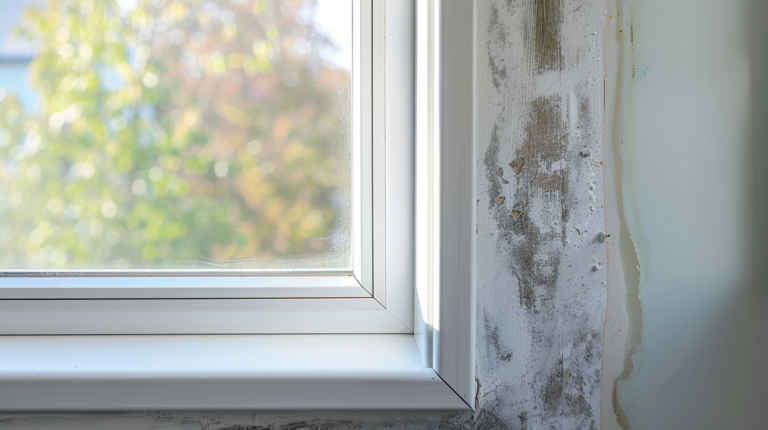
Look for Visible Caulk Damage
Start by examining the perimeter of each window frame, both inside and out. Cracked, peeling, or crumbling caulk is a clear warning sign. If the sealant has become brittle or is pulling away from the frame or wall, it has lost its protective function. Gaps where daylight peeks through mean air is moving freely.
Detect Drafts and Moisture Issues
Run your hand along the window edges on a windy day. Cold air seeping through confirms an air leak. Condensation forming along the inner frame edge, especially outside the glass, may signal moist indoor air leaking into the wall cavity. Over time, this can lead to hidden mold and wood rot.
Watch for Energy and Comfort Red Flags
A sudden spike in heating or cooling bills without a change in usage often points to poor window seals. Rooms that feel colder in winter or hotter in summer despite thermostat adjustments are also red flags. Your HVAC system works harder to compensate for air leakage, wasting energy and money.
Choose the Right Sealant for the Job

Pick Weather-Resistant Caulk for Exterior Use
For outside window frames, durability matters most. Silicone caulk is the top choice because it stays flexible, resists UV rays, and handles rain and freeze-thaw cycles. It bonds well with wood, vinyl, aluminum, and masonry and can last 20 years or more.
For large gaps or concrete and metal frames, polyurethane caulk offers superior adhesion and strength. It is harder to work with and may require a primer. Avoid standard acrylic caulk outdoors because it degrades quickly under sun and moisture.
Select Paintable Sealant for Interior Use
Inside your home, acrylic or latex caulk is ideal. It is water-based, easy to clean, and paintable, making it perfect for trim and drywall. If you need flexibility and a painted finish, choose paintable silicone.
Fill Large Gaps Before Sealing
If the space between frame and wall exceeds 1/4 inch, do not rely on caulk alone. Insert foam backer rod into the gap first to provide support and prevent the caulk from sinking. For deep voids, use non-expanding foam to fill the cavity before sealing the surface.
Gather Your Tools and Safety Gear
Essential Tools for Resealing
You will need a utility knife or caulk removal tool to strip old sealant. A quality caulking gun with a pressure release lever gives you better control. Use a putty knife or wire brush to clean debris, and masking tape to create sharp, professional edges.
For high windows, a stable ladder is critical. If sealing behind trim, include a flat bar and hammer to carefully remove and reinstall casing.
Safety and Cleanup Supplies
Wear safety goggles and work gloves because old caulk can be sharp and solvents are harsh. Use rubbing alcohol for final cleaning to remove oils and ensure proper adhesion.
Keep drop cloths handy to protect floors. Work in well-ventilated areas, especially when using solvents or foam sealants.
Remove Every Trace of Old Caulk
Cut and Peel the Old Seal
Use a utility knife to slice along both edges of the caulk bead. Slide the blade under the seal and peel it out. For stubborn residue, a dedicated caulk removal tool works faster and reduces hand strain.
Treat Stubborn Residue
If old caulk will not budge, soften it with a heat gun or hair dryer held 6 to 8 inches away to avoid damaging paint or wood. For silicone or polyurethane, apply acetone or WD-40, but test on a small area first to prevent surface damage.
Never Leave Old Sealant Behind
New caulk will not stick to old, degraded material. Any leftover residue causes the new seal to fail prematurely. Remove every bit until the surface is clean and bare.
Clean and Prep the Surface Thoroughly
Scrape and Vacuum the Gap
After removing old caulk, use a putty knife or wire brush to scrape away loose particles. Follow with a vacuum or compressed air to remove dust from the crevice.
Wipe and Degrease
Dampen a cloth and wipe the area thoroughly, then let it dry completely. Make a final pass with a cloth dampened with rubbing alcohol to remove invisible oils and ensure maximum adhesion.
Install Backer Rod if Needed
For gaps deeper than 1/4 inch, press foam backer rod into the space so it sits about 1/8 inch below the surface. This creates a proper hourglass profile for the caulk to bond to both sides without sticking to the bottom.
Apply New Sealant Like a Professional
Load and Cut the Caulk Tube
Insert the cartridge into the caulking gun. Cut the nozzle at a 45-degree angle, matching the hole size to the gap width. Puncture the inner seal by pressing the plunger slightly.
Use Masking Tape for Clean Lines
Apply masking tape along both sides of the gap to keep sealant off the wall and frame. Remove the tape immediately after smoothing, before the caulk skins over.
Hold the Gun at 45 Degrees and Apply
Hold the gun at a 45-degree angle and apply steady pressure. Move slowly and consistently from top to bottom on vertical edges, then across the top or sill. Push the gun forward to force sealant into the gap.
For wide gaps, apply two thinner beads instead of one thick layer to prevent cracking.
Smooth and Finish the Bead

Shape the Sealant Properly
Immediately after applying, smooth the bead with a caulk tool, damp finger, or putty knife. Press firmly to ensure contact with both sides of the gap. Shape it into a concave curve that sheds water and improves adhesion.
Remove Tape and Clean Up
Peel off the masking tape while the caulk is still wet. Wipe excess with a damp sponge or cloth. Avoid overworking the bead because too much smoothing can pull the sealant out.
Work in Manageable Sections
Do not try to caulk the entire window in one pass. Apply and smooth one side at a time to maintain control and consistency.
Allow Proper Curing Time
Wait 24 to 72 Hours to Fully Cure
Most sealants are touch-dry in 1 hour but need 24 to 72 hours to fully cure. Curing time depends on humidity, temperature, and product type.
Avoid Moisture and Movement
Do not expose the seal to rain, sprinklers, or condensation during curing. Keep windows closed and avoid bumping the frame. Premature stress can crack or weaken the bond.
Paint Only When Ready
If using paintable caulk, wait until it is touch-dry, usually 1 to 2 hours, before painting. Never paint over uncured silicone.
Reinstall Trim and Inspect Your Work
Secure Interior Trim Properly
If you removed trim, nail or screw it back in place so it sits flush. Then caulk the outer edge where the trim meets the wall to seal any remaining gaps.
Check for Missed Spots
Inspect the entire perimeter and run a finger along the bead to feel for air bubbles or thin spots. Touch up immediately with a small bead if needed.
Test for Air Leaks
On a windy day, hold a candle or incense stick near the window frame. If the flame flickers, you have a leak. Seal the spot right away.
Prevent Future Seal Failure

Inspect Annually
Check all window seals every year, especially before winter. Early detection prevents bigger issues like water damage or insulation loss.
Clean Seals Regularly
Wipe down caulk lines with mild soap and water. Dirt and debris trap moisture and accelerate aging.
Avoid Harsh Cleaners
Never use abrasive scrubbers or strong solvents on cured caulk because they degrade the surface over time.
Know When to Call a Professional
Fix Structural Damage First
If the window frame is rotted, warped, or loose, resealing will not help. These issues require professional repair or full replacement.
Handle High or Hard-to-Reach Windows
Windows above the second floor or on steep roofs need scaffolding and safety gear. Hire a pro to avoid accidents.
Address Double-Glazed Unit Failure
If you see condensation between glass panes, the insulated glass unit is compromised. Resealing the frame will not fix it. Only glass replacement will solve the problem.
Ensure Warranty Compliance
Some window manufacturers void warranties if DIY work is done. If your windows are new or under warranty, consult the provider before starting.
Frequently Asked Questions About Resealing Window Frames
Is resealing window frames worth the effort?
Yes. It prevents drafts, moisture intrusion, condensation, and mold, directly improving comfort and lowering energy bills. The low material cost makes it a high-return investment.
What is the difference between caulking and resealing?
They refer to the same process. Caulking is the common US term for applying sealant, while resealing is a broader term. Both mean replacing the material between the frame and wall.
Can I paint over the new sealant?
Yes, if you choose a paintable sealant like acrylic latex or specific siliconized hybrids. Pure silicone is generally not paintable. Always check the product label.
How do I choose between silicone and polyurethane caulk?
Choose silicone for general exterior use because of its flexibility, UV resistance, and ease of application. Choose polyurethane for high-movement areas, concrete, or metal substrates where extreme durability is required, knowing it is harder to apply and may need priming.
How long does the sealant take to dry?
Most sealants are touch-dry within 1 hour but require 24 to 72 hours to fully cure. Avoid water exposure during the curing period to ensure a strong bond.
Key Takeaways for a Lasting Window Seal
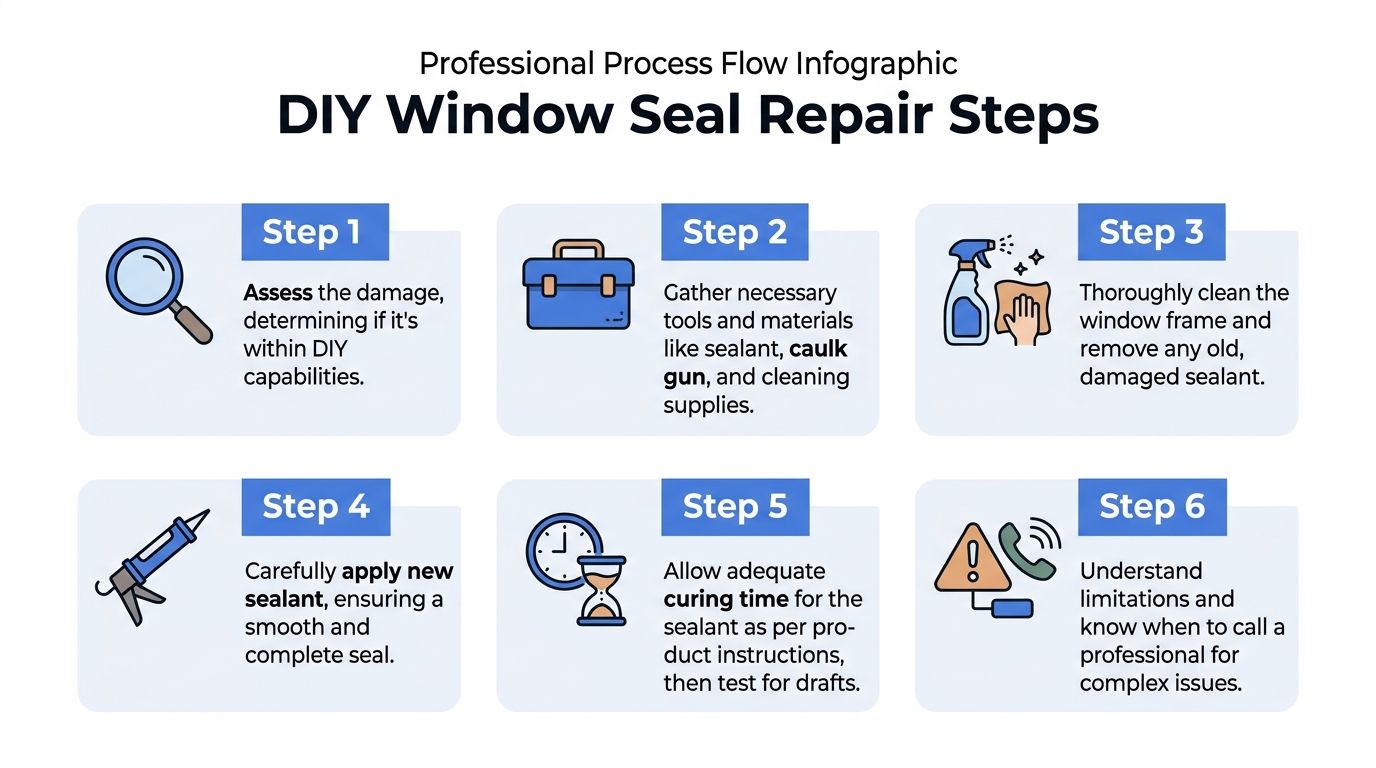
Resealing a window frame is a simple DIY project that delivers real results: lower energy bills, fewer drafts, and protection against moisture damage. Start by identifying failed seals through visible damage, drafts, or rising utility costs. Choose silicone caulk for exterior work and acrylic latex for interior trim, using foam backer rod for gaps wider than 1/4 inch.
Remove every bit of old caulk, clean the surface with rubbing alcohol, and apply the new sealant at a 45-degree angle for a smooth, concave bead. Allow 24 to 72 hours for full curing before exposing the seal to moisture or painting.
Gather your tools, pick a dry day with moderate temperatures, and reseal one window to build confidence. With under $25 in materials, you can transform your home’s comfort and efficiency for years to come.



