
That persistent buzz at 3 a.m. or the constant reminder of outdated hardware means it’s time to remove your doorbell chime. Whether you’re upgrading to a smart wireless system or finally eliminating that clunky wall unit, this guide delivers a complete removal roadmap. You’ll learn exactly how to remove doorbell chime components without risking electrical hazards or damaging your walls—all in under an hour with basic tools. Skip the electrician’s bill and gain confidence with step-by-step instructions covering both minimal disconnection and full system removal.
Your wall-mounted chime unit is just the tip of the iceberg. Behind that familiar buzzing sound lies a network of transformers, low-voltage wiring, and exterior buttons working together. Understanding this system prevents dangerous mistakes—like confusing harmless low-voltage wires with live 120V household current. This guide walks you through every critical phase: locating hidden components, safely cutting power, disconnecting wiring at multiple points, and restoring your walls to pristine condition. By the end, you’ll have a clean, silent wall ready for new decor or your next-generation doorbell.
Locate Every Component Before Cutting Power
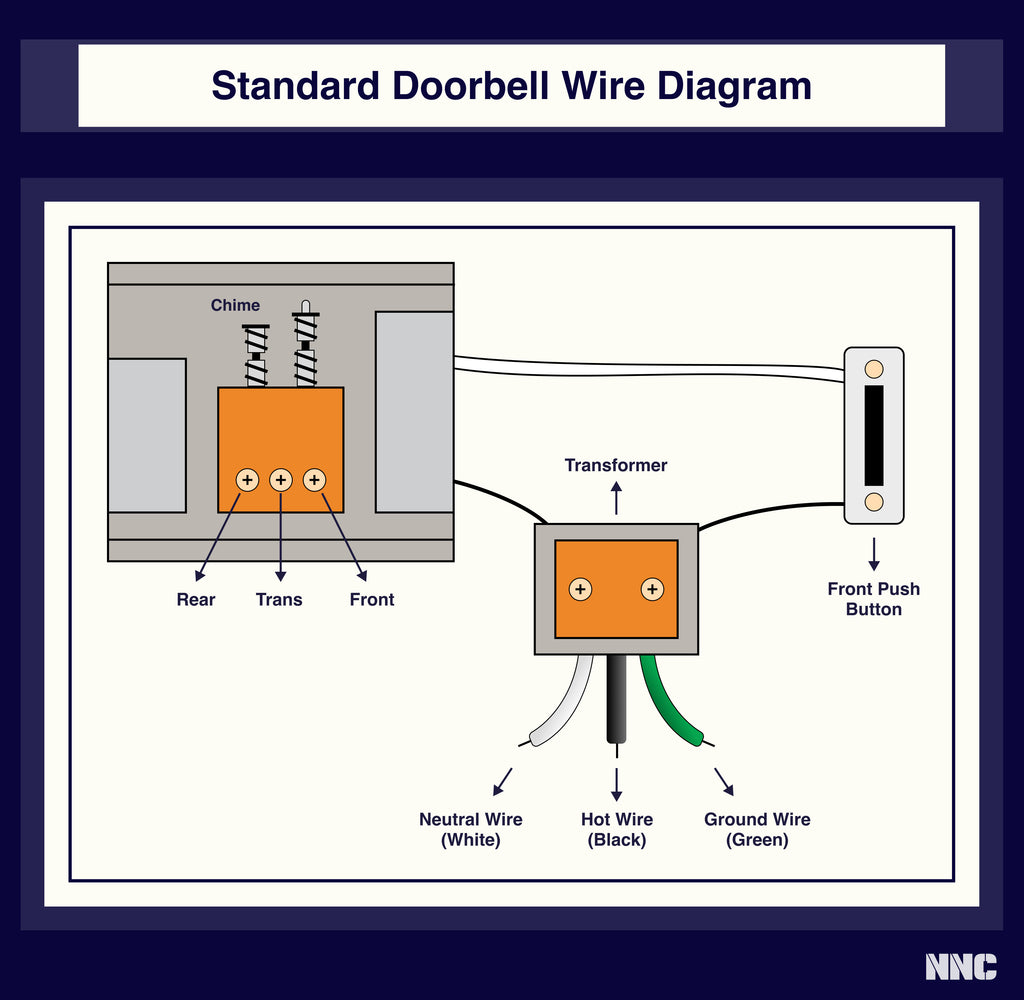
Your doorbell system spans three distinct locations, and missing one piece risks incomplete removal or accidental contact with live wires. Start with the most visible element: the chime unit itself. Check hallways, kitchens, or near entryways for a rectangular or circular box (typically 6-8 inches wide) with decorative vents. This is where the buzzing originates when visitors press your doorbell buttons.
Next, hunt for the transformer—a small metal or plastic box roughly the size of a matchbox (2″x2″x2″). Never skip this step: Transformers hide in garages, basements, attics, utility closets, or mounted directly to electrical boxes near your main panel. They’re the critical link converting dangerous 120V household power to the safer 16-24V your chime uses. Finally, inspect exterior walls near all entry points for doorbell buttons—these often have weathered faces or loose mounting screws signaling their age.
Why Transformer Location Determines Your Safety Approach
The transformer’s position dictates your risk level. If it’s surface-mounted in your garage, you’ll work only with low-voltage wires after cutting power. But if it’s tucked inside your main electrical panel? That demands extreme caution with 120V connections. Pro tip: Trace the chime’s low-voltage wires backward through your walls—they’ll lead straight to the transformer. Use a flashlight to spot its distinctive shape behind stored items in closets or garages.
Power Down Correctly—No Exceptions
Working on live doorbell systems causes 200+ annual emergency room visits. Start by switching off the correct circuit breaker—look for labels like “Doorbell,” “Bell,” or “Chime” in your electrical panel. If labels are missing, turn off your main breaker. This is non-negotiable: Doorbell transformers connect to 120V household current, which can deliver lethal shocks even though the chime itself uses low voltage.
Verify Power Is Truly Off
Grab a non-contact voltage tester (under $10 at hardware stores) and check two critical points:
1. At the transformer’s input terminals (thick black and white wires)
2. At the chime unit’s wire terminals
Hold the tester near each wire—no beeping or light means power is off. For absolute certainty, use a multimeter set to AC voltage: touch probes to the transformer’s secondary (output) terminals. A reading above 0VAC means you missed a live circuit. Critical mistake to avoid: Assuming low-voltage wires are safe without testing—transformer failures can send full 120V into your chime.
Remove Surface-Mounted Chime Units in 4 Steps
Pop Off the Decorative Cover Safely
Most chime covers snap into place with hidden clips. Insert a flathead screwdriver into the seam between the cover and wall plate, then gently twist to release clips. If screws hold the cover (common in older models), remove them with a Phillips driver. Set the cover aside—many have fragile internal components you’ll need if reinstalling later.
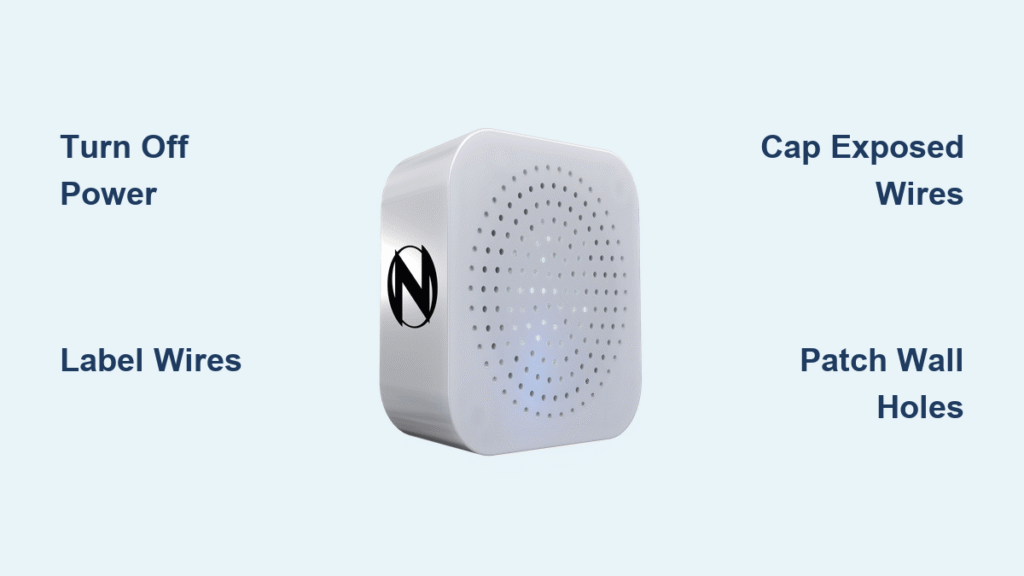
Label Wires Before Disconnecting
Your chime has three low-voltage wires: “Front” (for your main door button), “Rear” (for back door buttons), and “Trans” (common transformer wire). Don’t skip this: Wrap masking tape around each wire end, labeling them clearly. Take a photo with your phone as a backup. This 30-second step prevents hours of confusion if you ever restore a wired system.
Disconnect and Secure Low-Voltage Wires
Loosen each terminal screw with a small screwdriver, then pull wires free. Cut them 1-2 inches from the wall box using wire cutters—long enough for future reuse but short enough to prevent contact. Cap exposed ends with wire nuts or wrap tightly with electrical tape. Never leave bare wires dangling: They could short-circuit if the transformer reactivates.
Patch the Wall Like a Pro
Push capped wires into the wall cavity. Fill mounting screw holes with spackle using a 1-inch putty knife. Once dry (about 2 hours), sand smooth with 120-grit sandpaper. For a seamless finish, paint over the patched area with matching wall paint. Alternatively, cover the hole with a blank wall plate ($2 at hardware stores) if you might reinstall a wireless chime later.
Eliminate Exterior Doorbell Buttons Permanently
Remove Buttons Without Damaging Siding
Unscrew the two mounting screws holding each button to your exterior wall. If screws are rusted, apply penetrating oil and wait 10 minutes before trying again. Gently wiggle the button to release it from mounting brackets—older plastic housings often crack if forced.
Disconnect and Retire Button Wires
Pull the two low-voltage wires free from the button terminals. Cut them flush against the wall box and push the ends into the wall cavity. Critical safety step: Verify these wires show 0VAC with your voltage tester before cutting—they could carry power if the transformer is still active. Fill the small screw holes with exterior-grade spackle, then repaint to match your siding.
Fully Remove the Transformer (Advanced Option)

Access the Primary Junction Box
Follow the transformer’s thick black and white wires (14 AWG household wiring) to their source. This usually leads to a nearby junction box in your garage or basement. If wires run directly to your main panel, stop here and call an electrician—working inside service panels requires professional expertise.
Cap 120V Wires Safely
With your breaker confirmed OFF, remove the junction box cover. Verify no voltage on the black (hot) and white (neutral) wires using your tester. Disconnect these wires from the transformer, then twist a wire nut securely onto each exposed end. Tuck them neatly into the box and install a blank metal cover plate ($3). Never abandon uncapped 120V wires: This violates electrical codes and creates fire hazards.
Extract the Transformer Unit
Unscrew the transformer from its mounting bracket. Disconnect the thin low-voltage wires (18-22 AWG) from its output terminals. Recycle the transformer at an e-waste facility—don’t toss it in regular trash due to internal components.
Fix Recessed Chime Wall Damage During Removal

Recessed chimes sit inside wall cavities behind drywall, requiring extra care to avoid plaster cracks. After disconnecting wires, inspect for mounting screws along the unit’s edges—these often anchor it to wall studs. Pro technique: Insert a flat pry bar behind the chime housing and gently twist to release plastic clips. If the unit resists, stop immediately; forcing it can tear drywall.
Repair the Wall Opening Correctly
Remove the metal mounting bracket only if you won’t reinstall a chime. To hide the resulting hole (usually 4-6 inches wide), apply mesh drywall tape over the opening. Spread joint compound in thin layers with a 6-inch knife, sanding between coats. For instant coverage, mount an oversized picture frame or decorative plate over the patched area—no perfect finishing required.
Confirm Complete System Disconnection
Perform Final Voltage Tests
Test transformer output terminals with your multimeter—0VAC confirms full disconnection. Check any exposed low-voltage wires at button locations for residual voltage. If you read anything above 0VAC, revisit your breaker panel immediately. Red flag: A buzzing sound from the transformer after removal indicates live 120V connections—do not proceed.
Check for Hidden Shorts
Set your multimeter to continuity mode. Touch probes to each low-voltage wire pair (Front/Rear, Front/Trans, Rear/Trans). A beeping sound means wires are shorted inside walls—this must be fixed before installing new systems. If shorts exist, leave wires abandoned in walls rather than risking drywall demolition.
Avoid These 4 Costly Removal Mistakes
Leaving live 120V wires exposed is the top hazard—always cap and box them per electrical code. Cutting low-voltage wires too short (less than 1 inch) prevents future reuse; leave 2-inch stubs if possible. Skipping voltage verification at multiple points invites shocks—test transformers, chimes, AND buttons. Over-tightening drywall screws during repairs cracks plaster; apply only finger-tight pressure.
When to Call an Electrician Immediately
DIY removal is safe only when working outside your main electrical panel. Call a licensed professional if:
– Transformer wires connect directly to your service panel
– Breaker labels are missing or unclear
– You detect burning smells near wiring
– Voltage tests show inconsistent readings
The $200 service fee beats potential $50,000 fire insurance deductibles. For standard installations with accessible transformers, however, this project stays firmly in DIY territory.
Post-Removal Wall Restoration Checklist
- Fill all holes with spackle using upward strokes for smooth coverage
- Sand patches until flush with wall surface (use 220-grit paper)
- Prime patched areas before painting to prevent bleed-through
- Apply two thin coats of paint with a mini-roller for seamless blending
- For large recessed chime holes, install a 4×6-inch decorative plate instead of plaster repair
Your wall should now be clean, silent, and ready for whatever comes next—whether that’s mounting a smart doorbell or simply enjoying uninterrupted quiet. By following these exact steps, you’ve not only removed a doorbell chime but also eliminated hidden electrical risks while preserving your home’s integrity. Keep your circuit breaker labeled “Ex-Doorbell” in case future owners want to restore wiring—this small step saves hours of detective work down the line. With the chime gone, you’ve reclaimed both wall space and peace of mind, proving that even intimidating electrical projects yield to careful, informed action.


