
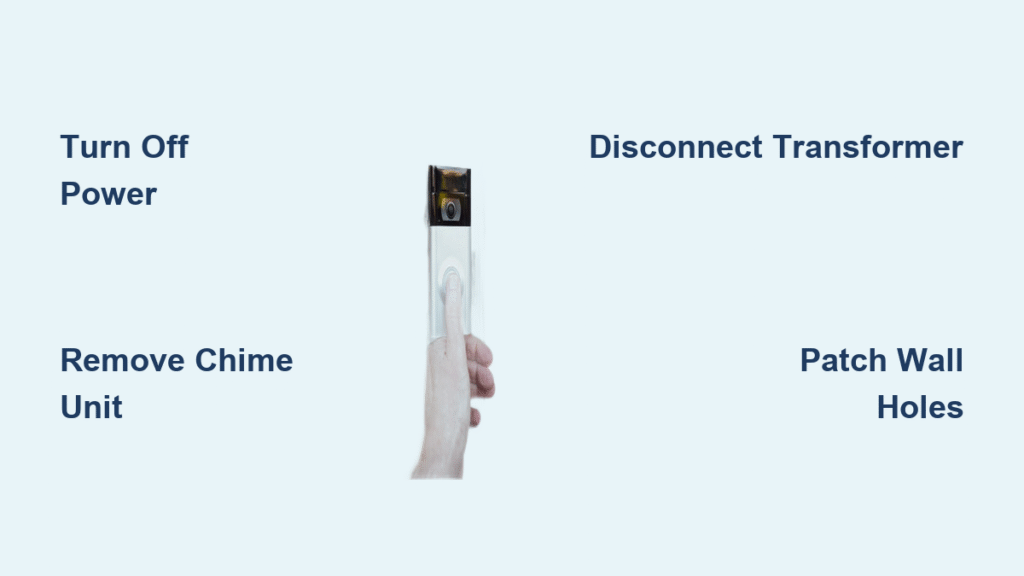
That chipped, tarnished doorbell button staring at you every time you approach your front door? Or perhaps the chime box interrupts your carefully planned living room gallery wall? You’re not alone—thousands of homeowners tackle how to remove old doorbell systems each year for aesthetic upgrades, space optimization, or wireless transitions. The good news: removing a wired doorbell is surprisingly straightforward once you understand the three-component system and follow proper safety protocols. This guide walks you through the complete removal process, from locating hidden transformers to patching those annoying leftover holes—no electrical experience required.
Locate Your Doorbell Components Before Starting
Find the Hidden Transformer First
Your doorbell system has three critical components you must identify before touching any wires. Start with the transformer—it’s the power source and the most dangerous part to handle. This small black or gray box typically hides in unexpected places: inside closets behind the chime wall, near your main electrical panel, in the basement or attic, or even your garage. Some homes have multiple transformers powering different low-voltage systems, so confirm you’ve found the right one by pressing your doorbell button before beginning. If the chime sounds, you’ve located the correct transformer.
Map Your Complete Doorbell Circuit
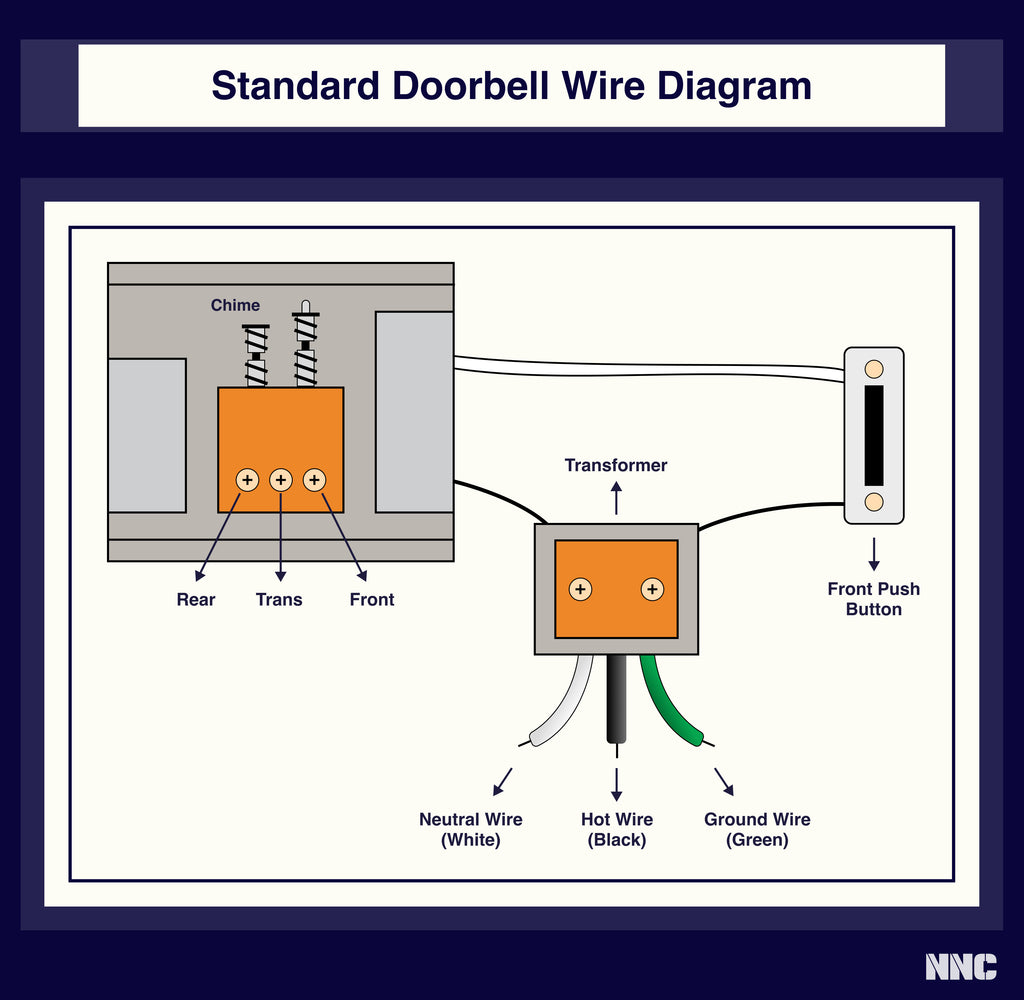
Once you’ve identified the transformer, trace the rest of your system. The front door button connects via low-voltage wires to the transformer and chime unit. The chime box—usually mounted near your entryway—contains the mechanism that produces sound. Understanding these connections prevents mistakes during removal. Note where wires enter walls; this helps determine your patching strategy later. Take photos of each component before disconnecting anything—these visual references prove invaluable if you ever reinstall a wired system.
Turn Off Power the Right Way
Never Skip These Safety Steps
Flipping the wrong circuit breaker wastes time and creates dangerous situations. Locate your home’s electrical panel and identify the breaker controlling the doorbell transformer circuit—this is typically a 15 or 20-amp breaker, often labeled “doorbell” or “chime.” Turn it completely off, then verify power is gone using a non-contact voltage tester at both the chime unit and transformer. Even though doorbell wires carry only harmless 16-24V, the transformer connects to dangerous 120V household current. Treat every wire as live until confirmed otherwise.
Double-Check Transformer Voltage
Most DIYers focus only on the low-voltage doorbell wires, forgetting the transformer’s deadly connection to standard household current. Before touching any wires at the transformer location, test both the low-voltage terminals (safe 16-24V) and the line-voltage connections (dangerous 120V). If your tester indicates power at either location, you’ve turned off the wrong breaker. This simple verification step prevents serious injury and makes how to remove old doorbell projects completely safe for homeowners.
Remove Front Door Button Without Damage
Disconnect Wires Properly
Start with the exterior button since it’s the safest component to handle. Gently pry off the faceplate using a flathead screwdriver—older units often have the button attached directly to the plate. Behind it, you’ll find two low-voltage wires connected to the mechanism. Take a photo of the wiring configuration before disconnecting, then carefully detach both wires. Don’t worry about wire polarity; doorbell circuits don’t require specific connections.
Choose Your Wire Management Strategy
You have three smart options for handling disconnected wires: push them deep into the wall cavity and patch over the hole for permanent removal; leave them accessible by taping each wire end separately with electrical tape (ideal if considering future wired systems); or cut wires as short as possible inside the wall to prevent accidental reconnection. The best approach depends on your plans—patching works for complete removal, while accessible wires provide flexibility for potential upgrades later.
Disconnect Chime Unit Safely
Remove Interior Chime Box Correctly
The indoor chime unit typically mounts with 2-4 visible screws. Remove these carefully, then gently pull the unit away from the wall. You’ll see three terminals labeled “Front,” “Rear,” and “Trans” (transformer). Disconnect all wires, noting their original positions. Unlike the transformer, these low-voltage connections pose minimal shock risk—but verify power is off with your tester anyway.
Handle Wires Without Capping
Many homeowners mistakenly cap low-voltage doorbell wires like standard electrical wires. Don’t do this—these wires carry no dangerous voltage when the transformer is disconnected. Simply push them back into the wall cavity or leave them accessible behind a blank plate. If patching the hole completely, cut wires short inside the wall to prevent future snagging during repairs. This knowledge makes how to remove old doorbell projects simpler than standard electrical work.
Disconnect Transformer Without Danger

Choose Between Two Safe Methods
Option 1: Simple Disconnection (Recommended)
Disconnect only the low-voltage wires from the transformer terminals while leaving the 120V connections intact. This method requires no electrical expertise and maintains code compliance. The transformer stays mounted with its dangerous line-voltage connections safely enclosed. Most homeowners choosing how to remove old doorbell systems should select this approach—it’s faster, safer, and preserves future wiring options.
Option 2: Complete Transformer Removal (Advanced)
Only attempt this if remodeling or the transformer location conflicts with new installations. After turning off power, remove the junction box cover, disconnect both 120V line-voltage wires from the transformer, cap them securely with wire nuts, and install a blank faceplate. Critical warning: Never bury uncapped 120V wires in walls—this violates electrical codes and creates fire hazards. Most professionals recommend against complete removal unless absolutely necessary.
Patch Wall Holes Like a Pro
Fix Chime Unit Mounting Spot
For quick, professional results, cover the chime hole with a standard blank electrical wall plate—it matches existing plates and takes minutes to install. If you prefer seamless walls, remove the old electrical box, cut a proper drywall patch, apply joint compound, sand smooth, and paint to match. This method creates an invisible repair but requires drywall skills. The best approach depends on your future plans—blank plates maintain wiring access while complete patching delivers perfect aesthetics.
Repair Door Button Exterior Hole
Exterior repairs vary by material: fill small screw holes in wooden trim with matching wood filler, sand smooth, and touch up with paint or stain. For drywall surfaces around the door frame, use standard patching techniques. Vinyl siding requires color-matched caulk, while brick needs mortar compound matching your existing joints. Take time with this final step—proper finishing makes how to remove old doorbell projects look professionally done.
Gather Essential Tools Before Starting
Basic Removal Kit Checklist
You’ll need just a few tools: a screwdriver (check if Phillips or flathead first), electrical tape for wire management, wire nuts (only if removing the transformer completely), and patching supplies matching your wall materials. Optional but helpful: a non-contact voltage tester, pencil for marking, and paint matching your walls. The entire process takes 30-60 minutes for basic removal, or 2-3 hours if doing professional wall repairs.
Future-Proof Your Doorbell Removal
Maintain Options for Later
Smart homeowners document transformer locations with photos and maintain clear breaker labeling even after removal. Consider leaving wires accessible behind blank plates rather than complete patching—this provides maximum flexibility if you ever want to reinstall a wired system. Industry professionals report that many homeowners later pay to reinstall wired systems after experiencing wireless reliability issues, making this foresight valuable.
Explore Smart Alternatives First
Before committing to complete removal, consider alternatives: mount a wireless system over existing holes, relocate the chime unit to a less obtrusive location, or simply replace tarnished components with modern finishes. Satin nickel or matte black upgrades often solve aesthetic concerns without full removal. Weigh these options carefully—how to remove old doorbell systems permanently eliminates future wired options.
Final Verification Before Completion
Critical Safety Checklist
Before considering your project finished, verify zero power at all former doorbell locations using your voltage tester. Test patched areas for stability and visual match to surrounding surfaces. Document your work with photos for future reference—especially if leaving wires accessible. Finally, ensure the circuit breaker remains clearly labeled if you kept the transformer installed. These final steps guarantee your how to remove old doorbell project is both safe and professional.
Your old doorbell system is now safely removed, walls are restored, and you’ve gained valuable space for your home improvements. The low-voltage nature of doorbell wiring makes this one of the safest electrical projects for DIY homeowners—just remember to respect the 120V connections at the transformer. By following these precise steps, you’ve accomplished what many professionals consider a straightforward upgrade that significantly enhances your home’s appearance and functionality.


