

A poorly fitted window sill invites drafts, water damage, and an unbalanced look that throws off an entire room. Many homeowners assume installing a window sill is simply nailing a board in place, but the truth is that precision matters at every stage. Walls are rarely flat, frames are rarely square, and even a small miscalculation can ruin the final result.
This guide breaks down exactly how to install a window sill with pro-level accuracy. You will learn how to assess clearance, take reliable measurements, cut and profile the wood, and secure everything for a clean, lasting fit. Whether you are renovating a single room or working on a production-style build, the steps below will help you achieve a professional outcome.
Pre-Installation Assessment for Your Window Sill
Before cutting any wood, you need to understand the real dimensions of your window opening. Walls shift, foam insulation bulges, and frames settle over time. A successful window sill installation starts with knowing your exact limits.
Check Minimum Clearance
Find the tightest point in the opening and treat it as your benchmark. If one corner only allows 1/8 inch of space, every cut and shim must respect that limit. Ignoring this measurement causes binding, misalignment, or damage to the window frame.
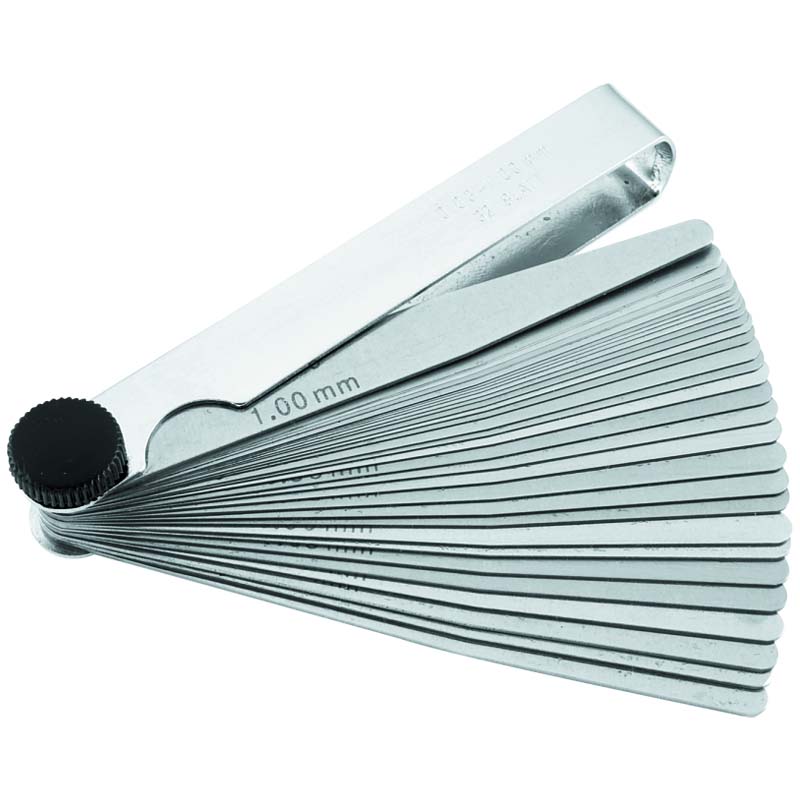
Use a feeler gauge or a thin scrap of wood to test gaps at multiple points along the sill line. Mark the narrowest spot clearly so it guides all your next steps.
Verify the Framing Gap Behind Trim
Behind the drywall and existing trim, there is often a 3/4 inch gap between the window jamb and the wall framing. This space accepts 5/4 stock (1¼ inch thick) without crowding the frame.
Confirm this depth before selecting your sill material. Using thicker stock than the cavity allows will push the window out of square and compromise the seal.
Inspect Wall Contour for Scribing
Most walls bow or slope slightly. When the sill ears (the side extensions) meet the drywall, gaps often appear because the wall is not perfectly flat.
Hold a straightedge against the wall at both ends of the window. If you see a gap behind the edge, plan to scribe the end of the sill to match the wall contour. This step eliminates visible gaps and delivers a seamless fit.
Measure for a Perfect Window Sill Fit
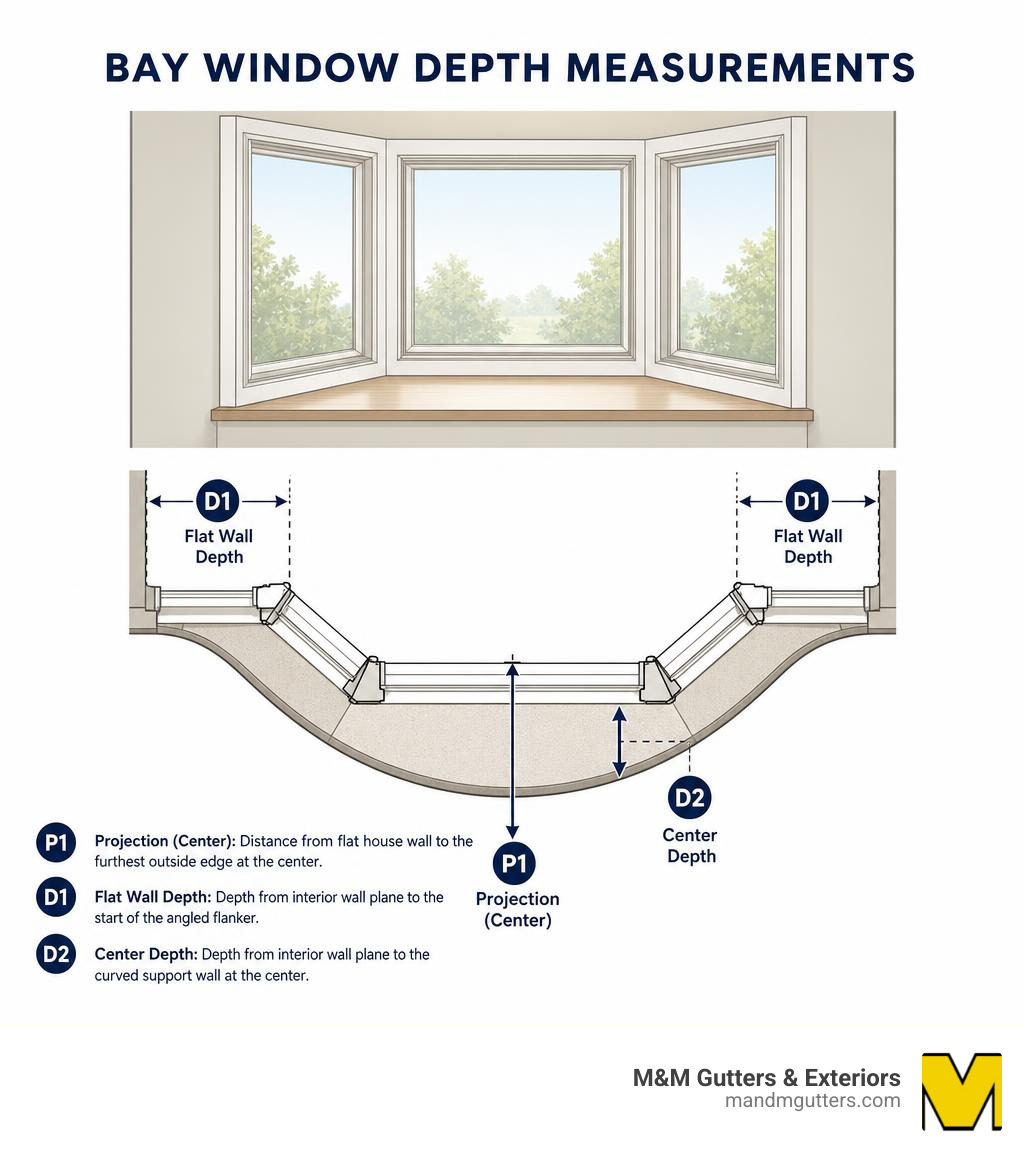
Accurate measurement prevents costly re-cuts and ensures symmetry. Always measure from the actual sill stock, never from backing boards, because even small deviations throw off the entire reveal.
Set the Reference Line
Measure from the back edge of the window jamb to the finished drywall face at the top, middle, and bottom. You will likely see variations like 3/4 inch, 11/16 inch, or 5/8 inch.
Always use the smallest consistent measurement as your standard. For example, if 11/16 inch appears repeatedly, use that figure for all jamb extensions and casing placement. Mark these points at the center and both ends of the window with a pencil.
Calculate Total Sill Length
The final length depends on your overhang style and design preference.
For standard overhangs:
• Measure the inside width (example: 39 3/16 inches)
• Add 5/8 inch per side for a total of 1 1/4 inches
• Final length: 40 7/16 inches
For production-style builds:
• Drywall-to-drywall opening: 34 ¾ inches
• Add 3 inches total for returns and overhang
• Final sill width: 37 ¾ inches
For the casing reveal method:
• Main sill: 34.5 inches
• Add 2.5 inch returns on each end
• Total assembly: 37 inches
Determine Apron Size
The apron sits below the sill and adds visual weight. It should be 1 inch narrower than the sill. If your sill is 37 ¾ inches, cut the apron to 36 ¾ inches for a clean stepped profile.
Match the apron height to your casing width, typically 2.5 inches, for design harmony.
Cut and Profile the Window Sill
Precision cutting produces tight joints and smooth transitions. Use the right tool for each task and never rush the profiling steps.
Transfer Jam Angles Accurately
Window jambs are rarely square. Use a sliding bevel or adjustable angle finder to match the jamb angle at several points along the opening.
Lock the tool once aligned, then transfer the angle to the edge of the sill stock. This mark guides your miter or bevel cut for a perfect fit against the frame.
Scribe the Horns to Fit Walls
The horn is the end extension that wraps around the window frame into the side wall. To fit uneven drywall, hold the sill in place and use a scribe tool or sharp pencil to trace the wall contour onto the horn end.
For high precision, transfer the line using dividers from the wall to the wood. Cut along the scribed line with a jigsaw to eliminate gaps caused by crooked walls.
Mark and Cut the Ears
Ears are the side cutouts that allow the casing to return into the wall. Use a framing square held flush against the drywall and mark 1 ½ inches from each edge.
If the wall slopes, draw a straight angled line from front to back to maintain a consistent reveal. Cut the ears with a jigsaw, letting the tool’s weight do the work.
Make Miter and Bevel Cuts
Set your miter saw to 45 degrees for returns and 15 degrees for production-style aprons. Double-check angles with a laser level or square before cutting.
For tight fits, use a slight bevel cut (1 to 2 degrees) to shave material and achieve a flush joint against the casing or wall.
Route and Sand Edges
Use a 20V router with a profile bit to create decorative edges like a cove profile. Adjust depth per manufacturer specs and move slowly, making a second light pass to remove imperfections.
Finish all edges with 120 to 150 grit sandpaper to remove splinters and tool marks. A smooth edge is essential for a clean painted finish.
Position and Align the Window Sill
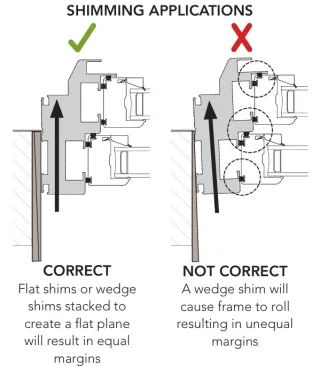
Proper alignment prevents gaps, wobble, and water intrusion. Use shims and levels to achieve a perfect fit before fastening anything.
Use Shims for Correct Elevation
Stack shims to position the sill at the right height. Place a 3/8 inch shim at the base, then add an 11/16 inch shim on top.
This two-part stack lifts the sill to sit flush under the casing with the proper 1/4 inch reveal. In production builds, skip shims and use a screwdriver as a fulcrum to adjust the reveal while nailing.
Achieve Consistent Reveal
The reveal is the gap between the sill and the frame, and it must be uniform. Aim for 1/4 inch on all sides for standard installs, or exactly one thickness of the window’s plastic spacer for production builds.
Set your saw blade depth to 1/4 inch when marking casing lines to maintain accuracy. On the sides, allow only a 1/16 inch gap per side to prevent racking.
Level and Secure the Sill
Place the sill into the opening at an angle to avoid chipping, then lower it into position. Check for level using a small level side-to-side and a longer level front-to-back. Tap gently with a hammer to adjust.
Secure with 2 finish nails at each end and 1 to 2 additional nails in the back. Drive wood screws through the sill into the jamb extensions, set at a consistent 1/4 inch gap. Apply a small amount of wood glue at joints and wipe away excess immediately.
Install the Apron and Trim
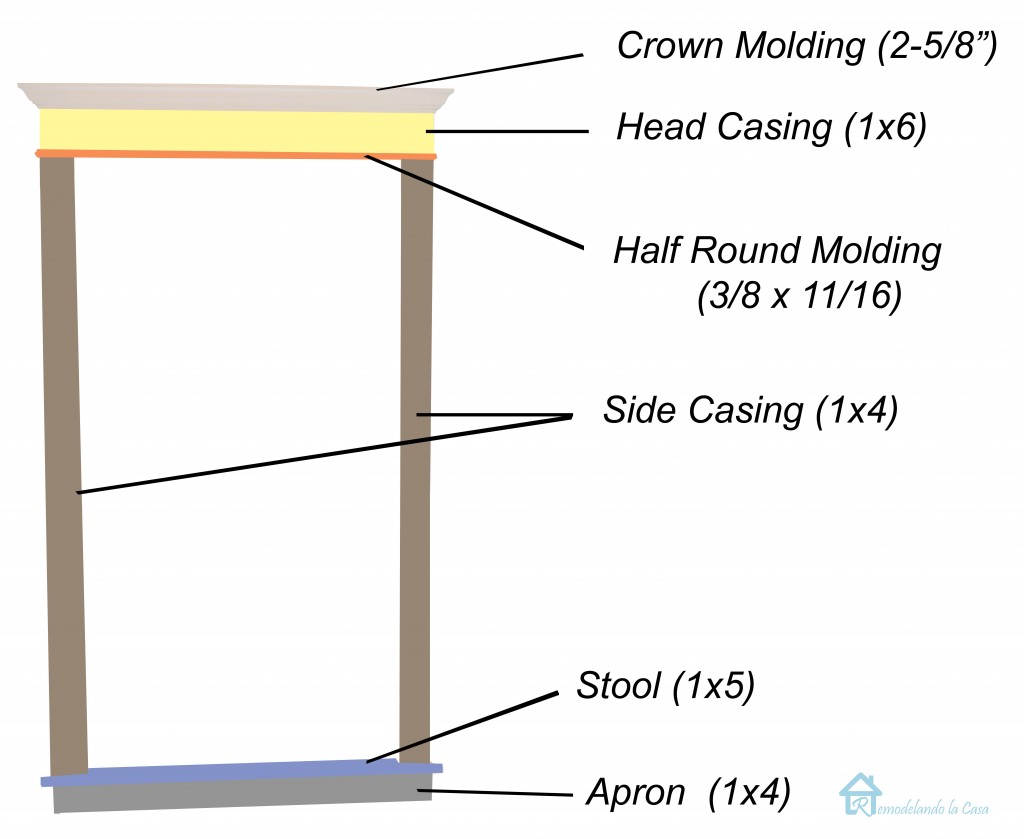
The apron and casing complete the look. Proper installation ensures clean lines and tight joints that frame the window beautifully.
Cut and Fit the Apron
Rip stock to 2.5 inches high using a table saw or circular saw. Cut ends at 15 degrees for production style or 45 degree miters depending on your design.
For small miters, use a box jig or clamping fixture during glue-up. Clamp until dry, then flush-trim the back with a jointer or hand plane.
Attach the Apron Correctly
Position the apron under the sill and use your finger width as a spacer on each side to check alignment. Secure with one finish nail per corner (4 total) and avoid over-nailing, which can split the wood.
Ensure the transition from sill to apron is seamless and free of gaps.
Install Jamb Extensions and Casing
Cut 3/4 inch jamb extensions and install them 3/16 inch inward from the window jamb. These create fixed reference points for horn length.
For side casings, cut to length and use 45 degree miters for inside corners. Leave a 1/4 inch reveal at top and bottom. For the top casing, measure outside-to-outside and cut 45 degree miters on both ends.
Cut miter returns to about 1 7/16 inches. Trim 1/8 inch off ends if too tight, then tap into place with a rubber mallet.
Finish and Inspect Your Window Sill
The final steps ensure durability, weather resistance, and a clean appearance that lasts for years.
Sand and Prepare Surfaces
Lightly sand all nail holes, screw heads, and routed edges. Use a sanding block to smooth transitions and remove minor inconsistencies.
This preps the wood for paint and fills small imperfections.
Seal Joints and Grain
Apply paint-grade caulk along all joints where the casing meets the drywall, between the sill and frame, and at mitered corners. Caulking hides minor gaps and creates a smooth finish.
For porous woods like pine or MDF, seal the grain with caulk before painting to prevent bleed-through and improve adhesion.
Final Quality Check
Verify these key points before calling the job done:
• Flush fit with no wobbling or rocking
• Reveal consistency (uniform 1/4 inch gap or one plastic thickness)
• Corner alignment with no visible gaps at miters
• Level confirmed in both directions
• Cleanliness with no glue residue or tool marks
Troubleshoot Common Window Sill Issues
Even with careful work, problems arise. Here is how to fix them quickly.
Fix a Gap in the Center
If the sill lifts in the middle, use a screwdriver as a fulcrum. Place it under the center, apply upward pressure, and drive a nail to lock the sill flat.
Adjust Tight Miter Returns
If returns do not fit, gently tap them into place with a rubber mallet. If too long, trim 1/8 inch off each end with a miter saw.
Handle Wall Irregularities
For uneven drywall, scribe the horn using dividers to transfer the exact wall contour. Cut carefully with a jigsaw to eliminate gaps without needing filler.
Prevent Splintering
Avoid tear-out by cutting slowly, using a wood block as backing, and letting the blade stop before lifting the saw. Flip the board upside down when using a circular saw to protect the finished edge.
Frequently Asked Questions About Installing a Window Sill
What is the standard reveal for a window sill?
The standard reveal is 1/4 inch on all sides. In production-style builds, the reveal should match exactly one thickness of the window’s plastic spacer to ensure proper water shedding.
Can I install a window sill without removing the existing trim?
Yes, but you must loosen the existing trim first to verify the framing gap behind it. A 3/4 inch gap is typically available, which allows room for 5/4 sill stock without forcing the window out of square.
What is the best material for a window sill?
5/4 stock (1¼ inch thick) is the most common choice for its depth and structural feel. For production builds, 1×8 boards are standard. Pine and MDF are popular for paint-grade work, while hardwoods suit stained finishes.
How do I handle walls that are not perfectly flat?
Scribe the horn (the end extension of the sill) to match the wall contour. Use a scribe tool or pencil to trace the wall onto the wood, then transfer the line with dividers for precision before cutting with a jigsaw.
How long does it take to install a window sill?
For a single window, expect 2 to 4 hours including measuring, cutting, and installation. Add extra time for routing decorative profiles or finishing with multiple coats of paint.
Do I need to seal the window sill against water?
Yes. Apply paint-grade caulk along all joints and consider sealing the grain before painting. The correct reveal also directs water away from the frame, which is critical for long-term durability.
Key Takeaways for a Professional Window Sill Installation

Installing a window sill is a precision task that rewards patience and accurate measurement. Start by identifying the tightest clearance point in your opening and let that benchmark guide every cut. Use the smallest consistent jamb-to-face measurement as your reference, and always scribe the horns to match real wall contours rather than assuming flat surfaces.
When securing the sill, stack shims correctly and maintain a uniform reveal of 1/4 inch or one plastic thickness. Drive screws through the sill into the jamb extensions for structural integrity, and finish with paint-grade caulk at every joint to seal out moisture and drafts.
Your next step is to gather your tools, take fresh measurements on your specific window, and follow this guide one section at a time. A careful approach delivers a window sill that looks sharp, sheds water properly, and holds up for decades.



