
Installing a window in a brick wall can transform your home’s natural light, ventilation, and curb appeal. However, this project demands precision, structural awareness, and proper weatherproofing techniques. Mistakes often lead to cracked masonry, water leaks, drafts, or even wall instability.
This guide walks you through every critical phase of how to install a window in brick wall, from initial measurements and structural cutting to final sealing and inspection. You will learn the difference between brick veneer and solid masonry, the right tools to use, and how to achieve a weather-tight, professional finish that lasts decades.
Identify Your Wall Type Before Cutting
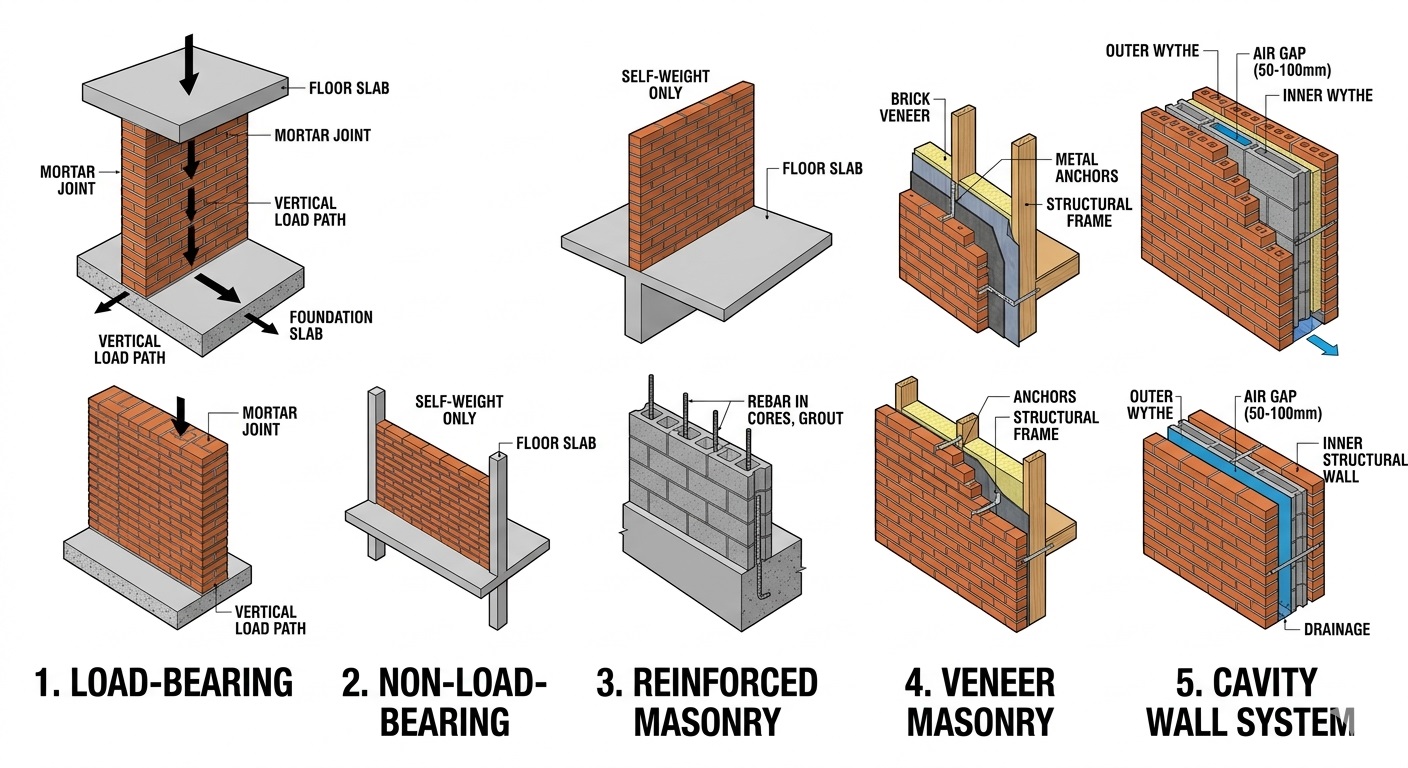
Recognize Brick Veneer vs. Solid Masonry
Before any tools touch the wall, determine your wall’s construction. Most modern homes use brick veneer, a single brick layer separated from the wood frame by a cavity. The window sits behind the brick, with the frame secured to wood studs. No structural load rests on the brick, making replacements safer.
Solid masonry walls, common in older homes, bear the building’s load. Cutting into them requires a header beam to support the weight above the new opening. Ignoring this step can cause sagging walls or cracks. If you are unsure, consult a structural engineer, especially for openings wider than 3 feet.
Plan the Opening with Precise Measurements
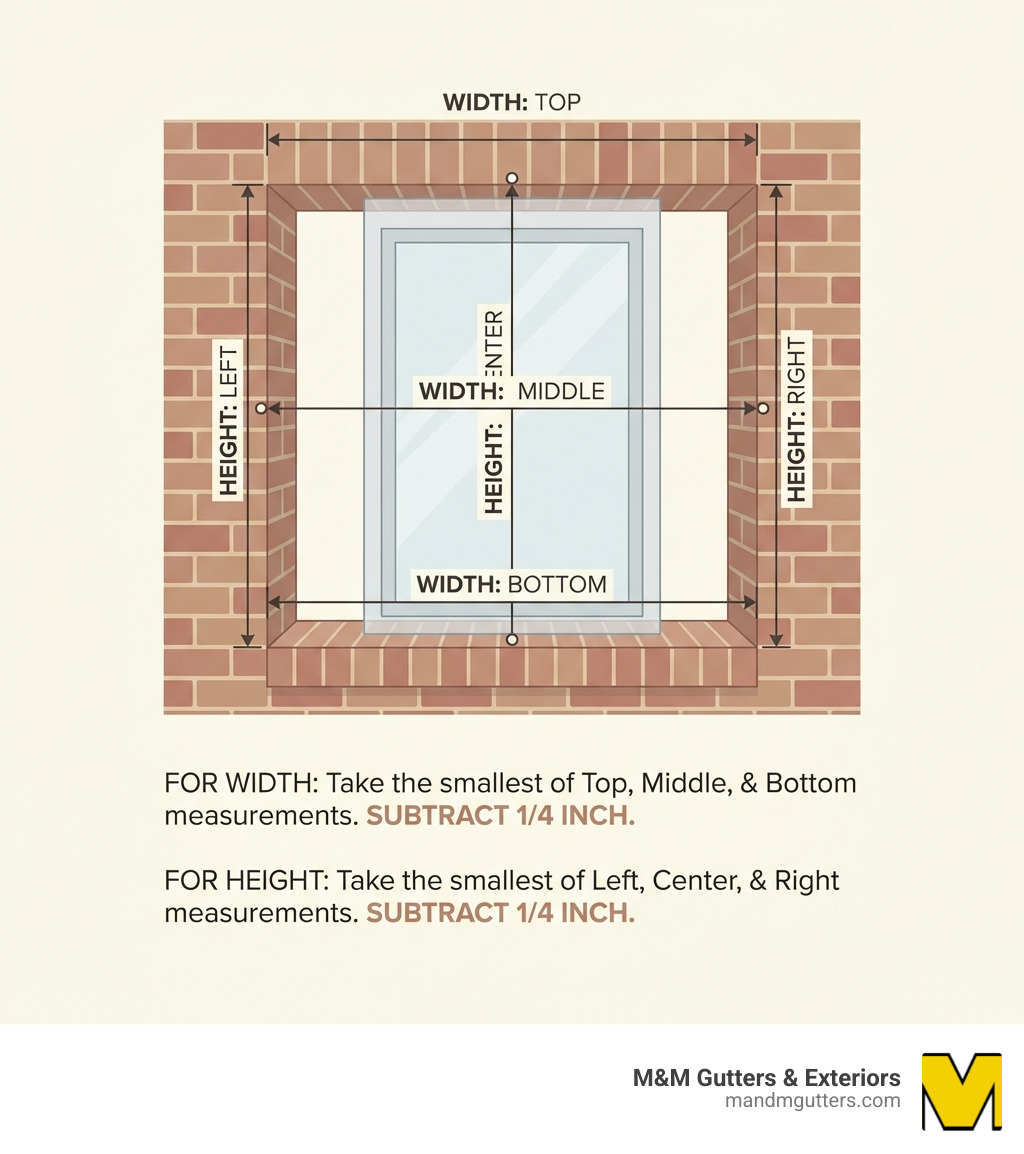
Measure Three Points Per Side
No window opening is perfectly square due to settling and temperature shifts. Measure the width at the top, middle, and bottom. Measure the height at the left, center, and right. Use the narrowest measurement in each dimension for your final size.
For example, if your width measurements are 47¾”, 47⅞”, and 47½”, use 47½”. Subtract 1/8 inch from each dimension to allow for shimming and expansion. This gives you a final width of 47⅝” and a final height of 59¼” if the narrowest height is 59⅜”.
Mark Interior Layout First
Start planning from inside the home. Decide your desired window size, such as 48 inches wide by 18 inches high. Add ½ inch to each dimension to accommodate the frame and sealing. Use a level and pencil to mark these lines on the drywall.
Drill a pilot hole at the center of the marked area. This helps transfer the layout to the exterior with perfect alignment. Use a stud finder to avoid electrical or plumbing lines behind the wall.
Transfer the Layout to the Brick Exterior

Use a Plumb Line for Vertical Accuracy
To transfer your interior marks to the brick facade, use a plumb line, a weighted string that ensures perfect vertical alignment. Hang it from the top mark, let it settle, and mark the bottom point on the brick. Repeat for both sides of the opening.
Connect the dots with a straight edge. Use a permanent marker rather than pencil, since brick dust will erase faint lines during cutting. Double-check all dimensions with a



