
That familiar buzz every time you crack open a window can ruin even the best summer afternoon. If you’re renting, living in an older home, or simply avoiding permanent modifications, learning how to install magnetic window screen offers the perfect compromise. These systems use powerful perimeter magnets and adhesive strips to create a tight, removable seal that keeps insects out without a single screw or drill.
The process is far simpler than most people expect. With basic tools and a clear sequence of steps, you can complete the entire job in under an hour. This guide covers everything from measuring and surface prep to reinforcement and seasonal storage, so your magnetic window screen stays secure through wind, rain, and repeated use.
Measure the Window Frame Accurately

Take Multiple Measurements
Use a measuring tape to record the inside width and height of the window frame at the top, middle, and bottom. Older frames are rarely perfectly square, so checking several points prevents sizing errors. Always use the smallest measurement for both dimensions to ensure full coverage without gaps.
Match Screen Size to Frame
Most magnetic screens come in standard sizes like 24″x36″ or 30″x48″. If your window is slightly smaller, you’ll trim the mesh later. If it’s larger than the kit dimensions, the screen won’t fit at all. Choose a kit that matches or runs up to one inch larger than your smallest measurement.
Clean the Installation Surface Thoroughly
Remove Dust, Grease, and Old Residue
Wipe down the entire window frame perimeter using a soft cloth or sponge. Clear away all dust, dirt, old adhesive, and oily residue. For stubborn buildup, use mild soap and water, then wipe dry with a clean towel.
Let the Frame Dry Completely
Moisture weakens adhesive bonds and causes long-term failure. After cleaning, allow the frame to air dry for at least 15 to 20 minutes before applying any magnetic strips or brackets. A bone-dry surface ensures the strongest possible hold.
Install Magnetic Anchors and Brackets
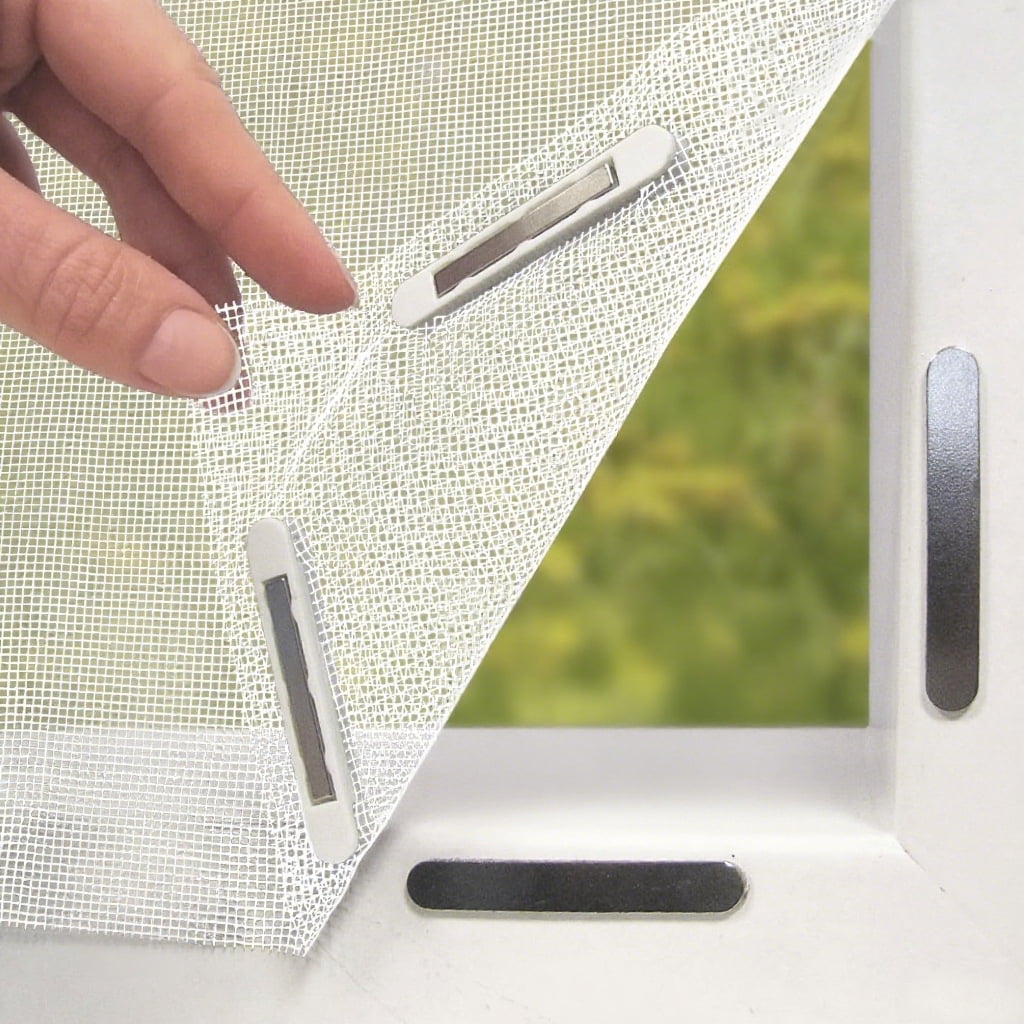
Apply Adhesive-Backed Strips
Peel the protective film from the adhesive backing on the magnetic straps or red mounting brackets included in your kit. Press them firmly along the inner edge of the window frame, matching the position where the screen will sit.
Keep Strips Straight and Continuous
Misaligned or bent strips disrupt the magnetic seal. Use a level if needed to keep everything perfectly straight. For systems with separate magnetic strips and clamping slots, install both so the screen edge sits flush when inserted.
Position the Screen Temporarily
Start with One Corner
Place the magnetic screen into the frame, beginning at one corner. Hold it steady and work around the perimeter, letting the magnets begin engaging with the installed strips.
Use 3cm Plastic Strips as Temporary Clips
To prevent shifting during installation:
1. Cut three sections of the included plastic edge strip, each about 3 centimeters long.
2. Insert these into the clamping slot along the top and right edges.
3. This holds tension while you secure the remaining sides.
Secure All Screen Edges

Insert the Left and Bottom Edges
With the top and right held in place, push the left and bottom edges into the clamping slot. If resistance occurs, slightly lift the plastic strip to widen the opening, then slide the mesh in smoothly.
Press Firmly for Full Contact
Once fully seated, press along the entire perimeter to ensure complete magnetic engagement. The screen should feel snug and remain stable when lightly tugged.
Lock Corners and Reinforce the Frame
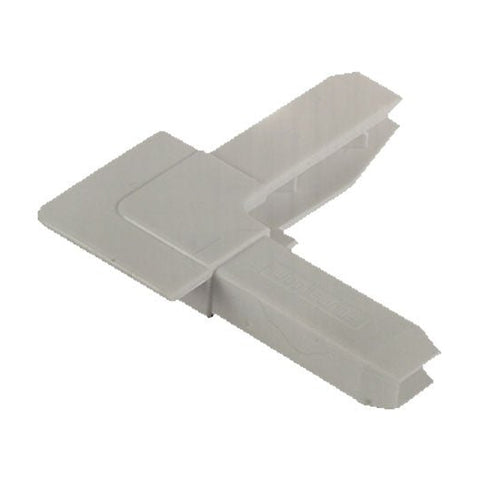
Snap in Corner Fittings
Insert the four plastic corner fittings provided in the kit. These lock the edges together and keep the mesh from pulling out. Press each one firmly until it clicks into place.
Attach PVC Clips for Extra Stability
Peel the backing off the adhesive side of the PVC clips and press them onto the frame at intervals of roughly 12 to 16 inches. These add resistance against wind and movement, especially on larger screens.
Trim Excess Mesh Material
Confirm the Fit Before Cutting
Double-check that all corners are locked, the screen lies flat, and no wrinkles or gaps remain. Only proceed to trim once everything looks aligned.
Cut Carefully with Sharp Tools
Use sharp scissors or a utility knife to trim excess mesh flush with the frame. Always:
– Cut away from your body
– Use a straight edge for clean lines
– Avoid cutting the magnetic edge or sealing strip; trim only the protruding mesh
Add the Windproof Fixing Buckle
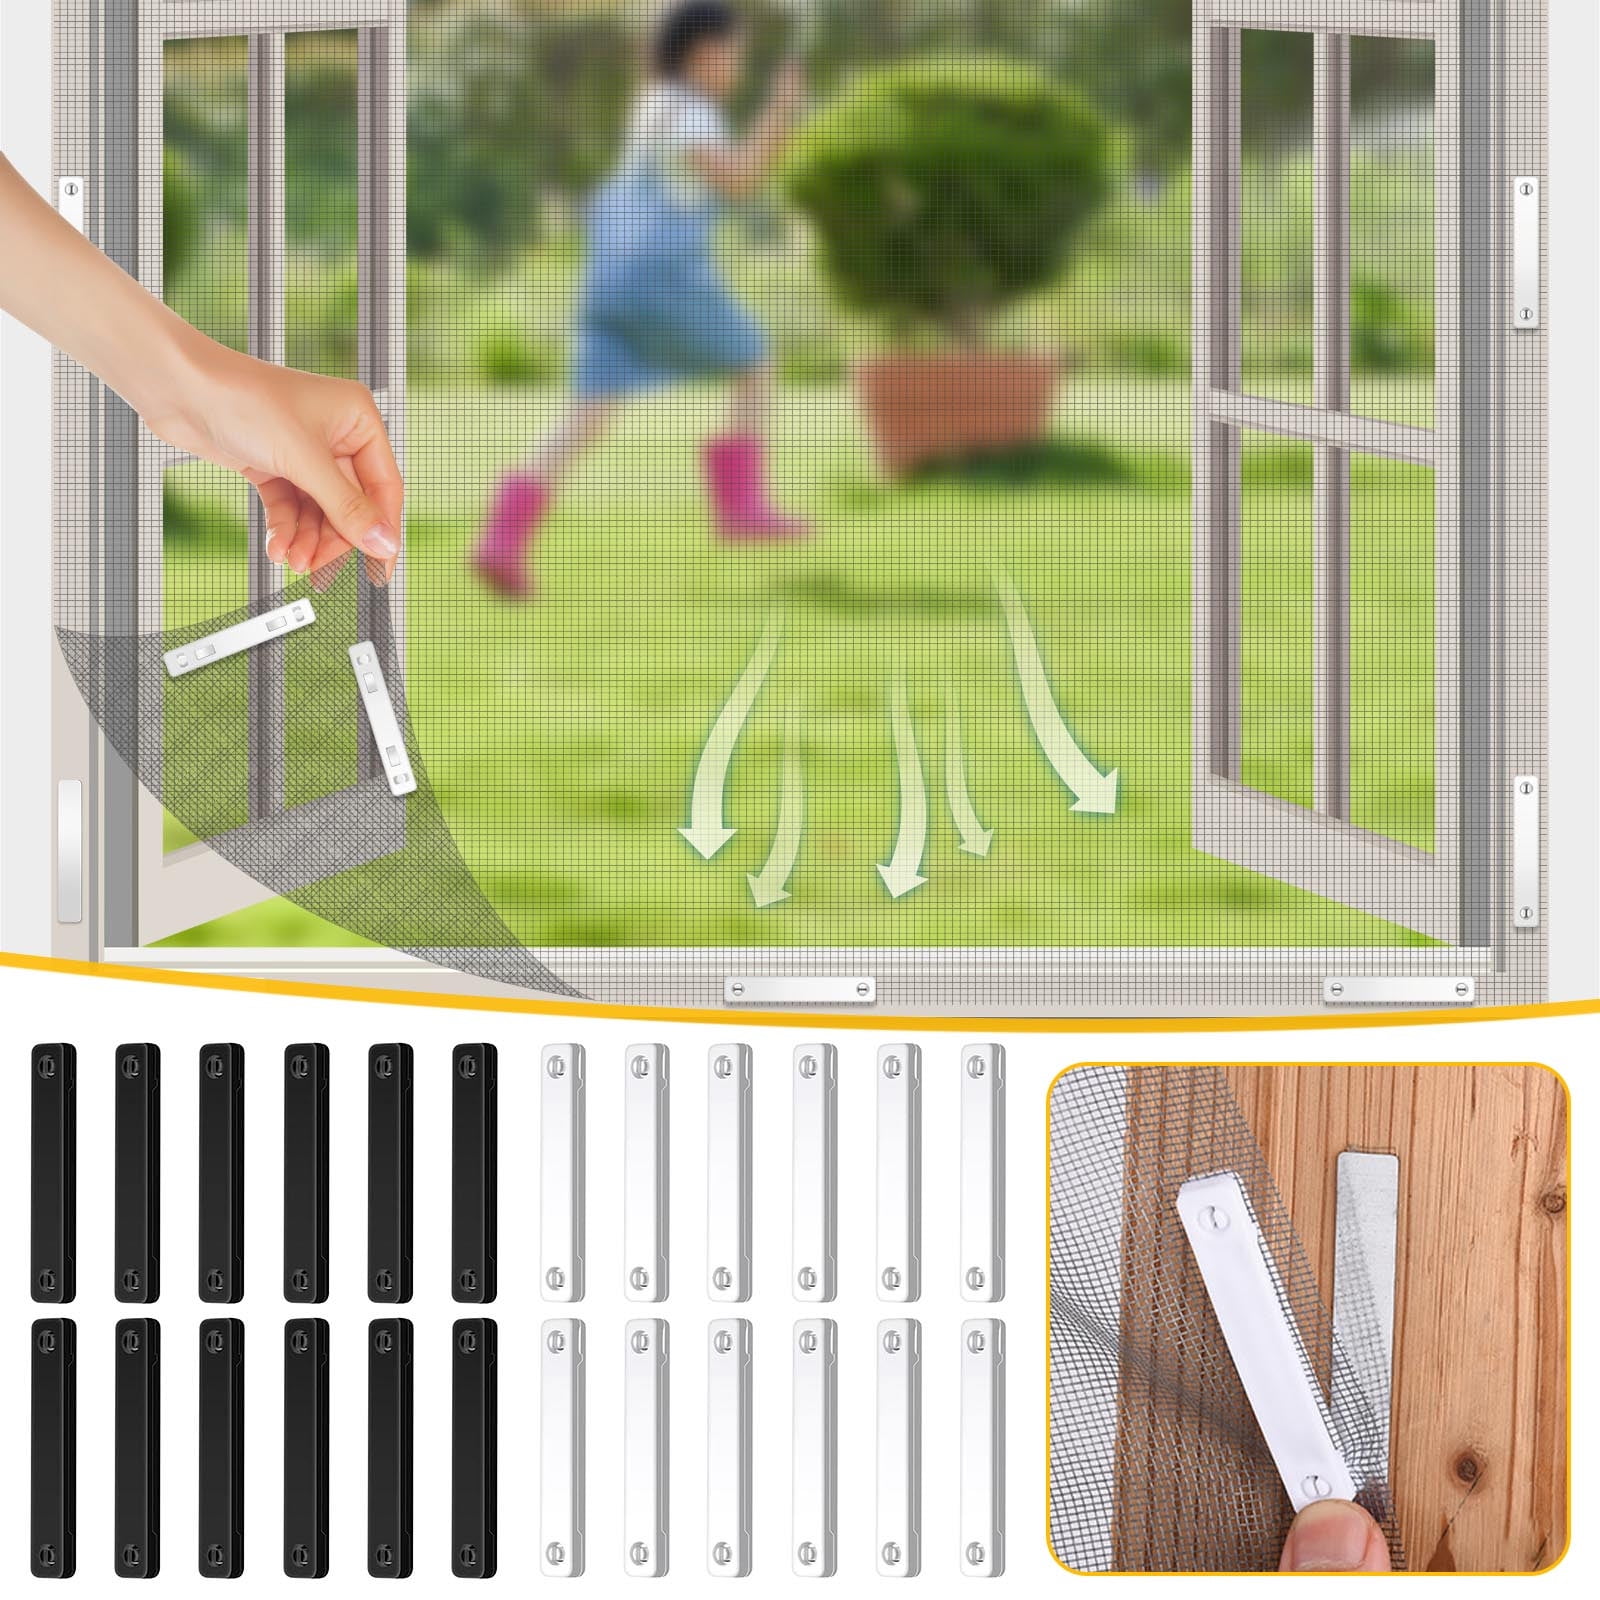
Install 30cm from the Top Edge
Locate the windproof fixing buckle in your kit. Attach it to the outer frame of the screen approximately 30 centimeters (about 12 inches) from the top. This anchor prevents billowing and detachment during strong breezes.
Test the Hold Strength
Close the buckle securely and tug gently to verify it grips firmly. In high-wind areas, consider adding a second buckle on the opposite side for extra security.
Test Operation and Alignment
Open and Close the Window
Gently operate the window to confirm the screen stays in place. It should not shift, sag, or interfere with normal window movement.
Check the Magnetic Seal
Run your hand around the edges to feel for consistent magnetic pull. If any section feels weak, reseat the screen and press harder to improve adhesion.
Adjust for Gaps or Sagging
If gaps appear, recheck alignment and reapply pressure. For sagging, ensure corner fittings are fully clicked and add more PVC clips as needed.
Troubleshoot Common Installation Issues
Screen Falls Out When Opened
Poor adhesion or weak magnets usually cause this. Re-clean the frame, reapply magnetic strips, and press firmly. Adding extra magnetic reinforcement strips can also help.
Gaps Around the Perimeter
Misalignment or an uneven frame is the typical culprit. Use the smallest measurement during sizing and realign the screen. Press firmly along the gap until the magnets rebond.
Mesh Tears Easily
Sharp tools or rough handling often cause tears. Avoid contact with keys, pet claws, or sharp objects. During cleaning or storage, handle gently and never fold sharply.
Sagging or Loose Edges
Insufficient tension creates this problem. Reinsert the mesh into the clamping slot and ensure plastic edge strips are fully seated in corners. Add additional PVC clips for support.
Clean and Maintain the Screen
Wash Monthly with Mild Soap
Remove the screen and rinse it with water. Use a soft brush and mild detergent to remove dust and pollen. Never use abrasive cleaners, as they damage the mesh and degrade magnetic coatings.
Air Dry Completely
Lay flat or hang vertically to dry. Do not reinstall while damp, since moisture reduces adhesion and may encourage mold growth.
Inspect Adhesive Annually
UV exposure and temperature changes gradually weaken adhesive bonds. Re-press clips and brackets each season, and replace any that have lost stickiness.
Store Properly During Off-Season
Roll, Don’t Fold
When removing for winter or long-term storage, roll the screen tightly from one end to the other. Folding creates creases that can damage the mesh or magnets.
Keep Indoors in a Dry Place
Store in a closet, under a bed, or on a garage shelf, anywhere protected from extreme temperatures, moisture, and pests.
Reuse Year After Year
These screens are built for seasonal removal and reinstallation. With proper care, they typically last 3 to 5 years or longer.
Ideal Use Cases and Key Benefits
Perfect for Renters and Older Homes
Since no drilling is required, magnetic screens are lease-approved and leave no marks. They also work beautifully on vintage windows that lack standard screen tracks.
Works on All Window Types
Install on sliding, casement, awning, or double-hung windows, including any type that opens inward, outward, or sideways.
Minimalist Aesthetic
The slim frame and invisible magnetic seal preserve your view far better than bulky traditional screens.
Quick, Tool-Free Installation
All you need is a tape measure, scissors, and a clean cloth. No power tools, drills, or professional help required.
Frequently Asked Questions About Magnetic Window Screen Installation
How long does it take to install a magnetic window screen?
Most installations take 30 to 60 minutes, depending on window size and surface condition. Cleaning and drying time can add another 15 to 20 minutes.
Can magnetic screens be used on any window type?
Yes. They work on sliding, casement, awning, and double-hung windows. They fit both inward-opening and outward-opening frames, making them highly versatile.
Will the adhesive damage my window frame?
High-quality adhesive strips are designed to peel off cleanly without residue. If you worry about marks, warm the adhesive slightly with a hair dryer before removal.
How do I clean a magnetic window screen?
Remove the screen monthly and wash it with mild soap and water using a soft brush. Rinse thoroughly and let it air dry completely before reinstallation.
Do magnetic screens hold up in strong wind?
Yes, when installed correctly. The windproof fixing buckle placed about 30cm from the top edge, combined with PVC clips, keeps the screen stable even in breezy conditions.
Can I reuse the same magnetic screen year after year?
Absolutely. These screens are designed for seasonal removal and reinstallation. With proper care and storage, they typically last 3 to 5 years or more.
Key Takeaways for Installing Your Magnetic Window Screen Successfully
Installing a magnetic window screen is one of the simplest upgrades you can make for comfort and pest control. The three most important steps are measuring accurately with the smallest dimension, preparing a completely dry and clean surface, and reinforcing key points with corner fittings and PVC clips. Following these basics ensures a snug, durable fit that lasts season after season.
Your next step is to gather your tools, measure your window, and order a kit that matches your dimensions. Within an hour, you’ll have a clean, invisible barrier that keeps insects out while letting fresh air in, all without a single drill hole or permanent modification.



