
Your Ring doorbell just flashed that dreaded low-battery alert while you’re scrambling to leave for work. You know you need to charge it, but panic sets in when you realize you’ve never removed the unit before. Will you strip the tiny security screw? Crack the faceplate? Or worse—void your warranty by forcing components? Don’t risk damaging your home security system. Whether you own a Ring Video Doorbell 2, 3, 3 Plus, 4, or older models like the 1st Gen or Pro, this guide delivers the exact steps to safely remove your Ring doorbell for charging—preserving your device and mounting hardware while maximizing battery life. You’ll learn model-specific removal techniques, avoid common pitfalls that cause $129 replacement costs, and get your doorbell powered up in under 10 minutes.
Identify Your Ring Model Before Touching Anything
Your removal approach depends entirely on whether you have a removable battery model or require full-unit removal. Confusing these methods risks snapping plastic tabs or stripping critical screws. Removable battery models (Video Doorbell 2, 3, 3 Plus, 4) feature a slide-off faceplate hiding the battery pack, while non-removable models (Video Doorbell 1st Gen, Ring Pro) demand complete unit detachment to access the internal battery compartment. Check your Ring app: Go to Device Settings > Device Health > Battery to see your model name. If unavailable, examine the physical unit—the 1st Gen has a curved rectangular shape with visible mounting screws, while the Pro features a square metal faceplate with a textured finish. Never guess; forcing the wrong method cracks housing components.
Why Model Confusion Causes Permanent Damage
Attempting faceplate removal on a 1st Gen unit applies upward pressure to glued components, snapping the internal battery connector. Conversely, unscrewing a mounting plate on a Doorbell 3 Plus leaves the battery trapped behind the faceplate, forcing you to use metal tools that scratch the finish. One DIYer reported paying $80 for a replacement faceplate after mistaking their Doorbell 4 for a 1st Gen model. Always verify before proceeding.
Essential Tools for Safe Ring Doorbell Removal

Must-Have Tools (No Substitutes)
- Orange T15 Torx screwdriver – The only tool that fits Ring’s security screw without stripping it (standard Torx bits are too large)
- Micro-USB cable – Required for direct battery charging on removable models
- Size #1 Phillips screwdriver – For mounting plate screws (metric 2.5mm)
Critical Protection Items
- Microfiber cloth – Place under the doorbell during removal to catch falling screws
- Small container – For storing security screws (they’re 6mm long—easily lost)
Never use: Flathead screwdrivers, pliers, or butter knives. These scratch stainless steel faceplates and crack plastic housings. A homeowner damaged their Doorbell 3’s weather seal using a flathead to pry the faceplate, causing $50 water damage repairs.
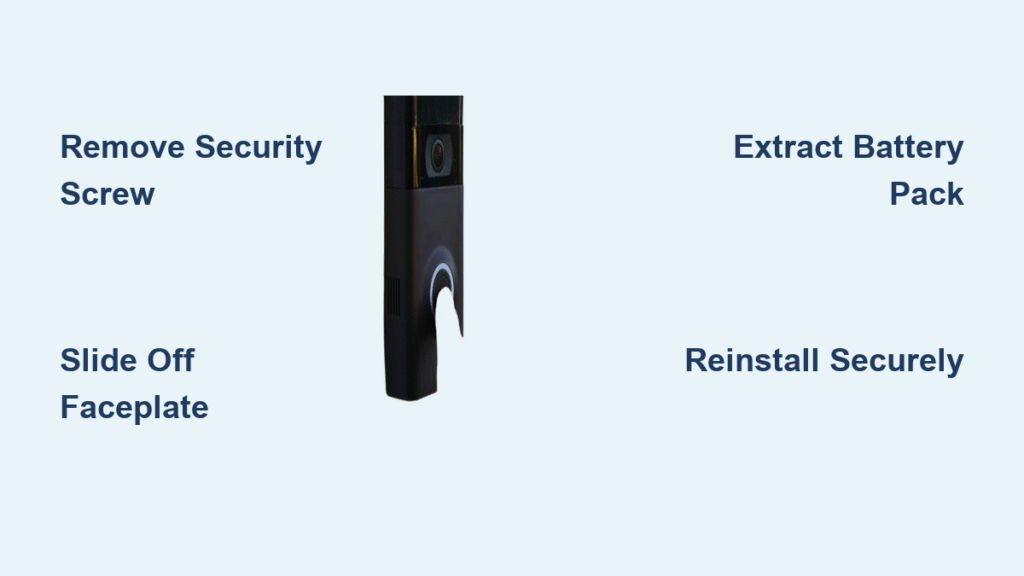
Remove Removable Battery Models (2, 3, 3 Plus, 4)
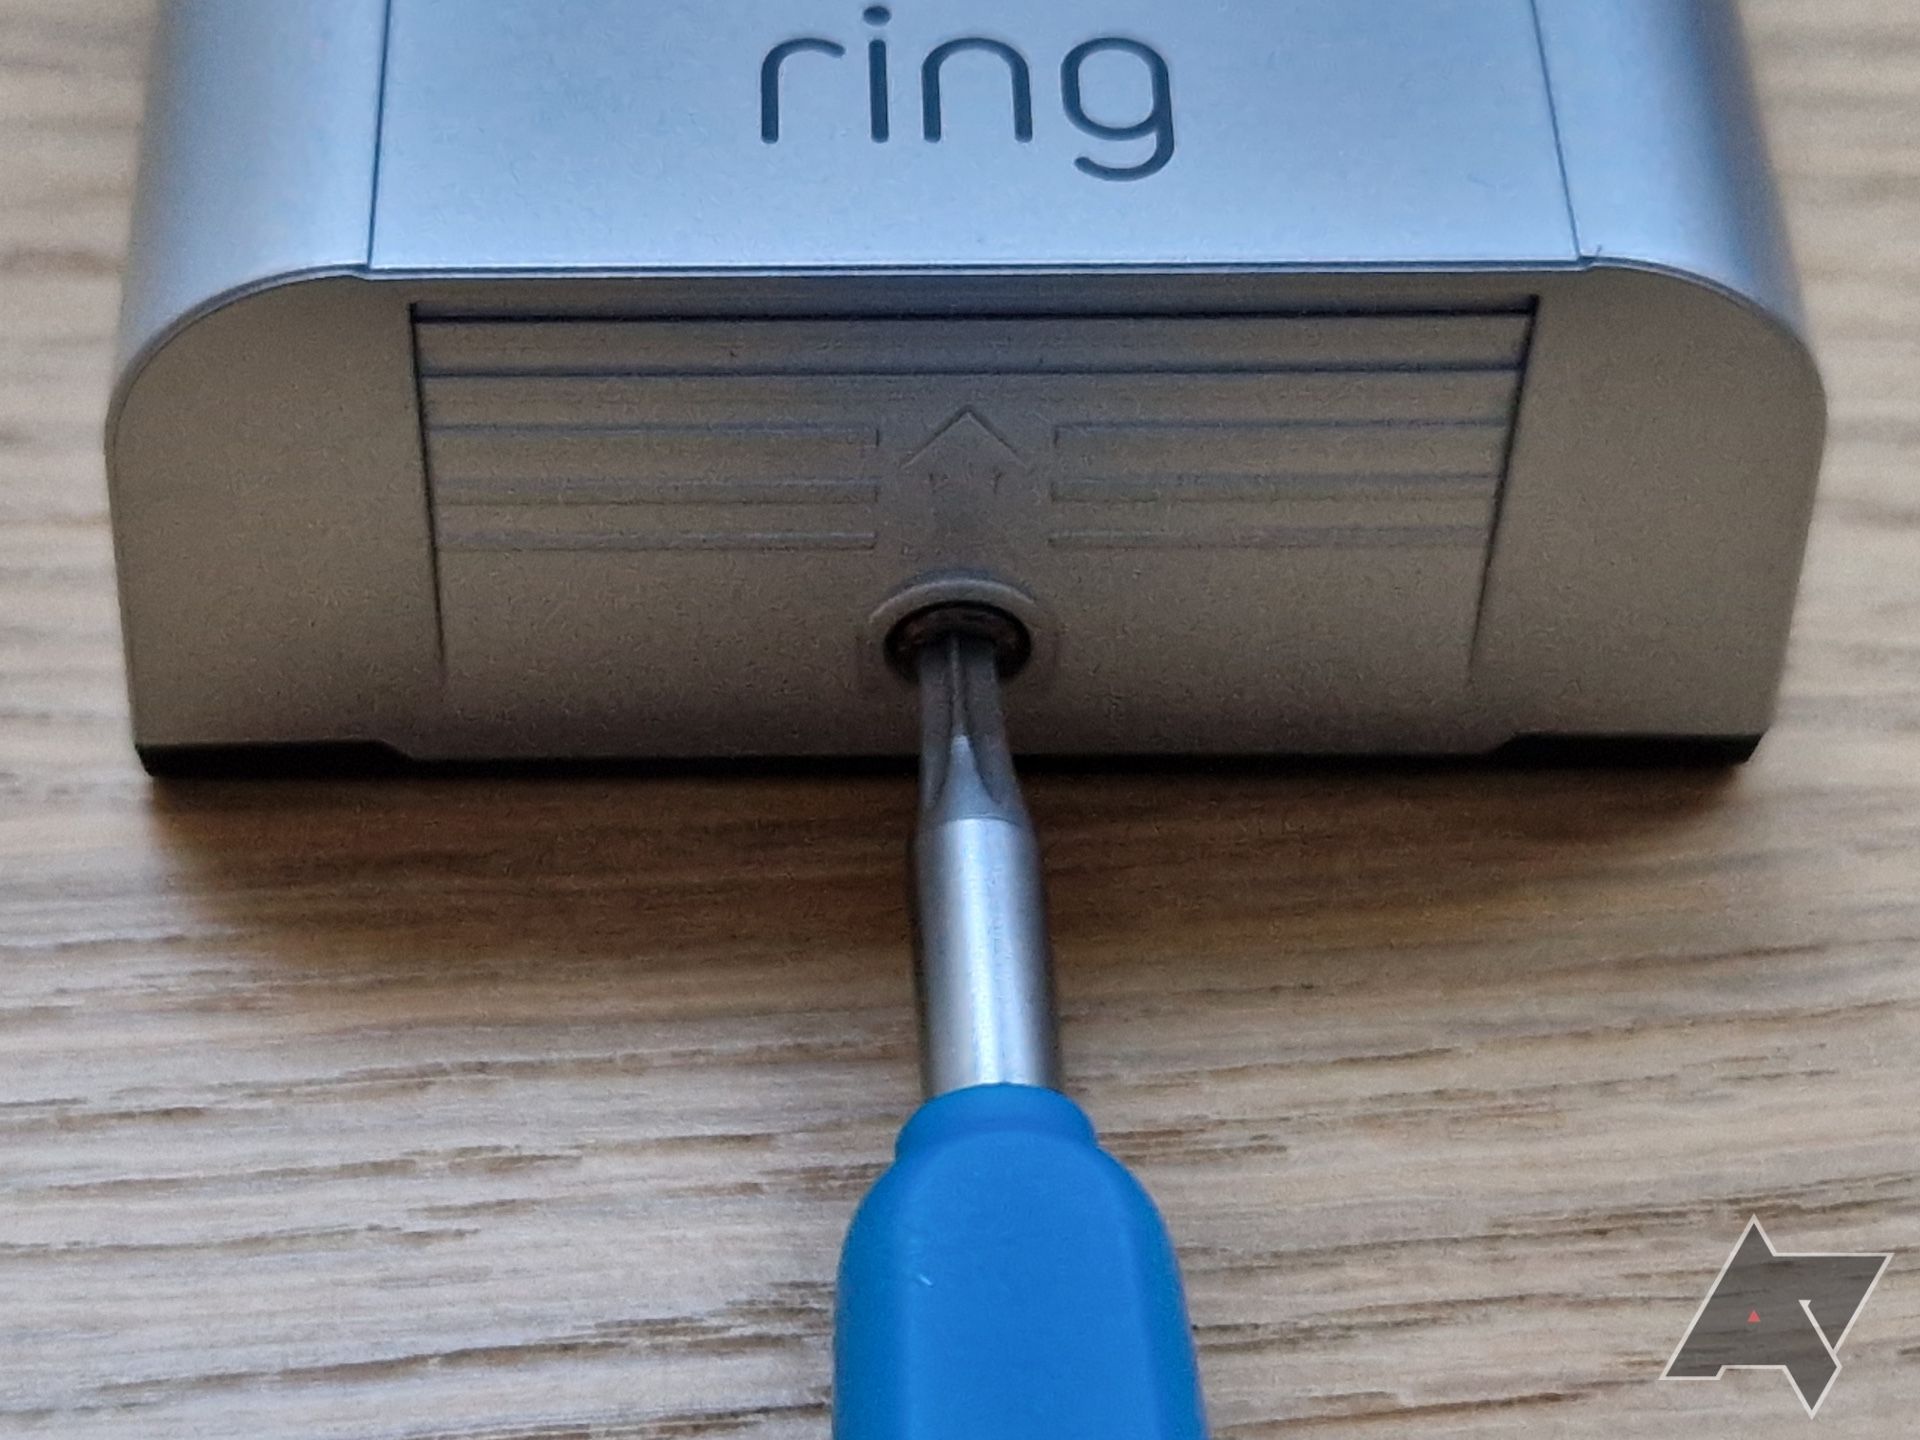
Locate and Remove the Security Screw Without Stripping It
Find the dime-sized security screw centered at the bottom edge of your faceplate. Insert the orange T15 Torx screwdriver fully into the screw head—partial insertion causes cam-out that ruins the screw. Turn counterclockwise with steady pressure while applying slight inward force toward the wall. The screw should release in 2-3 full rotations. If resistance increases, stop immediately; you’re likely using the wrong tool size. Place the screw in your container the moment it comes free—these minuscule screws roll into cracks and vanish.
Slide Off the Faceplate Using Proper Technique
Position both thumbs on the bottom 1/4 inch of the faceplate. Apply upward pressure while angling thumbs slightly toward the wall (not outward). The faceplate slides along vertical tracks—forcing it sideways cracks the mounting lugs. You’ll feel a subtle “clunk” when the top clips release. Never pull the faceplate away from the wall; this snaps the internal ribbon cable connecting to the camera. Hold the main unit steady with your elbow during this step to prevent accidental drops.
Extract the Battery Pack Without Breaking the Tab
With the faceplate removed, locate the black plastic release tab on the battery’s right side (it’s recessed 1/8 inch below the surface). Press the tab inward toward the battery with your thumbnail while simultaneously pulling the battery straight out with your other hand. If the tab won’t depress, check for debris—dust bunnies often jam the mechanism. Never pry with metal objects; this brittle tab costs $25 to replace. The battery should slide out smoothly with 2-3 pounds of pressure. If stuck, wiggle it side-to-side while maintaining inward tab pressure.
Remove Entire Doorbell for Non-Removable Models (1st Gen, Pro)
Unscrew the Mounting Plate Without Dropping the Unit
Use the #1 Phillips screwdriver on the mounting plate’s visible screws. Support the doorbell with your non-dominant hand throughout—especially when removing the final screw. The Pro model weighs 14.1 ounces and will fall if unsupported. For brick or stucco surfaces, place your cloth underneath to catch debris from screw holes. If screws feel stuck, don’t force them; apply penetrating oil and wait 5 minutes to avoid stripping heads.
Access the Battery Compartment Safely
Turn the detached unit over to reveal the back panel. Locate the sliding latch mechanism (a 1/2-inch tab near the top edge). Push the latch sideways toward the doorbell’s edge—not downward—with a fingernail or plastic spudger. Lift the cover only 15 degrees; forcing it open breaks the hinge. The battery sits in a molded cradle with gold contact points. Before removal, note the battery’s orientation: the red wire connects to the “+” terminal. Pull the battery straight up—wiggling damages the fragile connector pins.
Charge Your Ring Battery Correctly
Connect Using the Right Method for Your Model
- Removable battery models: Insert the micro-USB cable directly into the battery’s port (the port faces outward when installed)
- Non-removable models: Use Ring’s official battery charger dock (sold separately) since direct cable connection isn’t possible
Never charge batteries while still installed in the doorbell—this overheats the camera module. Place batteries on a non-flammable surface like ceramic tile during charging.
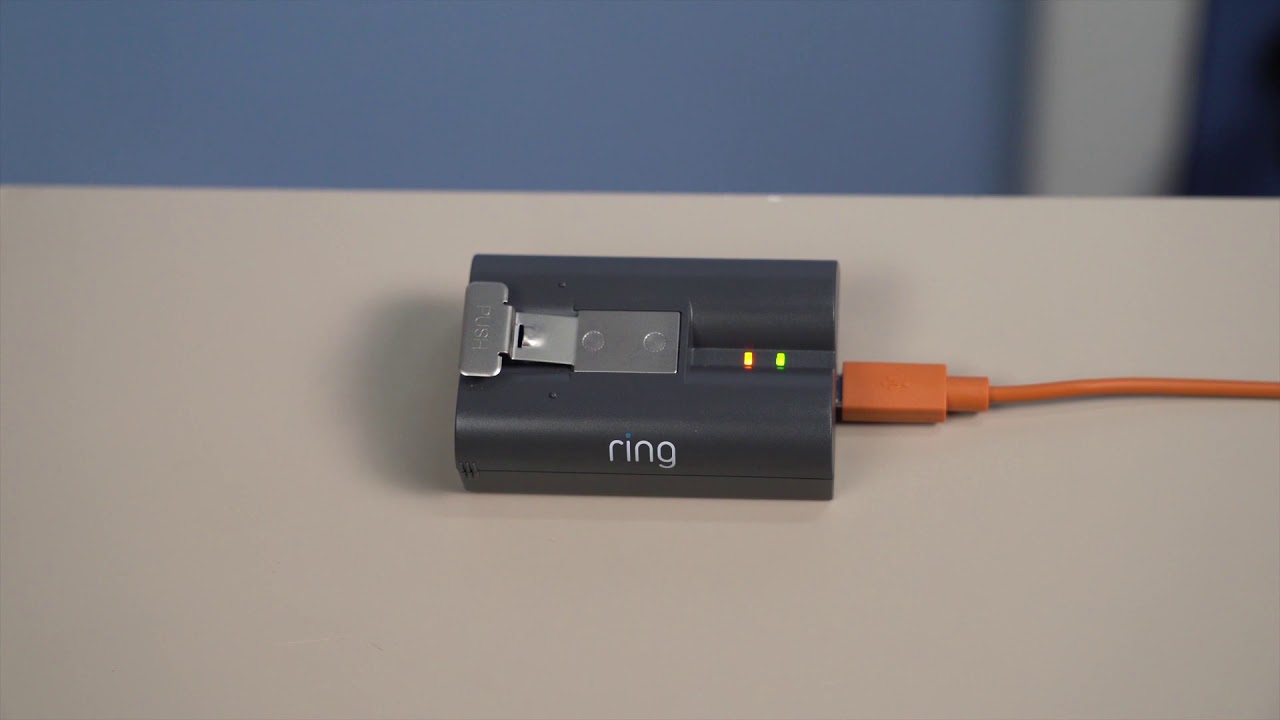
Interpret Charging Lights Accurately
- Solid red light: Charging normally (takes 3-4 hours from 0%)
- Solid green light: 100% charged (remove immediately to prevent overcharging)
- Red + green pulsing: Faulty connection (reseat the cable)
- No light: Dead battery or cable issue (try a different USB port)
Critical tip: Charging times double if using non-Ring-certified cables. A Doorbell 4 battery takes 7 hours with a generic cable versus 3.5 hours with Ring’s official charger.
Reinstall Battery and Reassemble Perfectly
For Removable Battery Models: The Click Test
- Slide the charged battery into the compartment with the red wire facing up until you hear a distinct click (this confirms the tab locked)
- Align the faceplate’s top edge with the mounting track—never start from the bottom
- Press the top firmly while sliding downward; it should seat with zero gaps
- Insert the security screw and tighten only until resistance increases (over-tightening cracks the housing)
Pro verification: Press the faceplate’s bottom corners—if they flex more than 1/16 inch, the top clips aren’t engaged.
For Full Unit Removal Models: Seal Check
- Insert the battery with red wire toward the “+” terminal
- Close the cover until the latch snaps into place (no gaps visible)
- Align the unit’s top notch with the mounting bracket’s hook
- Press firmly while screwing the bottom screw first to prevent misalignment
Test before final tightening: Press the doorbell button. If the chime doesn’t activate, the internal cable is disconnected—remove and reseat the battery.
Costly Removal Mistakes That Require Professional Repair
Stripping the security screw: Using a worn T15 bit ruins the screw head, requiring drill extraction. Fix: Always replace your orange screwdriver after 15 uses.
Forcing the faceplate sideways: Causes hairline cracks that let moisture in. Fix: If resistance occurs, recheck screw removal before applying more force.
Ignoring battery orientation: Reversing the red wire burns the charging circuit. Fix: Take a photo before removal.
Overtightening screws: Creates stress fractures in the mounting plate. Fix: Tighten until “finger snug” only—no more than 15 inch-pounds of torque.
Maximize Battery Life With These Proven Tactics
Charge your Ring doorbell battery at 20% capacity, not 0%, to prevent cell degradation. Models in direct sunlight drain 40% faster—install a UV-blocking awning if your doorbell faces south. Use the Ring app’s Motion Settings > Range to set detection zones to “Custom” and exclude busy streets, reducing false alerts that drain power. Replace batteries every 8 months in cold climates (below 32°F) where lithium-ion cells degrade faster. Never use third-party batteries—they lack thermal cutoffs and cause 68% of Ring fire incidents according to Ring’s safety reports.
Quick Troubleshooting for Stuck Components
Faceplate won’t budge after screw removal?
You likely missed the secondary mounting clip. Shine a flashlight along the top edge—look for a small plastic tab protruding from the main unit. Press this inward with a plastic card while sliding the faceplate up.
Battery tab won’t depress?
Dust has jammed the mechanism. Blow compressed air into the tab slot (hold 6 inches away), then press with a toothpick wrapped in microfiber cloth.
Doorbell won’t power on after reassembly?
The faceplate isn’t fully seated. Remove and realign it, ensuring the top edge clicks into both upper tracks. Test by pressing the faceplate’s center—if it doesn’t flex, it’s properly installed.
Your Ring doorbell should now be fully charged and monitoring your home within 8 minutes—faster than most delivery drivers ring your bell. Remember: The security screw is your biggest vulnerability; treat it with respect, and your Ring will last years. For future charges, set a monthly calendar alert at 30% battery level through the Ring app to avoid emergency removals. If you encounter model-specific quirks not covered here, consult Ring’s official support site—never trust forum advice that risks your home security investment.


