
A bare window seat looks incomplete and feels uncomfortable after just a few minutes. Many homeowners overlook this cozy corner because they assume custom cushions require professional upholstery work. Learning how to make a window seat cushion yourself saves money, ensures a perfect fit, and lets you choose fabrics that match your décor. This guide walks you through every step, from measuring your space to sewing a polished cover and adding practical safety features.
In the next few sections, you’ll discover how to pick the right foam density, select sun-resistant fabric, cut and sew a boxed-edge cover, and finish with non-slip backing. By the end, you’ll have a durable, stylish cushion tailored to your exact window seat dimensions.
Measure Your Window Seat Accurately
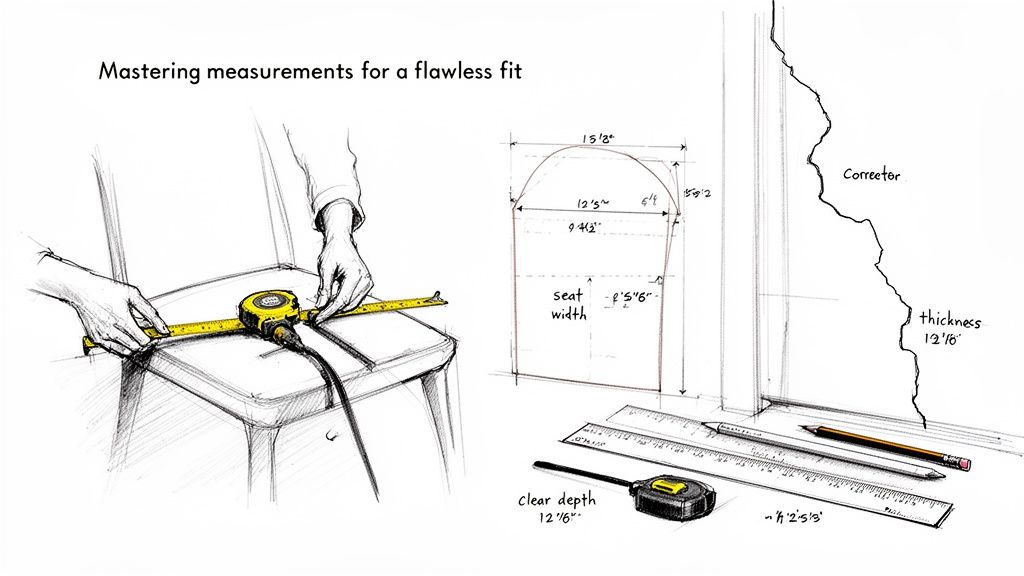
Accurate measurements form the foundation of a great cushion. Skipping this step leads to fabric waste and a poor fit. Grab a tape measure and a notepad before you start.
Determine Cushion Dimensions
Measure the length, width, and depth of the seating surface. For a snug fit, subtract 1/2 inch from each measurement to account for seam allowances. If your seat has side panels or arms, decide whether the cushion sits between them or extends over the edges. When making a removable cover, add an extra 1.5 inches in all directions for seams.
Choose Ideal Cushion Thickness
Most window seat cushions range from 3 to 5 inches thick. For casual lounging and reading, 4 to 5 inches offer plush support. For firmer seating, especially with a dining table, 3 inches works well. High-density foam holds its shape longer than soft, low-density options.
Select Foam and Filler Type

The core material determines comfort, support, and lifespan. Choose wisely to avoid flat, saggy cushions within months.
Compare Foam Density Options
High-density polyurethane foam rated between 1.8 and 2.5 lbs per cubic foot delivers the best results. It resists sagging and handles daily use without breaking down. Avoid low-density foam under 1.5 lbs, which compresses quickly. For extra softness, layer a 1-inch down alternative pad on top of firm foam.
Consider Alternative Fillers
Shredded foam or polyester fiberfill works well for curved or non-rectangular seats like bay windows. These materials mold to unusual shapes but compress faster and need occasional fluffing. To prevent shifting, baffle the fill inside the cover with internal stitching.
Pick Durable, Style-Smart Fabric

Fabric choice affects both appearance and longevity. Window seats often receive direct sunlight and frequent contact, so material matters.
Choose Sun-Resistant Outdoor Fabric
Indoor cushions still suffer UV damage over time. Solution-dyed acrylic, such as Sunbrella, or outdoor-grade polyester resists fading, stains, and moisture. Most wipe clean with mild soap and water. Avoid cotton or silk, which wear quickly and stain easily.
Balance Texture and Comfort
Smooth fabrics like canvas and microfiber feel soft against skin but show lint and pet hair. Textured weaves such as herringbone or tweed hide wear better. For homes with kids or pets, choose stain-resistant indoor-outdoor fabric with a subtle texture.
Cut and Assemble the Cushion Cover
A well-sewn cover protects the foam and gives a professional finish. Take your time with cutting and pinning for clean results.
Cut Fabric with Precision
Lay fabric flat with the right side down. Transfer your adjusted measurements using chalk or a washable marker. Cut two pieces: one for the top and one for the bottom. For a boxed edge, also cut a long strip for the side panel. Its length should match the perimeter of the top piece, and its height should equal the foam thickness plus 1 inch for seam allowance.
Sew a Boxed Edge for Fullness
A boxed edge creates depth and a tailored look. Pin the side strip to the top piece with right sides together, mitering corners for clean edges. Repeat with the bottom piece. Sew all three layers using a 1/2-inch seam allowance. Leave a 6 to 8 inch gap on the bottom panel for inserting foam later.
Insert Foam and Finish the Cushion
With the cover sewn, add the filling and close the opening for a polished result.
Insert the High-Density Foam Core
Slide the foam into the cover through the opening. Gently push it into each corner for full coverage. Smooth out wrinkles and bunching before closing. If using layered fill, insert the firm foam first, then add the softer top layer.
Hand-Stitch the Opening Closed
Use a ladder stitch, also called an invisible seam, to close the gap. Thread a needle with strong, matching thread and fold the raw edges inward. Stitch through the folded edges, pulling gently after every few stitches. This creates a clean finish with no visible stitching.
Add Non-Slip and Safety Features

Simple upgrades prevent slipping and extend cushion life, especially in busy households.
Attach Non-Slip Backing
Cut a sheet of non-slip rug pad or shelf liner to match the foam size. Secure it to the bottom of the cushion with spray adhesive. This keeps the cushion in place on smooth surfaces like wood or tile.
Secure Cushion in High-Traffic Areas
For seats near windows or used by children, add hook-and-loop tape to anchor the cushion. Attach one side to the underside of the cushion and the other to the seat frame. This prevents shifting without permanent installation.
Customize with Style Details

Decorative touches elevate a basic cushion into a designer-quality piece that complements your room.
Add Welting or Piping
Insert cording along the seam where the top meets the side panel for a tailored look. Cut bias tape or make custom piping from matching fabric, then sew it between the top and side pieces during assembly. Piping adds definition and strengthens high-stress seams.
Include Reversible or Removable Covers
Sew a second top piece in a contrasting fabric for a reversible cushion, perfect for seasonal updates. Use a zipper instead of hand-stitching for easy removal and washing. Install the zipper along the bottom seam for a clean appearance.
Maintain and Refresh Over Time
Regular care keeps your cushion looking new and functional for years. A few simple habits make a big difference.
Clean Fabric Without Damage
Spot-clean with mild detergent and a damp cloth for everyday messes. For machine-washable covers with removable zippers, wash in cold water on a gentle cycle and air dry. Never soak the foam, as water causes mildew and breakdown. Outdoor-grade fabric can be hosed off and left to dry fully before reinserting foam.
Replace Foam Every 3 to 5 Years
Even high-density foam loses resilience over time. Check annually for sagging or lumps. When the cushion no longer springs back, replace the core. Keep the original cover if it’s still in good shape, since inserting new foam cut to size is quick and easy.
Frequently Asked Questions About Window Seat Cushions
What Type of Foam Works Best for a Window Seat Cushion?
High-density polyurethane foam rated between 1.8 and 2.5 lbs per cubic foot offers the best support and durability. It resists sagging and handles daily use without flattening quickly.
How Thick Should a Window Seat Cushion Be?
Most window seat cushions range from 3 to 5 inches thick. Choose 4 to 5 inches for plush lounging comfort, or 3 inches for firmer seating, especially when paired with a dining table.
Can I Make a Window Seat Cushion Without Sewing?
Yes, you can use fabric glue, staple fabric to a wooden base, or buy no-sew cushion covers with Velcro closures. However, sewing produces the most durable and polished result.
What Fabric Is Best for a Window Seat Cushion?
Solution-dyed acrylic or outdoor-grade polyester resists fading, stains, and moisture. These fabrics hold up well in sunny spots and clean easily with mild soap and water.
How Do I Keep My Window Seat Cushion From Sliding?
Attach non-slip rug pad or shelf liner to the bottom using spray adhesive. For extra security, especially in homes with kids, use hook-and-loop tape to anchor the cushion to the seat frame.
How Often Should I Replace the Foam Inside My Cushion?
Replace the foam every 3 to 5 years, or sooner if you notice sagging or lumps. The cover can usually be reused if it’s still in good condition.
Final Takeaways for Your DIY Window Seat Cushion
Making a window seat cushion is a practical weekend project that blends function with personal style. Accurate measurements, high-density foam, and sun-resistant fabric form the foundation of a cushion that lasts. Adding non-slip backing and a removable cover boosts both safety and convenience. With basic sewing skills and quality materials, you can build a custom cushion that fits your space perfectly and becomes a favorite spot in your home. Start by measuring your window seat today, and gather your materials for a rewarding build this weekend.



