Old window glazing often hardens into a concrete-like substance that seems impossible to budge. Whether you are restoring a historic home, replacing cracked glass, or upgrading insulation, learning how to remove window glazing properly protects your windows, your health, and your budget. Mistakes during this step lead to shattered panes, scorched wood, and dangerous exposure to lead or asbestos.
This guide breaks down every proven removal method, from steam and heat to mechanical tools and chemical softeners. You will discover which techniques preserve fragile glass, which tools match your frame type, and how to keep yourself safe from hidden hazards in older homes.
Choose the Right Removal Method for Your Project

Picking the best way to remove window glazing depends on your frame material, the age of your home, and the tools you have on hand. Four core methods dominate restoration work: steam, controlled heat, mechanical tools, and chemical softeners. Each approach carries unique strengths and risks that you need to weigh before starting.
Steam Softens Putty Without Thermal Shock
Steam is the safest removal method, especially for historic wood windows with irreplaceable glass. Moisture and gentle heat penetrate micro-channels in the putty, softening it without direct contact or the risk of cracking your pane.
- Best for: DIYers, homeowners, and sensitive restoration projects.
- Time per section: About 1 to 2 minutes of steaming.
- What to look for: Putty lifts in large, intact pieces.
- Pro tip: A standard wallpaper steamer costs around $50. Remove the wall attachment to expose a focused nozzle.
Steps to use steam:
1. Lightly score the glazing surface with a putty knife.
2. Hold the nozzle directly against the joint.
3. Apply steam for 60 to 90 seconds.
4. Peel away softened putty with a thin, flexible blade.
Steam eliminates the risk of cracking glass or scorching wood. The tool also doubles as a cleaner for grout and wallpaper elsewhere in your home.
Heat Guns Deliver Speed With Strict Temperature Control

Heat guns are the professional favorite for their speed, but they demand careful handling. The goal is to soften oil-based putty made from linseed oil and resins without overheating the surrounding materials.
- Optimal temperature: 250°F to 300°F on low or medium setting.
- Danger zone: Anything above 1,100°F releases toxic lead fumes.
- Field test: If the heat blisters your skin from 6 inches away, it is too hot.
Steps to use safely:
1. Set the heat gun to low or medium.
2. Hold it 6 to 8 inches from the putty.
3. Move slowly in a sweeping motion.
4. Scrape with a plastic or wooden tool as the putty softens.
Avoid blowtorches entirely. They exceed safe temperatures instantly and create serious fire and fume risks. For better results on large projects, consider an L-shaped heated pad that warms both sides of the sash evenly.
Mechanical Tools Handle Stubborn Putty
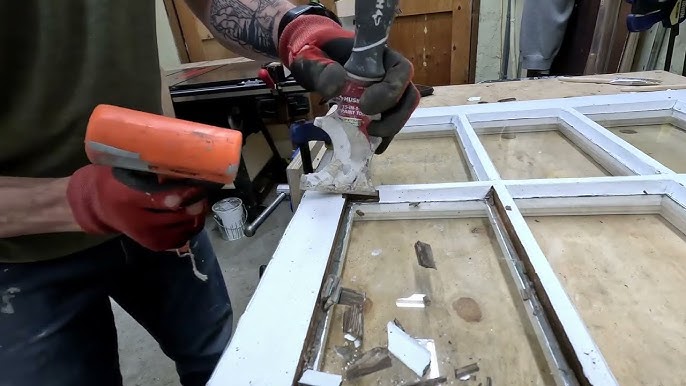
When putty resists heat or steam, mechanical tools offer precision and power. Technique matters here because improper force can shatter glass or gouge wood frames.
Apply Force Parallel to the Glass
The most important rule for manual removal is to angle your tool along the pane rather than pushing straight down. Perpendicular force transfers stress to the glass edge, which is the weakest point.
- Tools: Use a painter’s glazing tool or a rounded chisel.
- Technique: Angle the tool along the pane and tap gently with a rubber mallet.
- Outcome: The seal breaks cleanly without cracking the glass.
This method works even at room temperature and works well for quick touch-ups.
Oscillating Multi-Tools Cut Through Hard Glazing
A Fein MultiMaster or similar oscillating tool excels on metal frames or rock-hard putty. With the right blade, it slices behind the glazing without damaging the frame.
- Best for: Metal sashes, curved panels, and thick old putty.
- Power tip: Choose a corded model for maximum torque.
- Blade cost: Factor in recurring blade replacement.
Avoid drill-mounted putty chasers because they often damage wood and offer poor control. Routers are also dangerous at 23,000 RPM, where a single slip can shatter glass.
Manual Chisels and Scrapers Work for Small Jobs
For tight spaces or single windows, hand tools still get the job done.
- Side-strike chisel: Ideal for metal frames. Use it to get under the putty and create a gap.
- 5-in-1 painter’s tool: Thin, strong blade that outperforms many specialty chisels.
- Red Devil 3-in-1: Durable but needs daily sharpening.
Patience pays off here. Take your time to avoid gouging the frame.
Chemical Softeners Help in Delicate Areas
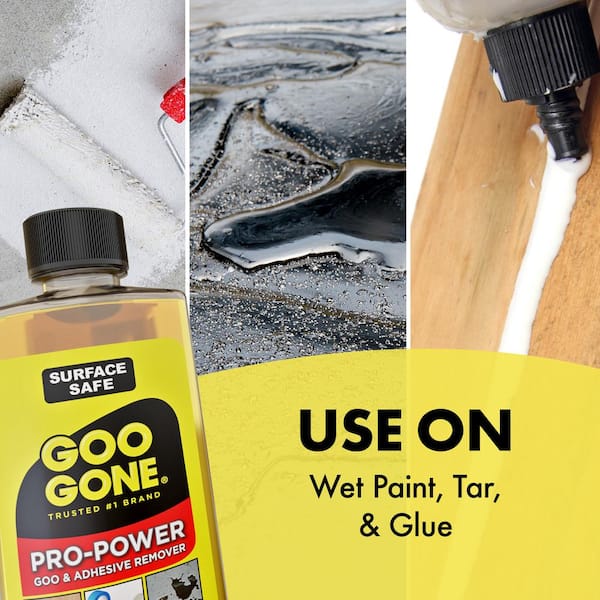
Chemicals alone will not remove glazing, but they loosen putty in heat-sensitive zones. Use them as a supplement to other methods.
- Effective products:
- Goo Gone Original
- Citrus-based solvents like EcoSolv or Citrus Solvent
- Loctite Glazing Putty Remover
- Boiled linseed oil (flood the area and wait 24 hours)
How to apply:
1. Dab the product on a small section.
2. Wait 10 to 15 minutes.
3. Scrape gently with a plastic tool.
4. Wipe the area clean.
Never use kerosene or mineral spirits because they strip paint and damage wood finishes. Always ventilate the area, wear gloves, and test on a hidden spot first.
Adapt Your Technique to the Frame Type

The frame material changes your entire strategy. Wood and metal sashes behave differently and require different tools.
Wood Frames Need Gentle Handling
Wood is vulnerable to scorch marks and gouging, so prioritize methods that preserve the sash.
- Best methods: Steam, low-heat guns, and plastic scrapers.
- Avoid: Metal scrapers on painted surfaces because they scratch easily.
- Prep tip: After removal, prime the rabbet with boiled linseed oil to seal the wood and improve new putty adhesion.
For large projects, a heated pad or oscillating tool speeds up work without compromising safety.
Metal Frames Require Power and Precision
Vintage steel or metal sashes often have glazing as hard as concrete. Paint acts as an insulator and blocks heat penetration, which complicates removal.
- Challenges: Spring clips instead of glazier points and paint-sealed joints.
- Best tools:
- Side-strike chisel to break the initial seal
- Corded oscillating multi-tool to cut behind the glazing
- Thin pry bar (sheet metal type) for lifting
- Heat use: Acceptable because repainting is usually needed anyway.
For curved glass or tight corners, a multi-tool is essential. Start with a chisel to create access, then switch to power tools.
Protect Yourself From Hidden Hazards
Old glazing may contain lead and asbestos, especially in homes built before 1978. Ignoring these hazards puts your health at serious risk.
Assume Lead Is Present
- Lead location: Found in glazing putty and surrounding paint.
- Fume risk: Lead vaporizes at 1,100°F. Most heat guns stay below this on medium, but torches exceed it instantly.
- Dust risk: Dry scraping creates inhalable lead dust.
Safety steps:
– Wear a NIOSH-approved respirator (not a basic dust mask).
– Use goggles and nitrile gloves.
– Work in a ventilated area.
– Contain debris with plastic sheeting.
Steam and chemical softeners carry the lowest risk for lead exposure.
Watch for Asbestos in Pre-1940s Homes
Homes from the 1941 era and earlier may contain asbestos in the glazing compound or nearby plaster.
- Regulatory note: Professional abatement is required in many regions.
- Never sand or dry-scrape because this releases dangerous fibers.
- If in doubt, test with a certified lab before starting work.
Steam and infrared heating reduce airborne particles. For full removal, consider industrial dipping services.
Consider Professional Dipping for Large Jobs
For multiple windows or irreplaceable glass, industrial dipping offers a clean and safe alternative.
- Process: Sashes are removed and dipped in a chemical tank that strips all paint and putty.
- Outcome: Perfectly clean wood and intact glass with no physical force used.
- Cost: Higher upfront, but saves labor and reduces breakage risk.
- Risk: May loosen old wood joints, though this is rare in window sashes.
- Availability: Offered by specialty furniture stripping shops.
This option works well for museum-quality restorations or whole-house projects.
Clean and Prep for Re-Glazing
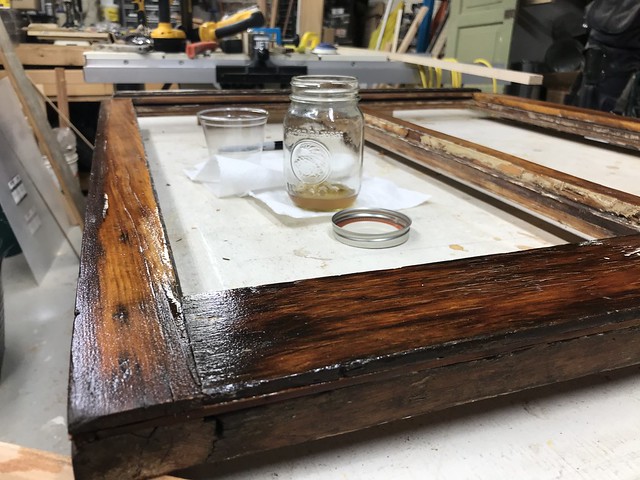
Once the old putty is gone, proper prep ensures a long-lasting seal on your new glazing.
Remove Residue and Prime the Surface
- Wipe the rabbet with a damp cloth.
- Let it dry completely.
- Apply boiled linseed oil to both the wood and the glass edge.
- Seals the wood
- Prevents oil absorption from new putty
- Improves adhesion
Let the oil skin over for 1 to 2 hours before applying new glazing.
Choose the Right Replacement Material
- Traditional putty: Linseed oil-based options like DAP 33 require skill to apply smoothly.
- Silicone: Dow recommends it for some applications.
- Apply a bead to the wood, set the glass, and tool the bevel within 3 to 5 minutes.
- Use painter’s tape for clean edges.
- Pre-formed strips: Peel-and-stick bevel caulk for quick fixes.
Source Authentic Restoration Glass
Modern glass may look flat and out of place in old homes.
- Restoration types: “Wavy” or “Ripple” glass mimics the look of 120 to 150 year old panes.
- Supplier: S.A. Bendheim Co., Inc. in Passaic, NJ sells to homeowners and ships precut pieces at around $15.95 per square foot.
- Note: Older glass is thicker, so measure your rabbet depth before ordering.
Match Tools to Your Project Scale
| Tool or Method | Best For | Cost | Skill Level |
|---|---|---|---|
| Wallpaper Steamer | Historic wood, safety-first projects | $50 | Low |
| Heat Gun (250 to 300°F) | General restoration work | $30 to $80 | Medium |
| Oscillating Multi-Tool | Metal frames, curved glass | $200+ | High |
| Side-Strike Chisel | Metal sash, gap creation | $10 to $20 | Medium |
| Citrus Solvent | Touch-ups, sensitive areas | $10 to $20 | Low |
| Industrial Dipping | Full-house projects, fragile glass | Service fee | N/A |
Frequently Asked Questions About Window Glazing Removal
What is the safest way to remove window glazing?
Steam is the safest method for removing window glazing. It softens putty without thermal shock, eliminates the risk of cracking glass, and prevents scorching on wood frames. A standard wallpaper steamer costs around $50 and works well for DIYers.
Can I use a heat gun to remove old glazing?
Yes, a heat gun works well for removing old glazing when set to 250°F to 300°F. Hold it 6 to 8 inches from the putty and move slowly to avoid overheating. Never exceed 1,100°F because lead fumes become dangerous at that temperature.
How do I remove glazing without breaking the glass?
Apply force parallel to the glass rather than pushing straight down. Use a painter’s glazing tool or rounded chisel and tap gently with a rubber mallet. This technique breaks the putty seal without transferring stress to the fragile glass edge.
Is old window glazing dangerous to remove?
Old glazing may contain lead and asbestos, especially in homes built before 1978. Wear a NIOSH-approved respirator, goggles, and gloves. Avoid dry scraping and never use a torch, which releases toxic fumes above 1,100°F.
What tools work best for metal window frames?
A side-strike chisel and a corded oscillating multi-tool work best for metal frames. Start with the chisel to create a gap, then use the multi-tool to cut behind the glazing. Battery-powered tools often lack the torque needed for this work.
Should I hire a professional for glazing removal?
Consider a professional for large projects, irreplaceable historic glass, or homes with suspected asbestos. Industrial dipping services strip paint and putty without physical force, preserving fragile glass and saving significant labor time.
Key Takeaways for Safe Window Glazing Removal
Learning how to remove window glazing comes down to three core principles. First, match your method to your frame: steam for historic wood, heat guns for general speed, and oscillating tools for metal sashes. Second, always assume lead and asbestos are present in older homes and protect yourself with proper respirators, gloves, and ventilation. Third, avoid shortcuts like blowtorches, routers, and drill-mounted chasers that create more risks than they solve.
Your next step is to assess your windows and choose the method that fits your project. Start with a single window using steam or low heat to build confidence before tackling larger restorations. With the right approach, you can preserve your windows, protect your health, and bring new life to your home.