
Your doorbell button gets pressed, but silence follows. No chime, no notification—just uncertainty about whether someone actually visited your home. This frustrating wireless doorbell not working scenario affects countless homeowners daily, yet most problems have straightforward solutions. Whether you’re dealing with complete silence or intermittent failures, this guide provides the exact diagnostics and fixes you need to restore functionality quickly.
Most wireless doorbell failures stem from just three root causes: power issues, signal problems, or synchronization errors. By following this systematic approach, you’ll identify and resolve your specific problem—often without special tools or technical expertise. Start with simple checks before moving to advanced diagnostics, and you’ll solve 80% of wireless doorbell not working cases within minutes.
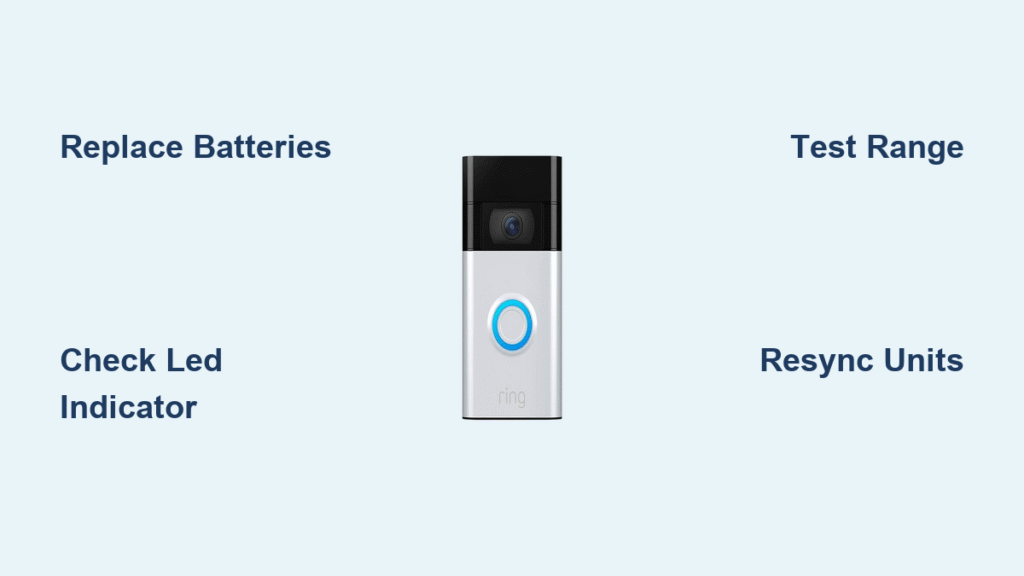
Replace Batteries Even When They Seem Fine
Dead or weakening batteries cause over 60% of wireless doorbell failures, yet users often overlook this simple fix. Testing batteries under load—not just with a basic voltage check—is crucial because some batteries show adequate voltage but can’t deliver sufficient current when needed.
Press Button and Check for LED Indicator
When you press your doorbell button, look for an LED light on the transmitter. No illumination means either dead batteries or poor connections. For Home Depot’s HB-7306-03 model, verify you’ve removed all protective tabs from both the button and chime units—this simple oversight causes many “defective” units. Replace batteries even if they appear fresh, especially in humid environments where battery life degrades 30-50% faster than in dry conditions.
Pro Tip: Use a battery tester that applies load rather than just measuring voltage. A battery showing 1.5V without load might drop to 1.1V under actual operating conditions—insufficient for reliable doorbell operation.
Test Chime Unit Power with Grey Reset Button
Locate the grey test/reset button on your chime unit and press it firmly. You should hear a chime sound immediately. No response indicates receiver power failure. The HB-7306-03 model requires 2 AA batteries in the chime assembly, and these often fail before the transmitter batteries due to higher power demands. Replace both sets simultaneously for best results—don’t assume one set is good just because the other failed.
Remove Corrosion from Battery Terminals
Corrosion on battery contacts interrupts power flow and causes intermittent failures. Remove batteries and inspect terminals for white, green, or blue deposits. Clean contacts using isopropyl alcohol and a cotton swab, then dry thoroughly before reinstalling fresh batteries. If corrosion has eaten through metal contacts, replacement becomes necessary as cleaning alone won’t restore conductivity.
Eliminate Signal Interference Blocking Your Doorbell

When power checks pass but your wireless doorbell still isn’t working, signal transmission issues are likely the culprit. These problems typically show as complete silence or very limited effective range—sometimes working only when you’re standing directly in front of the door.
Test Range by Bringing Button Close to Chime
Bring your doorbell button within 10 feet of the chime unit. If it works at close range but not at normal distance, you’re facing range limitations or interference. Standard wireless doorbells operate at 433MHz, which can be disrupted by WiFi routers on 2.4GHz bands, baby monitors, or even energy-efficient LED light bulbs. Move metal objects away from both units—large appliances, aluminum siding, and foil-backed insulation can block 433MHz signals completely.
Identify Hidden Interference Sources in Your Home
Turn off other electronics one by one while testing your doorbell. Common interference culprits include:
– Smart home hubs placed near the chime unit
– Cordless phones operating on similar frequencies
– LED lighting fixtures near the doorbell wiring
– Microwave ovens when in operation
Test your doorbell with these devices powered down—if functionality returns, you’ve found your interference source. Relocate either the interfering device or your chime unit to create physical separation.
Inspect for Environmental Signal Degradation
Coastal and high-humidity environments accelerate internal corrosion that degrades signal strength. Open your transmitter housing (if possible) and inspect for fogged lenses, rust on screws, or swollen plastic parts—these indicate moisture damage that requires replacement rather than repair. In humid climates, consider adding desiccant packets inside the transmitter housing to absorb moisture and extend component life.
Resync Your Wireless Doorbell Using Model-Specific Procedures
Lost pairing between transmitter and receiver creates deceptive failures where your doorbell appears broken but simply needs reconnection. This issue commonly follows power outages or battery replacements.
Complete HB-7306-03 Resynchronization in 30 Seconds
Follow this exact sequence for Home Depot’s popular model:
1. Press and hold the doorbell button until you hear “Beep-Beep” (about 5 seconds)
2. Within 30 seconds, press the button once
3. Listen for confirmation “Beep-Beep” tone from the chime unit
4. Test from your normal location—success means your wireless doorbell not working issue is resolved
Common Mistake: Users often press the button too briefly during step 1, failing to trigger the sync mode. Hold it firmly until you hear the double beep.
Reset Radio Shack 433MHz Models Properly
For discontinued Radio Shack units, follow this procedure:
– Remove batteries from both units for 30 seconds
– Reinstall batteries in the chime unit first
– Press and hold the chime’s program button until it beeps continuously
– Press the doorbell button to complete pairing
– Release both buttons when you hear confirmation tone
If you don’t hear confirmation tones after multiple attempts, your unit likely has component failure requiring replacement.
Diagnose Persistent Failures with Advanced Checks
When basic fixes fail, component-level diagnostics can pinpoint exact issues—especially valuable if your wireless doorbell not working problem persists after multiple troubleshooting attempts.
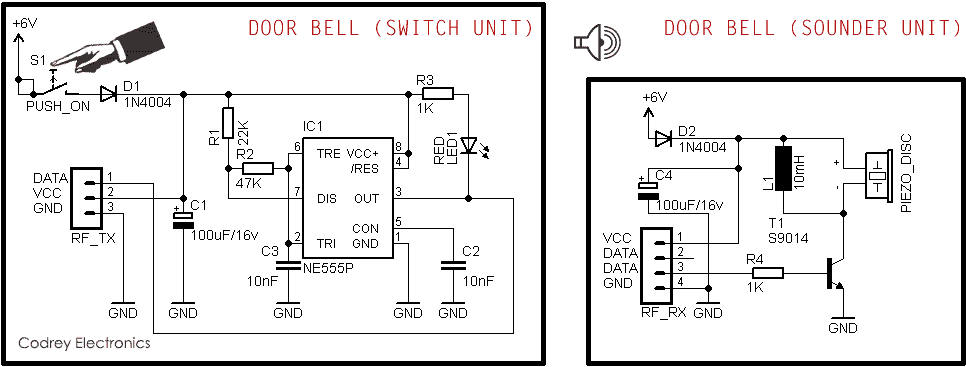
Check Transmitter Circuit Components
For technically inclined users with a multimeter:
– Test transistors Q1 and Q2 for shorts (zero ohms between any two pins indicates failure)
– Verify SAW resonator shows continuity but not direct shorts
– Inspect PCB for corrosion, particularly around oscillator components
On Radio Shack models, Q2 transistor failure accounts for 70% of persistent signal issues. Replacing this $0.50 component often restores functionality when other fixes fail.
Verify RF Signal Transmission
Without expensive equipment, test signal transmission by:
– Bringing a working 433MHz receiver within range of your transmitter
– Using a smartphone AM radio app to detect signal bursts (tune to empty frequency)
– Testing with the chime unit’s test button—normal operation confirms receiver functionality
No signal during button press with fresh batteries indicates transmitter oscillator failure, while weak signal suggests antenna or component degradation.
Prevent Future Wireless Doorbell Failures Proactively

Once restored, implement these strategies to avoid repeat problems with your wireless doorbell not working:
Establish Monthly Maintenance Routine
- Week 1: Check battery voltage under load using proper tester
- Week 2: Clean button contacts with isopropyl alcohol
- Week 3: Verify range hasn’t decreased due to new interference
- Week 4: Inspect for early signs of moisture or corrosion
Install Environmental Protection
- Add IP65-rated waterproof boxes for outdoor transmitters
- Place silica gel desiccant packets inside transmitter housing (replace every 6 months)
- Apply conformal coating spray to circuit boards in high-humidity areas
Upgrade to More Reliable Models When Needed
Consider replacing older units with models featuring:
– Dual-band operation (915MHz/2.4GHz) to avoid interference
– Better environmental sealing (IP67 rating)
– Smartphone integration for remote diagnostics
Know When Replacement Beats Repair for Wireless Doorbells
Sometimes repair isn’t cost-effective. Replace your wireless doorbell when:
– Factory reset and resync procedures fail completely after multiple attempts
– Physical corrosion has damaged multiple components
– The unit has experienced severe moisture damage
– Replacement parts cost more than a new system
Warranty Note: HB-7306-03 units purchased from Home Depot carry a 50-mile return policy—perfect for immediate replacement if you’re still within the return window. Radio Shack models, being discontinued, often require universal 433MHz transmitters as cost-effective replacements.
Final Fix Checklist: When your wireless doorbell isn’t working, start with fresh batteries in both units, verify LED illumination when pressing the button, test the chime unit’s reset button, and perform model-specific resynchronization. These steps resolve 80% of issues within 15 minutes. For persistent problems, environmental factors or component failures likely require replacement—document your specific model and symptoms before contacting support, as procedures vary significantly between manufacturers. Implement monthly maintenance to prevent future wireless doorbell not working scenarios and enjoy reliable door notifications year-round.


