
Your SkyBell doorbell’s live view keeps cutting out, the LED stays dark, and the app shows “device offline” more often than not. After three years of reliable service, the built-in lithium battery has finally reached the end of its lifespan. Instead of replacing the entire unit, you can swap in a fresh cell for under $20 and restore full functionality in about 30 minutes. This guide walks you through the exact steps for SkyBell Trim Plus models, plus compatible techniques for HD and Slim Line versions. You’ll learn where to find the correct replacement, which tools you’ll need, and how to avoid common mistakes that leave doorbells stuck in setup mode.
Confirm Your SkyBell Battery Replacement Part Number

SkyBell Trim Plus models require the US-602535PC-S replacement cell manufactured by STARTONG. This 500mAh lithium-polymer pouch cell (6.0 × 25.5 × 37.0mm) is the only verified drop-in replacement matching the original’s 3.7V voltage curve and 2-pin JST connector. For HD and Slim Line versions, you’ll need to measure your existing battery carefully since physical dimensions vary slightly between generations. Generic 3.7V LiPo cells work if they meet these critical specs:
- Voltage: Exactly 3.7V nominal (measure with multimeter)
- Capacity: 500mAh minimum (check product listing)
- Connector: 2-pin JST plug or solder pads (match your original)
- Certifications: UL, CE, and UN38.3 labels (non-negotiable for safety)
Pro Tip: Avoid cheap Amazon batteries with inflated mAh ratings. The 2.7/5-star average for SkyBell replacements comes from users installing uncertified cells that fail within months. Stick to STARTONG’s US-602535PC-S for Trim Plus models—it’s the only one with verified compatibility.
Why Generic Batteries Fail in SkyBell Doorbells
SkyBell’s power management system rejects cells with voltage fluctuations outside tight tolerances. Aftermarket batteries often lack the precise 3.6-3.8V “sweet spot” needed for stable operation. One user reported constant “device offline” alerts after installing a 700mAh generic cell—the higher capacity overloaded the charging circuit. Always verify voltage with a multimeter before installation, and never exceed 140°F during handling.
Power Down and Prepare Your Workstation
Turn off the 16-24VAC breaker supplying your doorbell’s transformer—this is non-negotiable for safety. Use a non-contact voltage tester on the wires to confirm power is off, as residual current can damage the new battery. While doorbell circuits are low-voltage, they still deliver painful shocks when wires are exposed.
Eliminate static electricity risks by clipping an anti-static wrist strap to bare metal or touching a grounded object before handling components. Lithium-polymer cells fail silently when zapped by ESD—your doorbell might work initially but die within weeks. If your unit faces direct sunlight, let it cool for 30 minutes before opening; heat above 140°F risks thermal runaway in damaged cells.
Essential Tools Checklist
- Phillips #0 screwdriver (for hidden screws under rubber feet)
- Plastic spudger (guitar pick or old credit card works)
- Multimeter (to verify 3.6-3.8V on new cell)
- 3M VHB double-sided tape (for resealing)
- Low-temp soldering iron (600°F max if leads are soldered)
Critical Warning: Never use metal tools to pry open the enclosure—that’s the #1 cause of cracked lens housings. Plastic spudgers prevent damage to the fragile PIR sensor dome inside.
Remove SkyBell From Mounting Bracket Without Disconnecting Wires
Start by loosening the two bottom security screws with the mini-Allen key provided in your SkyBell kit (or a Phillips screwdriver for Slim Line models). These sit flush with the base and may be hidden under rubber plugs—peel them back gently.
Lift straight up to disengage the top hooks from the mounting bracket. The unit should slide off while leaving wires attached to the bracket itself. This prevents accidental wire disconnection, which would require rewiring your entire doorbell system. Place the unit face-down on a soft towel to protect the camera lens during disassembly.
Avoid This Common Removal Mistake
Forcing the unit sideways instead of lifting vertically cracks the plastic mounting hooks. If you feel resistance, stop immediately—recheck for hidden screws under rubber feet (common on Slim Line models). SkyBell’s top-edge hooks are delicate; one user snapped both hooks trying to twist the unit free, requiring a $150 replacement.
Open the Enclosure Without Damaging Internal Components
Identify your model’s screw pattern: HD models have four visible Phillips screws on the rear cover, while Slim Line units hide screws under small rubber feet. Remove all screws before attempting to separate the halves.
Insert your plastic spudger between the matte rear cover and glossy front shell near the bottom edge. Work slowly around the perimeter, releasing plastic clips with gentle twisting motions—never force separation. You’ll hear distinct clicking sounds as clips disengage. Stop immediately if you feel resistance; forcing it severs ribbon cables connecting the camera and motion sensor.
What to Do If Clips Resist Opening
Apply light heat from a hair dryer (low setting) for 20 seconds to soften adhesive around the seam. Cold temperatures make the housing brittle—wait for a 60°F+ day if possible. If clips still resist, recheck for missed screws; SkyBell Trim Plus models often have an extra screw near the charging port.
Replace the Lithium-Polymer Battery Safely

The flat battery pouch sits against the main circuit board, secured with double-sided tape. Gently peel from one corner using tweezers—sharp tugs can puncture the aluminum casing, causing immediate failure. Note the connector type:
- JST plug: Pull straight up (never sideways)
- Soldered leads: Desolder red (+) and black (-) wires separately (max 3 seconds per joint)
Verify new cell voltage reads 3.6-3.8V with your multimeter before installation. Connect with correct polarity—reversed wires destroy the charging circuit instantly. Secure the new battery with fresh 3M VHB tape, ensuring no pressure on pouch edges. Route wires away from the PIR sensor dome to prevent motion detection interference.
Critical Polarity Check Before Power-Up
Use your multimeter to confirm positive (+) and negative (-) terminals match the PCB markings. One user fried their main board by installing a battery backward—their “solid yellow” LED turned into permanent smoke. If using soldered connections, apply flux to ensure clean joints that won’t overheat during charging cycles.
Reassemble and Validate Power Sequences
Snap the rear cover back into place, ensuring all clips engage fully. Tighten screws to finger-tight plus 1/8 turn only—overtightening strips plastic threads, causing water ingress later. Re-mount the unit by hooking the top edge first, then tilting down until it seats against the bracket.
Turn the breaker back on and watch the LED:
– Flashing red/blue: Normal charging (wait 10-30 min)
– Solid yellow (HD) or dark blue (Slim): Ready for use
– No lights: Check polarity and breaker power
If LED alternates red/green, complete WiFi re-pairing: Open your SkyBell app → Add Device → Connect via WiFi → Hold doorbell button until blue → Enter WiFi credentials.
Extend Your New Battery’s Lifespan Immediately
Boost WiFi signal strength to 70%+ in your app settings—weak signals drain batteries 3x faster as the radio struggles to maintain connection. Position your router closer or add a mesh node.
Optimize motion zones to cover only your walkway, excluding streets or trees that trigger false alerts. Each unnecessary recording drains 5-10% of your battery. Enable time-based recording schedules to disable overnight activations from passing cars.
Firmware Updates That Save Power
Check for updates monthly—SkyBell’s v2.4.1 release reduced background power consumption by 22%. Updates install automatically when the doorbell is idle for 2+ hours, so avoid constant live view streaming. One user gained 8 extra months of battery life after updating from v2.1.3.
Fix These 4 Post-Replacement Failures Immediately
Device won’t power on? Double-check polarity with a multimeter. Reversed connections show negative voltage—swap wires immediately.
LED stuck flashing red/green? Complete the full WiFi setup process even if the app shows “connected.” Disassembly often triggers hidden factory resets.
Battery dies in 3 days? Verify your replacement cell has UL/CE marks—counterfeit batteries fail rapidly in cold weather. SkyBell Slim Line models below 32°F need OEM-grade cells.
“Device offline” alerts persist? Perform a soft reset by holding the doorbell button for 30 seconds until the LED turns solid blue. This clears firmware glitches without re-pairing.
Warranty and Safety Compliance Must-Knows
DIY battery replacement voids SkyBell’s warranty—even if your unit is out of warranty, Brinks Home Support may deny future service. For monitored security systems, notify your insurance carrier before repairing; some policies require professional maintenance to maintain coverage.
Never install uncertified batteries. Non-UL cells violate electrical codes and create fire hazards—lithium-polymer pouches swell and combust when mismatched to charging circuits. Recycle old batteries at Best Buy or Home Depot; improper disposal risks environmental contamination.
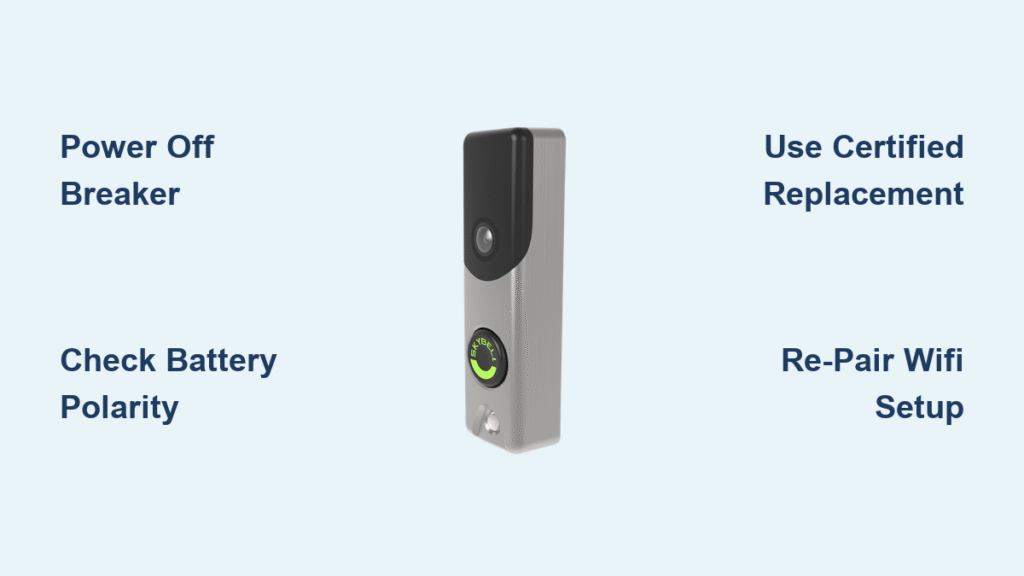
Final verification: Your SkyBell should now stream live view for 2+ hours per charge, trigger motion recordings reliably, and maintain solid blue/yellow LED status. The entire process takes 20-30 minutes with $15-25 in parts. Remember: Always power down at the breaker, verify battery polarity, and use certified replacements—these three steps prevent 95% of post-replacement failures. If issues persist, contact Brinks Home Support to re-register your device after factory resets.


