

Your doorbell stays silent as the delivery driver rings for the third time this week. Packages vanish, repair technicians leave without notice, and guests stand awkwardly at your door. When your doorbell fails, 80% of cases trace back to the button itself – not complex wiring or expensive components. The good news? Replacing a doorbell button is a beginner-friendly project taking under 30 minutes with basic tools. This guide delivers exact steps to diagnose and fix your faulty button, saving you $100+ in electrician fees. You’ll learn voltage checks, wire connections, and pro tricks to prevent future failures – all without prior electrical experience.
Diagnose Your Silent Doorbell in 5 Minutes

Before replacing anything, confirm the button is actually broken. Many homeowners waste money replacing functional components when the issue lies elsewhere.
Quick Voltage-Free Test
Remove the button cover with a flathead screwdriver, then disconnect one wire. Touch the bare wire ends together firmly. If your chime rings instantly, the button failed. No sound means troubleshooting must shift to your transformer or wiring. This simple test works because doorbell circuits complete when the button is pressed – mimicking this bypasses the faulty switch.
Multimeter Confirmation Steps
Set your multimeter to resistance (Ω) mode. Touch probes to the disconnected button terminals while pressing the button. Watch for resistance dropping from “OL” (infinite) to near zero ohms. No change confirms replacement is needed. If you measure voltage here instead, expect 10-16V on modern systems – but never skip the continuity test for definitive diagnosis.
Hot Button Danger Signs
If your existing button feels warm during operation, immediately power off the circuit. This indicates dangerous voltage mismatch – like installing a 16V button on an older 24V system. Overheating buttons can melt wiring or create fire hazards. Always verify transformer output (usually labeled 10V, 16V, or 24V) before buying replacements.
Match Your New Button to System Voltage

Buying the wrong button guarantees failure. Modern 16V buttons overheat on vintage 24V systems, while wireless replacements won’t fit wired setups. Avoid costly return trips with these checks.
Locate and Read Your Transformer
Follow thin low-voltage wires from your electrical panel to find the transformer – typically in basements, garages, or closets. The voltage rating (e.g., “16VAC”) is stamped directly on its metal case. Never guess voltages – a mismatched button causes premature failure. If you find 24V or 36V labels, purchase a high-voltage rated button (often sold for commercial systems).
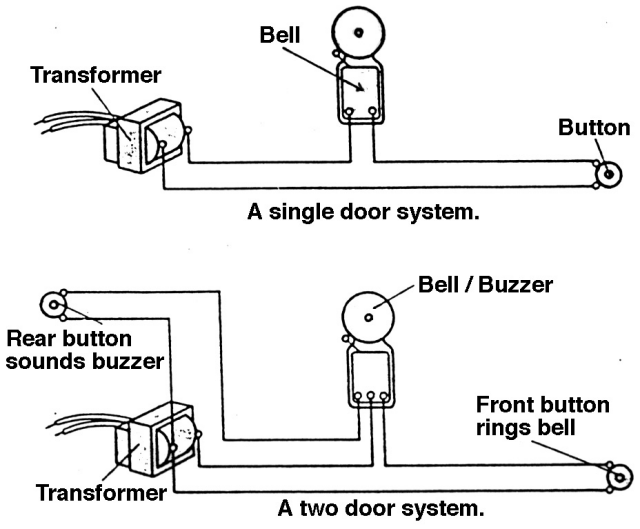
Wired vs Wireless Identification
Wired systems have two thin copper wires (18-22 gauge) running directly from the transformer to your button. Wireless units use batteries and show no visible wiring. Attempting to replace a wireless button with a wired model creates compatibility chaos – check your chime unit for “wireless” labels before purchasing.
Feature Selection Checklist
For exposed locations, choose weatherproof buttons with IP55+ ratings to withstand rain and snow. Illuminated models solve nighttime visibility issues but require compatible transformers. Skip smart buttons unless upgrading your entire system – they won’t work with standard chimes.
Remove Faulty Button Without Wiring Disasters
Power management prevents shocks, though doorbell voltage (10-16V) rarely causes injury. Still, skipping this step risks short circuits that could fry your chime unit.
Critical Power Shutdown Sequence
First, turn off the breaker labeled “doorbell” or “transformer” at your electrical panel. No dedicated breaker? Turn off the main power. Then verify safety by testing transformer output with your multimeter – it should read zero volts. This dual-check prevents accidental re-energizing during work.
Safe Demolition Protocol
Remove faceplate screws with a Phillips driver, then slice through caulk seals with a utility knife using downward strokes away from your body. Never yank the button – this retracts wires into the wall. After removal, secure loose wires with masking tape to the siding, preventing them from disappearing. Clean the mounting surface thoroughly with a rag to ensure the new button sits flush.
Install New Button with Pro-Level Connections
Poor wire connections cause 60% of “replaced but still broken” doorbells. Follow these steps to guarantee success on the first try.
Wire Loop Connection Method
Strip 1/4 inch of insulation using wire strippers, then form tight J-loops with needle-nose pliers. Hook each loop under the new button’s terminal screws clockwise before tightening. Pull firmly on each wire after connection – if it slips, remake the loop. This technique prevents wire slippage that causes intermittent failures.
Weatherproof Mounting Tactics
Position the mounting plate against your siding and punch pilot holes with a scratch awl to avoid splitting wood. For vinyl or metal siding, pre-drill 1/16-inch holes. Before final tightening, check for pinched wires by wiggling the button – exposed conductors cause shorts. Restore power and test immediately; if silent, recheck loop tightness before troubleshooting further.
Fix Common Post-Installation Failures
Don’t panic if your new button doesn’t work instantly. These field-tested fixes resolve 95% of issues.
Silent Button Emergency Kit
First, measure voltage at the button wires – it must read 10-16V. No power? Check transformer connections. If voltage exists but no chime, touch the wires directly to the chime terminals. If it rings, your button installation failed. If silent, the chime unit or transformer needs replacement.
Intermittent Operation Fixes
Moisture-induced corrosion causes sporadic failures. Sand wire ends with 220-grit paper before reconnecting. For metal siding installations, insulate wires with electrical tape where they contact metal – bare wires touching siding create ground faults. Persistent issues often trace to loose transformer wires; tighten all connections there.
Overheating Button Protocol
If your new button gets hot, power off immediately and remeasure system voltage. A 16V button on a 24V circuit will fail within weeks. Solutions: Install a voltage-compatible button (check commercial hardware stores) or replace the transformer – a $25 upgrade that future-proofs your system.
Smart Repair vs Replace Decision Tree
Most modern buttons aren’t repairable, but exceptions exist. Save money by knowing when to fix or replace.
Repair-Only When:
- Your button has replaceable diodes (common in illuminated models)
- It’s a vintage decorative piece worth $50+ to collectors
- You’ve confirmed a single broken spring inside (requires disassembly)
Always Replace When:
- The button has cracks or melted plastic
- It’s a wireless model (integrated circuit boards can’t be fixed)
- You’re spending more than 15 minutes diagnosing – new buttons cost $8-$25
Prevent Future Failures with 2-Minute Maintenance
Extend your new button’s life to 10+ years with these seasonal habits.
Monthly Quick Checks
Press the button firmly while listening for consistent chime volume. Wipe the surface with a dry microfiber cloth to remove pollen or grime that jams mechanisms. In winter, brush away ice buildup – frozen buttons mimic electrical failures.
Annual Weatherproofing Routine
Remove the faceplate and reapply silicone caulk around the mounting edge every spring. Check wire connections for green corrosion; if found, clean with vinegar-soaked cotton swabs. For painted surfaces, touch up chips immediately to prevent moisture intrusion behind the plate.
When to Call an Electrician (and When Not To)
Most button replacements stay firmly in DIY territory, but recognize these red flags.
DIY Danger Zones
Call a pro if you find no wires at the door location (requires new circuit installation) or smell burning from the transformer. Complex systems with multiple buttons or smart home integrations often need expert configuration. If your multimeter shows over 24V at the button, stop – this indicates dangerous wiring errors.
Cost-Saving Reality Check
Electricians charge $100-$200 for button replacements, but your time investment is just 30 minutes. Only call pros when voltage tests confuse you or after 2 failed DIY attempts. For standard wired systems under 16V, this project remains one of the safest home repairs you’ll ever tackle.
Final Note: Press your new doorbell firmly – you should hear an immediate, clear chime from inside. If silent, revisit wire connections before doubting your work. Once functional, seal the perimeter with a thin bead of exterior caulk to block moisture. Properly installed, your replacement button will reliably announce visitors for a decade. Remember to test it monthly by pressing firmly for 5 seconds – this prevents internal mechanism sticking and catches early failures before they strand you at home, missing that critical delivery.


