
That relentless buzz from your doorbell isn’t just irritating—it’s your home’s electrical system screaming for help. While the humming might seem harmless, it signals components working dangerously hard, potentially creating fire hazards inside your walls. This guide delivers exactly what you need to know about how to fix a buzzing doorbell, walking you through proven diagnostic steps and repairs you can complete in under an hour with basic tools. Most buzzing issues stem from just five common culprits, and you’ll solve 90% of them without calling an electrician.
Ignoring that buzzing invites disaster—overheated transformers can reach 200°F, melting insulation and igniting nearby materials. The good news? With this targeted approach, you’ll silence the buzz while eliminating hidden dangers. Let’s transform that nerve-wracking hum into a perfect chime.
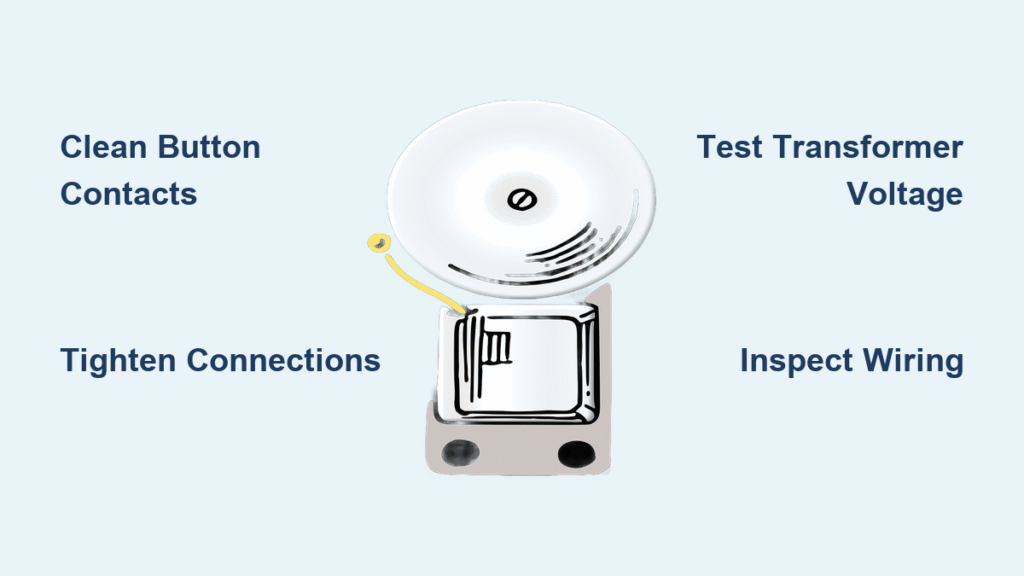
Pinpoint Exactly Where the Buzz Originates
Transformer Vibration Diagnosis
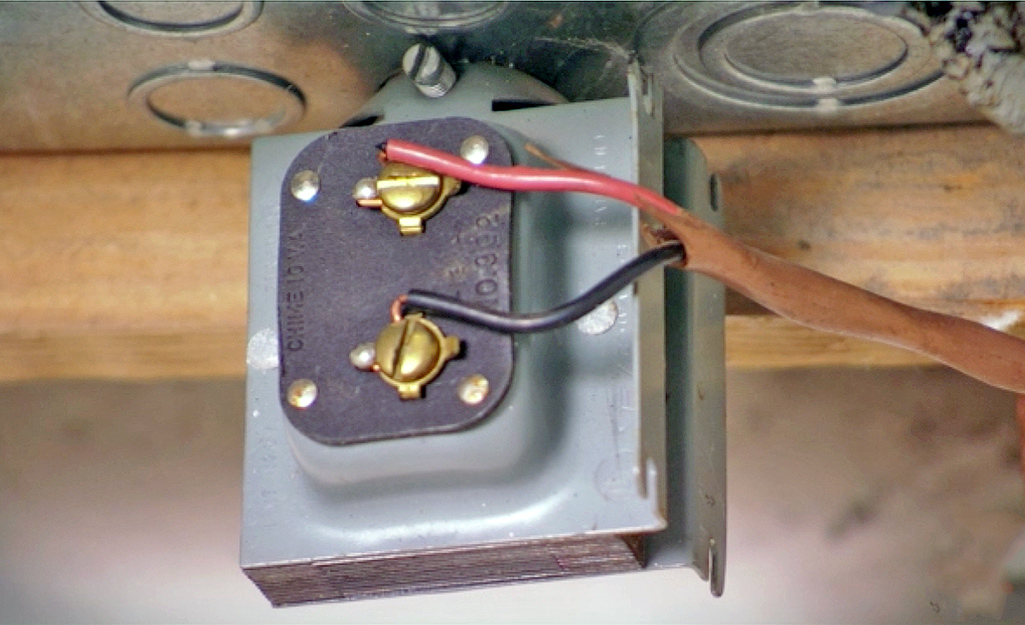
Your transformer likely hides near the electrical panel or in an attic junction box. When overloaded, this small metal box vibrates violently against mounting surfaces, creating the signature buzz. Critical test: Carefully touch the transformer casing—excessive heat (beyond warm) confirms dangerous overload. Listen closely: a loud mechanical hum points directly to transformer failure.
Chime Mechanism Inspection
Remove the chime cover and watch the striker while someone presses the button. If the metal arm vibrates instead of striking cleanly, worn components are your problem. Look for these telltale signs:
– Dust-packed interior preventing smooth movement
– Bent chime bars causing continuous contact
– Corroded striker pivot points creating resistance
– Visible wear grooves on moving parts
Button Sticking Verification
Outdoor buttons suffer moisture damage and debris buildup. Remove the button housing and check for:
– Green corrosion on metal contacts
– Spider webs jamming the spring mechanism
– Cracked plastic preventing full release
– Grit trapped under the button cap
Pro tip: Press and release the button 10 times while listening. If buzzing continues after release, the button is stuck “on”—the most common buzzing cause.
Power Down Correctly Before Touching Wires

Circuit Breaker Identification
Locate your doorbell circuit at the main panel—often labeled “chime” or “doorbell.” Flip the breaker OFF, then test immediately: press the doorbell button. If it still buzzes, you’ve shut off the wrong circuit. Repeat until the buzz stops completely.
Voltage Confirmation Protocol
Use a non-contact voltage tester on all connection points—transformer terminals, chime screws, and button wires. Hold the tester near each component for 5 seconds. Zero lights mean safe work conditions. If any light appears, return to the panel and kill additional circuits.
Fix Stuck Buttons in Under 10 Minutes
Contact Cleaning Procedure
Pop off the button housing with a flathead screwdriver. Spray electrical contact cleaner directly on metal contacts, then scrub with a soft toothbrush. Focus on the spring mechanism—grit here prevents full release. Dry completely with compressed air before reassembly.
Button Replacement Shortcut
When corrosion penetrates deep or plastic cracks, replace the entire button. Match voltage ratings (16-24V stamped on the old unit) and mounting style. Critical step: Note wire positions with your phone before disconnecting. Most modern buttons swap out in 2 minutes using existing wires—no rewiring needed.
Repair or Replace Faulty Chime Units
Dust Removal That Actually Works
Hold compressed air upright and blast dust from chime bars and striker mechanisms. Avoid tilting—liquid propellant can short circuits. After cleaning, manually move the striker 20 times to ensure smooth operation. If it sticks, apply one drop of electrical contact lubricant to pivot points.
Mechanical Alignment Fixes
Check striker distance to chime bars—should rest 1-2mm away. Measure with a business card edge. If bars are bent causing contact, gently straighten with needle-nose pliers. Replace any chime with cracked plastic housing or melted components immediately.
Transformer Testing and Safe Replacement
Accurate Voltage Measurement
Set multimeter to AC voltage. Touch probes to transformer’s low-voltage terminals while powered. Healthy range: 16-24V. Readings below 15V indicate undersized transformers; above 25V means dangerous overvoltage. Record your reading—this determines replacement specs.
Transformer Swap Safety Checklist
- Turn OFF main panel power—not just the circuit breaker
- Photograph all wire connections before disconnecting
- Match VA (volt-ampere) rating exactly—common specs: 10VA (16V) or 20VA (24V)
- Mount new transformer securely to prevent vibration hum
- Use wire nuts rated for the new transformer’s amperage
Warning: Never install a 24V transformer with a 16V chime—this guarantees immediate buzzing and component damage.
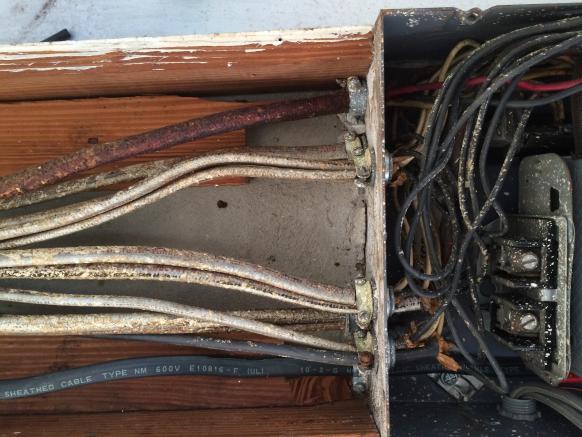
Wiring Inspection That Prevents Future Fires
Danger Sign Identification
Trace wires checking for these critical hazards:
– Cloth insulation: Must replace—fire risk in seconds
– Rodent damage: Exposed copper requires immediate repair
– Heat discoloration: Brown/black spots indicate chronic overload
– Green corrosion: Causes high resistance and buzzing
Connection Tightening Method
Twist wire nuts clockwise until snug, then tug wires firmly. Pro technique: After tightening, wrap connections with electrical tape for vibration resistance. Replace any wire nuts showing melting or brittleness—never reuse old ones.
Prevent Recurring Buzzing With Smart Maintenance
Monthly Buzz Check
Press your doorbell weekly and listen critically. New buzzing sounds indicate developing problems. Test both front and back buttons if applicable—failing buttons often affect the entire circuit.
Quarterly Transformer Care
Every three months:
1. Wipe transformer with dry microfiber cloth
2. Check mounting screws for tightness
3. Verify no wires touch hot surfaces
4. Confirm voltage stays within 16-24V range
Never spray liquids near transformers—even “electrical cleaner” can cause shorts if misapplied.
Emergency Response for Dangerous Situations
Immediate Shutdown Triggers
Stop all work if you see:
– Transformer too hot to touch (>140°F)
– Visible sparks at connections
– Burning plastic odor
– Repeated breaker tripping
Safe Power Cutoff
Flip the MAIN breaker—not just the circuit—to guarantee complete power removal. Do not restore power until a licensed electrician inspects the system. Hidden wiring damage could affect multiple circuits.
Wireless Upgrade When Repairs Fail
When to Choose Wireless
Consider battery-powered systems if:
– Wiring shows damage throughout the circuit
– Home is pre-1960 with cloth insulation
– Buzzing returns after multiple repairs
– You want video capabilities
Modern wireless doorbells like Reolink Battery Video models install in 15 minutes with no wiring. They eliminate buzzing risks entirely while adding smartphone alerts and HD video—no electrical expertise required.
Troubleshooting Flowchart for Persistent Buzzing
Buzz continues after button cleaning? → Check chime mechanism
Chime striker moves freely but buzz persists? → Test transformer voltage
Transformer voltage correct but buzzing continues? → Inspect all wiring connections
Wiring appears damaged throughout? → Install wireless system immediately
Three-Minute Buzz Fix Protocol
Most buzzing doorbells surrender to these urgent actions:
1. Clean button contacts (5 minutes): Spray contact cleaner, scrub with toothbrush
2. Tighten all connections (10 minutes): Transformer, chime, and button terminals
3. Verify transformer voltage (5 minutes): Must read 16-24V AC
Critical reminder: If buzzing continues after these steps, underlying wiring issues likely exist. Do not ignore persistent buzzing—it means electrical components operate beyond safe capacity. Address this warning immediately to protect your home.
Your doorbell should announce visitors with a pleasant chime, not an electrical protest. By following these specific steps, you’ve transformed that dangerous buzz into reliable operation. Implement the quarterly maintenance routine to catch problems early—your home’s safety depends on it. Take action today: that buzzing isn’t just annoying, it’s your first and only warning.


