
You press the doorbell button, anticipating the familiar chime—but silence greets you instead. That sinking feeling hits: did a guest arrive while you were in the shower? With 60-70% of doorbell failures tracing back to the button itself, your problem likely has a simple fix. This guide cuts through electrical confusion to get your system working again in under 30 minutes, even if you’ve never touched a screwdriver. You’ll learn precise diagnostic steps, avoid common repair traps, and discover why most homeowners waste hours chasing phantom wiring issues when the culprit is staring them in the face.
Before tearing into walls or buying expensive parts, understand that doorbell circuits operate at safe low-voltage (10-24V AC)—meaning you won’t get shocked during repairs. Yet 9 out of 10 people skip the critical first test that isolates the faulty component. By following this sequence, you’ll systematically eliminate guesswork and target your efforts where they matter most. Whether you have a vintage chime or smart video doorbell, these techniques apply universally. Let’s turn that silent button back into your home’s welcoming voice.
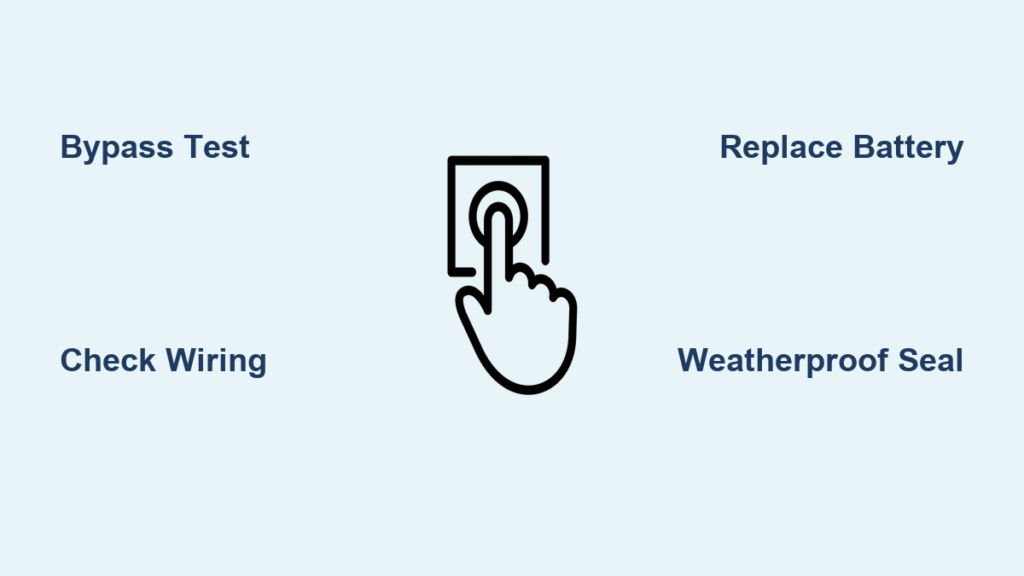
Confirm Button Failure in 60 Seconds
Don’t assume the button is broken just because the chime is silent. Many homeowners immediately replace the button only to discover the real issue lies elsewhere—wasting time and money. This two-step verification process takes under a minute and tells you exactly where to focus.
Quick Bypass Test That Never Lies
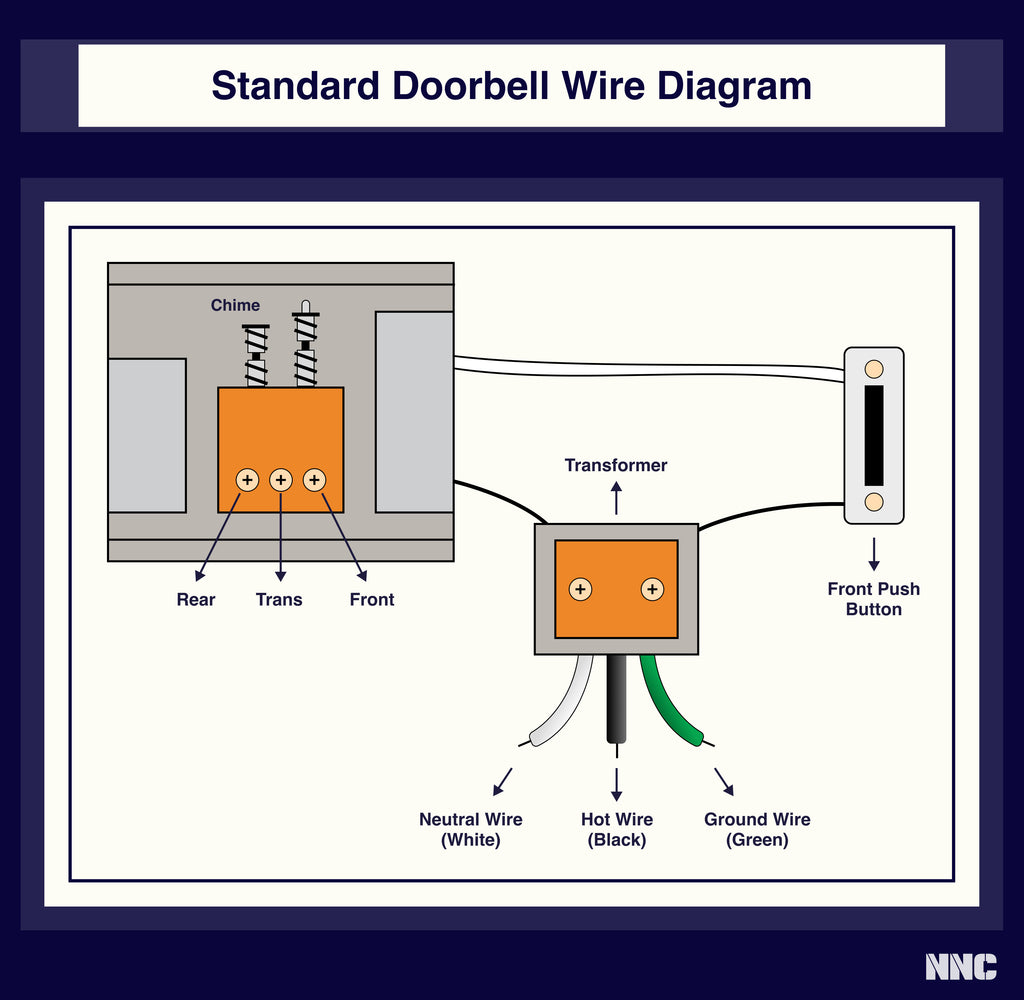
Grab a screwdriver and unscrew the button from its wall mount. With the faceplate removed, you’ll see two low-voltage wires connected to terminals. Carefully disconnect them and touch the bare copper ends together. If the chime rings instantly, your button is dead—no further testing needed. This bypass eliminates the button from the circuit, proving whether power reaches the chime unit. If the chime remains silent during this test, the problem lives in your transformer, wiring, or chime unit itself. Pro tip: Wrap the wire ends with electrical tape after testing to prevent accidental shorts.
Feel and Visual Check for Hidden Clues
Press the button firmly while listening for a crisp mechanical “click.” Healthy buttons rebound immediately; mushy resistance or no movement indicates internal spring failure. Now inspect closely: cracks in the housing, green corrosion around terminals, or missing weather gaskets are dead giveaways. Sun-bleached plastic often hides moisture damage inside—peel back the gasket to check for rust or white powder residue. If you spot any of these, replacement is inevitable. For wireless models, skip to the battery check—these fail silently when the CR2032 cell dies.
Replace Broken Doorbell Button
Replacing a faulty button is simpler than most expect, but skipping safety steps risks short-circuiting your entire system. Follow this sequence to avoid creating bigger problems.
Essential Safety Steps Before Touching Wires
Even though doorbell circuits use harmless low voltage, always flip the breaker controlling the transformer first. Locate your electrical panel and switch off the circuit labeled “doorbell” or “chimes”—usually a 15-20A breaker. Verify power is off by pressing the button; if it still works, you pulled the wrong breaker. You’ll need only three tools: a screwdriver, wire strippers, and needle-nose pliers. Never work on live circuits—even low-voltage shorts can fry your chime unit.
Remove Old Button Without Wiring Chaos
- Unscrew the two faceplate screws and gently pull the button away from the wall
- Photograph the wire connections before disconnecting—red typically goes to “Front,” white to “Trans”
- Loosen terminal screws with a flat-head screwdriver and slide wires free
- Check for moisture inside the housing; if present, let it dry 24 hours before proceeding
Install New Button to Prevent Repeat Failures
- Match the new button’s voltage rating (16V AC is standard—check packaging)
- Connect wires to identical terminals; polarity doesn’t matter for basic AC buttons
- Tug-test each connection—wires should resist gentle pulling
- Position the weather gasket over terminals before mounting
- Seal the perimeter with silicone caulk—this single step prevents 90% of future moisture damage
- Mount flush to the wall and reattach faceplate screws
Press the button three times. If the chime responds within one second each time, you’ve nailed it. If not, move to chime unit diagnostics—your problem runs deeper.
Diagnose Chime Unit Problems
When the bypass test fails (touching wires produces no chime), your chime unit could be the silent killer. Many homeowners replace transformers unnecessarily when a $5 cleaning would suffice.
Visual Inspection That Finds Hidden Failures
Remove the chime cover to expose the internal mechanism. Look for broken striker springs, melted coil windings, or thick dust clogging moving parts. A cotton swab dipped in 70% isopropyl alcohol often resurrects sticky strikers—swipe pivots until they move freely. If you spot rust on metal components, corrosion has likely interrupted the circuit. Pro tip: Shake the unit near your ear; a rattle means loose parts needing reassembly.
Voltage Test to Confirm Chime Unit Death
With an assistant pressing the doorbell button, set your multimeter to AC volts and touch probes to the “Common” and “Front” terminals. You should read 10-16V AC. If voltage appears but no sound follows, the chime is dead. No voltage? The fault lies upstream in wiring or the transformer. For vintage multi-note systems, ensure your transformer delivers 16V 30VA—undersized units cause weak or distorted tones.
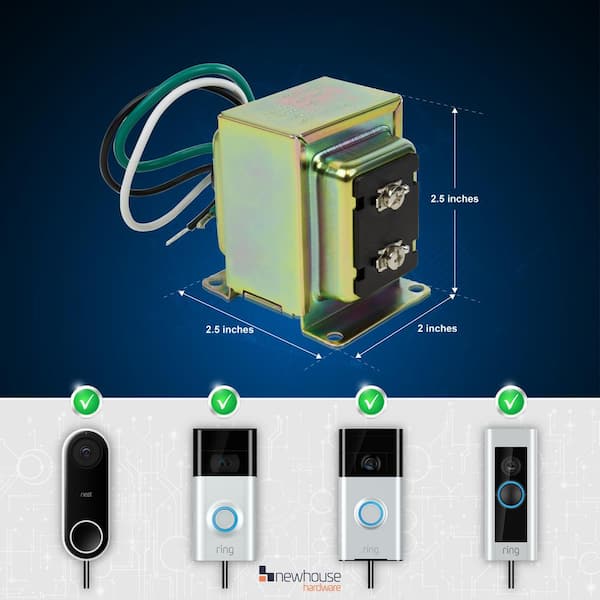
Check Transformer Issues

The transformer—the unsung hero mounted near your electrical panel—fails in 10% of silent doorbell cases. Diagnosing it takes two minutes but prevents dangerous mistakes.
Find Your Transformer Without Guessing
Search these three locations:
– Inside the main electrical panel (mounted to the cover or side)
– Garage ceiling joists near the opener
– Attic junction boxes near insulation
It’s a small silver or black box (2-4 inches square) with two low-voltage terminals and two 120V house wires. Never open the panel if your transformer mounts inside it—call an electrician immediately due to shock risk.
Voltage Test That Determines Replacement Need
Set your multimeter to AC volts. Touch probes to the transformer’s secondary (low-voltage) terminals while the doorbell button is pressed. Healthy output reads 16V ± 2V. Below 10V means replacement time. If you smell burnt insulation or see discoloration, shut off power and replace it now—these often fail catastrophically.
Repair Damaged Wiring
Rodents, nail punctures, and loose connections cause 5-10% of doorbell failures. These breaks hide in plain sight until you know where to look.
Continuity Testing for Invisible Breaks
Disconnect all components (button, chime, transformer). Set your multimeter to continuity mode and probe each wire pair end-to-end. No beep means a break exists. Common failure zones include:
– Behind door trim where installation nails pierced wires
– Attic insulation chewed by squirrels
– Basement joists with over-tightened staples
Splice New Wire Without Rewiring Entire House
Cut out the damaged section using wire cutters. Splice in new 18-gauge doorbell wire using waterproof Scotchlok connectors (not wire nuts—they corrode). Maintain color coding: red for front door, white for common. Wrap splices with electrical tape and tuck into wall cavities. Test before sealing—press the button to confirm chime response.
Handle Special Doorbell Types
Modern systems introduce unique failure points that stump even experienced DIYers. Know these model-specific fixes.
Wireless Doorbell Button Fixes That Work
When your wireless button stops working:
– Replace the CR2032 battery (even if it tests 3V—weak cells fail under load)
– Move the receiver within 100 feet line-of-sight, away from Wi-Fi routers
– Re-sync by holding the button for 5 seconds until the receiver LED blinks
Light interference from LED porch lights often causes random triggering—try a different battery brand first.
Smart Doorbell Power Solutions
Hardwired smart doorbells (Ring, Nest) need 16-24V AC minimum. Inadequate power causes 70% of “button not working” complaints. Check your transformer’s VA rating—30VA is the absolute minimum. If voltage drops below 16V when the button is pressed, upgrade to a 40VA transformer. Reset intermittent disconnects by holding the setup button 15 seconds until the LED flashes white.
Prevent Future Failures
Most doorbell deaths are preventable with two minutes of semi-annual maintenance.
Weatherproofing That Lasts Years
Re-caulk around your button every 2-3 years using exterior-grade silicone. Apply a bead around the perimeter, then smooth with a wet finger. This simple step blocks moisture—the #1 cause of button corrosion. For coastal homes, add a PVC weather hood to shield from salt spray.
Battery Calendar for Wireless Systems
Mark battery replacement dates on your phone calendar—CR2032 cells last 12-18 months. Set reminders for February and August to swap all wireless doorbell batteries during daylight saving time changes. Test range monthly by pressing the button from your driveway.
When to Call an Electrician
Stop immediately if you encounter:
– Transformers mounted inside the main service panel (120V exposure risk)
– Wiring runs through finished walls with no access points
– Persistent failures after replacing all components
Licensed electricians charge $75-150/hour but prevent fires from miswired transformers. For complex multi-button systems or vintage chimes, professional diagnosis often costs less than your third failed DIY attempt.
Final Note: Start with the bypass test—touching those two wires together takes 30 seconds and reveals whether your button is truly dead. This single step saves hours of unnecessary work 70% of the time. Keep a $5 spare button in your toolbox; with proper weatherproofing, it’ll sit unused for years while giving you instant peace of mind.


