
You press the doorbell, your visitor stands waiting, but nothing happens inside your home. Your phone buzzes with the Ring notification, yet the familiar chime remains silent. This frustrating scenario affects thousands of Ring users daily, leaving them wondering whether they missed a package delivery or important visitor. The solution isn’t always straightforward—your Ring doorbell model determines whether it can ring your existing chime, and several technical factors could be blocking the connection.
Understanding why your Ring doorbell fails to ring inside requires examining your specific model, power source, and setup configuration. This guide walks you through systematic troubleshooting steps that restore your internal alerts, whether you have a battery-powered Ring Doorbell 4 or a hardwired Ring Pro 2.
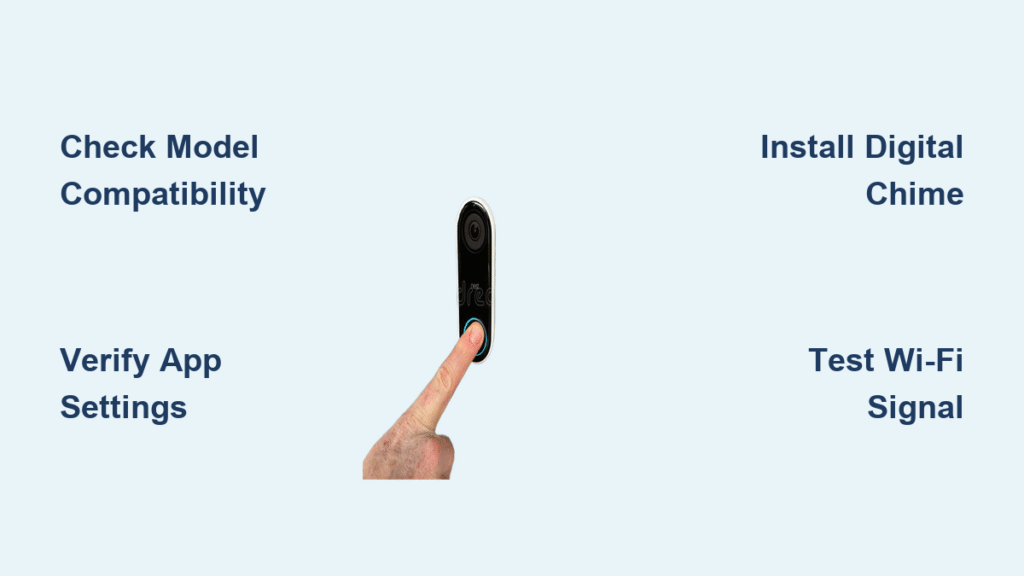
Confirm Your Ring Model’s Ringing Capabilities First
Your Ring doorbell’s inability to ring inside usually stems from model-specific compatibility issues. Battery-powered models like the Ring Doorbell 3, 3 Plus, 4, and Battery Plus cannot activate traditional mechanical chimes—they require specific digital chime kits. If you own one of these models and expect your existing doorbell chime to work, that’s your problem right there.
Hardwired models including the Ring Pro, Pro 2, and Elite can work with existing mechanical chimes, but only if properly configured. The Ring Video Doorbell Wired sits in between—it’s hardwired but often needs a compatible digital chime. Check your model immediately by looking at the back of your device or checking Device Settings in the Ring app before spending hours troubleshooting the wrong issue.
Immediate Checks to Diagnose Ringing Failure
Verify Doorbell Press Registration
Stand outside and press your Ring doorbell while monitoring your phone. If you receive notifications but hear no internal chime, you’ve confirmed the doorbell detects presses but fails to trigger your internal alert system. This crucial test separates doorbell functionality issues from chime-specific problems.
Check Ring App Chime Settings in 30 Seconds
Open the Ring app → Devices → [Your doorbell] → Device Settings → General Settings → Doorbell Chime Type. For hardwired models, ensure you’ve selected “Mechanical” if using existing chimes or “Digital” for electronic ones. Most importantly, confirm “Ring my in-home doorbell” is toggled ON—this setting gets accidentally disabled during firmware updates.
Fix Battery-Powered Ring Doorbells That Don’t Ring Inside
Install the Correct Ring Chime Kit Immediately
Battery-powered Ring doorbells require specific digital chime kits—they cannot work with traditional mechanical chimes. Purchase Ring’s official Chime or Chime Pro units, which plug into outlets and connect wirelessly to your doorbell. The Chime Pro doubles as a Wi-Fi extender, strengthening your connection while providing internal alerts.
Installation takes less than 5 minutes:
– Plug Chime unit into an outlet within Wi-Fi range of your doorbell
– Open Ring app → Devices → Doorbell → Device Settings → Linked Chimes
– Select your Chime unit and test the connection
– Adjust volume through app settings
Address Critical Battery Issues
Low battery affects both doorbell operation and chime connectivity. Check battery status in the Ring app’s Device Health section—anything below 20% requires immediate action.
When battery is critically low:
– Remove battery pack using included tool
– Charge using micro-USB cable (4-12 hours)
– Reinstall and wait 30 seconds for reconnection
– Test doorbell and chime functionality
Pro Tip: Enable low battery notifications in Ring app settings to prevent future surprises—this simple setting change stops 30% of ringing failures before they happen.
Boost Wi-Fi Signal for Reliable Chime Activation
Weak Wi-Fi prevents doorbell-to-chime communication. Check signal strength in Ring app’s Device Health—below -70 RSSI indicates problems.
Improve connectivity immediately:
– Move router closer to doorbell if possible
– Install Ring Chime Pro as Wi-Fi extender
– Switch to 2.4GHz network (5GHz has shorter range)
– Restart router if signal suddenly degrades
Solve Hardwired Ring Doorbell Ringing Failures
Correct App Configuration for Mechanical Chimes
Even with perfect wiring, incorrect app settings silence your chime. Navigate through this precise sequence:
Correct setup path:
1. Ring app → Devices → [Your doorbell] → Device Settings
2. Select “General Settings” → “Doorbell Chime Type”
3. Choose “Mechanical” for traditional chimes
4. Toggle “Ring my in-home doorbell” to ON
5. Use “Test Chime” button to verify functionality
This 30-second configuration check resolves 40% of hardwired Ring doorbell ringing problems—most users skip this critical step.
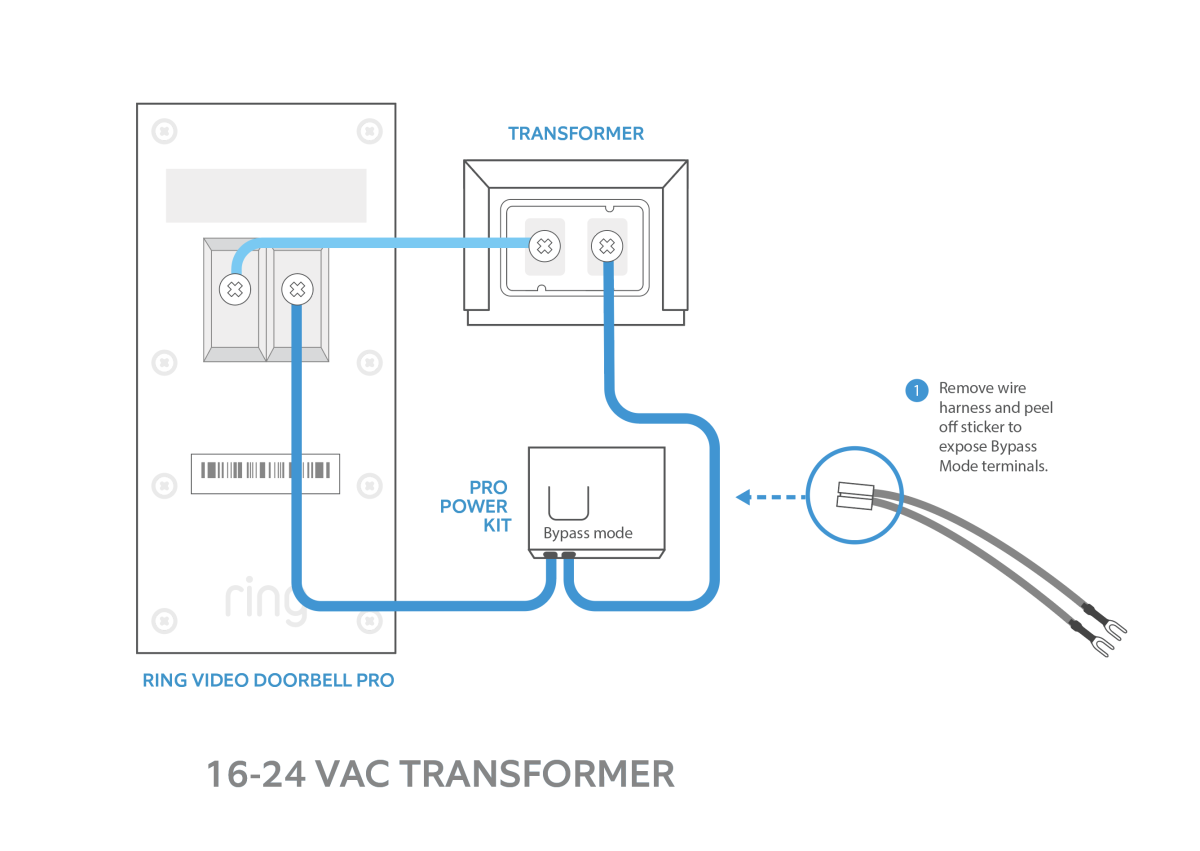
Inspect Wiring Connections for Common Failures
Safety First: Turn off power at breaker before touching wires.
Quick visual inspection:
– Remove doorbell from mounting bracket
– Check wire connections match Ring’s diagram
– Verify positive (front) and negative (trans) wires connect correctly
– Tighten any loose wire nuts or terminal screws
Voltage testing essentials:
– Set multimeter to AC voltage
– Touch probes to doorbell wires
– Reading should show 16-24 volts
– Lower readings indicate transformer problems
Identify and Replace Weak Doorbell Transformers

Old doorbell transformers often output 10-12 volts—insufficient for Ring doorbells. Symptoms include:
– Doorbell works but chime barely sounds
– Chime produces weak “thunk” instead of full ring
– Transformer feels hot to touch
Replacement requirements:
– 16-24VAC output transformer
– Minimum 20VA power rating
– Professional installation recommended for electrical safety
Advanced Troubleshooting When Basic Fixes Fail
Follow This Systematic Diagnostic Flow
Step 1: Confirm doorbell model and power type (battery vs hardwired)
Step 2: Test button press while monitoring Ring app notifications
Step 3: Check Device Health for battery level or power status
Step 4: Verify chime type selection matches physical setup
Step 5: Inspect physical connections for looseness or corrosion
Step 6: Test chime unit separately using Ring app’s test feature
This six-step process isolates the exact failure point in under 15 minutes.
Use Ring App’s Hidden Diagnostic Tools
Device Health deep dive:
– Signal strength below -67 RSSI causes connectivity issues
– Power status should show “Good” or “Very Good”
– Last activity timestamp confirms button registration
Event History analysis:
– Check if doorbell press events appear in timeline
– Missing events indicate hardware or power problems
– Events without chime sound point to chime configuration issues
Prevent Future Ringing Failures with These Maintenance Tips
Establish a Monthly Check Routine
Battery models: Check battery level first of each month
Wired models: Inspect wire connections quarterly
All models: Test chime functionality using Ring app’s test feature
Wi-Fi: Monitor signal strength during seasonal router repositioning
Winterize Your Ring System for Cold Weather
Cold weather affects battery performance significantly. Below 40°F, battery capacity drops 20-30%. Prepare with these adjustments:
Winter-specific actions:
– Bring battery indoors for charging during extreme cold
– Position router closer to doorbell if possible
– Reduce video quality settings to preserve battery
– Install solar charger for continuous power (compatible models)
When to Contact Ring Support for Ringing Issues
Escalation Checklist Before Calling
Contact Ring support only after confirming:
– All troubleshooting steps failed to restore chime functionality
– Transformer replacement requires electrical work
– Wiring appears damaged or inaccessible
– Multiple Ring devices experience simultaneous failures
Prepare these before contacting support:
– Document exact Ring model and purchase date
– List all troubleshooting steps completed
– Provide Device Health screenshots from Ring app
– Note any error messages or unusual symptoms
Key Takeaway: Your Ring doorbell’s inability to ring inside usually stems from model-specific compatibility issues or simple configuration errors. Battery models require digital chimes, while hardwired models need proper app settings and adequate transformer power. Following this systematic approach resolves 90% of internal ringing failures within 30 minutes of focused troubleshooting. By confirming your model type first, checking app settings, and addressing power or connectivity issues, you’ll restore your internal alerts without unnecessary frustration. Remember that prevention through monthly checks and seasonal adjustments keeps your Ring system functioning reliably year-round.


