
You reach for your doorbell button in the evening only to discover it’s completely dark. Without that gentle glow, guests struggle to find the button, packages get left in awkward places, and your home security system feels compromised. This frustrating situation affects countless homeowners with illuminated doorbell systems, but the good news is that a doorbell light not working problem usually has a straightforward solution once you understand what’s happening behind that plastic faceplate.
Most illuminated doorbell failures boil down to just two root causes: a mechanically jammed button or a burned-out light element. The beauty of this common household issue is that diagnosing and fixing it requires minimal tools and electrical knowledge. Whether your doorbell light suddenly went dark after years of reliable service or failed without warning, this guide gives you the exact steps to restore that welcoming glow to your entryway.
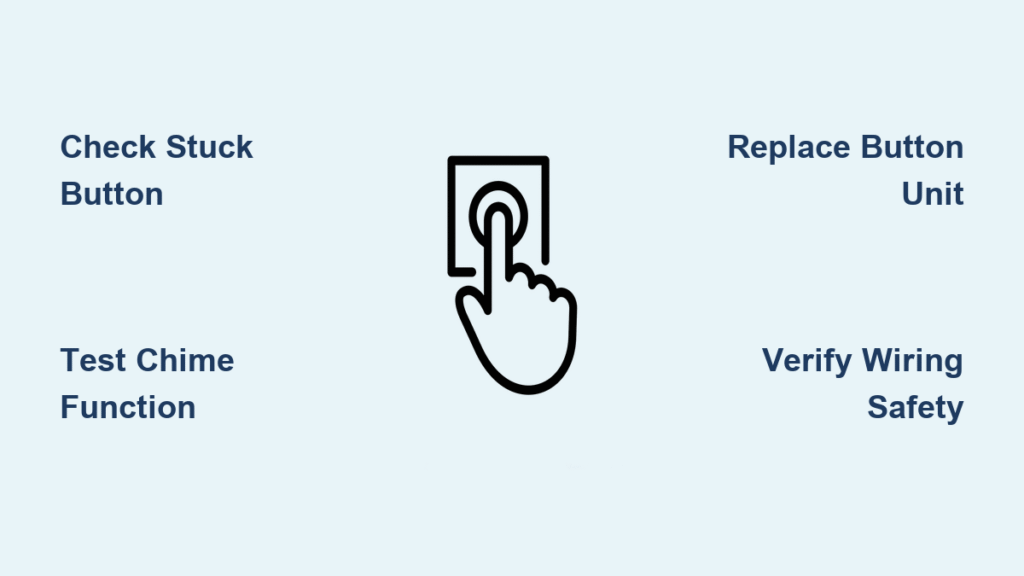
Identify Mechanical Button Jamming Issues First
Before you start replacing components, check for the most common culprit behind a doorbell light not working—a stuck button mechanism. When your doorbell button fails to return to its original position after being pressed, it creates a continuous electrical circuit that prevents proper power distribution to the light element. This simple mechanical issue accounts for approximately 60% of illumination failures in wired doorbell systems.
Recognize Stuck Button Warning Signs
Press your doorbell button firmly and release it completely. Does it spring back smoothly to its neutral position, or does it feel sluggish and resistant? A properly functioning button should return to its original position immediately with a clean, crisp action. Watch for these critical indicators that your button is stuck:
- The button remains slightly depressed after you release it
- You notice a visible gap between the button and its housing when not pressed
- The button feels spongy, sticky, or catches during operation
- You hear a muffled click instead of a sharp activation sound
These symptoms often develop gradually as dirt accumulates, paint builds up around the edges, or seasonal temperature changes cause materials to expand and contract.
Free Your Stuck Doorbell Button in Minutes
Step 1: Carefully clean around the button perimeter using a thin, non-conductive tool like a wooden toothpick or plastic spudger. Gently work around the entire edge to dislodge any accumulated dirt, paint drips, or debris that might be preventing proper button movement.
Step 2: Press and release the button rapidly 10-15 times. This repetitive motion often dislodges minor obstructions and helps restore the button’s natural spring action. Pay attention to whether the movement becomes smoother with each press.
Step 3: Apply gentle outward pressure around the button’s edges with your fingertip while simultaneously pressing the center. This technique helps realign any slightly misaligned components within the button housing.
Verify If Mechanical Fix Restored Your Light
After addressing potential mechanical issues:
– Wait 30 seconds to allow the electrical circuit to stabilize
– Test the button in a darkened environment for maximum visibility
– Observe whether the illumination returns immediately upon power restoration
If your doorbell light starts working again after freeing the stuck mechanism, you’ve successfully solved the problem. This common failure mode typically occurs due to seasonal temperature fluctuations, accumulated debris from weather exposure, or normal wear affecting the button’s return spring. No replacement parts needed—just a few minutes of your time.
Confirm Light Element Failure When Button Moves Freely
When your button moves smoothly but the light remains dark, you’re dealing with light element failure within the push button assembly. This integrated component has reached the end of its operational life, and no amount of button pressing will restore illumination. Before proceeding with replacement, verify these critical conditions to confirm light element failure:
- The button moves freely through its full range of motion without sticking
- Your doorbell chime still activates properly when pressed
- There’s no visible physical damage to the button housing or wiring
- The light remains completely dark in both daylight and nighttime conditions
Important note: A functioning doorbell chime with no illumination confirms your electrical system remains intact. This specific failure pattern indicates the problem lies solely with the light circuit within the button assembly, not with your transformer or wiring system.
Replace Your Illuminated Doorbell Button Assembly
When mechanical issues aren’t present—or fixing them doesn’t restore illumination—the complete push button unit requires replacement. Modern illuminated doorbell buttons integrate the light element directly into the assembly with sealed construction that prioritizes weather resistance over repairability. Unlike older systems with replaceable bulbs, contemporary designs make individual light element replacement impossible due to:
- Sealed waterproof housings that prevent component access
- LED elements that require specialized soldering equipment
- Cost considerations that make complete unit replacement more economical
Gather Essential Replacement Tools
Before starting your doorbell light repair, assemble these basic tools:
– Phillips head screwdriver (size #1 or #2 depending on your model)
– Flathead screwdriver for prying if needed
– Needle-nose pliers for wire handling
– Non-contact voltage tester (critical for safety)
– Exact replacement illuminated button (match your existing style)
Pro tip: Take a clear photo of your current button and mounting area before purchasing a replacement. This ensures compatibility with your existing wiring configuration and mounting holes—many doorbell buttons look similar but have subtle differences in terminal placement.
Ensure Electrical Safety Before Proceeding
Never work on doorbell wiring without verifying power is completely off:
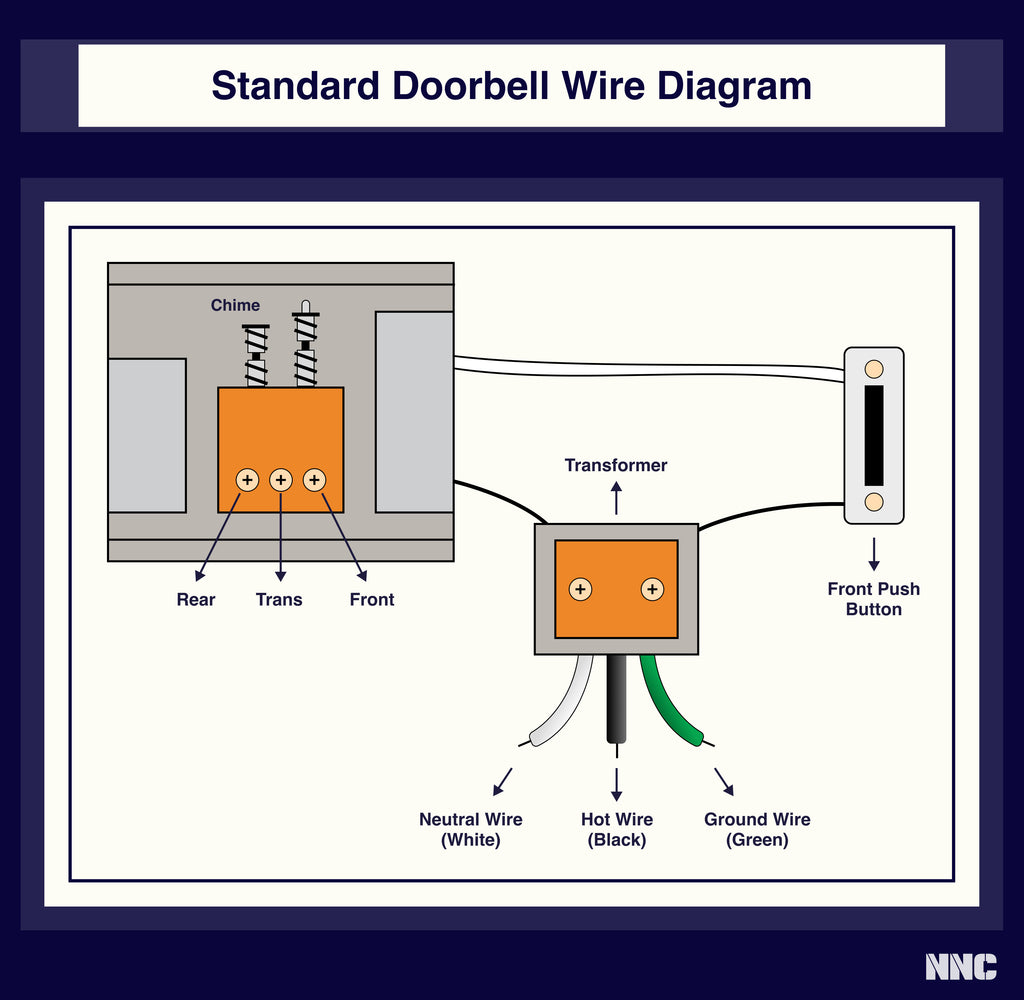
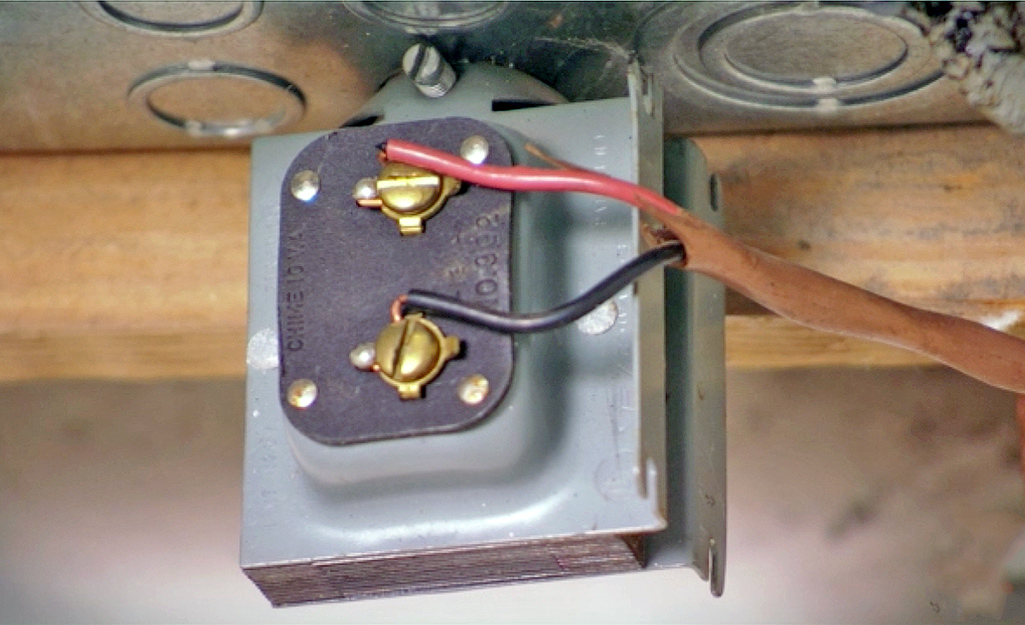
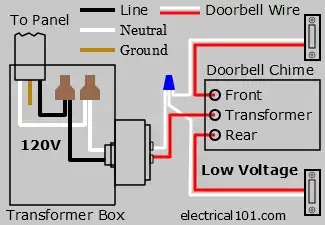
– Locate your doorbell transformer (typically mounted near your electrical panel)
– Switch off the dedicated circuit breaker labeled “doorbell” or “chime”
– Test both wires at the button location with your voltage tester
– Wait 5 minutes to allow any residual current to dissipate
Warning: Doorbell systems operate at low voltage (typically 16-24V), but working on live circuits can still damage components and create safety hazards. Always verify power is off before touching any wiring.
Remove Your Failed Doorbell Button
Step 1: Unscrew the button from its mounting surface. Most units conceal screws beneath the button face or along side panels—gently pry these covers if needed.
Step 2: Carefully pull the button away from the wall to expose the wire connections. Take care not to strain or damage existing wiring as you work.
Step 3: Document the wire positions before disconnecting anything. Most systems use two wires, but some older installations may have three. Take a photo or make a quick sketch of the connection arrangement.
Step 4: Loosen terminal screws using your screwdriver and remove wires with needle-nose pliers. Keep the wires separated to prevent accidental contact.
Install Your New Illuminated Doorbell Button
Step 1: Connect wires to the new button terminals, matching your previous configuration exactly. Tighten screws firmly but avoid over-torquing, which can damage plastic terminals.
Step 2: Carefully tuck excess wire back into the wall cavity, ensuring no sharp edges contact the wire insulation. This prevents future damage from vibration or movement.
Step 3: Align the new button with existing mounting holes and secure it firmly against the surface using the provided screws. Ensure it sits flush without gaps.
Step 4: Restore power at the circuit breaker and test both the chime function and the new illumination. Allow 10-15 seconds for the light to activate if it uses LED technology.
Verify Complete Restoration of Function
After installation, check these critical elements:
– Button illuminates within 5-15 seconds of power restoration
– Light emits steady, consistent brightness without flickering
– Doorbell chime activates reliably when pressed
– Button sits flush against the mounting surface with proper action
Prevent Future Doorbell Light Failures
Extend your new illuminated button’s lifespan with these simple maintenance habits. Most quality doorbell buttons last 5-10 years under normal conditions, but proactive care can help you reach the upper end of that range.
Monthly Button Function Check
Spend just 30 seconds each month verifying:
– Button returns fully and smoothly after pressing
– Light appears consistent in brightness (no dimming spots)
– No visible cracks or discoloration in button housing
– Clean appearance without excessive dirt or debris buildup
Seasonal Weatherproofing Maintenance
Before extreme weather seasons arrive:
– Clean button surface with mild soap solution and soft cloth
– Check mounting screw tightness to prevent vibration damage
– Verify wire connections show no signs of corrosion
– Apply thin bead of clear silicone caulk around edges if gaps appear
Warning: Never use harsh chemicals, abrasive cleaners, or pressure washers on your doorbell button. These can compromise the weather sealing and accelerate internal component failure.
When Professional Help Becomes Necessary
While fixing a doorbell light not working issue is typically a straightforward DIY project, certain situations warrant calling a licensed electrician:
- Your system has multiple wire colors beyond the standard two-wire configuration
- No chime function accompanies the light failure, indicating possible transformer issues
- Frequent circuit breaker trips occur when testing the doorbell system
- You’re working with historic home wiring that may have unique configurations
Professionals can quickly diagnose complex electrical issues and ensure your repair meets current electrical code requirements.
Quick Doorbell Light Troubleshooting Flowchart
When your doorbell light not working problem strikes, follow this streamlined diagnostic path: First, check for mechanical button jamming—this simple fix resolves most illumination failures. If the button moves freely but remains dark, complete button replacement becomes necessary due to integrated light element failure. This systematic approach eliminates guesswork, saves money on unnecessary replacements, and gets your welcoming glow restored in under 30 minutes with basic tools. With proper maintenance, your new illuminated doorbell button will reliably guide visitors to your door for years to come.


