
Your Ring doorbell needs to come off the wall—maybe the battery’s dead, you’re moving houses, or switching security brands. Whatever the reason, removing it isn’t complicated, but one wrong move can strip screws or damage your siding. This guide walks you through the exact steps for every Ring model so you can unmount cleanly in under 10 minutes. Knowing how to unmount Ring Doorbell properly prevents costly repairs and keeps your home’s exterior intact.
Trying to force removal without model-specific knowledge risks cracked faceplates or electrical hazards with hardwired units. I’ve seen homeowners lose security screws in brickwork or accidentally short-circuit wiring because they skipped power-down steps. Whether you own a battery-powered Ring 4 or PoE-powered Elite model, this guide eliminates guesswork. You’ll learn exactly which tools to grab, how to avoid common pitfalls, and why certain steps differ between generations.
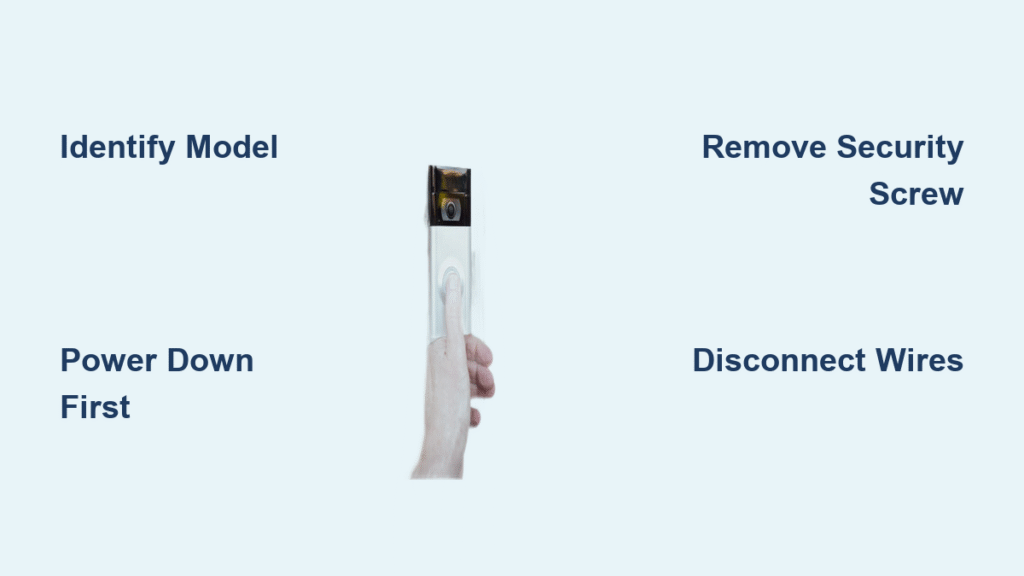
Identify Your Ring Model Before Touching Tools
Removing the wrong component could void your warranty or damage internal circuitry. Battery models have removable packs behind the faceplate, while wired units pull power directly from your home’s electrical system. Check your Ring app under Device Settings—battery models prominently display “Battery Level,” while wired versions show “Power Source: Hardwired.” This distinction dictates your entire removal approach.
Battery-Powered Models (2nd Gen, 3, 3 Plus, 4)
These units require faceplate removal to access the battery compartment. Look for a single star-shaped security screw at the bottom edge. Newer models like the Ring 4 may use a push-pin mechanism instead of screws. Always remove the battery before proceeding to prevent accidental triggering of motion sensors during disassembly.
Hardwired Models (Wired, Pro, Pro 2, Elite)
Ring Pro and Elite units lack removable batteries and connect directly to low-voltage wiring. The Elite model stands apart with its Power over Ethernet (PoE) connection requiring network switch disengagement. Wired models often have four mounting screws versus two on battery versions—grab your Phillips-head screwdriver before starting.
Why Model Identification Prevents Costly Mistakes
Mistaking a hardwired Pro for a battery model could lead to dangerous electrical contact. I once helped a client who tried removing a “battery” Ring Pro only to discover live wires when the faceplate came off. Always verify in the app first—this 10-second check avoids emergency electrician calls. If labels are faded, measure your unit: battery models are typically 4.7″ tall versus 5.1″ for wired versions.
Power Down Steps That Prevent Electrical Hazards
Battery Models: Cut Power at the Source
Slide out the entire battery pack before touching mounting hardware. For Ring 3/4 models, press the silver release lever at the battery base and catch the pack as it drops. This isn’t just about convenience—it prevents short circuits when metal tools contact terminals during screw removal. Never assume “low voltage” means safe; moisture exposure can create shock risks even in wireless units.
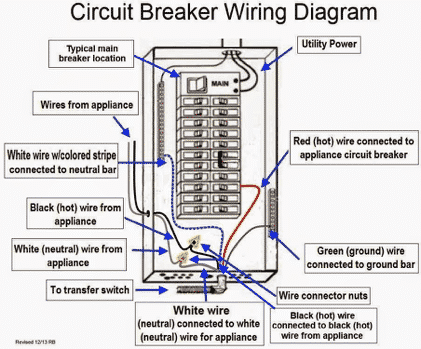
Hardwired Units: Breaker Safety Protocol
- Locate your electrical panel’s “doorbell” or “front door” breaker
- Flip it OFF and verify with a non-contact voltage tester
- Unplug any transformer adapters near doorframes
Critical: Take a photo of your breaker labels first. I’ve had readers call panicking because they couldn’t identify which breaker controlled their doorbell later. If breakers aren’t labeled, shut off the main power—better safe than sorry.
Remove Battery Models Without Stripping Screws

Security Screw Removal Technique
Position your Torx T15 bit perfectly straight before turning counterclockwise. Apply firm downward pressure to prevent cam-out—this is where 90% of stripped screws happen. If you don’t have the original Ring tool, wrap a rubber band around a Phillips head for extra grip. Never force it; a stripped screw turns a 5-minute job into a 30-minute drill-out operation.
Faceplate Detachment Method
Grip the bottom edge firmly and pull downward at a 45-degree angle. The top clips act as hinges, so yanking straight out cracks the housing. For push-pin models (Ring 4+), insert the tool into the underside hole until you hear a click—no screw removal needed. Set the faceplate aside face-down on a soft towel to avoid lens scratches.
Battery Extraction and Mount Release
After removing the security screw, slide out the battery completely. Behind it, you’ll find two Phillips screws securing the unit to the backplate. Remove both, then lift the doorbell straight up—it should release cleanly. If resistance occurs, check for hidden adhesive residue around the edges before forcing it.
Hardwired Model Removal: Avoiding Wire Damage
Faceplate Removal Variations
- Ring Pro/Pro 2: Same bottom security screw as battery models—loosen and pull down at 45°
- Standard Wired: Squeeze both sides inward to release plastic tabs, then pull straight forward
- Elite Model: Skip faceplate removal—grip the entire unit and lift upward at 45° from its bracket
Wire Disconnection Protocol
After removing mounting screws, support the unit with one hand while loosening terminal screws. Most systems use red/white wires—note which color connects to “R” (power) and “C” (common) terminals. Pull wires free slowly; if they’re stubborn, gently wiggle side-to-side. Never cut wires—you’ll need these for reinstallation or new devices.
Stuck Component Emergency Fixes

Stripped Security Screw Recovery
Place a wide rubber band between your screwdriver bit and the screw head. The added friction often provides enough grip for removal. If that fails, clamp locking pliers onto the screw head and turn counterclockwise. As a last resort, drill a small pilot hole into the screw center and use an extractor bit—this requires steady hands to avoid damaging the housing.
Adhesive Mount Removal Without Wall Damage
Slide a plastic spudger (or old credit card) behind the mount’s edge. Apply steady outward pressure while moving the tool around the perimeter—heat the area with a hair dryer first to soften adhesive. Never pull by the unit itself; I’ve seen cracked doorbell housings from homeowners yanking too hard. Work slowly; rushing causes drywall tears.
Wall Repair Techniques for Invisible Fixes
Exterior Surface Restoration
Fill screw holes with clear silicone sealant (not caulk) to prevent moisture intrusion. For brick or stucco, dab in matching-colored mortar compound. Test sealant on a hidden spot first—some discolor vinyl siding. Patch larger gaps with exterior-grade spackle, then lightly sand before painting.
Interior Wall Fixes
Use lightweight spackle for drywall holes, applying with a putty knife. Let it dry completely before sanding smooth. For textured walls, dab a toothbrush in joint compound to recreate the pattern. Always touch up with matching paint—most hardware stores scan paint chips for perfect color matching.
Device Storage and Account Management
Safe Storage Protocol
Place all components in a labeled zip bag: include screws, tools, and the battery at 50-80% charge. Store in a cool, dry place—garage temperature swings degrade batteries faster. Never store lithium-ion batteries fully charged; this accelerates capacity loss. If keeping long-term, check charge levels every 3 months.
Account Disassociation Steps
- Open Ring app → Devices → Select doorbell → Settings
- Tap “Remove Device” and confirm
- Perform factory reset via Device Settings menu
Critical: Skipping this leaves your device linked to your account. I’ve had readers report strangers accessing their old doorbells after moving—always disassociate before selling or recycling.
When to Call a Professional
Attempting DIY removal becomes risky if you encounter these red flags:
– Live voltage detected after breaker flip (indicates wiring error)
– Severely stripped mounting screws in brick or stone siding
– Water damage around the unit (mold/electrical hazards)
– Transformer issues causing buzzing or overheating
Licensed electricians charge $75-$150 for safe removal—worth it to prevent fire hazards. For rental properties, check your lease; some landlords require professional handling to maintain security system warranties.
Quick Reference Removal Checklist
- [ ] Confirm model type using Ring app (battery vs. wired)
- [ ] Power down completely (battery removal or breaker flip)
- [ ] Gather correct tools: Torx T15 for most models, Phillips for screws
- [ ] Remove security screw or activate push-pin release
- [ ] Detach faceplate using 45° downward pull
- [ ] Disconnect wiring (hardwired models only)
- [ ] Unscrew mounting hardware while supporting unit
- [ ] Patch wall holes with appropriate sealant
- [ ] Disassociate device from Ring account
Total Time: 5-10 minutes for experienced users
Difficulty Rating: ★☆☆ (Beginner-friendly with basic tools)
Mastering how to unmount Ring Doorbell properly saves repair costs and preserves your home’s exterior. Whether you’re charging a dead battery or upgrading systems, these model-specific steps prevent common frustrations. Keep this guide bookmarked—Ring’s frequent releases mean new variations emerge yearly, but core removal principles remain consistent. The next time your doorbell needs maintenance, you’ll complete the job confidently with no stripped screws or accidental shocks.


