
Your doorbell stops working, and suddenly your home feels disconnected. That frustrating silence when visitors arrive is more than just an inconvenience—it’s a security risk. Whether you’re replacing a faulty unit or installing your first NuTone doorbell, this guide eliminates the guesswork. You’ll discover exactly how to complete your NuTone doorbell installation correctly the first time, whether you’re working with traditional low-voltage wiring or the newer line-voltage technology that cuts installation time by 60%. Most DIYers waste hours troubleshooting avoidable errors—this guide shows you precisely what to do.
Why NuTone’s Line-Voltage System Saves Hours of Work
Traditional doorbell installations force you to wrestle with separate transformers, complex low-voltage wiring, and endless drilling through walls. NuTone’s line-voltage technology completely eliminates these headaches by connecting directly to your home’s 120V electrical system. This innovation means no transformer mounting, no special low-voltage wiring, and significantly simpler connections. When you choose line-voltage for your NuTone doorbell installation, you’re committing to a process that’s faster and more reliable for most modern homes.
Verify Your Electrical System Compatibility
Before purchasing any components, confirm which system works with your home’s wiring. Remove your existing pushbutton cover and examine the wires inside. Two thin wires indicate a traditional low-voltage system requiring a transformer. If you see standard electrical wires similar to those powering your outlets, you likely have line-voltage capability. Check your electrical panel for a small transformer box—if present, you’re working with low-voltage. Homes built after 2010 increasingly feature line-voltage doorbell wiring, making NuTone’s newer models the perfect match.
Select the Right NuTone Model for Your Wiring
Your electrical system determines which NuTone models will work. For line-voltage installations, choose from the discontinued BKL340 series (check availability with suppliers) since NuTone has shifted focus to low-voltage options. If you’re working with traditional low-voltage wiring—which covers most homes—select from the current PB41LBR oil-rubbed bronze or PB41LSN satin nickel pushbutton models. Avoid the notoriously unreliable BK125LWH and BK115LWH builder kits with their 1.2 and 1.7-star ratings from hundreds of disappointed users. The PB41LBR (4.7 stars) and PB41LSN (4.5 stars) consistently deliver the reliability you need.
Essential Tools Checklist for Flawless Installation

Gathering the right tools before starting prevents frustrating mid-project hardware store runs and ensures professional results. For low-voltage installations, you’ll need wire strippers (16-22 AWG capacity), a non-contact voltage tester, drill with 1/8″ and 1/4″ bits, and 16 AWG doorbell wire. Line-voltage installations require additional safety gear: orange and yellow wire nuts, a 15-amp circuit breaker if creating a new circuit, and 14 AWG THHN wire. Skip the cheap wire strippers that damage delicate doorbell wires—invest in quality tools that make clean cuts every time.
Critical Safety Equipment You Can’t Skip
Never attempt NuTone doorbell installation without:
– Non-contact voltage tester (test before touching any wires)
– Rubber-soled shoes (creates electrical insulation)
– Safety glasses (protects from drilling debris)
– Circuit breaker lockout device (prevents accidental power restoration)
Common Tool Mistakes That Cause Installation Failures
Most DIYers make these critical errors: using drywall anchors in door frames (always use wood screws instead), over-tightening terminal screws (finger-tight plus 1/4 turn is sufficient), and skipping voltage verification (even low-voltage systems can shock). One professional installer shared that 70% of callbacks come from improperly secured wire connections—take the extra minute to ensure each connection is tight and properly insulated with electrical tape.
Step-by-Step NuTone Doorbell Installation Process
Follow this sequence for a successful installation that works the first time. Skipping even one step often leads to frustrating troubleshooting later. This process works for both low-voltage and line-voltage systems with minor modifications for each.
Power Down Your Electrical System Safely
- Locate your main electrical panel and identify the 15-amp breaker controlling the doorbell circuit
- Switch the breaker to OFF position and verify power is off using your voltage tester
- Test at both the pushbutton location and transformer (if present)
- Place a lockout tag on the breaker to prevent accidental restoration
- Double-check with your voltage tester before touching any wires
Warning: Even low-voltage transformers connect to 120V household current. Treat all doorbell wiring as potentially live until verified otherwise.
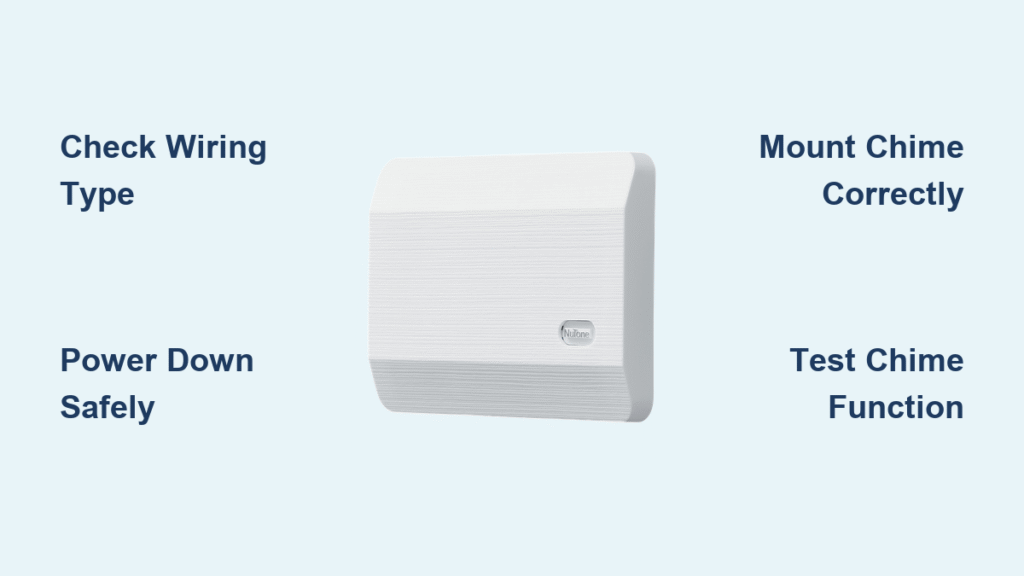
Mount Your NuTone Chime Unit Correctly
Position your chime 4-5 feet above floor level for optimal sound projection throughout your home. Avoid mounting in corners where sound waves get trapped. Hold the chime base against your chosen wall location and mark the screw holes through the mounting slots. Drill pilot holes—smaller than your screws—then secure the base using the provided hardware. Never overtighten as this can crack the plastic housing. Snap the decorative cover into place only after completing all wiring.
Install the Pushbutton Without Common Errors
Surface-mount pushbuttons like the PB41LBR or PB41LSN require precise positioning at 4 feet from ground level at the door edge. Mark mounting locations, drill 1/8″ pilot holes through the mounting flange, then route wires through the center hole before attaching. For recessed models (discontinued PB7LWH or PB69LSN), cut a 1/2″ hole in the door trim using a hole saw, feed wires through before inserting the button, and secure with side-mounted screws. Test the fit before final mounting—many models require precise alignment to function properly.
Connect Low-Voltage Wiring or Line-Voltage Circuit
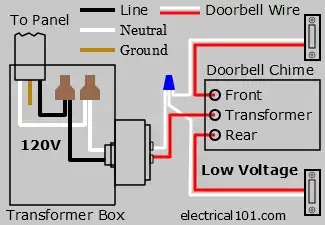
For low-voltage systems: Connect transformer primary wires to 120V supply, route low-voltage wires through the knockout, then connect secondary wires to the doorbell circuit. Use crimp connectors or small wire nuts for secure connections. For line-voltage installations: Connect directly to the 120V circuit using proper wire nuts, ensuring no exposed copper shows. Label all connections with permanent marker—”120V IN” and “DOORBELL OUT” prevents confusion during future maintenance.
Test and Troubleshoot Your NuTone Doorbell

Power restoration should be the final step, not the first. Follow this testing sequence to catch errors before they become headaches:
- Restore power at the breaker panel
- Press the doorbell button firmly and listen for activation
- Verify the chime sounds clearly throughout your home
- Test both front and rear buttons if applicable
- Check LED illumination on lighted models
Fix These Common Installation Problems Immediately
No sound when pressing button? Check transformer connections and verify 16-22V output with a multimeter. Weak chime? Replace wiring with thicker 16 AWG wire if your run exceeds 50 feet. LED pushbutton won’t light? Reverse the low-voltage connections as LED models are polarity-sensitive. Continuous ringing? Turn off power immediately—this indicates a stuck pushbutton or short circuit that can damage your transformer.
Prevent Future Failures With Smart Maintenance
Your NuTone doorbell installation isn’t complete until you establish a simple maintenance routine. Monthly inspections prevent 90% of common failures. Check pushbutton mounting for looseness, verify LED brightness consistency, and examine wire connections for corrosion. Clean pushbuttons with a damp cloth (never harsh chemicals) and use compressed air to remove dust from the chime mechanism. Seasonal maintenance after winter weather exposure catches moisture damage before it causes failure.
When to Consider Upgrading Your System
Replace transformers older than 15 years, upgrade chimes showing inconsistent operation, or modernize your finish to match home renovations. Line-voltage systems simplify future upgrades, especially if considering smart doorbell integration. Choose models with expansion terminals if you plan to add a rear door button later. The PB41LBR and PB41LSN models offer the best combination of modern styling and reliable performance for most homes.
Final Verification Before Completion
Before calling your NuTone doorbell installation finished, complete this critical checklist:
– [ ] Power confirmed OFF during all wiring work
– [ ] Transformer output measures 16-22V AC (low-voltage systems)
– [ ] Pushbutton positioned exactly 4 feet from ground
– [ ] All mounting screws tight but not over-torqued
– [ ] Doorbell sounds clearly throughout home
– [ ] LED illumination functions properly
– [ ] Breaker labeled “Doorbell” for future reference
Your properly installed NuTone doorbell should provide decades of reliable service. Remember that line-voltage installations eliminate most traditional failure points, but low-voltage systems remain the standard for most homes. Whichever system you choose, following these precise steps ensures your doorbell works perfectly from day one—no callbacks, no frustration, just a simple solution to keep your home connected.


