
Tired of missing packages or second-guessing who’s at your door? A properly installed Reolink doorbell delivers instant smartphone alerts, crystal-clear 2K+ video, and reliable two-way talk—regardless of whether you choose battery, PoE, or Wi-Fi models. The reolink doorbell installation process takes under 60 minutes for most homeowners, eliminating guesswork with model-specific wiring requirements and app pairing steps. This guide cuts through confusion by matching your home’s infrastructure to the perfect setup method, so you’ll have professional-grade security operational before your next delivery arrives.
Match Your Home to the Right Reolink Model

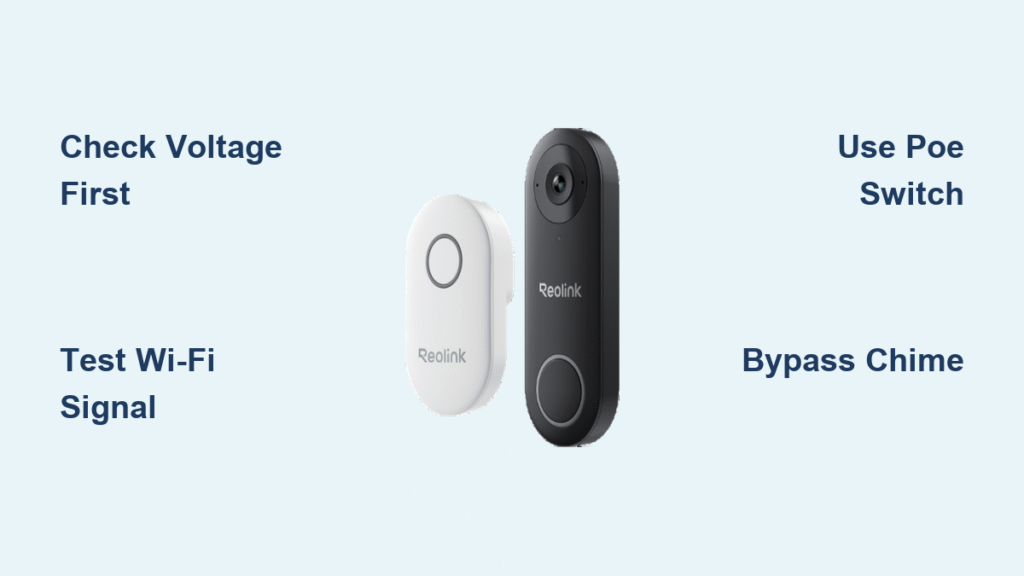
Skip the frustration of buying incompatible hardware by verifying your electrical and network setup first. Each Reolink variant solves distinct installation challenges.
Battery-Powered Doorbell: No-Wires Required Setup
Ideal for: Renters, historic homes, or locations without existing doorbell wiring
Critical specs: 2K 4MP vertical video, dual-band Wi-Fi connectivity, 2-4 month battery life
Installation reality: Mount directly to brick, wood, or vinyl with three screws—no transformer or Ethernet needed. Bring the unit indoors to recharge via USB-C when the LED turns red. Avoid this model if your front door Wi-Fi signal measures weaker than -70 dBm in the Reolink app.
PoE Doorbell: Single-Cable Professional Installation
Ideal for: New construction or homes with pre-run Ethernet
Critical specs: 2K+ 5MP video, IEEE 802.3af Power over Ethernet, 0-lux night vision
Installation reality: One Cat-5e/6 cable handles power and data simultaneously. Requires a PoE switch or injector—passive 24V PoE will permanently damage the unit. This model boots in 30 seconds after power-up and supports 24/7 recording without battery limitations.
Wi-Fi Doorbell: Existing Wiring Retrofit
Ideal for: Replacing traditional doorbells with compatible transformers
Critical specs: Matches PoE model’s 2K+ 5MP sensor, dual-band Wi-Fi, low-voltage power
Installation reality: Must connect to 16-24V AC transformer wiring. Do not skip voltage verification—use a multimeter to confirm readings before installation. Includes jumper wire to bypass mechanical chimes that interfere with operation.
Gather Model-Specific Installation Tools

Avoid mid-installation delays by preparing these essentials before starting your reolink doorbell installation.
Battery Model Toolkit
- Phillips screwdriver (included mounting plate)
- Drill with 6mm masonry bit for brick or 3mm wood bit for siding
- Reolink app installed on smartphone (test Wi-Fi signal strength at door first)
- Optional wall anchors for hollow surfaces like stucco
PoE Model Toolkit
- Cat-5e/6 cable (minimum 24 AWG)
- Ethernet crimping tool and RJ-45 connectors (T-568B standard)
- Cable tester to verify continuity
- IEEE 802.3af-compliant PoE switch (non-negotiable for safety)
Wi-Fi Model Toolkit
- Digital multimeter (mandatory for voltage check)
- Small screwdriver for chime box access
- Included jumper wire for TRANS/FRONT terminal bypass
- Voltage-rated wire nuts if extending existing wiring
Verify Critical Safety Conditions Before Starting
Power off at the breaker for any wired installation—this isn’t optional. For Wi-Fi models, confirm zero voltage across doorbell wires with your multimeter before touching connections. PoE installers must verify their switch outputs IEEE 802.3af standard power (not passive 24V) using the cable tester. Mount all models 48 inches above the doorstep for optimal facial recognition—measure from ground level before drilling. Skipping these checks risks electrical damage or subpar video angles.
Battery Model: 5-Minute Wireless Mounting
Achieve Strong Signal During Mounting
- Test Wi-Fi signal using the Reolink app’s RSSI meter—stay ≥ -70 dBm
- Position mounting plate using the built-in level, marking three pilot holes
- Drill holes (6mm for masonry, 3mm for wood), inserting anchors for hollow walls
- Secure plate with provided screws—snug but not overtightened
- Slide doorbell downward until it clicks into place
Complete Wireless Pairing
Open the Reolink app, tap “+” and scan the QR code on the device. Follow voice prompts to connect to the doorbell’s temporary Wi-Fi network, then select your home network. Never skip firmware updates—keep the battery charging during installation to prevent update failures. For indoor alerts, plug the Reolink Chime within 30 feet of the doorbell and press both sync buttons until you hear the confirmation tone.
PoE Model: Single-Cable Professional Installation
Run and Terminate Ethernet Properly
Pull Cat-5e/6 cable from your router location to the door, leaving 6-8 inches of slack at both ends. Terminate with RJ-45 connectors using T-568B wiring standard, then test all eight pins with a cable tester. Label the cable “Doorbell” at both ends to prevent future confusion during maintenance.
Connect Power and Mount Securely
Shut off the PoE switch before connecting cables. Thread the Ethernet through the mounting plate’s center hole, securing the plate with four screws. Connect the cable to the doorbell’s PoE port, then slide the unit onto the plate until it clicks. Power on the switch—the green LED confirms proper PoE delivery, and the doorbell boots within 30 seconds. Scan the QR code in the Reolink app for instant LAN detection.
Wi-Fi Model: Transformer-Compatible Retrofit

Validate Voltage Before Wiring
Set your multimeter to AC voltage and test across the existing doorbell wires. Only proceed if readings show 16-24V AC—lower indicates transformer issues, higher risks permanent damage. Locate the transformer (typically near your electrical panel) to confirm its 10-40VA rating.
Bypass Chime Interference Correctly
Inside your mechanical chime box, connect the included jumper wire between TRANS and FRONT terminals. This disables the internal striker that causes compatibility issues. For digital chimes, replacement with the Reolink Chime is often necessary.
Swap and Connect in 5 Steps
- Turn off the breaker powering the doorbell circuit
- Remove the old doorbell, labeling wires “Front” and “Trans”
- Attach wires to the new doorbell’s terminals (polarity irrelevant)
- Mount using existing holes or the included bracket
- Restore power—solid blue LED confirms successful boot
Complete Wi-Fi setup identical to the battery model via the Reolink app. The system automatically detects your network type (2.4GHz or 5GHz).
Eliminate False Alerts with Smart Detection Tuning
Configure Motion Zones Precisely
Start sensitivity at Medium, then adjust based on your street’s traffic volume. Draw polygon detection zones in the app to exclude public sidewalks—focus coverage on your doorstep and walkway. Enable person/vehicle/package filters to reduce notification fatigue. Set 3-second pre-motion buffering and 15-second post-event recording for complete incident capture.
Choose Storage That Fits Your Needs
Battery models support microSD cards up to 256GB. All models access Reolink’s free 7-day cloud history, with paid plans for extended retention. For continuous recording, integrate with a Reolink NVR or enable RTSP streaming to third-party systems like Blue Iris.
Troubleshoot Critical Issues in Under 2 Minutes
| Problem | Immediate Solution |
|---|---|
| Offline status | Check Wi-Fi signal strength; verify PoE LED on switch |
| Black video feed | Enable RTSP in settings, select H.264 baseline codec |
| Silent chime (Wi-Fi) | Confirm jumper wire between TRANS/FRONT terminals |
| Rapid battery drain | Lower sensitivity, activate sleep schedule in app |
| Motion false alarms | Draw tighter detection zones around door area |
| Two-way talk echo | Reduce phone volume and distance from doorbell |
Extend Hardware Lifespan With Simple Maintenance
Battery models: Recharge when the LED flashes red—typically every 2-4 months. In freezing temperatures, bring the unit indoors to charge as cold reduces capacity. All models: Wipe lenses monthly with a microfiber cloth and inspect rubber gaskets yearly for cracks. Wi-Fi installations: Test transformer voltage annually under load (while doorbell is active) and replace transformers older than 10 years proactively.
Realistic DIY Cost Comparison
- Battery installation: $0 (uses existing tools)
- PoE installation: $30 for 100ft Cat-6 cable and connectors
- Wi-Fi retrofit: $0 if wiring is compatible
- Professional help: $75/hour average (1-2 hours typically needed)
Maximize Warranty Coverage With These Steps
Your Reolink doorbell includes a 2-year limited warranty covering parts and labor. Register within 30 days via the Reolink app for faster service. When contacting support:
– Use live chat (6am-8pm PST weekdays) for fastest resolution
– Have proof of purchase ready for RMA processing
– Note your doorbell’s serial number (inside battery compartment)
Pro tip: Enable auto-firmware updates in the app to maintain warranty compliance—Reolink may void coverage for outdated devices.
Stop wondering who’s at your door—your Reolink doorbell installation can be complete before lunch. Verify your home’s wiring first: if you measure 16-24V AC with a multimeter, the Wi-Fi model delivers seamless integration. No existing doorbell? The battery-powered unit installs without a single wire. For new builds or Ethernet-ready homes, the PoE model provides unbreakable reliability. Grab your tools, follow these model-specific steps, and enjoy peace of mind with professional security at your doorstep today.


