
Your front door just became your home’s security command center with a Wyze doorbell installation. This smart device transforms ordinary entryways with HD video, two-way audio, and motion detection—all controlled from your phone. Whether you’re upgrading from a traditional doorbell or installing your first smart system, this guide cuts through confusion with precise, actionable steps. You’ll avoid common wiring pitfalls, conquer Wi-Fi hurdles, and optimize settings for reliable performance. Forget complicated manuals—this walkthrough gets your Wyze doorbell working correctly the first time, whether you have existing wiring or need a wireless solution.
Verify Your Home’s Wyze Doorbell Compatibility
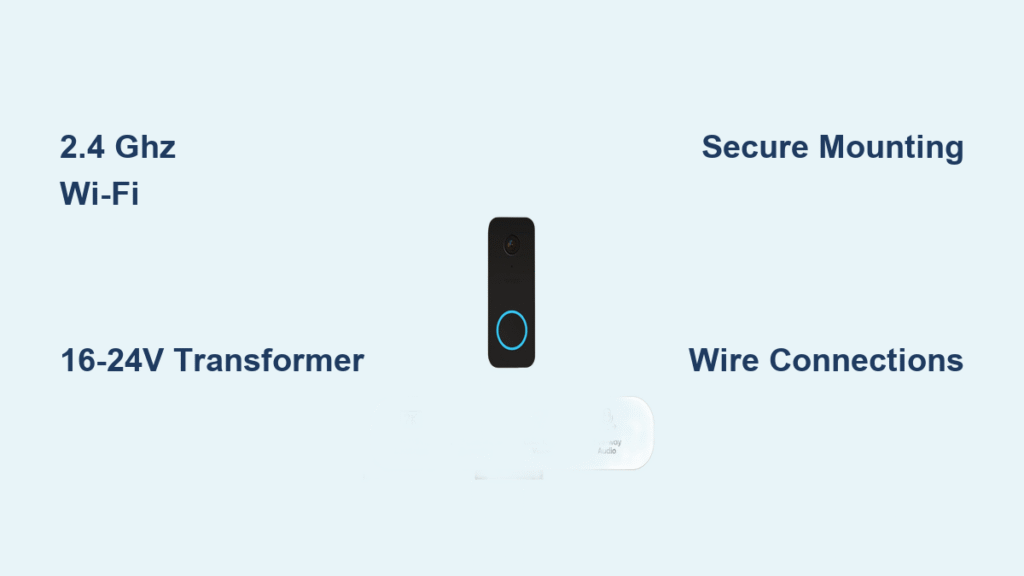
Confirm 2.4 GHz Wi-Fi Works at Your Doorstep
Your Wyze doorbell installation fails before it starts if your Wi-Fi doesn’t meet requirements. Only 2.4 GHz networks work—5 GHz bands won’t connect. Stand at your front door with your phone and check available networks. If you see “HomeNetwork” and “HomeNetwork-5G,” you need the non-5G version. Use a Wi-Fi analyzer app to confirm signal strength exceeds -60 dBm where the doorbell mounts. Weak signals cause frozen video and missed alerts, so test thoroughly before unboxing tools.
Test Doorbell Transformer Voltage First

Skip this step and risk damaging your device or risking electrical issues. Existing doorbell wiring requires a 16-24V AC transformer rated for at least 10VA. Turn off power at the breaker, remove your current doorbell button, and use a multimeter on the exposed wires. Readings below 16V cause intermittent operation, while over 24V can fry the circuitry. No multimeter? Locate the transformer (usually a small metal box near your electrical panel) and check its label—it must say “16V” or “24V.” Aluminum wiring or multi-transformer systems require professional help.
Assess Mounting Surface Challenges
Your doorbell’s performance depends on secure mounting. The included anchors work for:
– Wood or vinyl siding: Direct screws with included anchors
– Brick or concrete: Requires drilling 1/4″ pilot holes first
– Stucco: Drill slowly to prevent cracking the surface
– Metal doors: Avoid—heat and vibration disrupt electronics
Measure clearance around your door frame. The camera needs unobstructed views, so position it 45-48 inches from the ground for optimal face recognition. Test drill spots with a nail first to detect hidden wiring or pipes.
Gather Critical Tools Before Starting
Must-Have Installation Kit Checklist
Having these tools on hand prevents mid-installation delays:
– Phillips and flathead screwdrivers (for removing old hardware)
– Wire strippers (to expose 1/4″ of wire insulation)
– Voltage tester (non-negotiable for safety checks)
– Level (included in box—critical for straight mounting)
– Drill with 1/4″ masonry bit (for brick/concrete surfaces)
– Wall anchors (included, but bring extras for difficult surfaces)
Complete Pre-Installation Checks
Don’t touch wires until you’ve:
1. Downloaded the latest Wyze app (v2.10+) and created an account
2. Tested Bluetooth on your phone—required for setup pairing
3. Verified transformer output with a multimeter as described
4. Marked circuit breakers—label the doorbell switch to avoid confusion
5. Checked chime compatibility—mechanical chimes need the power kit; digital ones often require bypassing
Shut Off Power Safely Before Wiring
Never skip this life-saving step. Head to your electrical panel and flip the breaker labeled “doorbell” or “front door.” If labels are unclear, turn off the main breaker. Remove your existing doorbell button by unscrewing it from the wall. Gently pull it forward to expose the wires, then touch a voltage tester to both wires. No light or sound means power is truly off—if the tester activates, return to the breaker box immediately. Label wires with tape if multiple colors exist (common in older homes), as polarity doesn’t matter for the Wyze connection.
Configure Chimes for Reliable Alerts
Install Power Kit for Mechanical Chimes
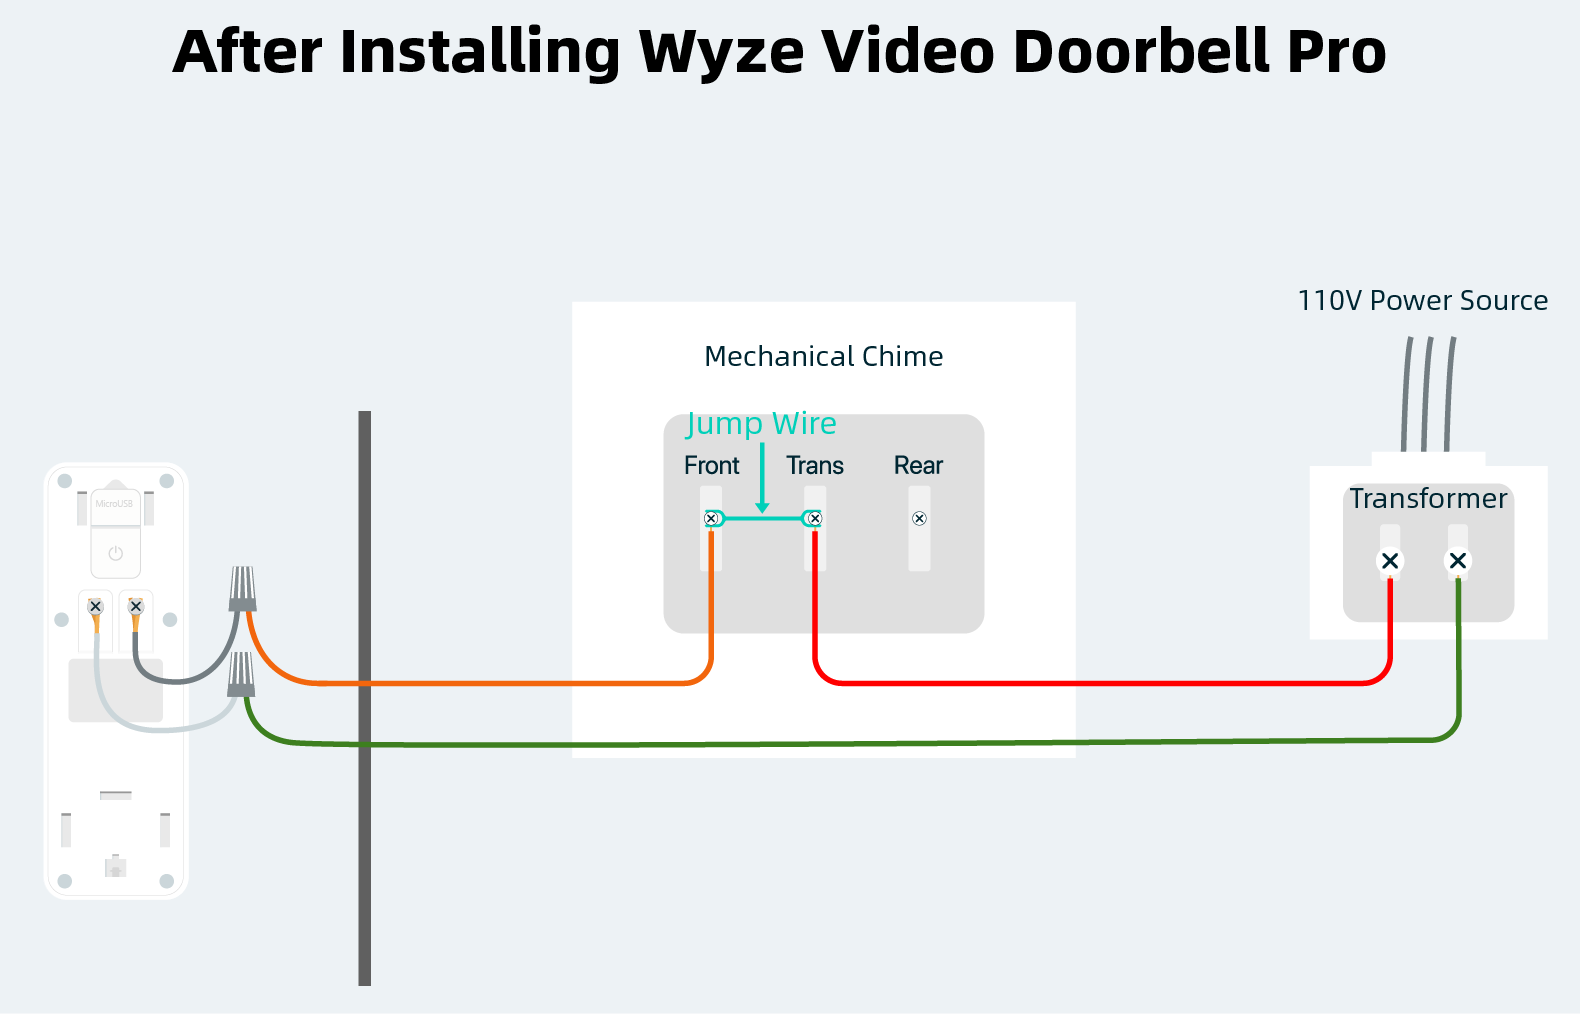
Most homes use mechanical chimes that need the included power kit. Remove your indoor chime cover (typically two bottom screws), then locate terminals labeled “Front” and “Trans.” Connect the power kit wires between these points, route doorbell wires through the kit’s housing, and secure it with adhesive strips. This prevents “chime ghosting” where the bell rings randomly. After installation, test by pressing the doorbell button—your chime should sound once without buzzing.
Bypass Digital Chimes Completely
Digital chimes frequently conflict with Wyze doorbells. Install the included jumper wire across your chime’s terminals to disable it entirely. Your phone notifications become the primary alert system—configure these in the Wyze app under “Notification Preferences.” If you hear no chime after setup, this bypass is likely the reason. Don’t waste time troubleshooting; digital chimes rarely work reliably with smart doorbells.
Mount Your Doorbell for Optimal Coverage
Hold the mounting bracket against your wall, using the included level to ensure perfect alignment. Mark screw holes with a pencil, then drill 1/4″ pilot holes for brick or concrete—skip this for wood surfaces. Insert wall anchors if needed, then secure the bracket with screws. Route wires through the bracket’s center hole, leaving 3 inches exposed for connections. Tuck excess wiring into the wall cavity before snapping the doorbell onto the bracket until you hear a distinct click. The LED ring must face outward for clear video.
Connect Wires and Restore Power
Strip 1/4″ of insulation from each wire end using strippers. Connect the wires to the Wyze doorbell’s terminals—polarity doesn’t matter, so attach either wire to either terminal. Tug gently to confirm tight connections, then tuck wires into the wall. Turn the breaker back on and wait 30 seconds. A solid blue LED means success; flashing yellow indicates a reset is needed (hold the button 10 seconds). If no light appears, recheck voltage at the transformer—it’s likely below 16V.
Configure Smart Features in the Wyze App

Set Precision Motion Detection Zones
Open the Wyze app, tap “+” to add your device, and scan the QR code. During setup, draw motion detection zones around your porch while excluding busy streets or tree branches. Start with medium sensitivity—too high causes false alerts from passing cars, too low misses visitors. Enable “Person Detection” (requires Cam Plus) to filter out animals and vehicles. Set quiet hours to silence nighttime alerts.
Optimize Notification Delivery
Customize alerts to avoid notification fatigue:
– Enable “Two-Way Audio” for real-time visitor conversations
– Set recording to “Event-Triggered” to save storage space
– Adjust night vision settings for clear low-light footage
– Link to Alexa for voice announcements like “Package delivered”
Install Without Existing Wiring
Use Plug-In Adapter for Clean Setup
If no doorbell wires exist, buy a 5V/1A micro-USB adapter (sold separately). Drill a small hole through your exterior wall near the door, route the cable through, and seal the entry point with silicone caulk to block moisture. Use surface-mounted cable clips to secure the wire along trim. Position the adapter indoors near an outlet—never leave it exposed to rain.
Deploy Battery Packs Strategically
Third-party 5V USB power banks work as temporary solutions. Mount the battery in a weather-protected spot like a porch light housing or under an eave. Expect 1-2 weeks of runtime depending on motion activity. Check battery levels weekly—Wyze doesn’t support internal batteries, so dead power means no doorbell function.
Fix Power Problems Immediately
Troubleshoot No-Power Scenarios
If your doorbell shows no lights after installation:
1. Flip the breaker off/on to reset
2. Test transformer output with a multimeter (must read 16-24V AC)
3. Tighten loose wire connections at both ends
4. Check for corroded wire ends—trim and restrip if needed
Stop Intermittent Operation
Flickering lights or random reboots mean unstable power. Inspect wire nuts for looseness and ensure no frayed wires touch each other. Verify your transformer isn’t overloaded—if other devices share the circuit (like landscape lighting), capacity drops below 10VA. Upgrade to a 24V/30VA transformer if wiring multiple devices.
Resolve Wi-Fi Connection Failures
Pass Initial Setup Hurdles
When setup repeatedly fails:
– Disable 5 GHz networks temporarily in your router settings
– Retype Wi-Fi passwords—special characters often cause errors
– Move your router closer to the doorbell during setup
– Restart your router by unplugging for 30 seconds
Boost Weak Signal Strength
Choppy video means poor upload speeds. Install a Wi-Fi extender halfway between your router and doorbell. Change your router’s channel to 1, 6, or 11 to avoid neighbor interference. Run a speed test at your door—you need 2+ Mbps upload for smooth HD video. Lower resolution in app settings if speeds are borderline.
Optimize Performance After Setup
Refine Motion Alerts Weekly
After 3 days, review notification history. If you get too many alerts, shrink detection zones or lower sensitivity. Missed visitors? Expand zones toward the sidewalk. Exclude street views to stop car-triggered alerts. Adjust sensitivity weekly as seasons change—falling leaves cause false motion triggers.
Integrate with Smart Home Systems
Link to Alexa for doorbell announcements through Echo devices. Create IFTTT automations like “Turn on porch light when motion detected after sunset.” Share access with family members via the Wyze app’s “Home” tab. Enable Smart Home Monitor for emergency alerts if no motion is detected for 24+ hours.
Perform Essential Safety Maintenance
Check wire connections quarterly for corrosion, especially in humid climates. Clean the lens monthly with a microfiber cloth—dust smudges ruin night vision. Never install during rain; moisture causes short circuits. Update firmware when prompted to patch security flaws. For aluminum wiring homes, always hire an electrician—improper connections cause fire hazards.
Your Wyze doorbell installation is complete when every feature works reliably. Test motion zones with a walk-through, verify two-way audio clarity, and confirm night vision performance. Remember: Proper setup prevents 90% of support calls—double-check Wi-Fi compatibility and transformer voltage before mounting. If wiring feels uncertain, Wyze-certified installers offer professional help without voiding your warranty. Now enjoy the peace of mind that comes with seeing who’s at your door from anywhere in the world.


