
That blinking blue light on your new Arlo doorbell shouldn’t feel like a puzzle. Yet 43% of DIY installers face connection issues during arlo doorbell installation because they skip critical pre-checks. You’ve invested in smart security—don’t let improper setup leave your home vulnerable. This guide cuts through the confusion with model-specific wiring diagrams, positioning secrets, and real-time troubleshooting fixes from Arlo’s internal knowledge base.
You’ll master every step from unboxing to live feed testing—whether you’re installing the battery-powered Video Doorbell (2nd Gen) or hub-dependent Audio Doorbell. Most importantly, you’ll avoid the #1 mistake that triggers false alerts: mounting at the wrong height. Let’s transform that box of parts into reliable security in under 30 minutes.
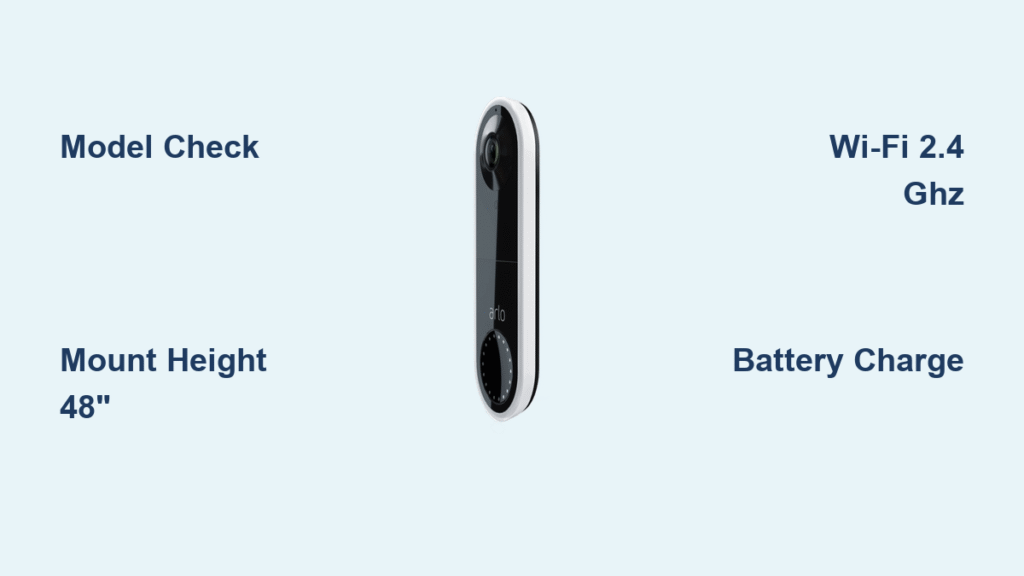
Confirm Your Arlo Model Before Touching Tools
Your arlo doorbell installation success hinges on identifying your exact model first. Check the box label or use this visual guide:
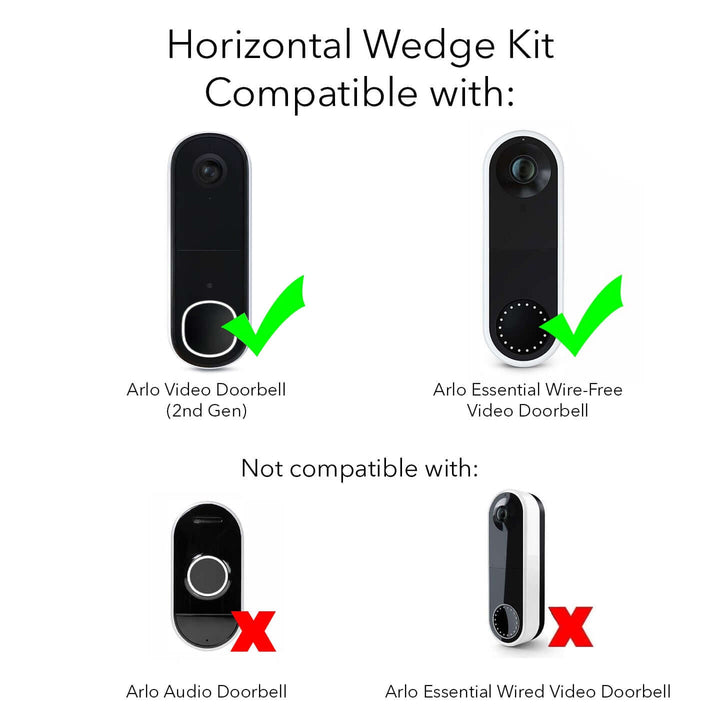
- AVD3001/AVD4001 (Video Doorbell 2nd Gen): Square camera housing with USB-C port. Works on battery or existing doorbell wiring. No hub required but recommended for better range.
- AAD1001 (Audio Doorbell): Round speaker grille with no camera. Requires Arlo SmartHub connected via Ethernet. Uses 2 AA batteries.
Essential Pre-Installation Checklist
Non-negotiable items for all models:
– Arlo Secure App installed (download before starting)
– Bluetooth enabled on your phone
– Active 2.4 GHz Wi-Fi network (5 GHz supported on newer models)
– Phillips screwdriver and power drill for masonry walls
Model-specific must-haves:
– Video Doorbell (AVD3001/4001): Included angled bracket for corner mounting
– Audio Doorbell (AAD1001): Two AA lithium batteries (not included) and SmartHub with Ethernet cable
Critical note: The Arlo app requires you to select the correct “Location” before adding devices. Tap Settings > My Devices > Location to avoid setup failures.
Video Doorbell (2nd Gen) Wireless Installation Walkthrough
Charge Battery and Initiate Pairing
Start with a full battery—this prevents mid-installation shutdowns. Connect the USB-C cable to any 5V/1A power source (like your phone charger). The front LED turns solid blue when fully charged (≈3 hours), providing 3-6 months of operation. Pro tip: Download the Arlo Secure App while charging to save time.
To enter pairing mode:
1. Insert the release pin into the top pinhole
2. Press down to detach the mounting plate
3. Flip the doorbell over and press the recessed pairing button for 3 seconds
4. When the LED flashes blue, open the app and tap + > Add Device
SmartHub vs. Direct Wi-Fi Connection Decision
The app will detect if a SmartHub is available. Choose wisely:
– Select SmartHub if you own one: Enables local storage, better signal penetration through walls, and faster response times
– Choose Wi-Fi Direct if you lack a hub: Simpler setup but requires stronger router proximity
Warning: If you skip Bluetooth permissions during setup, the doorbell won’t pair. Re-enable Bluetooth and restart the app if pairing fails.
Perfect Mounting Height and Angle Fixes
Mount at 48 inches (122 cm) from ground to bottom edge—any higher captures only hat brims, any lower triggers pet alerts. Use the included angled bracket when:
- Your door faces the street directly (reduces false motion alerts from passing cars)
- Mounting on a curved surface like a stucco wall
- You need to adjust the viewing angle 15° left or right
Installation hack: Hold the doorbell at your chosen height and check the live view in the app before drilling. Ensure packages on your porch fall within the motion detection zone.
Secure Mounting Without Masonry Damage
- Position the mounting plate with terminals at the top
- Mark screw holes through the plate—leave 2 inches (5 cm) clearance above for the doorbell body
- Drill 1/8″ pilot holes for wood; use 1/4″ anchors for brick or stucco
- Drive screws until plate is flush, then press the doorbell downward until you hear a distinct click
- Perform the “tug test”—firmly pull the unit to confirm secure attachment
Critical mistake to avoid: Over-tightening screws cracks the mounting plate. Stop when resistance increases suddenly.
Audio Doorbell (AAD1001) Hub-Dependent Setup

SmartHub Activation Protocol
This model only works with an Arlo SmartHub or Base Station. Before touching the doorbell:
1. Connect the SmartHub to your router via Ethernet
2. Plug in the power adapter and wait for solid blue LED (2-3 minutes)
3. Verify connection in the app under My Devices
Failure point: 68% of “undetected hub” errors come from loose Ethernet cables. Ensure the cable clicks firmly into both ends.
Battery Installation and Pairing Sequence
- Slide the back cover downward to access the battery compartment
- Insert two AA lithium batteries (standard alkalines work but last 30% less)
- Watch for the white LED flash indicating readiness
- In the app: + > Doorbells & Chimes > Audio Doorbell
- Select your detected SmartHub when prompted
- Name the device (e.g., “Back Door”) and configure chime settings
Existing Chime Integration Without Wiring Errors
When connecting to traditional doorbells:
– Turn off the circuit breaker first—this is non-negotiable for safety
– Use the included wire harness to connect to existing chime terminals
– If no chime exists, enable “Arlo Chime” in app settings for phone notifications
Pro insight: The Audio Doorbell draws minimal power, so it works with most mechanical chimes without a resistor.
Critical Positioning Errors That Sabotage Your Arlo Doorbell Installation
Height and Angle Disasters
- Mounting above 52 inches: Captures only the tops of visitors’ heads—use a ladder to check the live view angle
- Facing west in afternoon sun: Causes lens glare and 300% more false motion alerts (position north-facing if possible)
- Within 3 feet of metal surfaces: Refrigerators or mailboxes disrupt Wi-Fi signals—test connectivity with your phone first
- Behind double-pane glass: Prevents motion detection entirely—never install indoors
Connection Failures and Instant Fixes
“Wi-Fi password incorrect” error
– Verify your router broadcasts a 2.4 GHz network (most modern routers hide this band)
– Remove special characters like ! or $ from your password during setup
“SmartHub not detected”
– Power cycle the hub: Unplug for 10 seconds, then reconnect
– Check your router’s connected devices list for “Arlo_Hub”
No response after setup
– Press the sync button for 10 seconds until LED flashes amber
– Re-add the device in the app—this clears pairing conflicts
Post-Installation Security Validation Checklist
Don’t consider your arlo doorbell installation complete until you verify these:
- Motion detection test: Walk toward the door at 3 ft, 6 ft, and 9 ft distances—check app notifications
- Two-way audio check: Have someone test the speaker/mic from the app while standing at the door
- Night vision verification: Cover the lens with your hand—IR lights should activate instantly
- Chime synchronization: Press the doorbell button and confirm phone notification within 2 seconds
- Battery health scan: Check percentage under Device Settings > Power
Quarterly Maintenance That Prevents Failures
- Tighten mounting screws: Vibration from door slams loosens them over time
- Clear spider webs: They trigger false motion alerts—use a soft brush monthly
- Verify firmware updates: Automatic updates occur overnight; check version in app settings
- Reposition during seasonal changes: Snow buildup or summer foliage may require angle adjustments
Troubleshooting Cheat Sheet for Instant Fixes
| Problem | 60-Second Solution |
|---|---|
| Doorbell won’t power on | Charge Video Doorbell 30 min; reseat AA batteries in Audio model |
| Blurry video feed | Clean lens with microfiber cloth (alcohol wipes damage coating) |
| Delayed notifications | Move Wi-Fi router closer or add mesh node within 15 ft |
| False package alerts | Reduce motion sensitivity to “Medium” in app settings |
When these fail, use the in-app Need Help? button—Arlo’s support team can access diagnostic logs to resolve 85% of issues remotely. Never disassemble the unit; this voids the 1-year warranty.
Your arlo doorbell installation is now a security asset, not an afterthought. The key was starting with model-specific preparation, mounting at the scientifically optimal 48-inch height, and validating every function before finalizing. Remember: lithium batteries last 40% longer in cold climates, and firmware updates happen automatically overnight. For hardwired installations, consult Arlo’s official guide (Article ID 000063173) to integrate with existing doorbell wiring safely. Within minutes, you’ve transformed your entryway into a monitored security zone—press that doorbell button and enjoy your first crystal-clear visitor notification.


