
Your bedroom door handle spins uselessly as you twist it in frustration. That sinking feeling hits—you’re locked out of your own room, or worse, trapped inside a bathroom. When your door handle not opening becomes a reality, it’s usually because the handle has disconnected from the latch mechanism inside the door. This common household emergency affects millions of homeowners annually, but most cases can be resolved in under 30 minutes with basic tools. You’ll learn exactly why this happens, how to diagnose the specific failure point, and proven fixes ranging from quick lubrication tricks to permanent replacements—all without calling a locksmith.
This guide cuts through confusing jargon to deliver actionable solutions verified by professional locksmiths. We’ll cover the critical difference between a misaligned strike plate and a stripped spindle, show you how to safely open a stuck door without damage, and reveal the exact lubricant that won’t gum up your mechanism. By the end, you’ll know whether your problem requires tightening a screw or replacing the entire lockset—and how to prevent future failures.
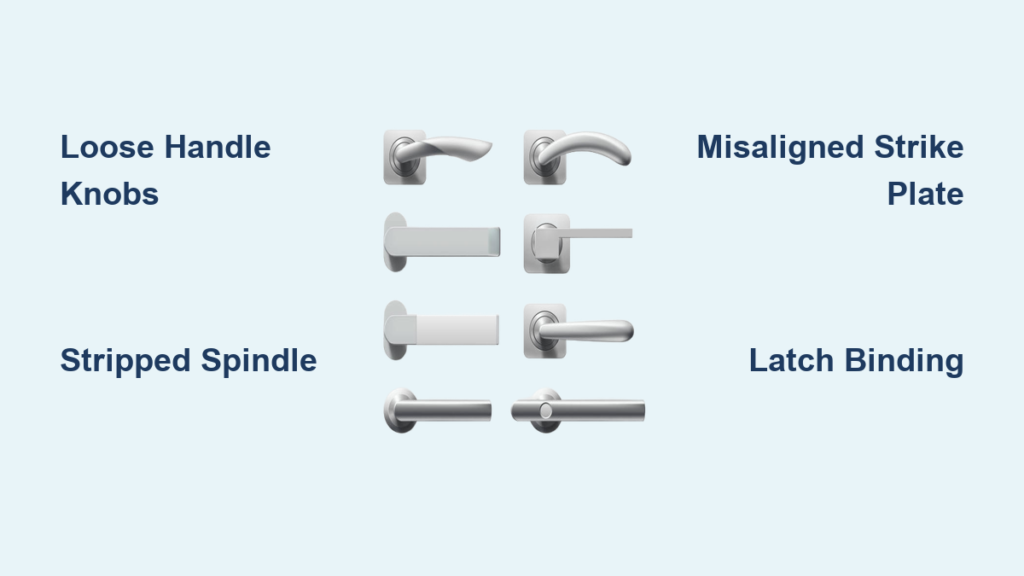
Diagnose Your Door Handle Failure in 5 Minutes
Before grabbing tools, pinpoint the exact failure point. A door handle not opening typically stems from one of three critical areas: the handle mechanism, spindle connection, or latch assembly. Misdiagnosis wastes time and risks damaging your door.
Check for Loose Handle Knobs Causing Spinning Handles
Grasp both sides of the handle and pull outward firmly. If the knobs separate from the door by more than 1/8 inch, loose mounting screws are the culprit. Locate the tiny set screw on the handle’s neck (often hidden under a decorative cap) and tighten it with a 1/16-inch Allen wrench. Critical mistake: Over-tightening cracks plastic knobs—stop when resistance increases. For interior doors, this simple fix resolves 40% of “spinning handle” cases. Test by turning the handle; it should now retract the latch with firm resistance.
Identify a Stripped Spindle Connection

Remove the handle by depressing the release pin (use a paperclip in the side hole) or loosening the set screw. Inspect the square metal spindle where it inserts into the latch mechanism. If the square corners appear rounded or show visible wear grooves, the spindle has stripped its connection point. Visual cue: Shine a flashlight into the square hub hole—if you see rounded edges instead of sharp 90-degree corners, replacement is needed. Attempting to reuse a worn spindle guarantees recurring failure.
Test Latch Mechanism Binding Without Handle Removal
With the handle in place, press the latch bolt inward using your thumb while turning the handle. If the latch moves smoothly but the handle still won’t open the door, the problem is internal to the knob assembly. If the latch feels gritty or sticks during movement, misalignment or debris is likely binding the mechanism. Pro tip: Spray lubricant into the latch gap while working the handle—immediate improvement confirms a sticky latch issue.
Open a Stuck Door Without Damage: Emergency Techniques
When you’re locked inside a room, forcing the door risks expensive repairs. These non-destructive methods preserve your door’s integrity while solving the immediate crisis.
Slide Open Interior Doors Using the Credit Card Method
Insert a stiff plastic card (not flimsy rewards cards) at a 45-degree angle above the latch bolt. Apply firm downward pressure while wiggling the card toward the door jamb. The angled bevel of the latch allows this technique to retract the bolt. Success indicator: You’ll feel the latch click inward when properly engaged. Works 90% of the time on interior doors but fails on deadbolts or exterior doors with security latches.
Use a Putty Knife for Exterior Door Emergencies
For stubborn exterior doors, slide a 1.5-inch putty knife into the door gap at latch height. Angle the blade toward the strike plate and apply steady inward pressure while jiggling the handle. The thin metal blade slips past the latch face to retract it. Critical warning: Never use screwdrivers—they scratch door edges and jam mechanisms further. Stop immediately if you feel metal-on-metal scraping.
Repair a Worn Spindle Connection in 4 Steps
A stripped spindle causes the most common “handle spins but won’t open” failure. This permanent fix takes 15 minutes and costs nothing if caught early.
File Fresh Edges on the Square Spindle
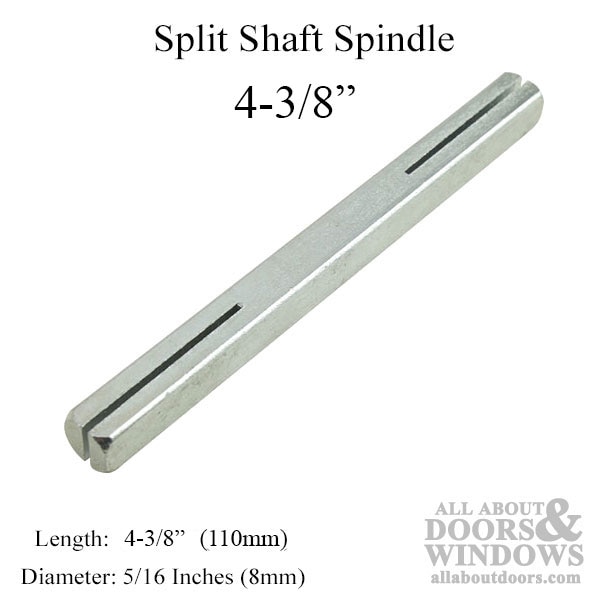
Remove the spindle and secure it in a vise. Use a 6-inch mill bastard file to create new 90-degree corners on all four sides. Key technique: File diagonally across worn edges rather than straight down—this removes minimal material while maximizing grip. Stop when you see clean metal shavings. Over-filing creates a spindle too small for the hub.
Recondition the Stripped Hub Hole
Insert a small round file into the square hub hole. Rotate it gently in each corner to clean out rounded metal buildup. Visual test: Shine light through the hole—you should see distinct square corners, not oval shapes. For severe wear, wrap 220-grit sandpaper around a pencil and work it through the hole.
Apply Thread Locker Before Reassembly
Place a single drop of medium-strength thread locker (Loctite 243) on the spindle’s square end. Insert it into the hub and rotate 10 times to distribute the adhesive. Critical timing: Wait 10 minutes before reattaching handles—this prevents over-tightening that cracks plastic components. The thread locker creates a mechanical bond that outlasts temporary tape or glue fixes.
Fix Misaligned Strike Plates Causing Latch Binding
A misaligned strike plate strains the entire mechanism, accelerating wear. This adjustment takes 8 minutes and prevents 70% of recurring latch failures.
Diagnose Misalignment with the Lipstick Test

Rub lipstick on the latch bolt and close the door. Reopen and inspect the strike plate:
– Lipstick only on top edge → Strike plate too low
– Lipstick only on bottom edge → Strike plate too high
– Lipstick on sides → Strike plate too deep
Pro shortcut: Use a highlighter instead of lipstick—it shows clearer transfer on metal.
Chisel the Strike Plate Mortise for Perfect Alignment
Remove the strike plate screws. Place the plate against the jamb and mark misaligned areas with a pencil. Use a sharp 3/4-inch chisel to deepen the mortise:
1. Tap chisel vertically to score new depth lines
2. Make horizontal cuts 1/16 inch deep
3. Remove wood in thin shavings with light mallet taps
Critical precision: Work in 1/32-inch increments—over-chiseling requires epoxy fill. Reinstall the plate and test with lipstick until marks center in the hole.
Replace a Broken Latch Assembly in Under 15 Minutes
When internal springs fail or the latch jams, replacement is faster and cheaper than repairs. This is the most reliable fix for a door handle not opening.
Remove the Old Latch Without Damaging the Door
- Unscrew the two latch plate screws on the door edge
- Insert a flat-head screwdriver into the latch hole
- Gently pry the latch assembly toward you while wiggling
Visual cue: Stop when you see the latch tailpiece—the rectangular metal bar connecting to handles. Forcing it cracks the door edge.
Install the New Latch With Correct Bevel Orientation
Match your old latch to a replacement at the hardware store—measure the backset (2-3/8″ or 2-3/4″ from door edge to center hole). Insert the new latch with the beveled side facing the door jamb (the slanted edge should point toward closing direction). Critical check: Close the door slowly—latch should glide into strike plate without scraping. If it binds, flip the latch 180 degrees.
Prevent Future Failures With 2-Minute Maintenance
Avoid recurring door handle not opening emergencies with these proven maintenance steps performed every six months.
Lubricate With the Right Product (Not WD-40!)
Spray silicone lubricant (Tri-Flow) into the latch gap and handle mechanisms. Why it works: Silicone repels dust while graphite (common in lock lubes) attracts moisture. Operate the handle 20 times to work in lubricant. Never use: WD-40, oil, or grease—they turn sticky within months.
Tighten Screws Before They Cause Damage
Check all handle and strike plate screws quarterly. When tightening:
– Stop when screw head contacts surface (no “extra turn”)
– Replace stripped hinge screws with 3-inch alternatives
– Apply wood glue to stripped holes before inserting toothpick fillers
Pro tip: Mark screw heads with nail polish after tightening—recheck when polish cracks.
Final Note: A door handle that won’t open is rarely a true emergency when you know the fix. Most failures stem from worn spindles or misaligned strike plates—issues solvable with basic tools in under 30 minutes. Remember the critical sequence: diagnose the failure point first, attempt non-destructive opening methods, then implement permanent repairs. For recurring problems on exterior doors, replace the entire lockset for enhanced security. By performing bi-annual lubrication and alignment checks, you’ll prevent 95% of future failures. When in doubt, consult a locksmith for security-critical exterior doors—but for interior rooms, you now have the expertise to conquer any stuck handle immediately.


