
Your package delivery just vanished around the corner while you scrambled to answer the door—not because you were slow, but because your doorbell went silent. When a doorbell not ringing leaves you missing visitors, deliveries, and important moments, frustration hits fast. This isn’t just an inconvenience; it’s a security gap in your home’s communication system. Whether your wireless chime died overnight or your wired doorbell gradually became unreliable, this guide delivers step-by-step solutions to diagnose and fix the problem in under an hour. You’ll learn exactly where to look first, how to test critical components safely, and when upgrading to a smart system makes more sense than repairing.
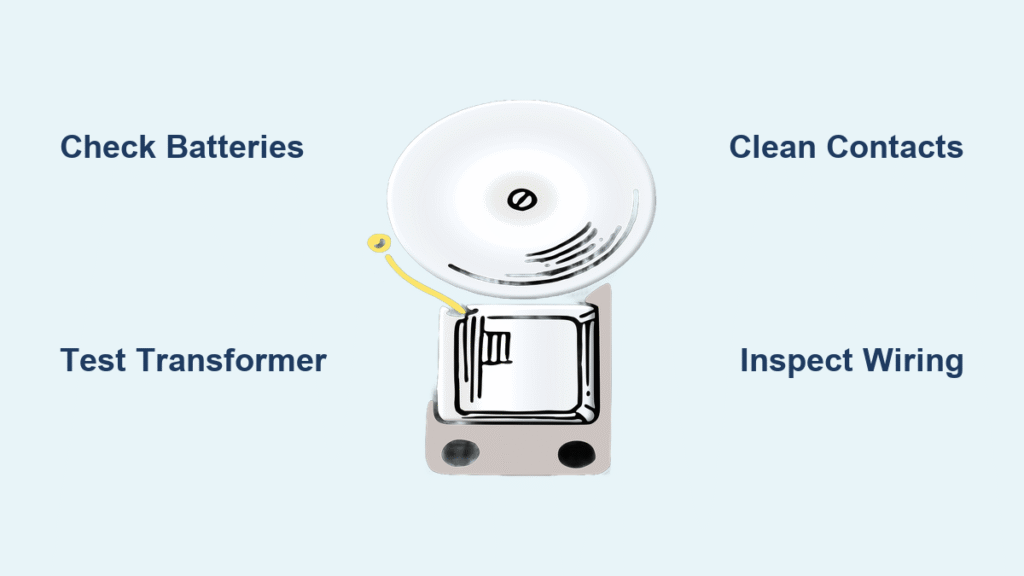
Power Failure Diagnosis
Battery-Powered Units: Silent Death
Dead batteries cause 80% of wireless doorbell failures. If your unit suddenly stopped working after months of reliable service, check the battery status indicator first—many models show low power with a dimming LED. Remove the button cover to access the compartment; most use CR2032 coin cells or AA batteries that degrade after 6-12 months even if unused. Test battery voltage with a multimeter: anything below 90% of the rated voltage (like 2.7V for a 3V CR2032) means replacement is urgent. Hold the button near the chime unit while pressing it—if it works within 3 feet but fails at normal range, weak batteries are confirmed.
Pro Tip: Mark your calendar for battery swaps every 6 months during daylight saving time changes. For rechargeable models, replace the battery if charge retention drops below 80% after a full cycle—most last 2-3 years before degrading.
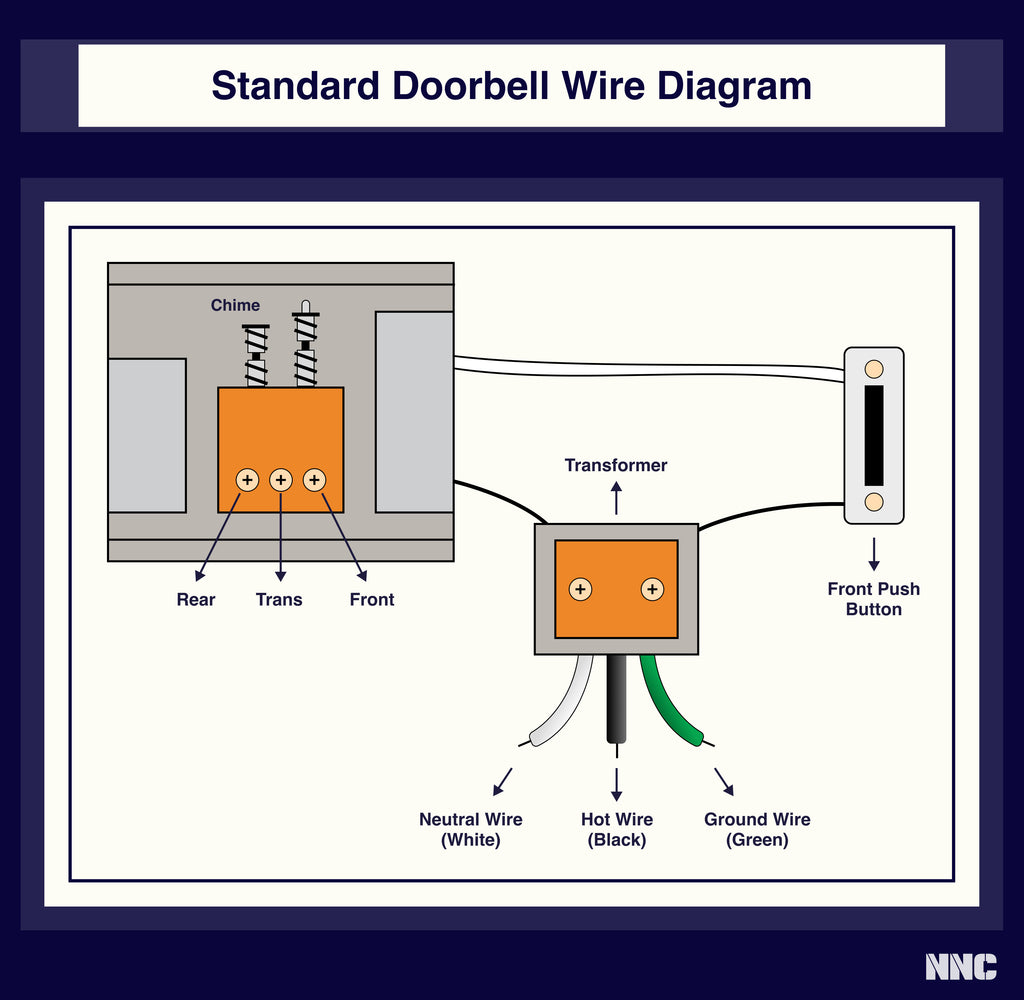
Wired Systems: Transformer Testing

Your doorbell transformer—the small metal box mounted near your electrical panel—is the heart of wired systems. When a doorbell not ringing plagues your home, start by listening for its faint 60Hz hum. No sound? Inspect for scorch marks, melted plastic, or that telltale burnt smell signaling failure. Set your multimeter to AC voltage and test the secondary terminals: readings below 13V AC (for a standard 16V system) mean replacement is needed. Normal operation shows 16-24V AC—values fluctuating wildly indicate internal component failure. If voltage disappears when pressing the button, the transformer can’t handle the load and must be replaced immediately.
Critical Check: Verify your transformer matches the chime unit’s voltage requirements. Mismatched units (like a 16V transformer on a 24V chime) cause chronic “doorbell not ringing” issues.
Button Failure Solutions
Clean Corroded Contacts
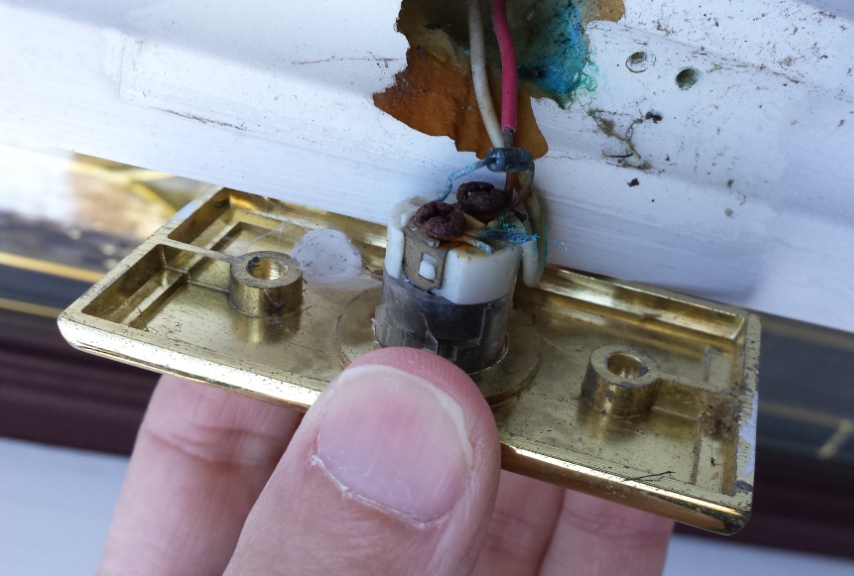
Outdoor doorbell buttons suffer constant weather exposure, leading to corrosion that breaks electrical contact. Remove mounting screws to access the internal mechanism—look for green oxidation or white crust on metal contacts. Spray electrical contact cleaner onto a cotton swab and scrub until shiny metal appears, then use compressed air to blast debris from crevices. Test continuity with a multimeter: touch probes to the contact terminals while pressing the button. You should see near-zero resistance when active. If readings stay high, corrosion has permanently damaged the contacts.
Weatherproofing Must: Apply a bead of clear silicone sealant around the button’s edge before reinstallation. This creates a moisture barrier that prevents future corrosion while allowing free movement.
Replace Worn Buttons
When cleaning fails, replace the entire button assembly—a $10 fix taking 15 minutes. Match your system’s voltage rating (16-24V AC for most homes) to avoid compatibility issues. Turn off power at the breaker first, then disconnect wires while noting their terminal positions (mark with tape if needed). Attach the new button’s wires to identical terminals, ensuring secure connections. Before sealing the weatherproof cover, test functionality repeatedly—the button should activate with firm, consistent pressure. If it sticks or feels mushy, readjust the mounting depth.
Warning: Never force wires into terminals. Loose connections cause intermittent “doorbell not ringing” that mimics other failures.
Chime Unit Problems
Mechanical Chime Cleaning
Dust-packed striker mechanisms cause weak or silent chimes despite power availability. Remove the chime cover to expose the solenoid coil and metal bars. Blast dust from pivot points using compressed air in short bursts—avoid shaking the unit violently as this misaligns components. Apply a drop of electrical-safe lubricant (like DeoxIT D5) to moving joints, then manually press the solenoid plunger to work it in. Test each tone bar individually by triggering the button; inconsistent sounds indicate bent bars needing gentle realignment with needle-nose pliers.
Pro Tip: Place a shop towel beneath the chime during cleaning. This catches dislodged dust that could short-circuit components.
Electronic Chime Reset
Digital chimes often develop software glitches causing distorted sounds or total silence. Unplug the unit for 30 seconds to clear memory corruption, then restore power while holding any reset button for 5 seconds. Reprogram chime selection if tones sound incorrect—many units default to silent mode after power loss. If resetting fails, check speaker functionality by pressing test buttons directly on the circuit board. A faint click confirms power delivery but indicates speaker failure.
Replacement Threshold: If voltage tests show proper input but no sound, the circuit board is faulty. Consider smart doorbell upgrades instead of costly repairs for units over 7 years old.
Wiring Detective Work
Locate Broken Wires
Broken wires cause 30% of persistent “doorbell not ringing” cases. Start testing at accessible points: transformer terminals, chime unit connections, and button wires. Disconnect power, set your multimeter to continuity mode, and test between transformer secondary and chime terminals. A broken circuit (no beep) means wire damage. Common failure spots include where wires pass through studs (staple punctures) or near attics (rodent chewing). Check for green corrosion at wire nuts—this increases resistance until the circuit fails.
Troubleshooting Hack: Temporarily connect a jumper wire between the transformer and chime. If the doorbell rings, the break is in your main wiring run.
Repair Specifications
Use 18-20 AWG stranded copper wire for repairs—solid core breaks too easily during installation. Maximum run lengths: 50 feet for 18 AWG, 100 feet for 16 AWG. Always pull new wire through walls using the old wire as a guide; tie them together with electrical tape and apply silicone lubricant to reduce friction. Make connections inside approved junction boxes using wire nuts rated for low-voltage systems. After installation, test voltage at the button—it should read within 10% of transformer output.
Critical Rule: Never splice wires inside wall cavities. All connections must be accessible in junction boxes to meet electrical codes.
Smart Upgrade Decisions
When Replacement Makes Sense
Replace rather than repair when your system shows multiple failure points or exceeds 15 years old. Obsolete 6V or 30V systems lack replacement parts, while extensive wiring damage often costs more to fix than a new smart doorbell installation. Modern video doorbells solve the “doorbell not ringing” problem permanently with smartphone notifications that work even during power outages. Key upgrade triggers include recurring chime failures, desire for package theft prevention, or integration with existing smart home systems like Alexa or Google Home.
Cost Insight: Basic smart doorbells start at $60—less than professional repair fees for complex wiring issues.
Smart Features Comparison
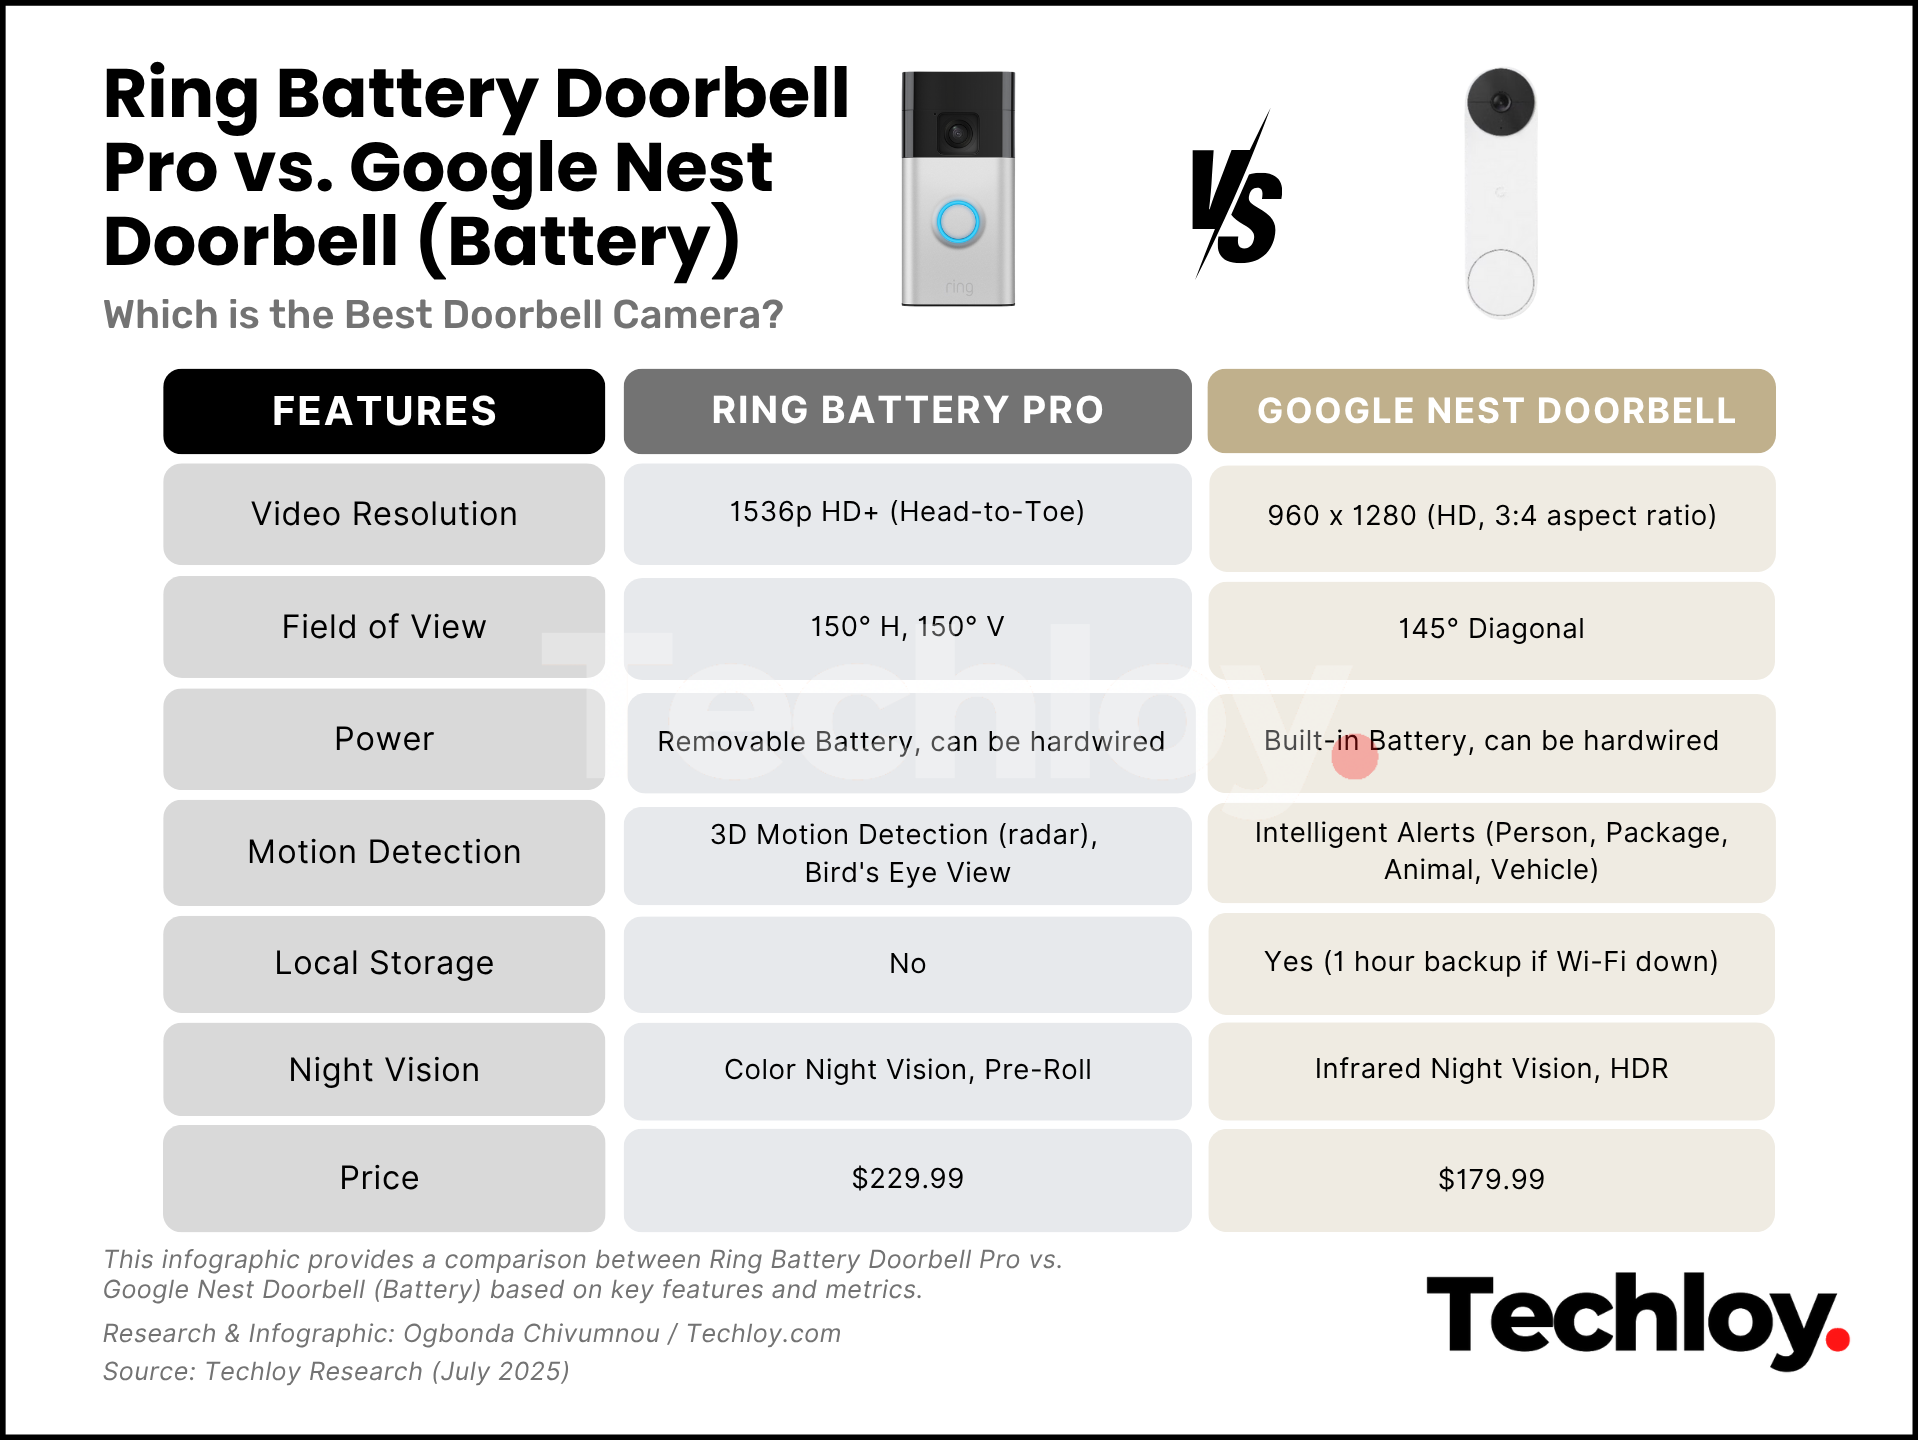
Video doorbells like the Ring Wired or Nest Hello deliver 2K HD clarity and color night vision, eliminating guesswork about who’s at your door. Hardwired models use your existing doorbell circuit for continuous power, while battery versions install in minutes but require quarterly charging. Hybrid systems (such as Eufy Video Doorbell Dual) switch automatically between power sources. All require strong Wi-Fi at the door location—test signal strength with your phone before buying. Cloud storage subscriptions ($3-$10/month) secure video evidence of missed deliveries.
Installation Tip: For hardwired upgrades, keep your old chime unit connected—it provides backup notification during Wi-Fi outages.
Professional Service Guidelines
DIY Safety Limits
Stop troubleshooting immediately if you encounter these situations: transformer replacement inside your main electrical panel (requires licensed electrician), new circuit installation, or extensive wall fishing through finished drywall. Homes under builder warranty often void coverage with DIY electrical work. If voltage tests show power at the transformer but nothing downstream, complex wiring faults need professional tracing tools. When smart doorbell integration with home automation systems fails repeatedly, consult a smart home specialist.
Red Flag: Burning smells from wiring or discolored outlets indicate fire hazards—call an electrician before proceeding.
Safety Protocol Checklist
Always turn off power at the breaker—not just the wall switch—and verify de-energization with a non-contact voltage tester. Use GFCI-protected outlets for outdoor work, and wear rubber-soled shoes on damp days. Check local permit requirements before modifying wiring; most jurisdictions require permits for new circuits but not repairs. When others are home, implement lockout/tagout procedures by placing a physical tag on the breaker box. Never work on live doorbell circuits—even low-voltage shocks can cause falls from ladders.
Critical Reminder: Transformer terminals carry 120V household current. Treat all connections as live until verified otherwise.
Key Takeaways: Your silent doorbell is rarely a total system failure—90% of “doorbell not ringing” cases stem from simple power or button issues solvable in 20 minutes. Always start with battery replacement and contact cleaning before tackling wiring. For recurring problems, smart doorbells provide reliable notifications that eliminate missed visitors permanently. Monthly testing and annual contact cleaning prevent most failures before they strand your next guest. When in doubt, consult a professional electrician—your safety outweighs the convenience of a working doorbell.


